DIY men's bandana. DIY head bandana: tips on how to sew or knit it yourself.
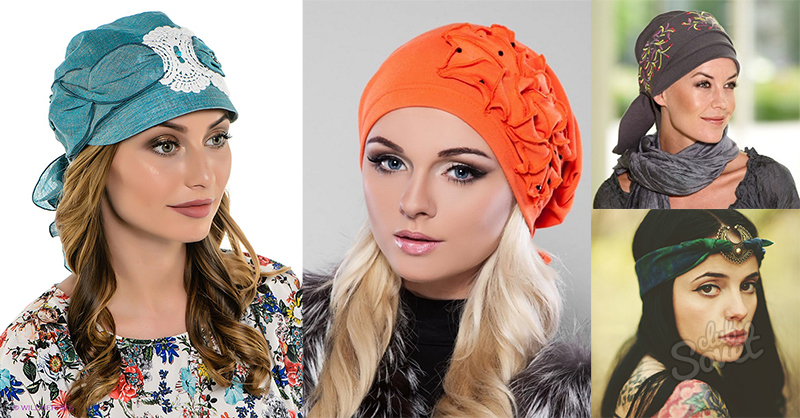
On summer days, the bandana is one of the most popular headwear due to the variety of fabrics, versatility and practicality; even on cold days, many people choose warm bandanas instead of hats. A bandana looks beautiful on any head and suits everyone. It is worn by both young people and adults, it all depends on the material and decorations. This is also a stylish accessory, but only a handmade bandana will reflect your personality and be unique. In addition, sewing it is not at all difficult; even beginners can handle it. Let's tell you in more detail how to do this.
Fabric selection
Any cotton or linen fabric, dense and elastic, such as calico, chintz or cambric, is ideal. In the summer, a bandana made of such material will be comfortable, your head will not be hot, it will not sweat, and the bandana itself will be durable and will last for many years. But other fabrics can also be used. Synthetic fabrics are suitable if you do not wear the product every day, but it is still advisable to give preference to natural materials. Silk, chiffon and other thin fabrics are least suitable, but if desired, you can sew from them.
When choosing fabric for a bandana, pay attention to the color. Headbands made from denim and camouflage fabric look stylish and bright. The color of the bandana should be combined with the color of the top of the clothing, and bandanas with beautiful patterns are especially fashionable now; take this into account when choosing fabric.
Don’t forget about the bandana when choosing a headdress for autumn and winter; in this case, thick fleece would be ideal as a fabric.
Sewing a bandana
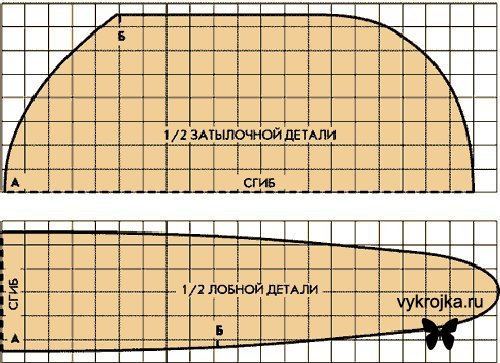
For sewing, you will need a piece of selected fabric measuring at least 40 by 90 centimeters. Prepare a paper pattern using the drawing below (this will be easy if you have graph paper).

Transfer the pattern to the fabric, do not forget to mark points for stitching 1 and 2. Having received two parts from the fabric, combine points 1 and 2, after unfolding the pattern, do this on both the visible and mirror sides of the pattern, and then machine stitch the seam (from point 2 to point 1 and then to the mirror image of point 2). The pattern already provides for seam allowances of 5 mm.
All that remains is to process the edges, giving the product a finished look. It is ideal to overcast them with an overlocker; it gives the signature bandana seam. You can also sew the edges with a zigzag stitch, folding the edges 1 cm or half a centimeter, and sew with a regular stitch. If you have time, you can hem the edges of the fabric with a buttonhole stitch manually; it is most similar to overlocking and looks no worse.
The stitching can be done with contrasting threads to highlight it and make the bandana stylish and unusual.

Decoration
The finished bandana can be further decorated different ways, but sometimes this is already unnecessary. If the fabric of the bandana has an active print or a beautiful bright pattern, it does not need any additional decorations, and a plain bandana can be transformed as follows:
- Applique - you can use ready-made thermal applique, which is attached to the product with an iron and sold in fabric stores, or you can make the applique yourself, sewing on parts from a variety of fabrics. Felt and leather appliqués are often made on hats.
- Thanks to beautiful embroidery, any bandana will look expensive and elegant.
- Decoration with beads, sequins or decorative stones. This bandana will be feminine and elegant.
- Don’t forget about decorative braid and ribbons; sew them along the edge of the bandana, and it will change beyond recognition.
- Lace - ready-made lace can be sewn onto the frontal part.
- Decorative folds - fold the fabric several times by half a centimeter and sew.
Here you have a beautiful and comfortable headdress for all occasions! You are convinced that sewing it with your own hands is not at all difficult. It won't take much time, and you'll get a unique, stylish accessory. Summer bandanas perfectly protect your head from the scorching sun and cool wind, and winter ones from the cold. Approach the process creatively, and you are guaranteed success!
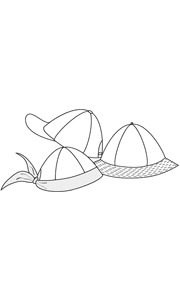
cap and four-piece Panama hat
Wedge width = Head circumference: 4 + 1 cm
Constructing a wedge pattern:
 wedge pattern

CAP
For a cap, you need to cut out a visor, the width of which is equal to the width
wedge The insert for the visor can be cut out of a plastic bottle.
Sew the wedges in pairs, make a semicircular shape on one of the wedges
hole, which is processed by turning, after inserting
decorative elastic (strings, plastic fastener).
Sew the visor to the opposite wedge.
Finish the bottom with a facing. Place a raised stitch along the bottom.
If the top fabric is light, then you can similarly cut out the lining from
calico, fold the top (with the visor) and the lining facing inward and stitch,
leaving a hole for turning.

BANDANA
Cut 3-4 cm from the bottom of the wedge pattern.
Sew the wedges in pairs, make a semicircular cutout on one of the wedges, which is processed by turning.
Cut out a hem 6-8 cm wide and a length equal to the circumference of your head.
allowance for a loose fit (4 cm) plus two lengths of ties (15-20
cm).
Fold the facing in half lengthwise, facing inward. Sew to the length of the ties
decorating them at the ends with a bevel. Turn the facing out and work the bottom with it,
aligning the ends of the semicircular neckline and the beginning of the ties.

PANAMA
If the width of the margins is 3-4 cm, they will be sloping; with a larger width, the margins will bend upward.
Add the width of the field to the height of the wedge.
With this radius, draw a semicircle from the highest point of the wedge. This will be the line of the bottom cut of the fields.
Cut the field pattern as a separate piece.
Cut out the fields in the amount of 4 parts with a fold (2 upper and 2 lower).
Having sewn the side seams, the fields are folded facing inward. To the top
fields, put a pad of calico. Grind all three parts along the outer
contour. Turn the margins inside out, straighten the seam and baste it. By fields
lay several parallel lines with an interval of 0.5 cm.
Fold the panama, brim and facing facing inward, with the edges facing outwards, and stitch.
Turn the Panama hat inside out and iron the facing inside out. At the bottom of the facing
lay a seam, simultaneously grabbing the sections of the wedges and the brim of the Panama hat.

cap and six-piece Panama hat
Wedge width = Head circumference: 6 + 0.7 cm
Wedge height = Head circumference: 4 + 2 cm
Constructing a wedge pattern:

CAP
It is sewn similarly to a cap from four wedges. The insert for the visor is better
use the finished one and use it to make a visor pattern.
You can determine the width of the visor using the formula: “divide the head circumference by 4 + 1 cm.”
A semicircular cutout for the fastener must be made at the junction of two wedges opposite from the visor.

PANAMA
From the highest point of the wedge with a radius equal to the height of the wedge, draw
semicircle until it intersects with the sides of the wedge. It will be
the bottom line and the line of the internal cut of the fields.
Add the width of the field to the height of the wedge. Draw this radius
semicircle from the highest point of the wedge. This will be the bottom cut line
fields.
Cut the field pattern as a separate piece. This will be the third part for constructing the main field pattern.
Cut out the fields in the amount of 4 parts (2 upper and 2 lower).
It is sewn similarly to a Panama hat from four wedges.
PANAMA FLOWER
Panama flower pattern

To create a pattern of petals, it is necessary to determine the central
wedge point along the bottom line. From this point with a radius of "half the width
wedge + 1 cm” draw a semicircle. This will be the bottom cut of the petal.
From the top point of the wedge with the radius of the wedge height, draw a semicircle to
intersections with the side cuts of the wedge. This will be the bottom cut of the wedge.
Continue the line further until it intersects - this will be an internal cut
petal
Cut the petal pattern as a separate piece. Cut the petals into
quantity of 12 parts (6 upper and 6 lower). Upper details of petals
glue with interlining.
Fold the upper and lower parts of the petals facing inward and stitch along
bottom cut. Turn the petal out, straighten the seam and stitch it.
Fold the petals opposite each wedge so that the edge of one touches the edge of the other and stitch.
Finish the bottom of the Panama with facing or lining.
BANDANA WITH METAL BLOCKS

Pattern width = Head circumference + 20 cm
Height = Head circumference
General diagram of the model:
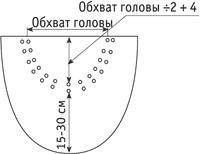
DESCRIPTION OF WORK
The blocks are placed in pairs at equal distances around the circumference, radius
which is equal to half the circumference of the head with an allowance for a loose fit
2 cm.
A cord is threaded through the blocks and its ends are secured with clips.
After spring comes hot summer, and you need to take care of hats that protect your head from the sun's rays. It is convenient to relax at the sea or by the river in a bandana - you can sunbathe and swim in it without fear of sunstroke. Sewing a bandana is easy.
Materials and tools for the master class "Bandana with an elastic band"
natural cotton fabric, elastic; thread, scissors, two safety pins.
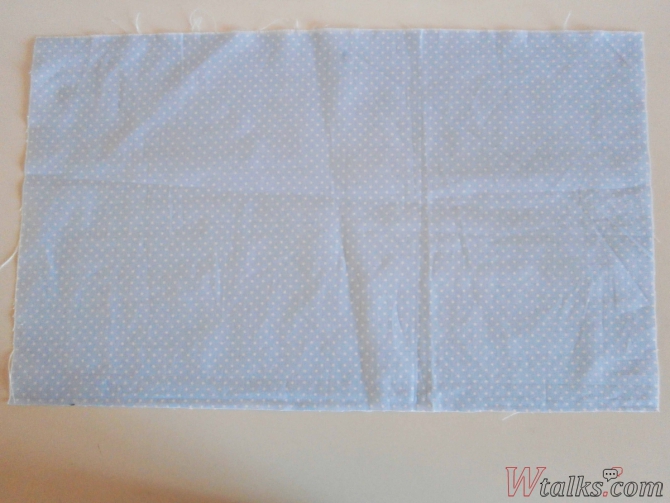
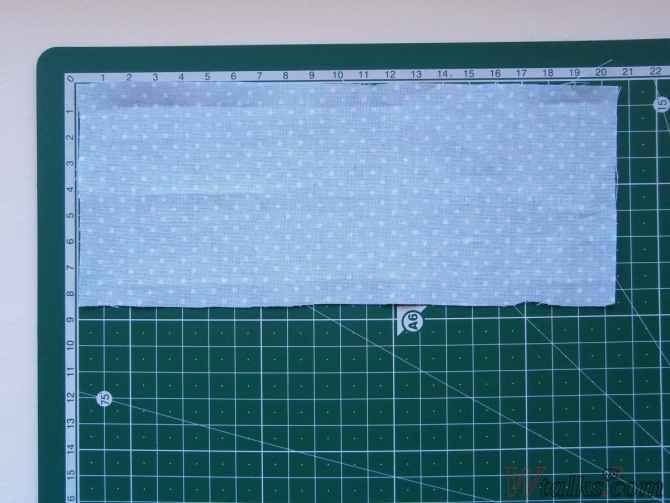
Instructions:1. Cut out a large rectangle measuring 27 x 45 cm from fabric.
2. Now cut out a small rectangle measuring 8 x 20 cm.
3. Take two identical pieces of elastic, each 13 cm long.

4. On a large rectangle, fold and stitch the long sides.

5. Smooth it out with an iron.
On the short sides of the large rectangle we will place several counter folds and stitch them together using a sewing machine.
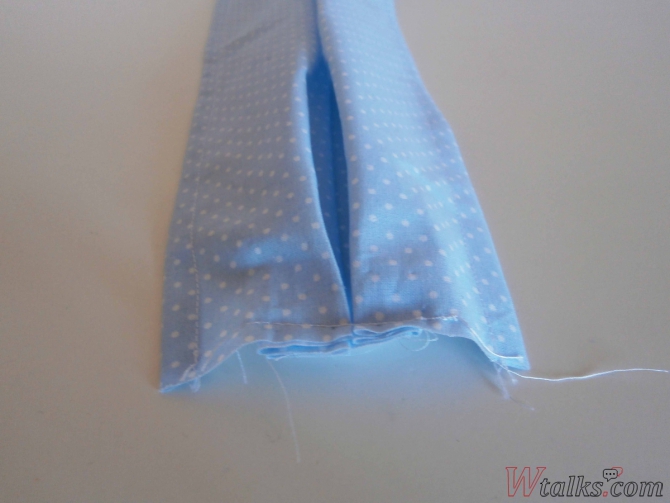
6. This is what a large rectangle with folds looks like.

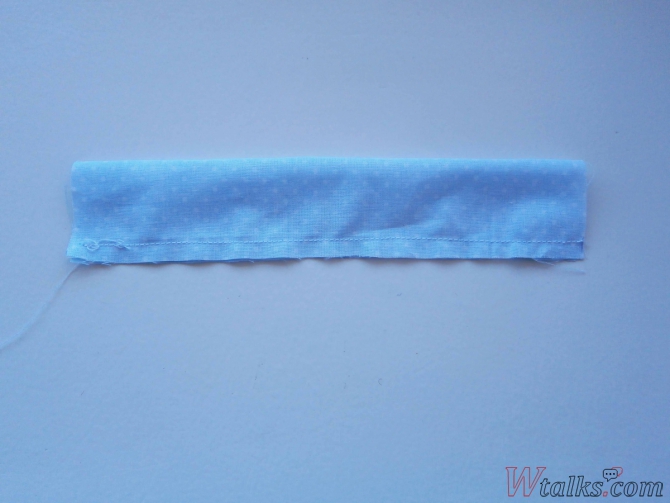
7. Take a small rectangle, fold it in half with the wrong side out and sew it.
11. Turn the bandana inside out and straighten it.
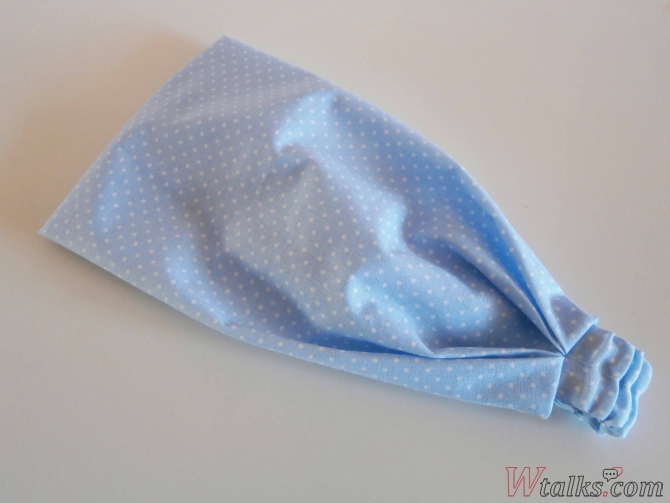
Summer bandana is ready. This bandana is designed for a head volume of 54-56 cm. That is, it is suitable for girls aged 10 years and older. The size can be adjusted by cutting out smaller or larger rectangles.
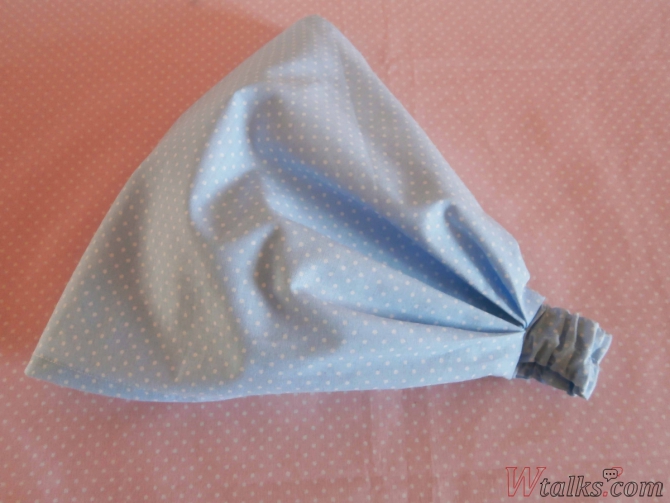
It is better to choose light-colored fabric for a bandana so that it reflects the sun's rays.
In the previous master class, I showed how to sew a cap for a baby. Today we will sew another summer headdress for our son - a bandana.
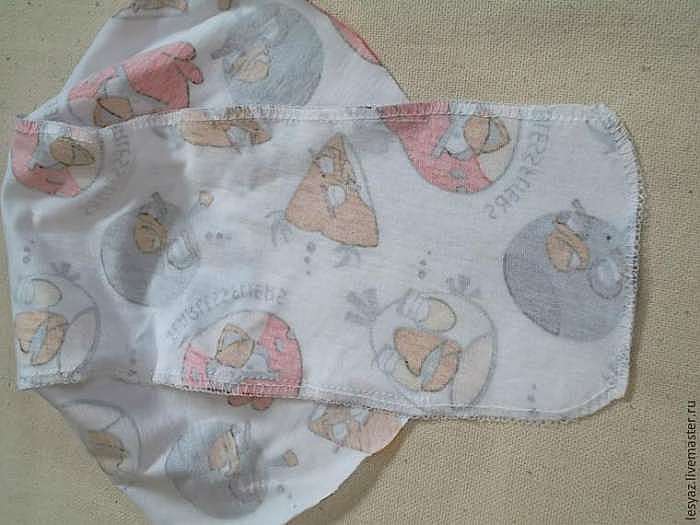
We will need cotton fabric, since the bandana for the baby should be comfortable, absorb moisture well and allow air to pass through. I took a cotton jersey - a cooler.
There will be only one pattern - a barrel.
We cut two parts of the barrel, as well as 2 additional rectangles: the middle part is 33 cm * 10 cm, and the lower part is 85 cm * 8 cm.

Sew the barrels to the middle part. We still have a small tail left. We process the seams on the overlocker and the cuts of the remaining tail.
Now we need to measure the circumference of the bandana. We measure the bottom cut in a circle, with the exception of the width of the tail at the back. I got 53 cm. Now we fold our rectangle - the lower part in half across. We set aside half of our resulting length from the fold. That is, for me it is 53 divided by 2 = 26.5 cm. Let’s note.

Sew on both sides to the mark. You can make ties at the corner. Cut off excess.

Now, before we turn out our ties, we need to notch the seam allowance. To make it more clear, I will show it in a diagram.
The notch must be made very carefully, not reaching 1 mm from the line!

We turn out our ties.

We pin and sew the loose allowance of the bandana and the loose allowance of the ties.
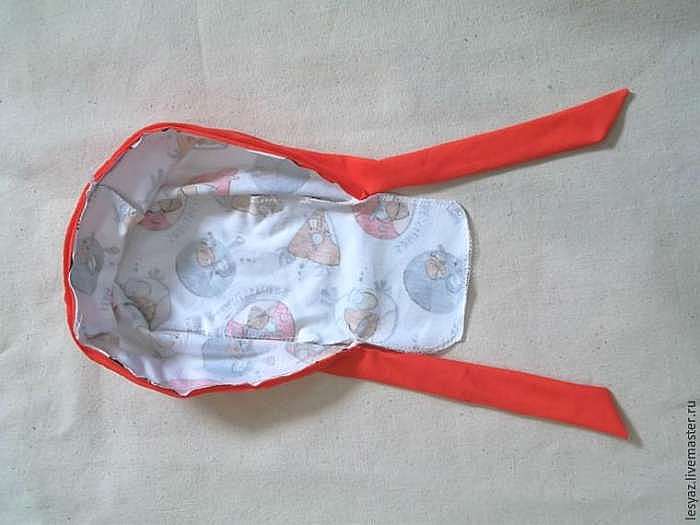
We process the cut with an overlocker. Using a gypsy needle, we hide the tails of the overlocker in the seam. Iron the product.


An original and always fashionable bandana headdress is always relevant.
Since it is already summer and the sun is baking, it is therefore necessary to beware of its insidious rays, which can lead to unpleasant consequences.
And a bandana will help protect your head; it is always a fashionable and very versatile item in your wardrobe. And anyone can sew a bandana because it’s very easy to do.
Choose any fabric according to your taste and your creativity. In total you need 40x90cm. fabrics.
It is done on graph paper according to the drawing where 1 cell = 2 mm. Seam allowance already included = 5mm.
The diagram shows one symmetrical part of the frontal and occipital parts.
After cutting, sew the finished parts along AB lines and the remaining edges need to be hemmed using an overlocker. If your imagination goes further, you can decorate it at your own discretion.

Download the bandana pattern for free from pattern.ru:
(downloads: 3162)
OPTION II

In addition, a bandana will help to hide your head from the heat. The bandana pattern is easy to make.
Bandanas have been around for a long time. For example, in America during the Wild West, cowboys wore a bandana as protection from dust. It was tied around the neck so that later it could be quickly closed Airways:) And in Central Asia, bandanas were used by riders to protect their heads from overheating.
It is noteworthy that for all the times that the bandana has been around, its main purpose has remained virtually unchanged. Of course, now bandanas have begun to be worn not only for utilitarian purposes of protection from the weather, but increasingly for decorative purposes. And they started tying a bandana not only on the head, but also as an accessory on the arm, or maybe you use it as a cute belt.
These days, bandanas come in a variety of colors, cuts, and can be made from all sorts of materials. In general, there is room for choice!
Let's look at a bandana pattern, cutting and sewing which will take you 15-20 minutes :)
The bandana pattern is shown below.
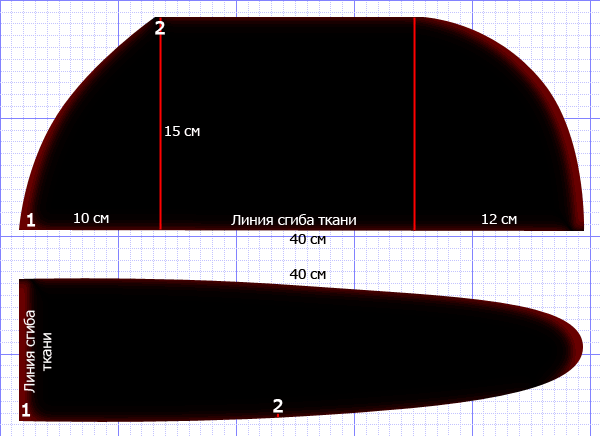
Schematic pattern of a bandana.
After looking at the pattern, choose the fabric for your bandana. As a material for a bandana, you should choose elastic but dense fabric. For example, it can be soft drape, leather, denim, or linen; in general, any fabric that matches the description. Its size will be 40x90 cm.
As you can see from the bandana pattern, it consists of two parts. After you select the size, cut out the fabric pieces. Don't forget to mark the joints of the parts. Having aligned these marks together, stitch them from point 2 to point 1. Do not forget that the given pattern is applied to the folds of the fabric, and after unfolding, on the other side of the pattern you need to put and combine exactly the same marks.
Now your bandana is ready! Congratulations on your successful sewing :)
Bandana. Galia Zlachevskaya "Genetics of cut".
http://www.youtube.com/watch?feature=player_embedded&v=WTCeOLwUXoE#!


