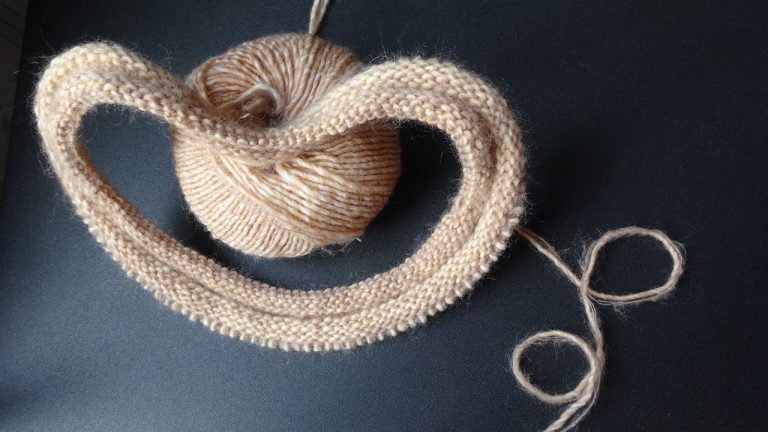
How to knit purl rows in the round. Circular knitting with fishing line
Often, round-shaped knitted fabric is crocheted - this is how elegant openwork napkins and capes are made. However, you can link circle knitting and quite easily. When done carefully, such needlework looks very interesting. A knitted circle can be used either separately (for panels, interior stands for vases, etc.) or as part of a larger product.
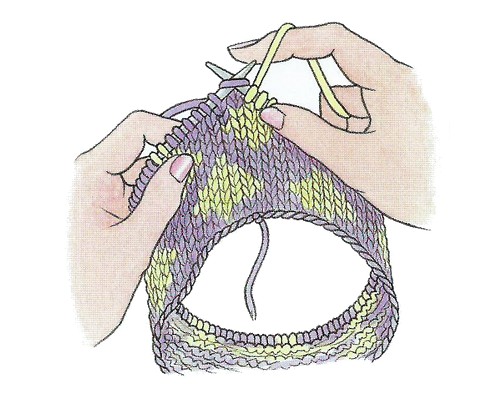
Knitting in the round happens tubular- from the name it is clear that a pipe is knitted - and from the center. Examples tubular knitting- socks, mittens, knitted in a circle, i.e. in one piece, without seams.
An example of knitting from the center is openwork tablecloths and napkins, knitted, or bag.
Knitting occurs, as in crocheting, in fact in a spiral. No edge stitches, no row turns, no purl rows.
Usually knitting goes on the front side. Thus, all rows will be front rows (not front loops, but the front side of the product). When knitting purl, all rows will be purl, i.e. the wrong side of the product.
If not provided for in the description, the pattern is knitted in the first (and all odd) rows, and the pattern is knitted in the second (and all even) rows “as the stitches look” - without change. In this way, a kind of alternation of rows is obtained - the purl row of turning knitting replaces the circular row “as the loops look.”
Tools for knitting in the round.
First of all, let's talk about instruments- knitting needles with which you can, need and comfortably knit in the round.
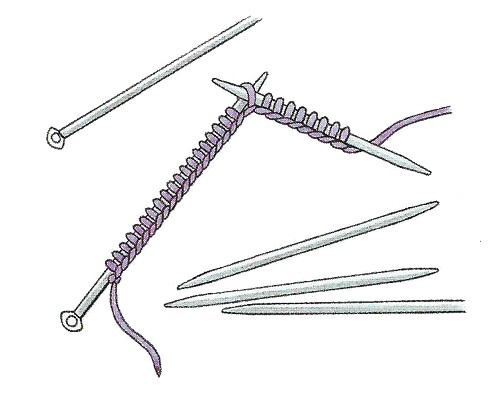
1. Double-edged needles (socks, stockings) - have two pointed ends. Usually sold in sets of 5, less often 4, sometimes 2 knitting needles. They come in various lengths. The size (thickness) of these knitting needles varies from very thin to very thick. Can be steel, aluminum, wood.

It is believed that knitting needles for knitting in the round need to be taken half a size larger, because you have to knit tighter than usual. So that the loops fit the knitting needles tightly - the knitting needles will not fall out when knitting. But all this is very individual. Knitting a sample will save you from doubts.
2. Knitting needles on a fishing line (circular, ring knitting needles, on a flexible cable). They are 2 short knitting needles connected by a flexible cord or fishing line. The length is 40 cm, 60 cm, 80 cm, 100 cm, 120 cm.

Some manufacturers offer exotic sizes - both very short and long.
A convenient option is knitting needles with replaceable fishing line.
In general, each knitter decides for herself the question of choosing knitting needles - which qualities are required and which ones can be neglected when determining the optimal price-quality combination.
Circular knitting needles (on a fishing line) are not suitable for knitting items of small diameter - the knitted fabric will stretch when knitting and become deformed. The length of the row should be slightly longer than the length of the knitting needles. Some compromise is possible when the length of the knitting needles is slightly longer than the circular row. Then knitting occurs by periodically pulling a loop from the excess fishing line approximately in the middle of the row - thus the knitted fabric moves towards the ends of the knitting needles.
3. Markers (stitch markers). Used in circular knitting to mark the beginning of a row. Without this, you can easily miss the beginning of a row or do annoying calculations.
Markers are also needed when we switch to circular knitting needles to mark (separate) individual repeats of the pattern.
Markers can be purchased or homemade, for example, from paper clips (preferably colored ones). Markers can be hung on either a knitting needle or a loop.
Knitting in the round can be tubular and from the center.
We’ll talk about tubular another time, but I suggest you look into knitting from the center in more detail.
Knitting in the round from the center.
Please note that when knitting in the round, you need to knit a classic knit stitch.
Since there is no reverse row, when knitting behind the back of the loop we will get crossed knit stitches. Therefore, you need to knit at the front of the loop.
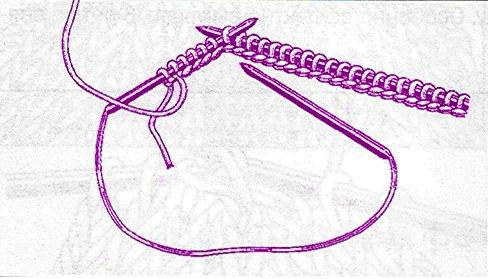
This is how to pick up and knit a loop correctly

This is how we pick up the loop by the back half:
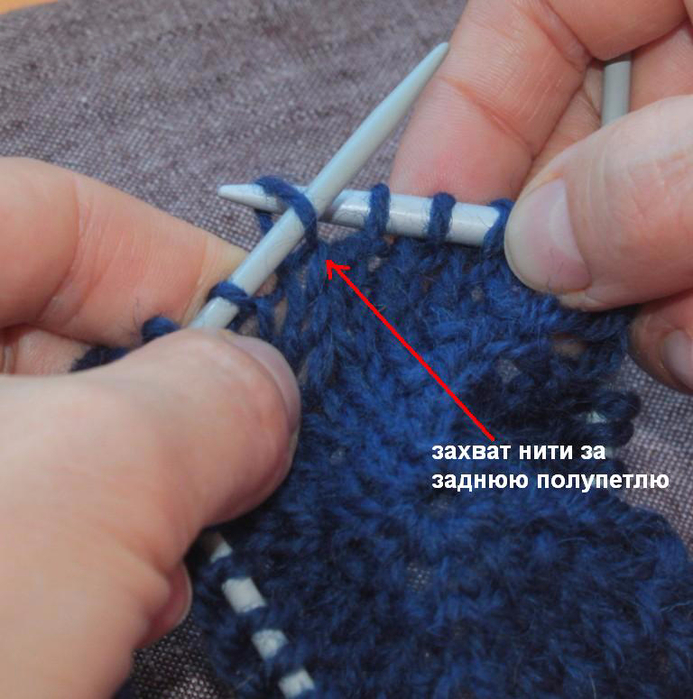
And this is the result we get when knitting in the back half of the loop in the round:

Shapes obtained by knitting in the round from the center.
When knitting from the center we get a circle (possible options are oval or square, as well as any polygon).
Therefore, knitting consists of circular rows of increasing length. At least 3 loops in the center until the desired size is achieved.
The final shape of the knitted fabric depends on the quantity and places of addition.
When knitting on 3 needles and adding at the beginning and end of each needle, we get a triangle.
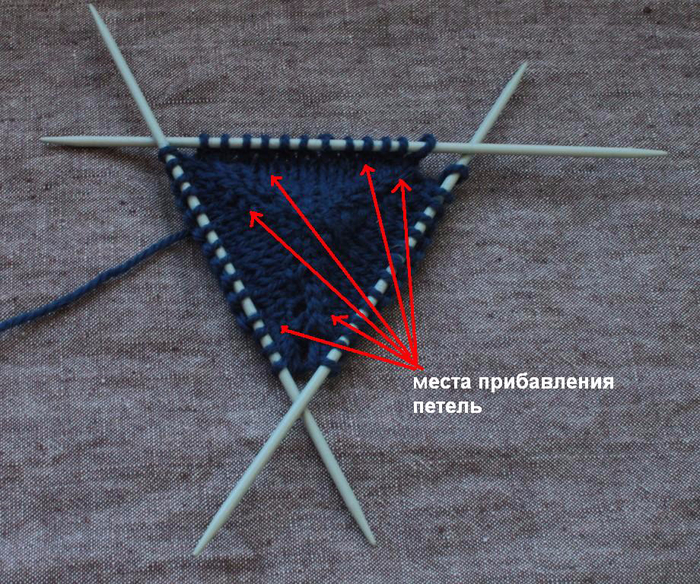
4 additions at equal intervals will give us a square.

Uniform additions at 6-8 points give a circle or polygon (6-8) and depending on the pattern used.


A set of loops is possible in several ways.
- cast on all the stitches on 2 knitting needles folded together and divide by the required number of knitting needles
- Immediately cast on stitches on the required number of needles
- crochet stitches into a ring of thread wrapped around your finger
- cast on loops from a chain of chain stitches crocheted
There may be other options.
Now a little more about each method.
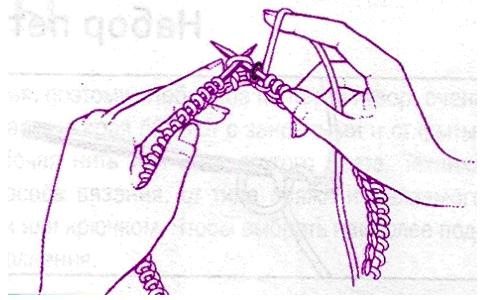
Cast on the required number of stitches on 2 folded knitting needles,
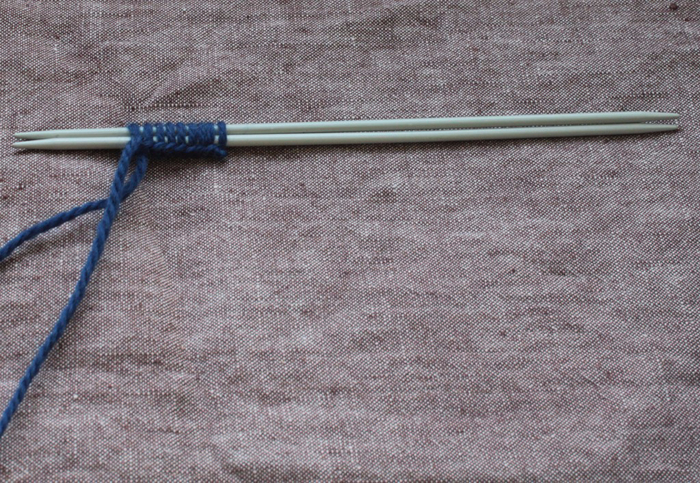
then we divide them equally (unless otherwise provided in the description) by the specified number of knitting needles - from 3 knitting needles (the minimum number of knitting needles with which it is possible to obtain a circular row). We will knit with the fourth needle.

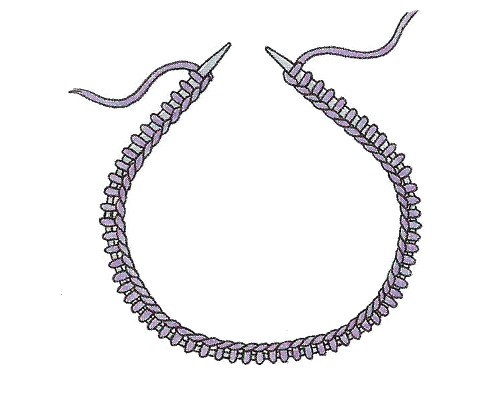
In the first row we close the knitting in a circle - we knit loops from each knitting needle sequentially: we knit loops from the 1st knitting needle, we knit loops from the second knitting needle with the freed knitting needle, and so on. Having knitted the loops from the last knitting needle, we knit the loops again from the first one with the freed knitting needle - this is how we begin the second round.
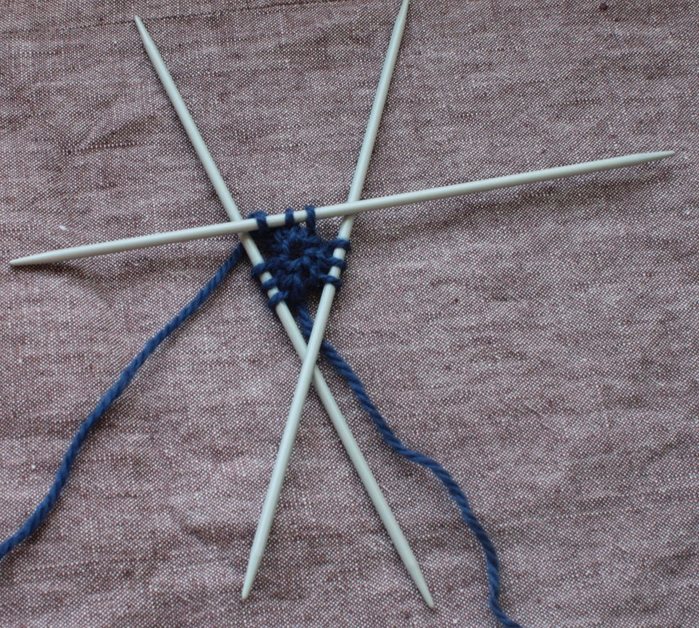
For convenience, the beginning of the circular row is marked with a marker (stitch marker) - this can be either purchased in a store or homemade, for example, from a paper clip.
Second way- cast on the required number of stitches on 2 knitting needles folded together. For example, total number The number of loops you need to cast on is 20, the number of knitting needles is 4. So, we cast on 5 loops. Take 2 other pairs of knitting needles folded together, pull the cast-on thread to these knitting needles and cast on the next 5 stitches. And repeat this for the other 2 pairs of knitting needles.
Thus, you need to have 2 sets of knitting needles.

Or, after casting on the loops on one needle, take out one of the two needles and use it for further casting on. Having cast on the loops on the 4th (last) knitting needle, take out one of the pair of knitting needles and use it for knitting.
This method is good for those who already have sufficient experience. The bad thing is that after pulling out the second knitting needle, the loops will not fit the knitting needle tightly enough, which means the knitting needle may fall out, which, to be honest, is annoying and annoying.
Third way A set for knitting in a circle from the center is, in my opinion, the most convenient - usually you need to cast on a small number of loops, and a hole in the center is not desirable. Both problems are solved by casting on loops using a hook into a ring of thread wrapped around a finger. The end of the thread is then pulled up and the hole in the center disappears completely.
We insert a hook into the ring of thread, pull out a loop, and then knit this loop:

Insert the hook into the ring again and pull out the loop:

And again we knit the elongated loop - there are 2 loops on the hook:
![]()
Repeat until the required number of loops:
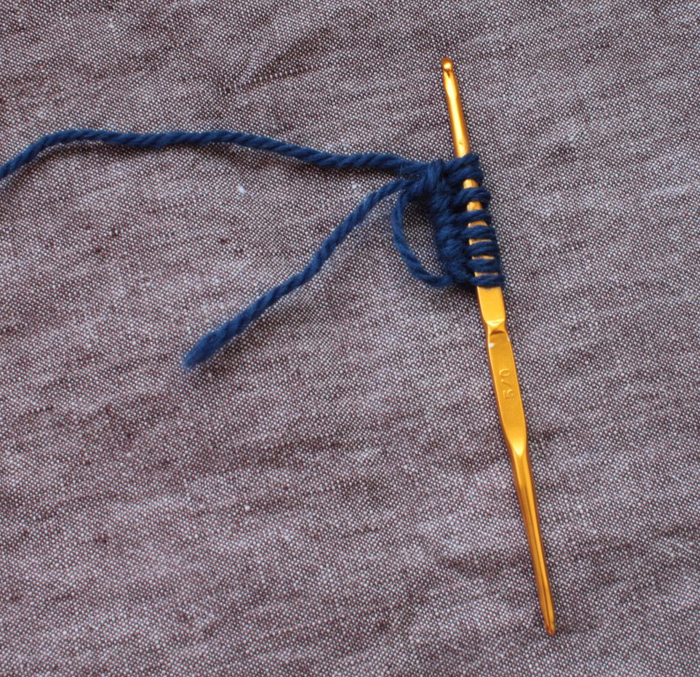
We distribute the cast-on stitches onto stocking needles and knit the first row. Next we knit according to the selected description. After 1-2 circular rows you can tighten the thread in the center. This creates a very neat center of the circle.
Fourth method- cast on a chain with a number of chain stitches equal to the required number of stitches in the cast-on row. We close the chain into a circle. We knit 1 loop from each loop of the chain using a hook and distribute them onto the required number of knitting needles.
Knitting in the round from the center begins with stocking needles. When the length of the row becomes such that the knitting does not fit on the knitting needles, either add the number of stocking needles or switch to circular knitting needles on a fishing line of a suitable length. Sometimes when knitting large items, such a transition has to be made several times.
It is better to practice knitting from the center using ready-made patterns.
When the principle of knitting has been mastered, you can, if desired, begin to create your own patterns and designs.
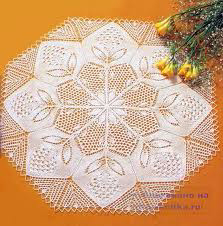
You can knit in the round absolutely anything you want: mittens and socks, hats and berets, scarves and ponchos, skirts and sweaters, tablecloths and napkins...
You can knit both openwork patterns and dense ones, including jacquard.
Below are examples borrowed from the Internet.

Like brushes for an artist, knitting needles for a knitter are the main tools for creativity. Without this simple device, you cannot create a real masterpiece, and like a conductor without batons, you cannot force the orchestra to play a beautiful knitted symphony.
The choice of tools for needlework must be approached responsibly. Any beginning craftswoman needs to be able to understand the numbers, types and methods of using various knitting devices.
There are straight and circular knitting needles:
- straight. Tools made of a variety of materials, having either both pointed ends, or one sharp, the other with a stop. They are used for knitting individual parts of a product, which are then sewn together. The work process is carried out in forward and reverse knitting rows of flat fabric;
- circular. A tool that has two solid parts made of different materials, and a thin connecting thread in the form of a fishing line between the working tips. These knitting needles allow you to knit fabric in the round, creating a seamless seamless pattern.
More about circular knitting needles
Circular knitting needles have a number of advantages that greatly facilitate the work process:
When starting to knit any pattern, you need to stock up on various tools in advance, study the instructions, patterns, and choose the right working knitting needles in terms of length and diameter.
Advice! It is advisable to lower the fishing line on new knitting needles for a few minutes hot water, then it will not make work difficult and will not twist when knitting.
Secrets of mastery in visual master classes
Any work begins with a set of loops. If this is a new piece that does not start from any base, then the set must be made on straight knitting needles. Then carefully, without losing a single stitch, transfer it to the circular ones; the numbers of both needles must match.
Important! When transferring, do not turn or twist the loops!
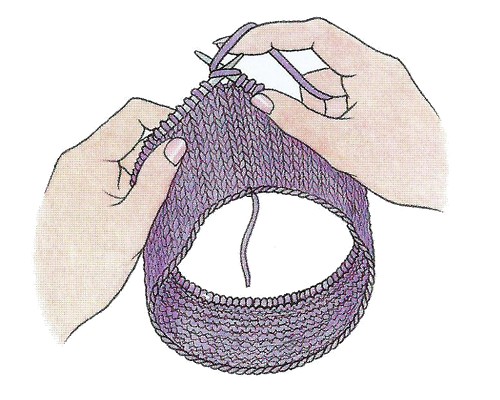
All loops are concentrated on the fishing line. IN right hand The end of the knitting needle on which the last loop was cast is placed, and the second end is placed on the left with the beginning of the cast-on. The reference point for the correct position is shown in the photo, this is the thread from the beginning of knitting, it should be on the right knitting needle.

To keep track of the knitted rows, you need to put a mark on the last loop in the form of a thread of a contrasting color or a special plastic marker. Next, knitting is carried out in a circle until the mark. The row ends, it is transferred to another knitting needle, as in the photo, and the work continues.
Video master class review of circular knitting needles
To consolidate all the material, let's look at the video from useful tips And detailed master class How to cast on stitches on circular knitting needles, carefully close the row and start knitting the future whole fabric.
Circular knitting Great for making hats, snoods, fashionable pipes, the seamless product looks neat and eliminates the separation of the front and back of the model.
The patterns fit perfectly into circular knitting; a video master class from a young but already experienced craftswoman will teach you how to make a beautiful warm snood with a braided pattern.
Video: Circular knitting of a snood
Selection of photos MK

Rows when knitting in the round are knitted continuously, in the round, without turning the product. For this technique, use 3-4 regular knitting needles or a pair of special knitting needles.
In general, circular knitting is no different from flat knitting, but it has several advantages. When knitting in the round, the work is always facing you front side, which is very convenient, especially with a complex pattern. In addition, the circular product does not need to be sewn on the sides.
When using this technique, it is important to mark the beginning of each circle. To do this, I use a special stitch marker (usually a large plastic safety pin or a piece of yarn in a contrasting color) which is inserted before the first stitch of the round and moved at the end of each round.
When knitting in circles, use circular knitting needles with fishing line or a set of 4-5 double-edged needles. The choice of knitting needles depends on the product. It is convenient to knit small items with stocking needles; the length of such knitting needles ranges from 15 to 30 cm. Circular knitting needles are more suitable for large items. When choosing circular knitting needles, keep in mind that the length of the fishing line should be slightly shorter than the circumference of the pipe, otherwise the loops will be too stretched. Circular knitting needles also come with interchangeable fishing line and are usually sold in a set. This set allows you to combine different knitting needles with different fishing line.
Cast on the total number of stitches on a regular long needle. Carefully transfer the stitches to the double needles, distributing them evenly across the three needles, slipping them like purls. Place the knitting needles in a triangle so that the working thread is at the apex of the triangle formed by the knitting needles (between the knitting needles).
Complete the circle: insert the tip of the right needle into the first stitch on the left needle, knitting it tighter. Insert a stitch marker.
Using the fourth knitting needle, knit the stitches from the first knitting needle. Using the freed first knitting needle, knit stitches from the second knitting needle. And so on.
Knitting on four needles
Cast on the required number of stitches using circular needles as usual. Distribute the loops evenly along the line, aligning the cast-on edge with the inside of the circle. The end of the working thread should be on the outside of the right knitting needle.
Complete the circle by knitting the first stitch on the left needle using the right needle. Continue knitting the first round, stopping to move the knitted and knitted stitches along the line. Continue knitting stitches from the left needle to the right without breaking the circle or turning the work.
Circular two-color knitting
When knitting in the round, the product is always facing you, so it is much easier to ensure the correctness of the pattern.
Each line of the pattern is read from right to left and counted as one knitting circle. Place a stitch marker at the beginning of each round (row) to mark the beginning of the next line in the pattern.
Long broaches along the wrong side can be woven into the fabric. Broaches of less than 3 loops do not need to be fastened. It is important not to pull the broaches so as not to tighten the pattern of the product.
Read more about two-color knitting in the section.
When knitting in the round, a seamless tube-shaped product is obtained.
For this technique, use 3-4 regular knitting needles or a pair of special knitting needles with fishing line.
Knitting on four needles: Cast on stitches on a regular long needle, then transfer them to double needles.

Complete the circle. insert the tip of the right needle into the first stitch on the left needle, knitting it tighter.

Using the fourth knitting needle, knit the stitches from the first knitting needle. Continue knitting in the same way.
Knitting on four needles: Cast on the required number of stitches

Complete the circle. Continue knitting the first round.
Continue knitting stitches from the left needle to the right without breaking the circle or turning the work.
Circular two-color knitting Each line of the pattern is read from right to left and counted as one knitting circle.
Knitting in the round is most often used for knitting socks, mittens and gloves, but sweaters, skirts, and dresses can also be knitted in the round. This technique saves the knitted fabric from seams, and the craftswomen from sewing products.
Circular knitting
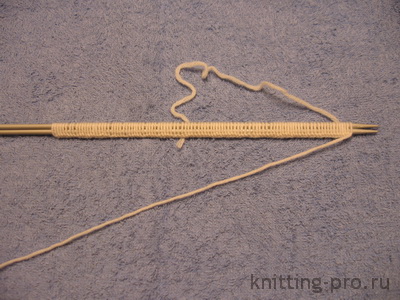
1. Start knitting by casting on the required number of loops. It is advisable that it be a multiple of 4. Take 2 knitting needles, fold them together and cast on the required number of loops. Having finished the set, pull out one knitting needle and distribute the stitches equally on 4 knitting needles.
2. Lay out the knitting needles in a square, making sure that the loops are not twisted. Take a square of knitting needles left hand, and place the working thread from the 4th knitting needle on the index finger of your left hand. The working thread should be behind the work.
3. Take the 5th knitting needle in your right hand and knit the first loop from the beginning of the cast-on. This stitch should come close to the last stitch on the 4th needle. Thus, by connecting the 1st and 4th knitting needles, you get a circle of loops. Next, knit along the outside of the circle.
Remember that there are patterns that cannot be knitted when knitting in the round, since the purl rows in them are not knitted according to the pattern.
When knitting products without seams, in addition to five straight knitting needles, circular knitting needles on a fishing line are used. The length of the fishing line is selected depending on the diameter of the circle of the product - the smaller the diameter, the shorter the fishing line should be.
1. Cast on the required number of stitches on the knitting needles.

2. Bring the end of one needle to the end of the other and begin knitting stitches. Make sure that the loops on the knitting needle are not twisted. Knit the first stitch. Before removing, make sure it is tight enough to fit snugly against the spoke.
Circular knitting with fishing lineKnitting in the round
Nowadays, knitting in the round is increasingly strengthening its position among knitters. Of course, it has a lot of advantages compared to knitting in rotary rows. Firstly, the products are obtained without seams, and this is important for knitting for babies. Secondly, for beginner needlewomen who have not yet mastered the skill of carefully stitching together parts. Thirdly, knitting in the round eliminates the need to knit purl stitches when knitting stocking stitch. For example, diagrams for Japanese patterns are always drawn up the way they look with front side, and it is more convenient to knit on them when knitting in the round, since they are very intricate and even experienced needlewomen often find it difficult to invert these patterns for turning rows. Well, knitting socks, mittens, gloves, hats is simply unthinkable without circular knitting. Therefore, I highly recommend mastering this method of knitting, in which, of course, you will have to observe a number of features. (I have highlighted them in bold.)
For circular knitting you will need knitting needles with fishing line. You can also knit in the round on double-pointed needles, but we will look at this technique in another lesson.
You can cast on loops directly on knitting needles with fishing line, but for casting on I always use straight knitting needles of the same size as the circular knitting needles with which I am going to subsequently knit the product. Cast on the required number of stitches on the knitting needles. Attention, when knitting in the round, the number of loops is always a multiple of the pattern repeat, no loops for symmetry, and edge loops are never taken into account since they simply won’t exist.
You need to continue knitting on circular knitting needles with fishing line. Pull one straight needle from the cast-on row and set it aside; you won't need it anymore. Take a knitting needle with fishing line, and we will continue knitting with it. 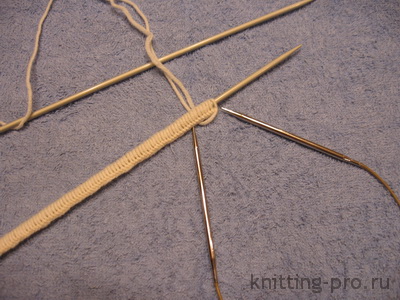
As I already mentioned, there are no edge loops when knitting in the round, so we knit the first loop according to the pattern. I started knitting with a 1x1 rib, so I knitted the first stitch, carefully tightening the working thread at the first loop. For a 1x1 elastic band, the number of loops must be even, then when moving from row to row, the joints will not be visible. For a 2x2 elastic band, the number of loops must be a multiple of 4. We continue knitting according to the pattern, in our case, this is a 1x1 elastic band, knit 1 knit stitch, 1 purl stitch. 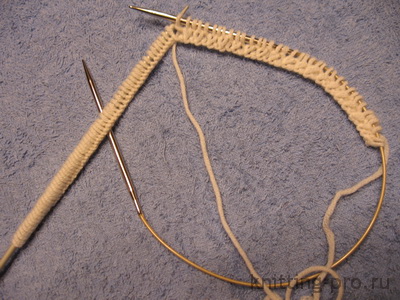
Since we do not have edge loops, we knit the last loop in the row according to the pattern, in our case it is a purl loop. Carefully distribute all the loops along the entire length of the fishing line and the knitting needles so that the knitting begins and ends at the very ends of the knitting needles. To do this, it is important to choose the correct length of the knitting needles on the fishing line. For large quantities loops, for knitting tablecloths and large pieces, use knitting needles with a fishing line length of 80 cm or more. For knitting cuffs, socks and the like, take the shortest knitting needles - 20 or 30 cm. For working the neckline, knitting hats, take knitting needles approximately 40 cm long. When distributing the loops along the length of the knitting needles, carefully ensure that the knitting does not twist around the fishing line, otherwise the knitting will twist and it will no longer be possible to fix it after knitting several rows. Next, we do not turn the knitting as usual. Take the end of the knitting needle with the first loop of the row in your left hand, and the end of the knitting needle with the last loop of the row in your right hand and close the two knitting needles. You are ready to knit the next row in the round. 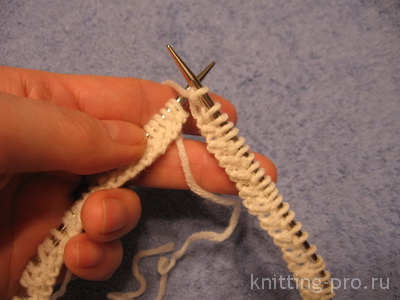
We continue knitting with an elastic band 1x1, alternating 1 stitch. and 1 p.p. You can easily determine the beginning and end of the row by the tail of the cast-on thread. However, if this is difficult for you, then you can use a special marker placed on the knitting needle while knitting into a ring. When moving from one row to another, simply transfer this marker from one needle to another. The 1x1 rib is always knitted the same way, with knit stitches above the knit stitches and purl stitches above the purl stitches. 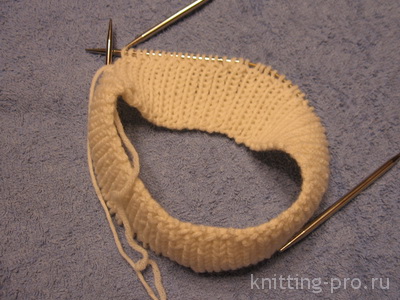
Keep in mind that the purl loops must be knitted using the second method, since only with this method the loop lies with the front wall (upper lobe) forward, and we always knit the purl loops at the top lobe. If you choose the first method of knitting a purl loop, then when knitting a purl in the next row you will have to hook it to the back wall. So we smoothly moved on to knitting the purl stitch on circular knitting needles. Since the knitting is always turned to the knitter with one side, we always knit the loops the way they look. Accordingly, to obtain a purl stitch, we knit all the loops purl in the second way in both even and odd rows 
As you already understood, to obtain a knit stitch, all stitches are always knitted with knit stitches. And it doesn’t matter how you tied the first row with them, behind the front wall or behind the back wall. When knitting knit stitches in the round, they will always be positioned with the front wall (upper segment) forward, so knit stitches when knitting in the round are always knitted behind the front wall, otherwise it simply won’t work. So, to obtain the front stitch when knitting in the round, all rows: both even and odd, are knitted with facial loops. 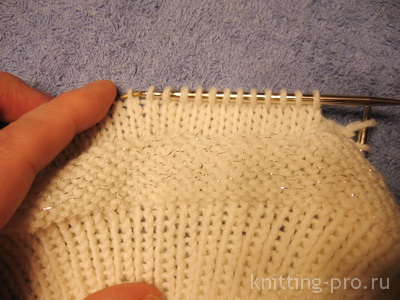
When knitting in the round, as I wrote above, the knitting is always facing the knitter with the front side, there are no turning rows. Therefore, when knitting patterns, it is important to keep track of which rows are even and which are odd. If the description of the pattern says that in even rows, knit “as the stitches look,” then all even rows simply repeat the odd ones. Many patterns can be adapted to knitting in the round. If the pattern is drawn up in the order of knitting the loops, then all even rows must be inverted, i.e. Imagine how the loops will look from the front side and knit them this way. Very often, diagrams for patterns are drawn up in such a way that it shows how the loops look from the front side. Such patterns are more visual and are very suitable for knitting in the round. In the patterns on our website, from today I am publishing a diagram for the pattern and “how to knit loops”, and “what the pattern looks like from the front side”, i.e. for circular knitting. Unfortunately, there are some types of patterns that are only possible when knitting in turning rows, in which case, if you choose this pattern, you will have to abandon circular knitting.
source: http://knitting-pro.ru/knitting-work/basic-kind-stitch/113-circle-knitting


