Knitting in the round. Circular and tubular knitting
Good day, friends!
In our next knitting lesson we will talk about how to knit in the round with knitting needles. Some knitters, especially beginners, are afraid to knit in the round. Many people even prefer to knit socks on 2 knitting needles and then sew them together.
This, of course, is all individual. Knitting is generally a democratic form of needlework in the sense that it allows different ways. And every knitter has the right to do as she is used to and as is convenient for her.
But for me, I love circular knitting. And where possible, I try to use it. First of all, because the knitted fabric is tubular, and the parts do not need to be sewn! And I (I’ll tell you a secret) don’t really like sewing knitted things...
Another important advantage circular knitting- all rows are performed according to the face of the work, which is very convenient for some patterns. For example, when knitting in the round it is easier to perform , as well as patterns where even rows are not knitted just like the knitting looks like ( ), and in them you also need to follow the scheme.
Different types of knitting needles for circular knitting
So what can you knit in the round? Yes, a lot of things! Socks, mittens, leg warmers, hats, berets, skirts, dresses, ponchos, sweaters (especially convenient if you knit them from the neck with raglan sleeves - then you can do without seams at all!) - and this is not a complete list.
Disadvantages of knitting in the round: in some cases, the rows are too long and the work process is cumbersome. This is inconvenient if sometimes you have to take your knitting with you somewhere. And your hands get more tired. As for the rest, “beautiful marquise, everything is fine, everything is fine!”
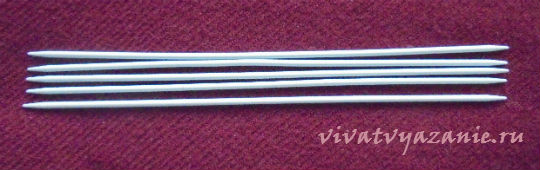
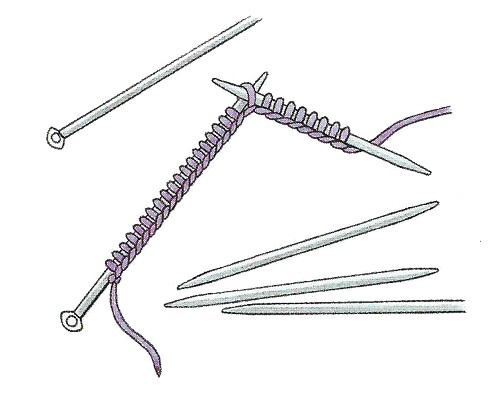
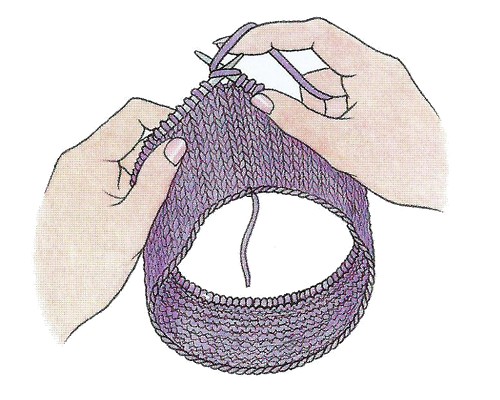
You can knit in the round on 5 short, so-called stocking needles, or you can use ring needles for this. Let's look at each method in more detail.
It is more convenient to knit small items on 5 knitting needles: socks, mittens, gloves - when there are relatively few stitches in a row. For this, a set of five knitting needles is used - identical in thickness and length, with pointed ends on both sides. Like all other knitting needles, they come in different numbers.
First, take 2 knitting needles and cast on the required number of stitches, as usual. It is desirable if the number of loops is divisible by 4. For example, let’s cast on 32 loops:

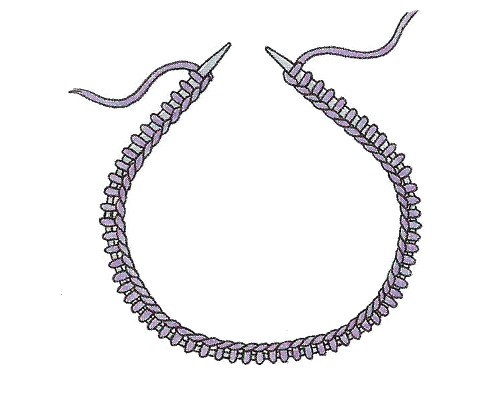
Immediately after the cast-on row we distribute the stitches onto 4 knitting needles. There should be 8 loops on each needle (32: 4 = 8). Everything is done very simply: take one of the remaining 4 knitting needles and knit 8 loops with it, leaving the loops on this knitting needle. Take the second knitting needle and knit the next 8 stitches, then connect the third and fourth knitting needles in the same way:
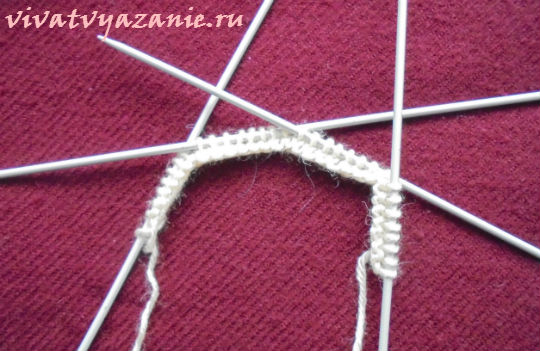
Now we connect the extreme knitting needles. We fasten the short end of the thread to the opposite end of the cast-on row so that the circle does not move apart. So, all the loops of the row are distributed on 4 knitting needles:

Our fifth knitting needle will be working. Using the fifth knitting needle, we alternately knit loops from each knitting needle, connecting the working thread. At the same time, after the loops from the next knitting needle are knitted, this knitting needle is released - and it already becomes a working one. Thus, the rows are knitted in a circle from left to right, or counterclockwise. As you can see, everything is quite simple.
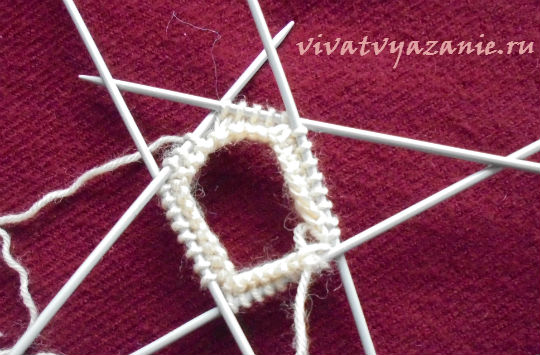
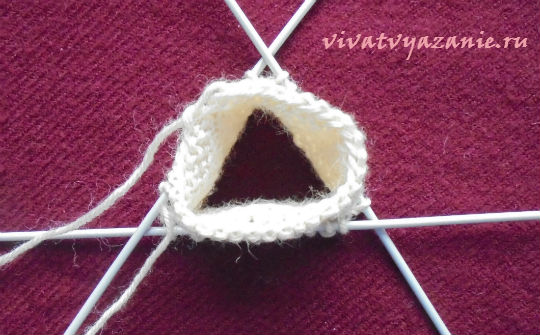
In the example for the photo, I knitted all the stitches. When knitting in the round, in this case the result is stockinette stitch, or stockinette stitch:

It is clear that you can knit different patterns in a circle, following the pattern or description of the pattern. In this case, it is extremely important that the number of loops in the row exactly matches .
For example, if the pattern repeat is 5 loops, then you need to cast on the number of loops that is divisible by 5. It may turn out that this number will not be divided exactly by 4 in order to equally distribute the loops on 4 knitting needles.
No problem: we distribute them so that the number of loops on the knitting needles coincides across one knitting needle. For example, if you need to cast on 50 loops for a pattern, then distribute it onto the knitting needles: 13, 12, 13, 12 loops, or whatever is more convenient for knitting the pattern. This is not important.
And by the way, in order to knit in the round, it is not necessary to distribute the loops exactly on 4 knitting needles. It can be divided into 3, the fourth will be working. It’s just somehow more convenient to knit with five needles.
For knitting in the round, you can distribute the stitches not on 4, but on 3 knitting needles.
Knitting on circular needles
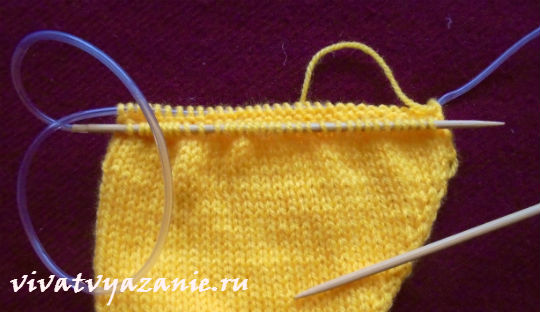
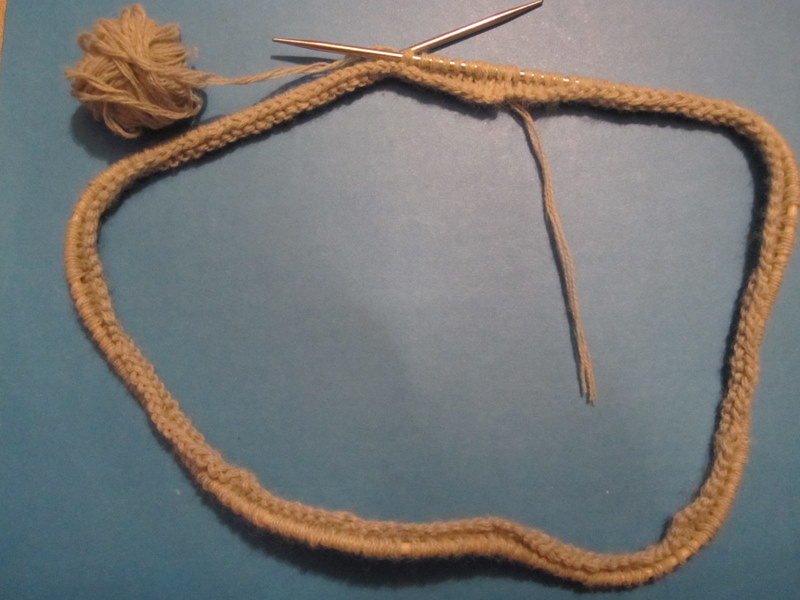
It is convenient to knit in the round on ring needles when your rows are much longer than when knitting on 5 needles. The knitting technology is the same as in the previous case. We cast on loops and connect the ends of the row into a circle.
At the same time, on the one hand, it’s good if your row is so long that the loops fill the ring needles along the entire length - you just knit counterclockwise in a row and that’s it.
But even if the row turns out to be shorter, it doesn’t matter. We simply pull out the excess length of the knitting needle (connecting line, tube) with a loop somewhere in the middle of the row, as shown in the photo below.
The most difficult and responsible thing here is to make sure that the row does not twist. Then we connect the ends of the knitting needles and begin to knit in a circle counterclockwise. Additionally, we secure the short end of the thread from the set of loops by threading it into the first loop.

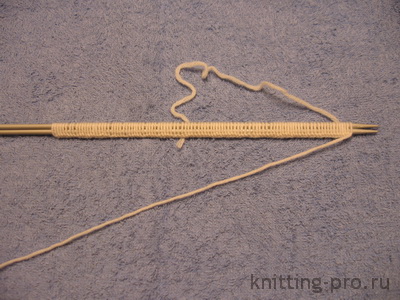
We pull out the excess part of the flexible section of the knitting needles in the form of a loop.
Having knitted the loops to the place where the excess length of the flexible part of the knitting needle is stretched out, we tighten the right end of the knitting needle so that the loops lie on the left knitting needle and are ready for knitting:

The stitches on the left needle are ready to be knitted.
We insert the right knitting needle into the first loop lying on the left knitting needle and continue knitting as usual:
We do this every time and every row, reaching this place. Subsequently, the place of “extending the extra spoke” - I’ll call it that, can be moved. Make it at the beginning of the row, for example. At the same time, it will be easier to navigate where a new row begins.

The short end of the thread at the bottom shows where the row begins. This is the most convenient place to pull out the excess part of the knitting needle.
But there are cases when, on the contrary, the rows are so long that all the loops simply cannot fit on one pair of circular knitting needles. For example, when knitting the bottom of a flared skirt. Then you can use 2 or even 3 pairs of circular knitting needles to work simultaneously (it is clear that they must be the same in thickness).
In this case, the principle of operation is the same as when knitting on 5 knitting needles - one pair is released and becomes a working pair of knitting needles. By the way, this is how I had to knit the lower part of this skirt
How to knit sleeves in the round
There is another method of knitting on ring needles, which is convenient to use in cases where the rows are not too long, but not too short to use a set of 5 knitting needles. The method can be used for knitting sleeves (especially if the item is knitted from the top, from the neck), and hats without seams.
The bottom line is that we extend the “extra” length of the knitting needle in two places - at the end and exactly in the middle of the row. Each time we knit to this point, we turn the knitting so that the working thread is on the right.
Then we pull the right end of the knitting needle to the right, and pull the left end by the flexible part of the knitting needle on the left so that the loops on the left knitting needle are in the “fighting” position. So we move the knitting needles 2 times in a row each time. At first it may seem troublesome, but this is only at first glance until you get used to it.

Rows when knitting in the round are knitted continuously, in the round, without turning the product. For this technique, use 3-4 regular knitting needles or a pair of special knitting needles.
In general, circular knitting is no different from flat knitting, but it has several advantages. When knitting in the round, the work is always facing you front side, which is very convenient, especially with a complex pattern. In addition, the circular product does not need to be sewn on the sides.
When using this technique, it is important to mark the beginning of each circle. To do this, I use a special stitch marker (usually a large plastic safety pin or a piece of yarn in a contrasting color) which is inserted before the first stitch of the round and moved at the end of each round.
When knitting in circles, use circular knitting needles with fishing line or a set of 4-5 double-edged needles. The choice of knitting needles depends on the product. It is convenient to knit small items with stocking needles; the length of such knitting needles ranges from 15 to 30 cm. Circular knitting needles are more suitable for large items. When choosing circular knitting needles, keep in mind that the length of the fishing line should be slightly shorter than the circumference of the pipe, otherwise the loops will be too stretched. Circular knitting needles also come with interchangeable fishing line and are usually sold in a set. This set allows you to combine different knitting needles with different fishing line.
Dial total number loops on a regular long knitting needle. Carefully transfer the stitches to the double needles, distributing them evenly across the three needles, slipping them like purls. Place the knitting needles in a triangle so that the working thread is at the apex of the triangle formed by the knitting needles (between the knitting needles).
Complete the circle: insert the tip of the right needle into the first stitch on the left needle, knitting it tighter. Insert a stitch marker.
Using the fourth knitting needle, knit the stitches from the first knitting needle. Using the freed first knitting needle, knit stitches from the second knitting needle. And so on.
Knitting on four needles
Cast on the required number of stitches using circular needles as usual. Distribute the loops evenly along the line, aligning the cast-on edge with the inside of the circle. The end of the working thread should be on the outside of the right knitting needle.
Complete the circle by knitting the first stitch on the left needle using the right needle. Continue knitting the first round, stopping to move the knitted and knitted stitches along the line. Continue knitting stitches from the left needle to the right without breaking the circle or turning the work.
Circular two-color knitting
When knitting in the round, the product is always facing you, so it is much easier to ensure the correctness of the pattern.
Each line of the pattern is read from right to left and counted as one knitting circle. Place a stitch marker at the beginning of each round (row) to mark the beginning of the next line in the pattern.
Long broaches along the wrong side can be woven into the fabric. Broaches of less than 3 loops do not need to be fastened. It is important not to pull the broaches so as not to tighten the pattern of the product.
Read more about two-color knitting in the section.
When knitting in the round, a seamless tube-shaped product is obtained.
For this technique, use 3-4 regular knitting needles or a pair of special knitting needles with fishing line.
Knitting on four needles: Cast on stitches on a regular long needle, then transfer them to double needles.

Complete the circle. insert the tip of the right needle into the first stitch on the left needle, knitting it tighter.

Using the fourth knitting needle, knit the stitches from the first knitting needle. Continue knitting in the same way.
Knitting on four needles: Cast on the required number of stitches

Complete the circle. Continue knitting the first round.
Continue knitting stitches from the left needle to the right without breaking the circle or turning the work.
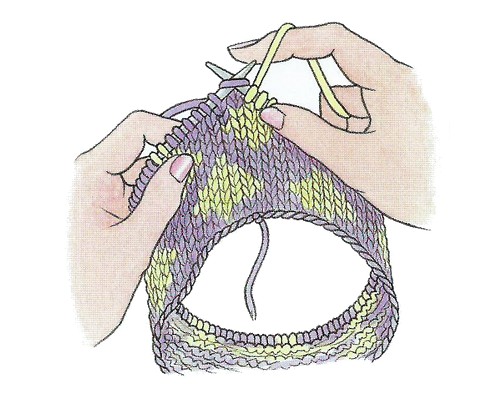
Circular two-color knitting Each line of the pattern is read from right to left and counted as one knitting circle.
How to knit on circular knitting needles in a circle and why is this necessary? We will try to answer these questions, as well as give important advice, which you cannot do without at the initial stage of studying the technique of creating a canvas.
Anyone who has never used this technique can say that even without it they cope perfectly with the embodiment of their own creative ideas. Knitting in the round has one highlight - it allows you to create seamless items. This means that they will be without seals at the joints of the parts, the risk of deformation of the product in this area is eliminated, and, which is also quite important, there is no need to spend your precious time assembling all the parts together, laying jewelry seams. This method is relevant for creating turtlenecks, sweaters, all kinds of hats and more. The scope of application of circular knitting on knitting needles is limited only by the knitter’s imagination.
Is everything as simple as it seems at first glance? So how to knit in the round? Maybe it’s enough to simply bring the first cast-on loop to the last one, and then continue using the same technique as knitting a straight fabric? This almost corresponds to the real state of affairs. But there are several small, and at the same time, quite significant adjustments.
Getting Started: Ring Connection
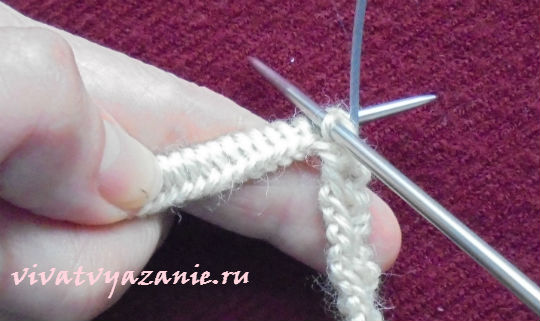
There is nothing difficult about knitting on circular needles. Pitfalls lurk at the very beginning of the process. We start working with loops: cast on the estimated number plus one. This additional unit will make it possible to make the junction of the beginning of the first row with the last smooth and without flaws.
The loops are cast on. Having distributed them evenly along the entire length of the circular knitting needles, we bring the first, which is in the right hand, to the last (left). Please note that the typesetting row along its entire length must be even, and in no case twisted. Now we remove the first loop from the left knitting needle to the right one, pull it through the last one (after that it became the second one), return it again to the left one, lowering the unit through which it was passed. Here's what to do next. Thus, one loop was lowered - this is the same additional unit that was added during casting. With its help, the row was connected into a ring. Now the edge will be smooth. To firmly fix the joint, you need to pull the tip of the thread at the beginning of the cast-on edge, tightening the fixing loop tightly. Circular knitting has begun. At the end of the work you only need to thread the tip of the thread.
Knitting in the round
Behind the connection of the loops into a ring. It is clear to any needlewoman that she needs to mark the starting point - this will make further work easier. To create patterns, considering the front and back sides of the design is one of the most important aspects of knitting in the round. Therefore, to indicate the beginning of the row, we put a special marker on the right knitting needle (a small fastening plastic part with a rounded eye, sold in sewing stores) or, if there is none, replace it with a small ring. IN in this case The presence of the connector does not matter. If you don’t have a marker or a small diameter ring at hand, then you can just use a thread of a contrasting color, attaching it to a knitting needle between the beginning and end of the row.
Circular knitting with fishing lineKnitting in the round
Nowadays, knitting in the round is increasingly strengthening its position among knitters. Of course, it has a lot of advantages compared to knitting in rotary rows. Firstly, the products are obtained without seams, and this is important for knitting for babies. Secondly, for beginner needlewomen who have not yet mastered the skill of carefully stitching together parts. Thirdly, knitting in the round eliminates the need to knit purl stitches when knitting stocking stitch. For example, diagrams for Japanese patterns are always drawn up the way they look with front side, and it is more convenient to knit on them when knitting in the round, since they are very intricate and even experienced needlewomen often find it difficult to invert these patterns for turning rows. Well, knitting socks, mittens, gloves, hats is simply unthinkable without circular knitting. Therefore, I highly recommend mastering this method of knitting, in which, of course, you will have to observe a number of features. (I have highlighted them in bold.)
For circular knitting you will need knitting needles with fishing line. You can also knit in the round on double-pointed needles, but we will look at this technique in another lesson.
You can cast on loops directly on knitting needles with fishing line, but for casting on I always use straight knitting needles of the same size as the circular knitting needles with which I am going to subsequently knit the product. Cast on the required number of stitches on the knitting needles. Attention, when knitting in the round, the number of loops is always a multiple of the pattern repeat, no loops for symmetry, and edge loops are never taken into account since they simply won’t exist.
You need to continue knitting on circular knitting needles with fishing line. Pull one straight needle from the cast-on row and set it aside; you won't need it anymore. Take a knitting needle with fishing line, and we will continue knitting with it. 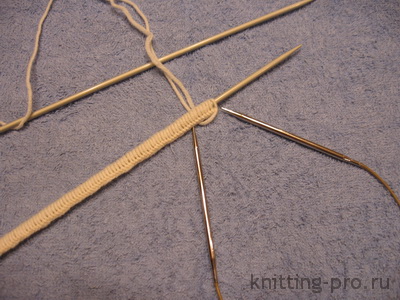
As I already mentioned, there are no edge loops when knitting in the round, so we knit the first loop according to the pattern. I started knitting with a 1x1 rib, so I knitted the first stitch, carefully tightening the working thread at the first loop. For a 1x1 elastic band, the number of loops must be even, then when moving from row to row, the joints will not be visible. For a 2x2 elastic band, the number of loops must be a multiple of 4. We continue knitting according to the pattern, in our case, this is a 1x1 elastic band, knit 1 knit stitch, 1 purl stitch. 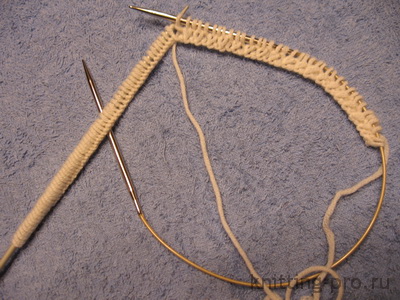
Since we do not have edge loops, we knit the last loop in the row according to the pattern, in our case it is a purl loop. Carefully distribute all the loops along the entire length of the fishing line and the knitting needles so that the knitting begins and ends at the very ends of the knitting needles. To do this, it is important to choose the correct length of the knitting needles on the fishing line. For large quantity loops, for knitting tablecloths and large pieces, use knitting needles with a fishing line length of 80 cm or more. For knitting cuffs, socks and the like, take the shortest knitting needles - 20 or 30 cm. For working the neckline, knitting hats, take knitting needles approximately 40 cm long. When distributing the loops along the length of the knitting needles, carefully ensure that the knitting does not twist around the fishing line, otherwise the knitting will twist and it will no longer be possible to fix it after knitting several rows. Next, we do not turn the knitting as usual. Take the end of the needle with the first stitch of the row in left hand, and the end of the knitting needle with the last loop of the row in right hand and close two knitting needles. You are ready to knit the next row in the round. 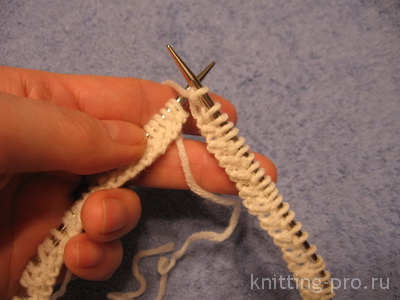
We continue knitting with an elastic band 1x1, alternating 1 stitch. and 1 p.p. You can easily determine the beginning and end of the row by the tail of the cast-on thread. However, if this is difficult for you, then you can use a special marker placed on the knitting needle while knitting into a ring. When moving from one row to another, simply transfer this marker from one needle to another. The 1x1 rib is always knitted the same way, with knit stitches above the knit stitches and purl stitches above the purl stitches. 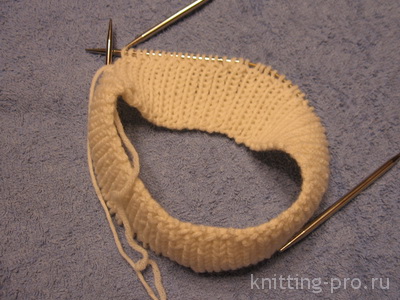
Keep in mind that the purl loops must be knitted using the second method, since only with this method the loop lies with the front wall (upper lobe) forward, and we always knit the purl loops at the top lobe. If you choose the first method of knitting a purl loop, then when knitting a purl in the next row you will have to hook it to the back wall. So we smoothly moved on to knitting the purl stitch on circular knitting needles. Since the knitting is always turned to the knitter with one side, we always knit the loops the way they look. Accordingly, to obtain a purl stitch, we knit all the loops purl in the second way in both even and odd rows 
As you already understood, to obtain a knit stitch, all stitches are always knitted with knit stitches. And it doesn’t matter how you tied the first row with them, behind the front wall or behind the back wall. When knitting knit stitches in the round, they will always be positioned with the front wall (upper segment) forward, so knit stitches when knitting in the round are always knitted behind the front wall, otherwise it simply won’t work. So, to obtain the front stitch when knitting in the round, all rows: both even and odd, are knitted with facial loops. 
When knitting in the round, as I wrote above, the knitting is always facing the knitter with the front side, there are no turning rows. Therefore, when knitting patterns, it is important to keep track of which rows are even and which are odd. If the description of the pattern says that in even rows, knit “as the stitches look,” then all even rows simply repeat the odd ones. Many patterns can be adapted to knitting in the round. If the pattern is drawn up in the order of knitting the loops, then all even rows must be inverted, i.e. Imagine how the loops will look from the front side and knit them this way. Very often, diagrams for patterns are drawn up in such a way that it shows how the loops look from the front side. Such patterns are more visual and are very suitable for knitting in the round. In the patterns on our website, from today I am publishing a diagram for the pattern and “how to knit loops”, and “what the pattern looks like from the front side”, i.e. for circular knitting. Unfortunately, there are some types of patterns that are only possible when knitting in turning rows, in which case, if you choose this pattern, you will have to abandon circular knitting.
source: http://knitting-pro.ru/knitting-work/basic-kind-stitch/113-circle-knitting


