Macbook second monitor. Several tricks for using an external monitor in Mac OS X.
Today's post will be dedicated to owners of Apple laptops - that is, owners of a MacBook, MacBook Air or MacBook Pro. Perhaps this information will be relevant for earlier models, such as the iBook G3 and G4, as well as the PowerBook G3 and G4, but, to be honest, I haven’t checked. You've probably already noticed a video output on the end of your pet: early models had it VGA, then it changed to DVI or Mini DVI, then replaced him Mini DisplayPort and in the newest models it is a universal high-speed port Thunderbolt. Many people know that you can connect an external monitor or LCD panel through these ports, and many are already using this successfully. But not many people know about all the additional amenities that can be gleaned from such a pair. This note will ask questions that have puzzled me for a long time, and give brief answers to them.
How to change the location of the external monitor connected to a MacBook, MacBook Air or MacBook Pro relative to the main one in Mac OS X?
By default, the connected external monitor becomes a “continuation” of the desktop right side: we drag the cursor to the very edge and it continues its movement on the external monitor. Everything is great if the laptop is to the left of the monitor. In this case, everything is intuitive and convenient. But what if the location is non-standard? Let's go to System Settings > Monitors > Location, “grab” the external monitor (I have it surrounded by a red frame) and “pull” it to a convenient place.
If you place one monitor above or below the other, the menu bar will be on the top monitor and the Dock on the bottom - a la one large space. To see how it will look live, click on the image with the settings. 
How to make an external monitor the main monitor in Mac OS X?
It is convenient to use an additional monitor if the resolution of the laptop display is equal to the resolution of the connected external monitor. But usually they connect a monitor whose resolution is much higher than the resolution of the matrix built into the laptop. Because of this, in fact, external monitors are used. I have experience using this: a 15″ MacBook Pro with a 23″ external monitor. In this combination, it becomes not very convenient to use: constant dragging of working windows from the laptop to an external monitor (and windows of running programs open on the laptop monitor by default) is particularly tiring, moreover, during work, when “transitioning” from an external monitor to “ laptop”, every now and then you’ll get stuck with the mouse cursor in one of the corners (marked green in the screenshot). All this starts to irritate after a while. And then another solution was found - assigning an external monitor as the main one. In order to assign an external monitor to the main one, we take the white stripe - this is a schematically depicted menu bar, and drag it onto the external monitor.
 It’s very convenient to work in this mode: we move informative windows that we don’t need to access frequently, such as the Twitter client window, Jabber, Skype or ICQ contacts, to a smaller screen, and on the larger screen we work in Photoshop, surf the Internet or design another website .
There is another way, but this is more for people who have suffered misfortune in the form of damage to the matrix on the laptop. An external monitor can simply be used as the main one, and a MacBook, MacBook Air or MacBook Pro will act as a system unit. To do this, you will need an external keyboard, mouse or Magic Trackpad (USB or Bluetooth makes no difference). We connect an external keyboard, mouse or trackpad to the laptop and, if necessary, do their initial setup. Close the laptop lid and wait until it goes into sleep mode (the white indicator should slowly “pulse”). After the laptop “falls asleep,” we “wake up” it using the keyboard, mouse or trackpad. When the system “wakes up,” the built-in monitor will be turned off, and the external one will be perceived by the system as the main and only one. To avoid overheating of the laptop, the lid can be opened slightly.
How to synchronize the image on a laptop and an external monitor (projector) in Mac OS X?
There are situations when it is necessary to display the same image on an external monitor or LCD panel as on a laptop. The simplest example is a presentation or lesson, during which you need to demonstrate actions performed in a system or program. In this case, we connect an external monitor, LCD panel or projector to the laptop, which is also perceived as a monitor, go to System Settings > Monitors > Location and activate the checkbox below Synchronize monitors. When using the “Sync” mode, it is worth considering one thing: when synchronizing, the image on a large monitor or plasma may be blurred due to the fact that the relatively low resolution of the image of the built-in display is simply “stretched” onto the large screen.
Before buying a monitor, I neglected to study the capabilities of the MacBook with external displays, because I was convinced that the situation was exactly as good as with other laptop computers. In other words, I was sure that the MacBook supports a full set of modes for working with external displays, allowing you to habitually switch between modes using a key combination (Fn+F5 or similar). But it was not there.
Once the new monitor arrived, I unpacked it and connected it via DisplayPort to my laptop. The monitor was immediately identified, but it turned out that the MacBook only supports two modes of working with it:
- Clone/Mirror (the “Mirror Displays” checkbox is checked), when both displays are active and display the same image;
- DualView (the “Mirror Displays” checkbox is not checked), when both displays are active, but independent of each other. Each of them has its own desktop and each works with its own frequency and resolution settings.
Unfortunately, there is no option for turning off the laptop display. When I learned about this, I was not upset. Intuition suggested that there should be some kind of workaround. After searching for information on the Internet and organizing a series of experiments, we were able to find several workable solutions. I present a short how-to.
Goal: to ensure that the external monitor connected to the MacBook Pro is the only image source. In this case, you must be able to use the laptop keyboard and touchpad.
Option 1
Initial conditions: the laptop is turned on, an external monitor is connected.Procedure:
- Activate the mirror mode of working with an external monitor (Clone/Mirror);
- Close the laptop lid and wait until the computer goes into sleep mode;
- Without opening the lid, wake up the computer by connecting any USB device, such as an external HDD. A flash drive will also work. This will automatically activate the external display;
- You can open the lid and use the laptop's keyboard and touchpad. The laptop screen will remain turned off.

Option 2
Initial conditions: laptop is turned off, external monitor is connected.Procedure:
- Turn on the laptop and close the lid without waiting for it to load;
- Once the computer boots, the external display will be automatically activated;
- You can open the laptop lid and use the keyboard and touchpad. The laptop screen will remain turned off.
UPD: I received advice to turn off the laptop screen by reducing its brightness to zero. I'll explain why this doesn't work:
- Mirror mode. In this mode, the resolution is the same on both monitors. The internal display is 1280x800. On the external one, it is also 1280x800, while 1920x1080 is supported. Naturally, it is inconvenient to work this way.
- DualView mode. In this mode, the mouse will jump from the main display to the internal laptop monitor, which is turned off - falling into a black hole, so to speak. Which is also not very convenient.
- Wake up your laptop using the Apple Remote
- Wake up a laptop with an iOS device (iPhone, iPad, iPod) using the Remote program,
- Wake up your laptop with the Magic Mouse (it turns out that this is possible). It’s my fault that I didn’t discover this earlier, I didn’t dig deep enough. But all I had to do was check the box in the Bluetooth settings (thanks for the tip
As we know, Apple sells many more laptops than desktops. This means that most Mac users will have to settle for displays no larger than 15 inches. If your line of work requires you to deal with a larger number of pixels, in this series of materials we will tell you how to choose the most suitable second (and possibly third) monitor for yourself.
Why do you need an additional monitor?
If you find yourself using the ⌘+Tab key combination too often to switch between applications, then it would be much more convenient for you to be able to open several programs simultaneously on the same screen. Well, if you program in Xcode on an 11-inch Macbook Air, then you could use some extra screen space. Having a second monitor allows you to use many more pixels, which can be very useful in your work.
In addition to allowing you to have multiple apps open on the same screen at once, apps like Aperture and iMovie have some great features that let you take advantage of having two screens. For example, in iMovie, you can make settings that allow you to edit your movie on a large screen and watch the preview on an external monitor.
Are two monitors better than one?
For some users, the thought of placing two monitors side by side may seem like an unnecessary luxury. But what if you want to take advantage of two screens without using them at the same time? To do this, Apple laptops provide a feature called “shell mode.”
Introduced in the PowerBook G4, this feature allows you to work with an external monitor when the laptop's lid is closed. Since the MacBook's controls will be under a closed lid at this moment, to use this mode you will have to get an external keyboard and mouse (wired or wireless, it doesn't matter).

After closing the laptop lid, simply connect the monitor, power, mouse and keyboard. Your MacBook will wake up and start working exactly like a desktop. If you are going to work like this regularly, there are special stands that will give your design maximum ergonomics and presentability.
Connector type
Behind last decades Many monitor connectors have appeared on the market, and all of them are often used in monitors to this day:
- Dual-Link DVI
- Mini DisplayPort
- Thunderbolt
VGA
Compatible with VGA displays only
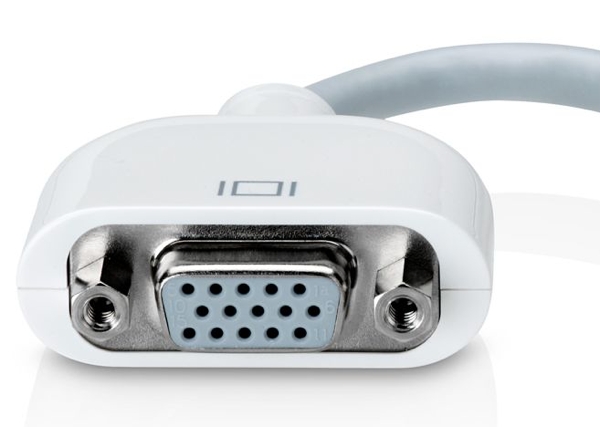
The VGA connector can now be seen quite often on computers. This connection is “analog,” which means that since the Mac transmits a digital signal, it will have to be converted to analog. For the same reason, you should not count on an absolutely flawless picture: interference in such a configuration is clearly unavoidable.
DVI
Compatible with VGA and HDMI monitors

The DVI standard was created specifically to work with digital displays. This means that no digital to analog conversion is required. Some Macs come with Mini-DVI ports. This is the same DVI, but has a more compact connector, to use which you will have to arm yourself with an adapter.
Dual-Link DVI
Compatible with VGA, DVI and HDMI monitors
DVI operates over a single channel, while Dual-Link DVI is the same type of connector but operates over two channels. In practical terms, this means that this standard can support much higher resolutions than DVI and VGA: for example, 2560 x 1600 pixels, like a 30-inch Cinema Display. Compare that to the 1366 x 768 resolution of the 11-inch MacBool Air and feel the difference!
HDMI
Compatible with VGA and DVI monitors

HDMI is an improved version of DVI that supports not only digital image, but also audio. Therefore, this standard is often used in multimedia players and game consoles.
Mini DisplayPort
Compatible (via adapters) with VGA, DVI, Dual-Link DVI and HDMI monitors

Mini DisplayPort is Apple's version of DisplayPort, designed to replace VGA and DVI. Even though this standard officially became a thing of the past in 2009, it is still seen quite often.
Thunderbolt
Compatible (via adapters) with VGA, DVI, Dual-Link DVI, HDMI and Mini DisplayPort monitors

Thunderbolt is a development by Apple and Intel and is based on the DisplayPort standard. At the same time, Thunderbolt provides monitors with additional functionality. As an example, we will give, which supports USB, Ethernet and even serial connections. This means that although Thunderbolt has the same connector as Mini DisplayPort, Thunderbolt monitors will not work with Mini DisplayPort-based Macs.
By the way, it wouldn’t hurt to explain what the phrase “series connection” means in the previous paragraph. This means that thanks to Thunderbolt, you can connect two Thunderbolt Displays to your 2012 MacBook Air at the same time. And if you are the owner, then you can get as many as four displays at your disposal by connecting, in addition to two, another external monitor via HDMI.
Video adapters
You probably noticed that for each connector we indicated the supported adapter types. For example, if you have an external monitor that only supports HDMI, you can only use it with a Mac that has DVI, Mini DisplayPort, HDMI, or Thunderbolt ports using an adapter. With most connectors being two-way compatible, you can even connect your Mac with Thunderbolt to a DVI monitor. At the same time, a Mac with a DVI port will no longer work with a Thunderbolt monitor. The following adapters are currently available in Apple stores. Take this list with you so you don't get into trouble when you go shopping for a monitor:
- Mini DVI > VGA
- Mini DVI > DVI
- Mini DisplayPort > VGA
- Mini DisplayPort > DVI
- Mini DisplayPort > Dual-Link DVI
- Mini DisplayPort > HDMI
- For Thunderbolt-enabled Macs, you can simply use Mini DisplayPort.
Now that we have figured out the question of why we need an external monitor, and have chosen required types adapters to connect to our Mac, you can move on. In the second part of our article, we will tell you what other important points you need to pay attention to when choosing an external monitor. Don't switch!
Based on materials from Tutsplus.com

MacBooks are laptops from the world famous company Apple, which has always been distinguished by the special quality of its devices and certain problems in terms of their functionality. All equipment runs on its own operating system, which is why sometimes difficulties arise. There are situations when the existing screen is not enough and there is a need to connect an additional monitor. MacBook supports three modes of interaction with external monitors.
Most Apple laptops have a universal port (Mini DisplayPort). To connect an external screen, you will need a cable, the end of which will be VGA, HDMI or DVI, depending on the connectors on the monitor. You must make sure that the cord supports audio transmission. You can use adapters. You can work with any of the modes in the “Displays” tab in the system settings.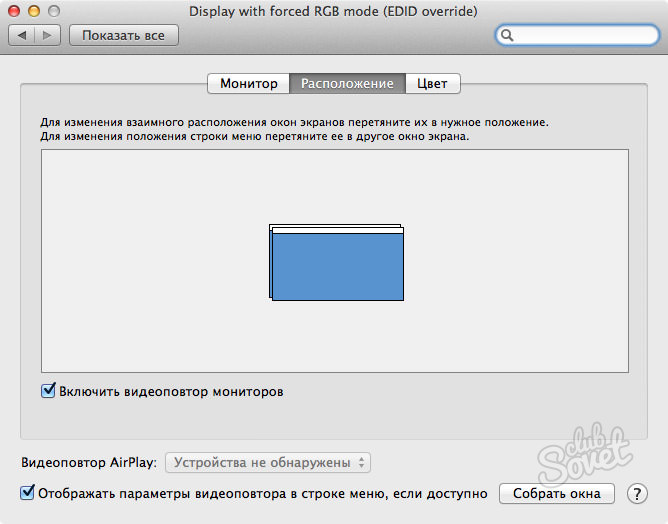


The third mode allows you to use the laptop as a system unit. In this case, the external monitor is the only and main one. However, the MacBook must be turned on despite the lid being closed. To do this, you need to find the “Bluetooth” tab in the system settings and enable the “Allow Bluetooth devices to wake this computer from sleep” option. A keyboard and mouse must be connected to the monitor, otherwise it will be impossible to use it.
The third method is considered the most convenient, since in this case you can use an external monitor together with a MacBook as a home personal computer.
"R" is for variety. A set of criteria so as not to miss the mark. By the end of this year I plan to assemble a small stationary setup based on 2015. It will greatly increase my productivity - at least it should. It will include a comfortable desk with the ability to work while standing, an extraordinary monitor (or better yet, two), a comfortable mouse and touchpad, a keyboard for the fastest possible typing, as well as a whole set of additional accessories, which we will discuss separately.
By the way, we have already discussed the choice of a keyboard for Mac, and identified the nuances of modern mice that you need to pay attention to. Today we picked five criteria for choosing a monitor so as not to miss.
1. Give yourself design criteria. It definitely matters

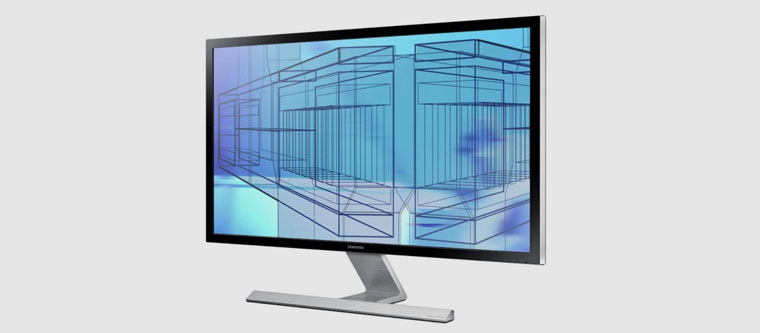
For example, today, when selecting the necessary equipment, I focus on minimalism and the highest quality materials in the design. I need a solution without unnecessary frills. For example, this model very pleased - nothing superfluous.
To this point I also include the ability to work with peripherals. All necessary additional devices can be connected to the monitor. And to get started, just plug one single cable into your MacBook. It is very comfortable.
Plus, it should definitely connect to a MacBook Pro without adapters - via HDMI or Thunderbolt.
2. Select matrix type and resolution. Consider the pros and cons
Today there are three types of matrices available on the market: TN+film, IPS and MVA/PVA. Each option should be considered in terms of the following characteristics - response time, viewing angles, color rendering and contrast. Let's abstract from cost in principle - we only live once.
- TN+film is characterized by minimal response time, not the largest viewing angles, average color rendering quality and relatively low contrast.
- IPS stands out for its average response time, maximum viewing angles, high color quality and excellent contrast levels.
- MVA/PVA is characterized by the same average response time, the same maximum viewing angles, average color rendering quality and highest levels contrast.
I myself am still inclined towards IPS, but among the interesting-looking options in in this case only available Apple Thunderbolt Display, which does not please with pixel density and other parameters. So something like this would suit me this model from Philips with Ultra HD resolution. By the time the purchase is made, Apple may still introduce 4-5K monitors, but for now I’m choosing from what’s available.
As for screen resolution, today you only need to look at 4K. I'm sure it's mine By the end of this year I plan to assemble a small stationary setup based on 2015 will be able to pull it at a level decent for comfortable work. Plus, in my particular case there is definitely a need for a high pixel density (it’s simply difficult to look at something less clear after Retina), and Full HD is not an option.
3. Decide on the number of monitors. One may not be enough
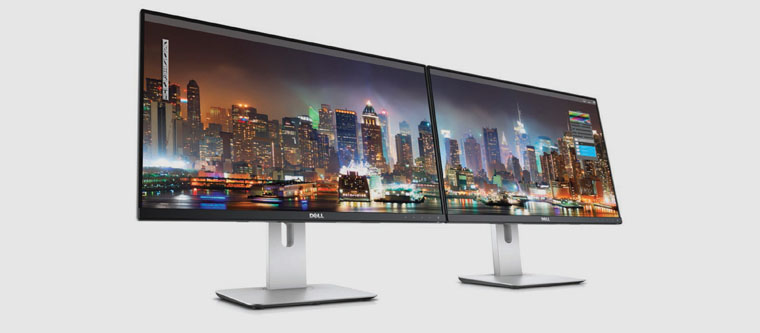
I don’t think any of our readers need to explain the advisability of using multiple monitors at the same time. I myself regularly pretend to be Julius Caesar and play multitasking. And for this purpose an additional screen would not hurt me.
I'm currently looking at two monitors (for example, the same ASUS 28″ Ultra-HD PB287Q) as one big one. In my case, one of them will be on the right in a vertical orientation (this position is convenient for infinitely long news and other feeds).
4. Estimate the required size. And don't overdo it
I am sure that when choosing a monitor it is important to clearly define the scenarios for its use. For example, I understand that I need it specifically to create content, and not to consume it. Therefore, there is no point in making a TV out of a working tool.
However, I simply don’t want to take something smaller than 27-28 inches - the requests are not the same. As experience shows, it is more convenient to see the whole “picture” as a whole. And this applies not only to text content, but also to image processing or video editing.
The 21.5 inches of the smallest iMac is definitely not enough for me (there’s no point in looking at even smaller options in 2016). But it is perfect for home use, simple retouching and just everyday use. Designers, editors and other categories of professionals involved in content creation usually pay attention to 27+ inches.
Don't forget about a comfortable distance between your eyes and the monitor. With 27-inch and larger solutions it is convenient to work at arm's length and even further. If space does not allow, it is better to pay attention to smaller options.
5. Understand the aspect ratio. Regular, wide-format and ultra-wide solutions
Most monitors available on the market today have an aspect ratio of 16:10 or 16:9, and the classic 4:3 and 5:4 solutions have long ceased to be taken seriously. Plus – ultra-wide options with a width-to-height ratio of 21:9.
If we are talking about real versatility and high productivity, we need to consider monitors that will allow you to fully work with two applications and even more without any problems.
But almost all ultra-wide options feature a curved design. The first impressions after several hours of trial work are that it is a little unusual. And I just don’t like them myself appearance. Therefore, I’m still leaning towards a pair of monitors.
What else should you pay attention to?

I think everyone will be able to both add a few points to the selection and remove unnecessary nuances from it. A monitor is a very individual device, on which it depends no less than on the “head” of the setup. A reasoned discussion in the comments, for which this material was intended, can help you make the most correct choice.
What is important to you when choosing a monitor for your Mac?
While the discussion goes on, I fall more and more in love with Philips Brilliance 4K Ultra HD 288P6LJEB. It fits, if not all, but many of my criteria. Now I'm considering buying this one.
Apple LIVE news:


