Is it possible to learn to take photographs on your own? Three common misconceptions and six life tips.
Despite the fact that today everyone can buy a camera or take photos using a smartphone and tablet, not everyone is able to achieve good picture quality. Why does this happen and what do you need to know to turn your passion for photography into a hobby?
Before we understand how to learn photography, it is necessary to understand the existing misconceptions that may hinder us.
The first misconception is that good pictures can be taken with a good camera.
 No matter how high-quality your camera is, it is worthless without a photographer. After all, any technique is just a tool. So that with its help we can achieve nice photos, you need a professional who knows how to handle a camera.
Here you can draw a parallel with drawing. If you don't know how to draw, but buy expensive paints and brushes, it won't make you a better painter.
It is better for beginner photographers not to use professional equipment at all. Because there will only be disappointments ahead. Understanding all the settings is quite difficult, because a professional camera is designed for an experienced specialist. At the initial stages, cameras that can be used to take photographs automatically are suitable, so that the photographer can only choose interesting subjects without thinking about the technical side of photography.
Determining the purpose of photographing will help you choose one model or another. To do this, you need to answer the question: am I going to take photographs for memory or am I planning to learn how to take photographs?
The second misconception is that it’s easy to take photographs.
 Most creative activities, including the art of photography, seem simple until you begin to comprehend them yourself. However, any creativity requires special preparation.
So, to learn how to take photographs, you need technical and creative knowledge. The first includes setting up the camera, and the second is the ability to compose a shot, choose the angle and lighting.
In addition, you need to make an effort to gain certain knowledge and find opportunities to hone your skills. And for this you will have to choose places for filming, go on long and not so long journeys.
Once you have gained experience working with a camera, photography will become a pleasant and easy task. But to achieve this, you need training, training and experience, as in any business.
Misconception number three: to take a good photo, you need to read the instructions.
 Technical questions are very easy to master. But learning photography doesn't end there. Photography is an art, so creativity is indispensable.
Even experienced photographers are always tormented by the following questions:
- what to photograph?
- how to arrange objects in the frame?
- what story to choose?
Advice for beginners and intermediates
The main problem for beginners is the lack of artistic taste. So the first piece of advice is:
Tip #1: Develop an artistic taste!
How to do it? Simple enough. To do this, you need to look at photographs taken by masters, go to their exhibitions, and visit art galleries.
When looking at paintings and photographs, analyze why exactly these objects came to the attention of the master, how he built the composition and how he worked with light. This approach will allow you to gain experience, which you can then use in your own creativity.
Tip #2: Travel!
 You won't take good photos if you stay at home. A camera, like a dog, needs to be walked. You don't have to go far from home. You just can't miss it interesting events in my city. They will give you many stories. In addition, it doesn’t hurt for an amateur photographer to practice shooting in a variety of conditions.
Without choosing a suitable location, it is impossible to conduct landscape photography or even portrait photography. And don’t forget that every trip is a source of creative energy, inspiration and new experiences.
Tip #3: A little self-criticism can't hurt!
Progress in photography is impossible without a critical attitude to your photographic creativity. Even if you are praised, try to find flaws in your work.
Learning to take photographs will be difficult without analyzing your photographs and understanding where the mistake was made.
Tip No. 4. About photography techniques and choosing a camera
 Without knowledge of the technical side of things, learning to take photographs will be difficult. You cannot completely trust the automation of modern cameras, since they can make mistakes in the brightness and sharpness of the image.
The minimum set of knowledge on photography techniques comes down to studying
- principles of image formation in a camera;
- focusing work;
- concepts of “white balance” and “exposure”.
You also need to know how to set up your camera. As for the latter, you don’t need to buy it in the hope that you will become a professional very quickly. In addition, the first camera must have a manual shooting mode.
These cameras include SLR cameras and compact cameras with detachable lenses.
I would like to end this article with photographs taken by a photographer from Montreal this fall. In the photographs he captured a natural disaster.


Have you ever thought about making photography your hobby? Share your opinion in the comments.
With the advent of digital and SLR cameras available to the general public, photography has become a very common hobby and even a source of income for many, so more and more people are wondering how to learn photography. We'll tell you what you need to do to take your photography to a level beyond just family meals and landmark photos.
Start with the Basics
Learn the basics of photography, which includes knowledge of composition, exposure, shutter speed, aperture, light sensitivity, etc. Information about this can be found in specialized literature or on Internet resources. We suggest watching the following video about the basics of photography.
Understand what capabilities your camera has and how it works - study the user manual.
You need to learn how to hold the camera correctly. Usually right hand hold the body of the camera, the index finger is within reach of the shutter button, and with the left hand they support the lens from below to avoid shaking.
Genres of photography
The main genres include landscape, portrait, still life, and reportage photography. When starting photography, decide which genre you like best and develop in that direction.
Scenery
When looking at a good landscape photograph, the viewer should have an understanding of what made the photographer stop at this particular frame and shoot this landscape.
Portrait
The most attractive subject of photography was and remains a person. Ideally, the task of a portrait photographer is not just to show a person, but to learn to convey his image, mood, and inner world.

Still life
This genre is designed to present various household items and art in an elegant form. And by depicting objects that belong to a particular person, you can reveal his inner world and character.

Reportage photography
A photo report is designed to capture the natural course of an event within a certain time frame. This kind of filming involves no staging; as a rule, the reportage is filmed impromptu. You can shoot concerts, holidays, sports competitions and much more.

Tips for a beginner photographer
A good photographer always thinks before pressing the shutter button, so we advise everyone who wants to learn how to take photographs, regardless of the chosen genre, to pay attention to the following recommendations:


Learning to take photographs requires constant practice. Shoot every day. Take your camera with you everywhere and don’t miss the opportunity to capture your favorite moment.
At first, you can photograph anything, but after you get used to the camera, don’t wait for a good story to come your way—look for that story. When an idea pops into your head, find a way to make it happen.
These tips will be useful for both those who want to learn photography for themselves and those who want to take a photo
The ability to take decent photographs, although not a direct responsibility of a traveler, is still very desirable.
Nowadays, almost every active person has a SLR camera, but as I noticed, most use auto mode.
Perhaps someone thinks that there is no need for this at all, because the automatic mode already produces good quality pictures, but the fact is that only direct control of the camera provides ample opportunities.
Judging by my inquiries, people would like to use the device settings, but They think that learning photography is very difficult. My article today is intended to dispel this myth.
IN in this case we're only talking about cameras enough high level, that is, about DSLRs and mirrorless cameras. The latter are a much more practical option for the traveler.
First, let's define what it actually is - a good camera on which it makes sense to use manual mode. At the core digital camera lies a photosensor called a matrix, onto which light passing through the lens is focused. In principle, a modern camera is no different from a film camera - the film has simply been replaced with a photo matrix.
Matrix size
So, the most important parameter in the quality of the camera itself is the size of the matrix. I don’t want to go into theory, all this can be read on specialized resources or Wikipedia, I will only note that the physically larger the matrix, the higher the signal-to-noise ratio, and, accordingly, the quality of the picture.
The standard in the consumer segment is considered to be the so-called full-frame matrices (also called full frame), their the size is identical to 35mm film.
Therefore, in photography, all matrix sizes smaller than 36x24 (full frame) are calculated using the crop factor. This crop factor essentially means how many times the sensor is smaller than a full-frame one.
For example, most DSLRs have a crop factor of ~1.5, which simply means that their sensor is one and a half times smaller than a full-frame one. I don’t want to touch on how the crop factor affects focal lengths yet, maybe we’ll talk about that another time.
When talking about high-quality cameras, we can say that the lower limit of the matrix size is within the crop factor limit - 2. Anything that has a smaller matrix can be considered a point-and-shoot camera and is not considered in this article.
How many megapixels do you need?
One more note: for some reason it is believed that the number of megapixels in modern cameras is growing only under marketing pressure. Allegedly, on old low-pixel DSLRs the picture was much better.
This statement is nothing more than retrogradeness and longing for the “warm tube sound.” Increasing megapixels in DSLR cameras combined with new image processing algorithms only improves detail and reduces noise On the photo.
Let's proceed directly to shooting in manual mode. I know that many people associate such shooting with childhood memories, when, under the guidance of a parent, we measured the exposure level with a photo exposure meter and calculated the shutter speed depending on the required aperture. Friends, it’s the 21st century, everything has become much simpler.
Depth of field
Let's return to the camera. We don’t need fully manual mode M, so we turn on mode A. In this mode we control the aperture size, and the camera itself will select the shutter speed. It is very important to understand here that the aperture size determines the depth of field - one of the most important shooting parameters.
Most likely, you have seen more than once how photographers separate the main subject of a composition from the background by blurring. This is precisely the result of using a diaphragm. Remember, the wider we open the aperture, the more the background will blur.
And vice versa, if our composition is a landscape, and we need to sharpen everything that falls into the frame, we need to close the aperture. The numbers indicating the aperture value are in reverse order: that is, at 3.5 the aperture is open wider than at 8, and the depth of field will be shallower.
The second factor influencing depth of field is the focal length of the lens. The larger it is, the more the background is blurred. The wider the lens angle, the less blur.
The third is the distance from the lens to the object and from the object to the background.
That is, roughly speaking, portraits should be taken at a closer approach, with the aperture set to the lowest value (number). Here's an example. I want to shoot a girl in the city, separating her from other people with an out-of-focus background.
I turn the lens to maximum (most often with SLR cameras the glasses are 18-55mm), and I approach the girl with my feet so that she fits into the frame the way I need - in full height, waist-deep, face only.
Thus, I make the distance between the camera and the subject minimal in this situation, which will allow you to blur the background well.

I set the aperture to the widest value (lowest number), most likely in your DSLR it will be 5.6. I take a photo and get a great portrait.
There are so-called portrait lenses. They are not zooms: as a rule, their focal length is 50mm, but they have a very wide open aperture - 1.4-1.8. The wider the aperture is open, the more the background is blurred.
Advice: do not photograph people next to walls or large objects, ask them to move away so that there is at least five meters of free space behind them. This will give the photo “air” due to the contrast of the subject with the background.
Now, if you decide to shoot landscape or architecture, you just need to set the aperture smaller (the number is larger). Just don’t get carried away, for matrices with a crop factor of 1.5, at approximately aperture 10, the diffraction limit begins, at which the detail of the image begins to fall. Those who are interested in the nature of the phenomenon go to Google, the rest take my word for it that the aperture should not be set beyond 8.
Excerpt
Shutter priority mode S is used by photographers much less frequently, to solve specific creative problems. For example, we want to photograph a racing cyclist to convey his speed. We set the shutter speed longer (experimentally) and when a biker flies past, we follow him with the camera, pressing the shutter.

As a result, the person in the photo will be clear, but the background will be blurred in movement. It's called wire shooting. But I repeat, shutter priority is used very rarely, especially by amateur photographers. Therefore, 99% of the time the camera is set to aperture priority mode A.
It would seem that since the automatic machine selects the shutter speed itself, then we have nothing to monitor it, but unfortunately, this is not the case. The fact is that the less light there is on the street and the harder we press the diaphragm, the longer time shutter speed is needed for our frame to be exposed.
With a long shutter speed, your hands are not able to hold the camera absolutely still, and the photo comes out a little blurry. Photographers call it a wiggle.
To find out at what shutter speed there will be no movement, you need to look at the shutter speed offered by the camera and compare it with the focal length of the lens. For example, if you currently have a wide angle of 25mm, then the shutter speed should be no longer than 1/25(a larger number in the denominator means shorter, a smaller number means longer).
Thus, by increasing the focal length of the lens, the need for light also increases. In the same place as in the previous example, having turned the lens to 55mm, our minimum shutter speed will already be 1/50.
To combat camera movement, a stabilizer is installed in cameras, and this device allows you to at least halve the need for light. That is, using a stub, with a focal length of 55mm, it will be quite possible to photograph at a shutter speed of 1/25.

What should you do if, no matter how hard you try, you can’t get a fast enough shutter speed and the photos come out blurry? You can open the aperture slightly (just remember that this reduces the depth of field), you can rest your elbows on your stomach, you can put the camera on some object.
The stabilizer prevents blurring due to hand shaking, but if there are moving objects (people, cars) in the frame, then in case of a long shutter speed they will be blurred.
But the easiest way is to increase light sensitivity. I deliberately do not touch upon the possibility of using the built-in flash, because the result will usually be disastrous. Avoid shooting with the built-in flash as much as possible.
Light sensitivity (ISO)
In order to shoot in low light conditions, the camera matrix is capable of working in high sensitivity mode. This means that when you increase ISO by one point, the light requirement is cut in half. If you can’t achieve the minimum shutter speed at which you can take a successful shot, increase the light sensitivity.

Unfortunately, the ISO limit is not infinite - as it increases, the amount of digital noise sharply increases, which eats up details in the shadows, color shades, etc. Improving the photosensitivity of matrices is the subject of improvement in modern cameras, and today it is already quite possible to shoot at ISO3200 without losing almost any image quality.
Lens sharpness
All photographers love sharpness. This parameter depends on the optical properties of the lens. More expensive glasses are not always sharper, because other factors determine the price: optics design, weight, dimensions, subjective assessments and, of course, the red stripe on the front lens. 🙂
We must remember that zoom lenses will almost always be less sharp overall than prime lenses. This is easily explained because with a zoom, the manufacturer has to combine too many variables, and for the lens to be sharp at all focal lengths, it must cost and weigh as much as a steam locomotive. Most often, zooms have the greatest blur at the edges: at the widest and farthest angles.
Another important feature is that each lens has its own sharpest aperture. This information is not advertised, but you can find it out by taking a few test shots in different meanings. As a rule, the open aperture is the softest. Therefore, if you want to take a portrait in which every eyelash is visible, close the aperture a little, sacrificing a little background blur.
That's all the information you need to start photographing the way you need, and not the way the camera seems right. In my opinion, everything is very simple if you practice a little. I am sure that by taking a few thoughtful shots that you yourself will like, you don't want to go anymore to automatic mode.
Hello, readers of my blog! I’m in touch with you, Timur Mustaev. So, have you decided to master photography? Maybe you want to read something from theory first, or maybe go straight to practice? Both options are good, but the main thing here is to start! I suggest you start learning photography from scratch in several stages. In principle, some of them can be swapped if desired, however, it is important to follow the plan. It is consistency and focus that will help you not only when studying photography, but in any other matter, if you do it seriously.
Are you hosting the Holi Festival of Colors? This is an Indian holiday where all people smear each other with food, dry paints, different color. In our city, it is already in its 4th year. And only this year, I managed to get to this interesting show. As you probably know, I studied in India for one year, received a master’s degree, you can read about this in the “About the Author” section, and so that’s where I became acquainted with this holiday, one might say, from head to toe.

Did you enjoy the holiday? Would you like to take part in such an event? What do you think about this?
Let's continue our topic of the article.
Several large blocks can be distinguished:
- Technical block. Aperture, shutter speed and light sensitivity are the most important parameters that need to be mastered to understand the system for creating a photographic image. There is a lot of information about them on the Internet, on my blog. You can also find the necessary information, and everything is written in accessible language. In addition, take the time to learn the inner workings of your camera.
- Aesthetics. When you look at your own or someone else's photographic creation, does something grab you? Yes, this happens. A feeling of peace may arise; photography may evoke trepidation, tenderness, or, conversely, excitement and anxiety. This is the subjective experience when perceiving a photograph. A photograph gives us certain emotions; we like to look at the moment captured on it, especially if it is original enough and looks harmonious. Or better yet, it tells a story. This is achieved through visual and expressive means, which are also worth reading about separately: perspective, combination of colors, proportions of objects, etc.
- Composition. Everything a photograph does can be summed up in one phrase: it conveys meaning. And everything listed above is aimed precisely at expressing your thoughts. It is the semantic orientation of the frame that makes it truly valuable. The main idea may be some kind of social message, admiration for an image or view, an unusual lighting solution, etc. It is also important to learn to see the frame - interesting moments, shooting point, light, etc.
How often do you purposefully look at and curiously study photographs taken by professional photographers? I can say that this is great way learn photography because you learn from a specific, well-known example. I advise you to pay more attention to the photographs of specialists and actively analyze your own photos. Don't be afraid of outside criticism! In most cases it is useful.
Two important tips.
- Read the instructions for your SLR camera in great detail and not just once or even twice, but 3 and 4 times. Remember all the key points that are written in it.
- After in-depth study instructions, I would recommend you the course " Digital SLR for a beginner 2.0" Very wonderful video course. Which explains all the basics of photography in simple and understandable language. The course will be very useful for beginners.
Selecting a camera
There are a lot of camera models now. There are also Canon, Nikon, Sony... At the initial stage, the company is not so important, each of them has advantages and disadvantages. In principle, you can learn the basics of photography on a point-and-shoot camera. But I advise you to immediately buy a mirror one, which is not too expensive. And choose a lens called “universal”, for example, usually with SLR cameras entry level, kit lenses sold, 18-55 mm. or 55-105 mm., it is better to take the second one. If money allows, you can buy an even more universal one, 18-200 mm. It's suitable for many shooting situations, be it landscapes, portraits or subject matter photography, and will give you the opportunity to experiment while you learn photography. A budget DSLR and a universal lens are the optimal combination for those who are just starting to dive into the world of photography.
The above lenses are available from both Nikon and Canon.

Simple rules for good photos
At the end of the article, I have collected several points that will make it easier and easier to create interesting photographs. Beginners should study them especially carefully. So:
- Exposure metering is a very useful thing. You can see a scale in your viewfinder on your camera. So this is it. If you are already mastering the various modes of the device, but are not sure whether you are setting the shooting parameters correctly, contact him for help. The exposure metering should be approximately 0, then the picture will be well lit - not dark or overexposed.
- Use the built-in flash as a last resort - it gives a bright, but absolutely flat and ugly image, especially when photographing people, it unpleasantly shines light directly into the eyes. Consider purchasing an external flash - it will help you many times in the future.
- Photographed objects (people) can be of different shapes and be in different positions. The main rule here: if an object is pulled up (a glass, a tower, a tree, standing man), then select a vertical frame if it is extended in side(building, car, road), therefore, horizontal.
- My favorite topic is the horizon, that is, the line between the land (water surface) and the sky. With rare exceptions, it should always be straight! Watch this, don't shoot thoughtlessly. If, when viewing, you feel like you are falling, this is clearly a bad impression that will remain from your photographic work.
- If your hands are not yet accustomed to holding the camera tightly, take a tripod with you if possible. It will stabilize the camera, and the pictures will be clearer. It’s better to always use tripods, that’s what I do.
- Master graphic editors. For example, you can start with the simple and functional Lightroom utility. It is very powerful for photo processing. Personally, I have been using it for a long time. Even a little photo processing in it will significantly improve your photo. 95 percent of all frames need some retouching! There are many courses on lightroom, but not all of them are high quality. I would recommend watching the course " Lightroom wizard. Secrets of high-speed photo processing" It is very simple and understandable.
I hope something has already cleared up in your head? Read my articles, starting with the very first one. Consistent reading of them will form the correct thinking and concept of photography in your head, and you will begin to understand the basics of photography.
See you soon, my dear readers! On my blog, we have already dealt with many important concepts. Useful information is becoming more and more, and I again encourage you to read my blog, comment and subscribe to it. Don't forget to share with your friends on social networks. Don't miss any important information! See you soon!
All the best to you, Timur Mustaev.
so, hurray, and you bought your first “DSLR”, my congratulations! Usually, when the excitement from all these interesting buttons, levers and spinning wheels subsides, a logical question arises - what to do with them? What and where to screw to get good photos? How to learn to take photographs correctly and beautifully?
Of course, we have collected a lot of articles on our website for beginners, but they are all scattered in different sections and published at different times, and in order not to aggravate your state of panic caused by the terrible words aperture, ISO, angle, etc., we decided to make it easier You have the task of finding the necessary information - we have collected the most basic and useful articles in a small reminder for the beginning amateur photographer.
Here we go!
First of all, friends, so that the words “photosensitivity” and “composition” do not cause fear, and “aperture” stops haunting you in nightmares, required to study the article:
Yes, yes, I understand that there is a lot of information at once. Yes, sometimes you’re too lazy to read so much and want to take at least some pictures. And some people have had the habit since school of falling asleep after reading the third paragraph. But you want take good photos with a DSLR?
Do you want your photos to be admired by friends, family, and even strangers? And without the basics and understanding of the fundamentals of professional photography, it will not be so easy. Although some people do it intuitively.
I propose this compromise - you can study one article today, and another tomorrow. And in a week you will be able to smartly say the following phrase: “And this frame was shot with a 4-second shutter speed at ISO 50 and an aperture of f/13, ... well, besides that, a neutral gray gradient filter was also used,” driving those around me into a state of shock.”
And if you forgot something, you can always go back and look, not during an exam, after all.
Well, now, let’s assume that “interesting buttons and levers” for you have turned into a mode selector and a scroll wheel, and there is also an understanding that exposure in photography- this is not the same as the “iron endurance” of a soldier on guard. And you, in full combat readiness, decided to plunge into the world of photography. Where to start, what to photograph and how to photograph it?
I suggest, first, try the basic types of photography - portrait, scenery And macro photography, and we will be happy to help you.
How to take photos?
Portrait
Great article on the topic:
This article is especially relevant in spring and summer:
Well, a couple of articles on the topic:
Scenery

Landscape photography - there is definitely something for your soul to enjoy! For a real photographer, creating photographic landscapes is a real mystery that can appear and disappear like a mirage. It is not for nothing that landscape is usually called the real appearance of a place; it is an entire genre of photographic art, which makes the main object for an image or photograph natural or somehow transformed by human hands nature.
Summer is just around the corner, and there are a number of great articles for you:
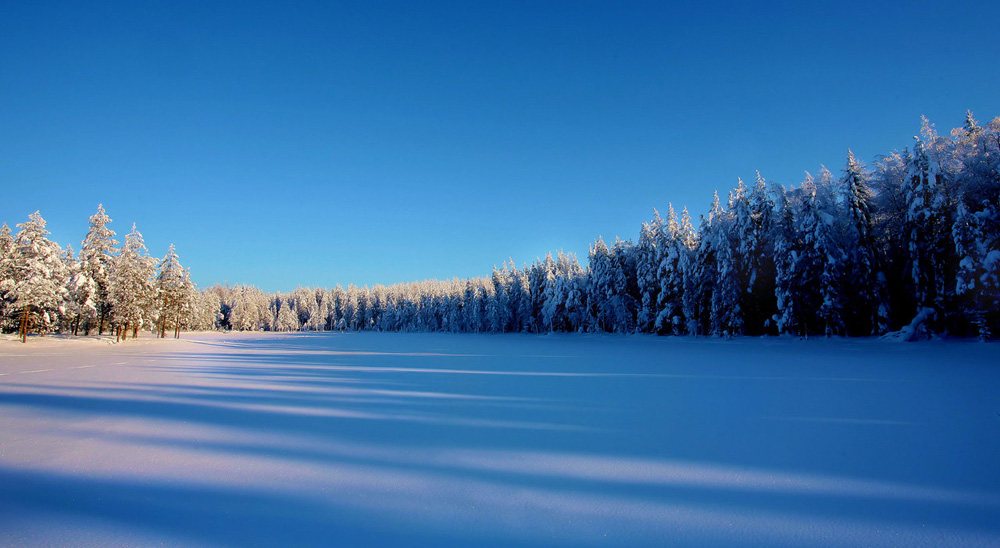
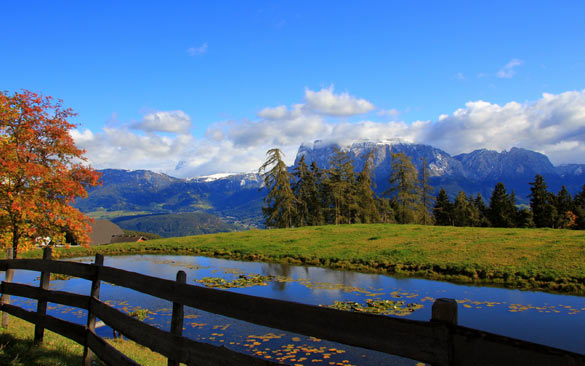
Let's not forget about winter, although few people like temperatures of minus 25, a red nose and 4 kilograms of clothes, winter photography is extremely beautiful!
Night photo
Darkness is the friend of youth! Night photography has its own charms, for example, in winter, when the moon shines brightly in the sky and the snow shimmers, colorful New Year's illumination, and so on.


