How to set up LG TV for satellite. Tips for setting up your TV correctly
You bought a new TV, installed it, connected it, but the picture quality is not the same as in the store. We were deceived, you might think. Don't rush to conclusions, because new TVs need tuning.
A good setting allows you to get a clear picture with deep and natural colors, an excellent ratio of light and dark tones. By default, the TV settings are optimized for viewing in a store rather than at home.
This is due to the fact that usually the buyer evaluates the performance of the TV in the store, rather than taking each model to his home for testing. Most likely, the level and type of lighting in your home is not the same as when you bought your TV.
Ideal Picture Settings
As a rule, large TV manufacturers have their own laboratories to evaluate image quality. The laboratories conduct comprehensive testing of televisions under various conditions. Surely in the box, in addition to the TV and a technical data sheet with detailed characteristics of the selected model, you will find an instruction manual.
If you scroll through it, you can find the “Ideal Picture Settings” or “Recommended Settings” section. There you will find the best viewing settings selected by testers in the lab.
The ideal settings may not produce the best image quality for you. Use the data obtained as a starting point, take into account personal preferences and desires.
How to change picture settings
Make sure the lighting conditions in the room match normal viewing conditions. Then press the Menu button on the remote control or the Options button to open the OSD menu and find the Picture Options section.
Most TVs have default picture settings saved, so if you end up making a lot of changes and then decide to start from scratch, you can load them.
Where to begin
First of all, turn off any minor image enhancements such as noise reduction, autoflesh, autocolour, and others. Most of them do very little to improve the picture, and sometimes lead to adverse side effects.
Only after you've changed the basic settings can you try image enhancements in Settings separately for calibration and fine-tuning. For example, noise reduction can help improve a very poor signal or an old, grainy recording.
Brightness setting
The owner's manual probably says that the brightness settings are used to control the brightness, intensity of the image, or something similar. The truth is that brightness is used to set the level of black in an image.
Most TVs and projectors used today have the brightness set too high. This is because people think that a bright picture is good, so it is worth setting the level high. Well, this is good in theory and completely wrong in practice. Adjusting the brightness too high makes blacks appear grey, reducing overall sharpness and image clarity.
To find the correct settings for brightness, you can use two methods.
The first is to adjust the brightness by eye. Find an image in the movie that has textured blacks and some shadows, stop the movie on that frame. As the brightness decreases, the black intensity will increase and the shadow will appear darker.
Optimal brightness settings are achieved when true black objects appear black. Above this value, blacks will appear grayer. Below this value you lose detail in the shadows. Find the brightness level that is optimal for you.
The second method is more accurate and consists of using a special image. It is necessary to reduce the brightness level until the left stripe matches the background.

Adjusting Contrast
You can also get confused with . The contrast level is also often set too high. Contrast sets the ratio of the brightest level of white to black. In fact, the contrast setting is used to control the intensity of the brightest moments in a picture.
To set up, find a test scene that has bright white detail and freeze that frame. Let's assume you have a white glacier in sunlight. If you start with low contrast, the glacier will be light gray instead of white. As the contrast increases, the glacier will become whiter. There will come a point when the image begins to lose detail. This means that the optimal point has been passed.
Find the point where a white image appears white, preserving structure and detail. These are the optimal contrast settings. 


Important! Please note the following: Brightness and contrast can be interactive to some extent. Your new contrast settings will probably affect brightness. Therefore, check the brightness setting and repeat the brightness and contrast adjustments if necessary. This is an additional hassle, but imagine the quality of the image you will get.
Color Setting
The color control on your set determines the level of color intensity in the image. One of the most common mistakes people make when setting up their TV is color saturation. As a rule, they think: “I want to get as many colors as possible, I’ll set the intensity level higher!”
If you reduce the color level to zero you will notice that the image has turned into black and white. Optimal settings for colors are achieved by increasing the intensity to a value where the colors look natural. The tones should look natural and without any hint of unnatural shine. The grass should look natural and not have a poisonous green color.
When adjusting color, make sure your test image has relatively desaturated colors. Natural landscapes are the ideal choice. It is impossible to set the color correctly if you use a bright red Ferrari as the test image. 


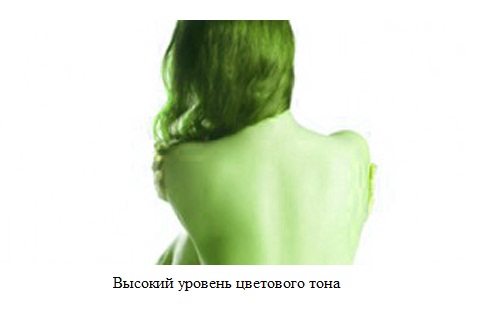
Adjusting the Color Tone
Hue controls color balance, not color intensity. If skin tones appear either too green or too purple, the color tone level is not adjusted correctly.
Find a picture of a person. Increasing the hue level turns the skin green, and decreasing it turns the skin purple (red + blue).
The correct hue level is near the middle of the scale. This is the most neutral point between two extremes. Flesh tone looks most natural at this point.

![]()
Sharpness adjustment
Sharpness sets the visibility of details in an image, adding processed information to the image that is not part of the original video signal. It adds artificial edges and makes the image appear less natural than it actually is.
On most TVs, the optimal sharpness setting is zero. On many digital projectors, the optimal setting is either on the low or medium end of the scale.
By turning down the sharpness level you will see a smoother, more natural image. It may take some getting used to as you get used to watching videos with all the artificial enhancements that create the illusion of added sharpness.
However, this removes interference and noise from artificial sharpening. You'll be surprised how smooth, natural, and satisfying the image really can be. 

Setting the Color Temperature
This important control affects the entire color palette. Choose a warm or low option that is close to the 6500 Kelvin standard.
Bottom line
We looked at setting the most basic parameters that will make the image unique. All you have to do is find where exactly the settings for this or that parameter are located on your TV. This shouldn't be too difficult. Experiment and enjoy the great image you have set up.
To begin with, what is the “correct setting”. If you've ever been to an electronics store, you've probably noticed that all the TVs on display display differently. What is this connected with? Which one is better? Let's figure it out.
I think you will agree that a TV should not only show some kind of picture, but also introduce as little distortion as possible into the original content. The content itself is always created with an eye to industry standards and recommendations, and the main goal of any TV is to bring to you exactly the image that they wanted to show you. Everything is important here: the actor’s skin tone, the color of the sky at sunset, and which details of the image should be visible and which should be hidden. There are international standards that describe what the image on your TV screen should look like. All of you have probably come across the abbreviations PAL, NTSC, or HDTV, and these letters hide the properties of the video signal and various image parameters. With the advent of HDTV in our lives, most of standards are immediately outdated, and, in fact, the most relevant now is the REC709 standard, which is used in high-definition television (HD) and Blu-Ray video.
The general parameters of a correct image are:
- color temperature 6500K (D65)
- linear gamma, recommended value 2.22, for a darkened room 2.4
- recommended brightness ~120 cd/m2
- color gamut according to REC709 (similar to sRGB gamut).
Unfortunately, modern TV manufacturers set up their products frankly poorly, because they are not interested in ensuring that their displays meet existing color standards, but in increasing sales of these same displays. In an effort to sell more TVs, manufacturers are constantly trying to introduce more “vivid blues” and “vital reds” than their competitors. They specifically enhance the brightness of certain colors so that the products look more seductive on store shelves compared to analogues from other companies. On shelves with seemingly identical products, the buyer will choose the brightest TV, or the one whose colors seem “deeper.” If only manufacturers paid enough attention correct setting of their products, then all the televisions displayed on the counter would show a very similar image.
The only one the right way obtaining the correct image on the TV screen - hardware calibration. It consists in the fact that reference images are supplied to the TV input, and measurements are taken from the screen. Next, adjust the TV settings until the image parameters are as close as possible to those required by the standard. But this setup is quite labor-intensive and requires knowledge, and above all equipment.
Is it possible to make the image on your TV screen more accurate without resorting to hardware adjustments? Here are some tips based on my experience setting up various TVs.
Which picture mode should I choose (standard/dynamic/cinema)?
On the vast majority of TVs, the most correct mode is Cinema/Cinema. Do not use the “Dynamic” mode for viewing: due to the non-linear gamma, the image in it is always incorrect, and due to the greatly increased brightness, this mode strains the eyes, especially if you watch TV in dim lighting or in the dark.
Which color temperature mode should I choose (cool/standard/warm)?
On the vast majority of TVs, the closest to the standard color temperature (6500K) is the Warm mode. If you have a choice of Warm1/Warm2 (on Samsung TVs), decide for yourself which one is better. This is usually Warm2, but there may be exceptions.
What settings are recommended to be turned off to get the best image?
It is necessary to disable all settings that adjust the brightness/contrast to the discretion of the TV. That is, you should disable “dynamic contrast”, “power saving mode”, “light sensor”, “dynamic backlight” and do not use the “Dynamic” image mode.
How to set the “contrast” parameter correctly?
In fact, it is incorrect to call this parameter “contrast”, since contrast is the ratio of the maximum brightness of the white field (white level) to the black level (minimum luminosity level of the panel). So, the “contrast” parameter in the TV menu changes exactly the white level, that is, the level of maximum image brightness.
For plasmas:
- it is better to adjust the “contrast” parameter in the dark;
- set the “contrast” parameter to a value close to the maximum (90-95);
- reduce the “contrast” parameter until the picture with the white level (100IRE) stops “hurting the eyes.”
Samsung plasma TVs have a cell light setting that has a big impact on the overall brightness of the image. You can immediately set it to a value close to the maximum (18-20), and then follow our recommendations.
LCD TVs are designed a little differently - they have a "backlight brightness" setting (sometimes called "backlight contrast") that has highest value for overall image brightness.
For LCD/LED:
- it is better to make adjustments in the dark;
- set the “contrast” parameter close to the maximum value (90-95);
- display an image with a white level window (100IRE) (links at the end of the article);
- set the “backlight brightness” parameter to the maximum value;
- reduce the “backlight brightness” parameter until the picture with a white level (100IRE) stops “hurting the eyes.”
I do not recommend using the maximum values for the “contrast” parameter, because some TVs have maximum value nonlinearities in color temperature arise.
An excessively bright image (and “contrast” / “backlight brightness” is responsible for the real brightness on a TV) strains your vision and leads to eye fatigue, remember this when you adjust these parameters.
How to set the “brightness” parameter correctly?
The "brightness" parameter determines the black level. To install it in the correct position, you can use the special “Pluge pattern” image. In this image, the leftmost vertical stripe is black. To set the "brightness" parameter to the desired position, first increase it until you can clearly see all the bars, and then decrease the "brightness" parameter until the leftmost vertical bar merges with the background. In addition, you can use special setup disks, for example AVSHD (link at the end of the article), where in the “Basic Settings” section you will find required images to configure basic TV settings.
What is "clarity"? How to install it correctly?
“Sharpness” is precisely the clarity of the image. This parameter is needed so that you get an equally clear image from different viewing distances. To configure this parameter, you can use the special “Sharpness pattern” image. The method for setting “clarity” is as follows:
- sit at viewing distance from the TV;
- display “Sharpness pattern” on the TV screen;
- increase the “sharpness” parameter to the maximum, or to a value at which artifacts of excessive “sharpness” will be clearly visible: light halos around objects and thickening of thin lines;
- reduce the “sharpness” parameter until image artifacts, such as light halos around objects and thickening of thin lines, disappear.
How to set the “color/saturation” parameter correctly?
It is difficult to set this parameter correctly without measurements. My recommendations are to display high-quality nature photographs on the TV screen with many shades of green (since this is what the eye is most sensitive to, and it is this color that is overexposed on many TVs) and adjust the “color/saturation” parameter until the image looks as realistic as possible . Additionally, you need to check the settings on high-quality photographs of people; skin tones should be natural.
My TV has white balance settings and a color management system (CMS), how do I set them correctly?
Only using hardware calibration. It is useless to configure these parameters “by eye”.
In the next article I will tell you how to do hardware calibration of a TV with a minimum of equipment costs.
We continue the series of articles dedicated to correct image settings on your TV. Today we will look at the main Settings options. These include brightness, contrast, and color. These settings are not difficult to make, and it is quite possible to improve the quality of the TV image. So let's continue.
Brightness

Brightness is nothing more than black level in the image. By changing the brightness settings you control the display of dark and black areas of the picture.
A high brightness level distorts the visible picture and degrades detail in dark areas. Dark and completely black areas become indistinguishable from each other.
To adjust the brightness, do the following: You need to choose a video that has black bars above and below the picture. Stop the video playing on a scene with approximately equal amounts of light and dark areas. Increase the brightness to maximum, then gradually decrease until the black bars at the top and bottom are truly black. If some shadow details become indistinguishable (for example, people's eyes appear as a dark spot), you should increase the brightness level.
Contrast

Contrast, or white level, determines the intensity and detail of the highlights and white areas of an image. In the absence of a backlight, it completely determines the light output of the display.
depends on the presence of backlight lamps (for LCD monitors) or light cells (relevant for plasma panels). For such TVs, the role of contrast comes down to determining the amount and degree of visibility of details in the bright areas of the image. For other TVs, contrast determines all the light emanating from the picture and the higher its level, the more powerful the glow of the image.
To adjust the contrast level, you need a picture with a white object and a few visible details. A man in a white button-down shirt or an image of a glacier from Ice Age quite suitable. Set the contrast to maximum, then gradually reduce it until you can clearly see details against a white background. For example, buttons on a shirt or cracks in an ice floe.
Chroma

Chroma or saturation determines the intensity color range in the image.
At high level saturation, the picture looks completely unrealistic; elements of the picture may appear reddish. Insufficient saturation levels make the image faded and gray. Setting the color to zero will make the picture “black and white”.
Let's move on to adjusting saturation. If possible, you should first adjust the color-temperature balance to warm tones. To do this, select a large image of a face. Raise the color level until you see a good tan on the face in the picture, then gradually lower the color until you get a natural skin color on the face, without excessive redness. If the other colors look grayish, increase the saturation a little.
In a store, all TVs display differently, and the buyer, as a rule, chooses the brightest TV. But it should not just show pictures, but introduce as little distortion as possible into the image. You will be offered to make the correct settings when purchasing a TV in a store, but you will have to pay for it. LG TVs implement Smart TV technology, so the user can easily set up a “smart TV” independently and for free.
Connect the TV's power cord to an electrical outlet. Connect the antenna or cable. Turn on the TV using the “Input” button on the remote control, pointing it at the screen. The TV comes with two remote controls: a regular remote control and a Magic remote control; in addition, you can attach a USB computer mouse. The easiest way to control your TV is with the Magic remote control. It is similar to a mouse, but works in space rather than on a surface. Settings management is simple and intuitive. The instruction manual is available in electronic form on the TV screen. When the TV is turned on for the first time, the factory settings screen will be displayed. When the TV is partially or fully tuned, the broadcast of the last active channel will turn on. To turn on TV mode, you can press the “TV” button. Access to factory settings is opened by the “Options” item in the main menu.


A modern TV can easily replace a computer. You can connect it to the Internet via Wi-Fi, connect it to a computer, use it as a monitor, watch movies in various formats with external media, watch movies in 3D format using the included set of stereo glasses, watch movies in digital quality (HD).


