Rear view camera connection diagram. Connecting power to a rear view camera in a car.
You will need
- 1. Camera and monitor
- 2. Ready-made wires with connectors
- 3. Fuses (2 pcs.) 0.5 A
- 4. Screwdriver
- 5. Set of keys
- 6. Knife
- 7. Pliers
Instructions
Before starting any work, remove the positive terminal of the battery.
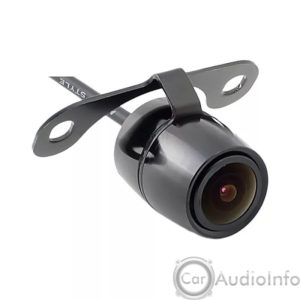
Look carefully camera: Regardless of the model, the camera must have power and video wires (connectors) progress. Most often it is recommended to supply power to the camera from the rear light progress, as a result of which the camera will only work when driving in reverse. The rear view camera is designed for short-term use, and failure to do so may dramatically shorten its service life.
Connect the red wire of the camera to the positive terminal of the rear light progress. If there is no fuse on this camera wire, install one. The fuse should be 0.5 A and located as close to the connection point as possible.
Connect the black (negative) wire of the camera to the car body. For example, under a suitable and pre-cleaned bolt. No fuse is required for the black wire.
Most cameras are equipped with a five-meter yellow wire for connecting to the monitor, with a connector typical for audio-video equipment. If the cable is not long enough to be installed inside the car, purchase an extension cord with a connector connector. You can purchase a suitable cable and solder the necessary connectors yourself.
Connect the cable to the monitor by plugging it into the video input. Please note that each monitor or radio may have several video inputs, one of which is specialized for connecting a rear view camera. You can find the required video input according to the instructions for the monitor (radio tape recorder). The simplest monitors have only 2 connectors: video output (most often white) and video input (most often yellow).
The monitor itself also needs to be powered. Proceed in the same way as when connecting the camera: red wire with a fuse to the power plus, black to ground (under the stripped bolt).
After a thorough check of the work done, the connectors are wrapped with electrical tape. Don't forget to turn on the positive terminal of the battery.
Tip 2: How to connect parking sensors
Parking sensors assist the driver in reversing maneuvers. When approaching any hidden object, the sensor begins to beep and show the distance to the obstacle. This way the driver can park in limited conditions
parking camera included. And on such cars it will not be superfluous at all, especially when parking.
The natural desire of the owners of such cars is the desire to correct this deficiency. Connecting a rear view camera is a process that almost any car owner can handle.
What might be required if you decide to install the camera yourself? You will need the following items: a parking camera that you purchased in advance; small terminals or ready-made wires with terminals; special clips for wires; screwdriver (knife); pliers; washer hose; tee for washer hose; multimeter (tester); drill.
Most often, the parking camera is installed in the standard hole of the “native” head unit. Therefore, before buying a camera, make sure it is available. So, your car has a connector for parking cameras, you went to the store where you purchased the best camera option for you.
 Where to start? And it’s worth starting by not being lazy and checking all the wires used with a tester. You won't burn anything with a voltmeter, but with a light bulb you can easily.
Before disassembling half the machine, carefully inspect the camera itself. Testing the functionality of each camera may vary slightly. Therefore, for this it is best to use widely available step by step instructions to check a camera of a specific brand. Connect the rear view camera only after making sure that the camera itself is working properly. The following is a sample action plan.
Rear view camera: connection
- It is necessary to remove the trim from the rear door, as well as the rear frame with headlights. The bolts are unscrewed in order to remove the cable from the door handle.
- Try on the camera, then drill a hole for it.
- If desired, you can immediately install washer nozzles on the camera. If you decide to install them, then also drill a hole for them, as well as a hole in the door to route the hose and wires. ![]()
- After this, return the frame to its place, but do not rush to screw it, first make sure that the camera is installed in the direction you need.
- And then directly connect the rear view camera itself. Power for the camera is taken from the tee instead of the rear door washer hose. Check for leaks several times and repair them.
- The hose and wires themselves can easily fit under the door trim. Next, you will need to remove a lot: seat belt fastenings, trim, rubber bands. Lay the wire, reaching it to the “head”. All that remains is to connect and assemble.
This is how you connect a rear view camera. To receive an image from a parking camera, you can use a replacement or install a display in the cabin, or display the image received from the camera on the navigator screen. But connecting the rear view camera to the navigator is done a little differently.
To install or not to install a camera reverse, each driver decides for himself. In this article we will tell you how to connect a rear view camera, and it’s up to you to decide whether you need it or not. Connecting a rear view camera requires some knowledge and skills, so not everyone can do it themselves. But if you still decide that installing a standard rear view camera is necessary for you, then use the advice from this article. With a small set of tools and basic removal skills, you can easily figure out how to connect a rear view camera.
Side mirrors, and even your head turned 180°, will not give the desired effect; you may still not notice some little things, or maybe not little things. And then a showdown with the owner of the scratched car may begin, and this can cost you tens of times more than connecting a reverse camera. Later in the article we will look at which camera you can choose, whether a Chinese manufacturer is right for you, or whether you prefer something more solid. We will also discuss whether it is possible to install a rear view camera yourself, and how to properly connect the device you have chosen.
How to choose a camera
The modern electronics market, and especially China, is overcrowded with a variety of cameras, and this makes choosing the right thing more complicated. In order to make your work easier, decide on your priorities, what worries you more – price or quality. Not everyone needs cameras high resolution, or cameras that can show even in poor lighting. For some drivers, an inexpensive rear view camera for the radio is enough.


What parameters should you pay attention to if you decide to purchase a higher quality product, then in this case there are at least five points that need to be taken into account when purchasing:
- What resolution does the camera record in? The higher the video resolution, the better the recording quality. And high image clarity is not always needed.
- The next point is the camera’s sensitivity to lighting. With cheaper models, low-light recording quality can be very poor. Therefore, if, due to circumstances, you often use a car in the dark, then this point is worth paying attention to.
- If, before purchasing, you have already decided where to install the rear view camera, then you need to pay attention to the installation method of this particular model.
- The next point is this viewing angle that the camera lens captures. Usually it is in the range from 120 to 180 degrees. It is better to take something in between these two indicators so that you have good review rear view, but there was no panorama, because with it reality is distorted.
- Selecting the monitor on which the camera will display the image. But if you already have a radio with a screen in your car, then you just need to think about how to connect the rear view camera to the radio.
How and where should it be installed
Later in the article we will look at how to install a rear view camera. There is more than enough space in the car to install a video camera, but we need the most advantageous position. The camera eye must have a good view, which is not limited to any parts of the machine. Any camera will reveal its full potential if it is installed in the most advantageous location.
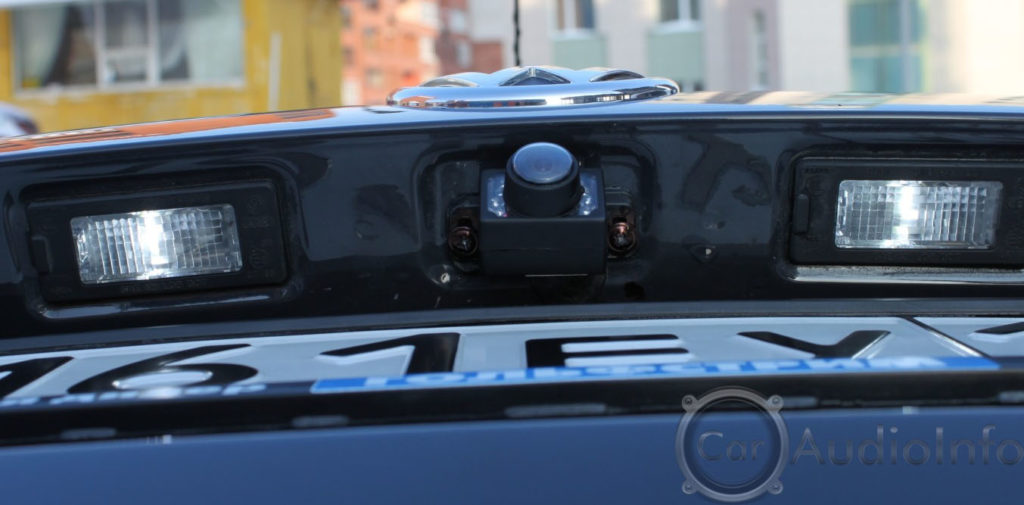 In our case, such a place is a niche above the rear bumper of the car; the camera should be placed in its upper part above the license plate number of the car. What this gives is viewing angles, your car radio will only show the road and not parts of your car. But it must be positioned so that it is not too recessed, but also does not stick out. True, there is a minus here - your camera is accessible to dirt and the hands of others. If you place it inside the cabin on the rear window, then half of the screen will be occupied by the trunk, viewing angles will decrease and the image quality will suffer to some extent due to the glass. But it will be clean and inaccessible to strangers.

The procedure and diagram for connecting the rear view camera
And now in more detail about how to install and connect a rear view camera to a Pioneer radio. Why go to this model, because it is the most common. If we take into account the unsafety of our video camera, and the best view, then its place should still be above the number, outside. It should be installed closer to the edge to improve visibility, but not so that it is exposed. The installation of the camera itself is not complicated. The camera has the bracket necessary for installation; you only need to drill a couple of holes for the mounting bolts and one hole for the cable.
 And then comes the inclusion of the rear view camera in the general electrical network of the car. If you are not strong in electrics, then it is better to turn to car service specialists, but if you have at least basic knowledge, then you will be able to figure it out on your own. So, the order of connection in stages:
- Any camera has two wires, one transmits the video signal from the camera to the monitor, and the second wire is for power. Since the camera itself has short wires, you will need to extend them so that they are enough from the front panel to the end of the trunk (as a rule, an extension cord for the video signal is included in the kit).
- Where can I get power for my video camera? Usually the camera is connected to the rear lights. Therefore, immediately after reverse gear is engaged, the rear view camera also turns on.
- All wires running throughout the cabin and in the trunk must be secured and hidden. This will help avoid unexpected network breaks while driving.
- If you use a monitor instead of a radio, you will need to find a power source for it as well. If you have a Pioneer multimedia radio, this issue is resolved automatically.
Connecting a reversing camera to a Pioneer radio
Now we will talk specifically about how to configure and connect the reverse camera to the Pioneer radio. There are small nuances here that mislead everyone. We connect the camera to the reversing light, all the power is on the camera, then the wire through which the video signal will go. In Pioneer this is a brown tulip not to be confused with a yellow one. Go to the settings, find the section in the rear view camera menu, set the item to on, and switch the polarity to battery mode. Our camera is working, you can check this by going to the main menu and selecting the camera icon, but it will not turn on automatically. This can be fixed by connecting the purple wire to the rear light (where the camera is). As a result, when reverse is engaged, the light comes on, power is supplied to the camera, and the radio understands that it is necessary to switch to reverse.
 The entire connection diagram for a rear view video camera is quite simple, and therefore most drivers often cope with installing it themselves. In cars equipped with an automatic transmission, random activation of the rear view camera may occur. To eliminate this problem, you need to install an additional camera turn-on delay sensor. In each car model, the camera installation may differ, but in small details, the connection principles are similar. The connection process is more complicated for video cameras that transmit a signal via radio, but they have the advantage that several of these cameras can be connected. There are more and more cars on city streets, so a rear view camera is already a necessity. It will not only help you park correctly, but will also preserve evidence of your innocence in the event of a collision.
Video on how to connect a reverse camera
We hope that this article helped you understand how to properly connect a reverse camera. Rate the article on a 5-point scale; if you have any comments, suggestions or you know something that is not indicated in this article, please let us know! Leave your comment below. This will help us make the information on the site even more useful.
One of the options for connecting a rear view camera, with viewing on the monitor. Actually, this is not an article, but a monologue on the evolution of options, electrical connection of a monitor and a rear view camera in a car.
One of the most difficult maneuvers when driving a car is reversing when parking, on a narrow track, when entering a garage, etc. Unpleasant situations arise not only for beginners, but also often for drivers with decent driving experience, and the reason for this may be a simple inability to see an obstacle. Examples include cases involving collisions with low posts, the rear wheel falling into open hatches, reversing with limited visibility through the rear window (tinting at night, dirt, icing). The solution to these problems can be installing a car rear view camera.
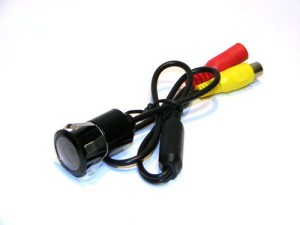
Components - monitor and video camera were purchased in China for the occasion.


Technical specifications:
Display size: 7 inches
Screen format: 16:9
display: TFT
Resolution: 480 x RGB x 234 pixels
Video input AV1, AV2/
Standard: NTSC/PAL
Operating voltage: 12V DC
Working current: 0.25A
Power consumption: ≤ 5WFull-function remote control remote control OSD
Menu: Russian.
Technical specifications:
Viewing Angle: 170 degrees
Lens: EFL=1.8mm
Standard: NTSC/PAL
Resolution: 656*492
Frame rate: 30fps
Minimum illumination: 0.2 Lux
Operating voltage: 12V DC
Working current: 60mA
Operating temperature: -20 to +85°C, 95% relative humidity
Housing: waterproof.
Automatic white balance.
Parking lines.
However, the main thing is not to buy a parking camera, but to connect it. The easiest way to do this is with a non-standard device. Almost all modern multimedia devices that have a monitor have a video input connector and allow you to easily connect a parking camera. In this case, there are no difficulties.
To begin with, I consulted with the nearest car service center to see how they do it.
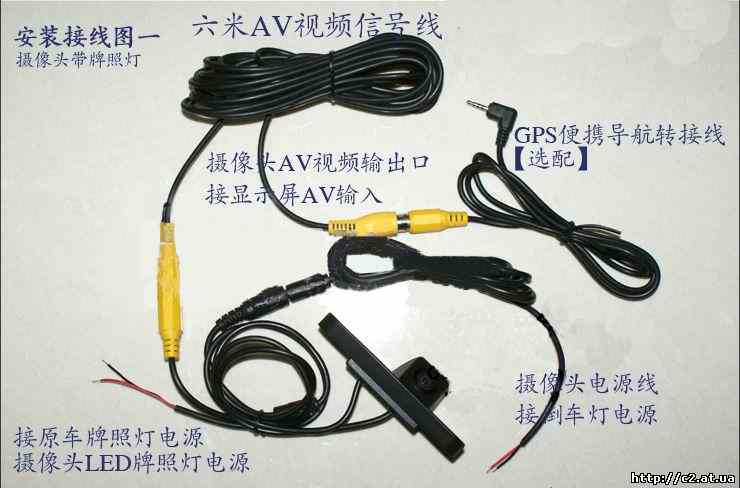
During the conversation, it turned out that the electrical connection option is made as in Fig. 1

Functionally, I wasn’t very happy with it all, I asked if it was possible to connect it like in Fig. 2.
Got a reply; “NO, the monitor is a powerful consumer, problems will arise” (meaning, the car’s computer will react inadequately).
It’s clear... I didn’t give advice on how to install the relay.
The first sketch of the circuit, I planned how to connect it like this in Fig. 3.
A circuit with the ability to later use a second video input.

For implementation, it was decided to make a version of the circuit with a timer, Fig. 4, with 30 seconds. power off delay.
In practice, this makes it possible to see behind you when maneuvering, not only when reversing, but also when moving away from an obstacle a little forward.
And also, when moving forward (not including reverse gear), you can use the Kn-1 button to turn on the rear view, for example, to see what’s with the towbar.... tow rope... or whatever else is attached (if the car is not pulls))))))))


During the operation of version Fig. 4, a circuit version of Fig. 6 appeared, but this is for the future. (The difference between the diagram in Fig. 4 and the diagram in Fig. 6 is that after each turn of the ignition key, the rear view does not turn on for 30 seconds.)
Nowadays, many companies selling automotive electronics offer the services of their technical centers for the installation of radios, alarms, rear and side view cameras.
Often the cost of such work is quite high, which forces many car owners to install rear view cameras on the car themselves.
Many people prefer to do this so as not to pay large sums to specialists.
Installing a car rear view camera
Before you begin any work on your vehicle's electrical system, evaluate your electrical capabilities and knowledge.
If you are not sure of a positive result, it is better to seek help from a professional auto electrician or service center.
If you decide to do everything yourself, first of all disconnect the positive terminal on the car battery to avoid short circuits and fires in the electrical wiring.
All rear view cameras for cars, regardless of installation location, are connected in the same way.
A wire is connected from the camera's power connector to the power cable of the car's on-board electrical system to power the camera, and a video cable from the video output is laid to the car's media system or radio.
Power to the rear view camera comes from the reversing light.
This is done so that the camera turns on only at the same time as you start moving backwards.
The peculiarity of such cameras is that rear view cameras cannot operate in constant mode, unlike conventional CCTV cameras.
They should only be turned on for a short period of time, no more than an hour.
This time is quite enough to get into a parking space.
How to properly connect the rear view camera power supply
The rear view camera is connected to the reversing light only through a 0.5A fuse, which can be purchased at any electrical or radio parts store.
It is necessary to connect the red power wire (phase) of the camera and the red (phase) wire from the flashlight.
The negative wire - black - is fixed to the car trim using any bolt or fastening unit, for example, a license plate mount.
There is no need to install a fuse on this contact.
At this stage, connecting the camera's power is completely completed.
You can start connecting the video cable.
 Fuse is a required element when connecting
Any new equipment in the car is connected to the on-board electrical network only through fuses to avoid short circuits and fires in the wiring.
All fuses are selected depending on the power of the device to which they are connected.
Consult with professionals to avoid connection errors.
Laying a video cable inside a car
Rear view cameras, like most video devices, have a standard tulip-type plug for transmitting a video signal.
This plug is usually marked yellow.
Exactly the same output with a yellow plug can be seen on any TVs, camcorders and VCRs.
The camera is supplied with a 5 meter long video cable intended for installation in the cabin.
This length is more than enough to install a camera in a large jeep.
If the length is not enough (installing a camera in a bus, limousine or truck), the cable can easily be extended with another exactly the same cable.
You can purchase it at any radio parts store.
Connecting video output
When the cable is already laid in the cabin and connected to the camera, we can connect it to the radio or on-board computer monitor.
Remember that we need the yellow plug, connecting the video cable to the white input will result in the system not working.
For detailed information about connecting a video camera to a specific radio, please refer to the instructions for both devices.
There should be a specification of the radio ports, marking methods and the location of the inputs.
If you connect the camera to a regular car TV or monitor, then the task is greatly simplified.
You just need to match connectors of the same color.
Connecting the monitor power
Power is supplied to the monitor in exactly the same way as power is supplied to the video camera.
The red power wire is connected through a 0.5A fuse to the on-board electrical system, the black wire is connected to the car body through any bolt or screw.
Checking connections
When all connections are made, you need to check that all wire connections are correct to avoid short circuits.
It is recommended to seal the places where video cables are connected to each other with overlapped vinyl tape.
This will protect the wires from disconnecting the plugs due to shaking from driving.
The last step of the connection is to install the positive terminal back on the car battery, as well as check the functionality of the system.
Now you know how to install a rear view camera on your car.


