Draw a black and white drawing with a black pen. Draw a cat on black paper with colored pencils
This tutorial details how to draw fur realistically on black paper. To create such a drawing, you will need black paper or any other black drawing surface, a graphite pencil, an opaque white colored pencil, and a number of other colored pencils. I also advise you to always keep your pencils sharp, especially if you are drawing fur. The first thing I do when I start drawing a new drawing is to study it very carefully.
I study shapes and colors, I pay attention Special attention the way light and shadows fall. Study where the darkest areas are, where the fully lit areas are, where light reflection occurs. I carefully studied the sample photograph, the compositional plan, I draw the main contours of the object on the sketch. I usually use an "F" hardness pencil. "B" also works well.
The shine from the pencil is very visible on paper, and if necessary, the pencil mark can be easily erased. Some artists prefer to use white charcoal, pastel, or even colored pencil for the basic sketch. I don't recommend using colored pencils due to the difficulty of erasing them, but you can try all the materials listed above and decide what works for you personally. Choosing Colors If you are drawing a picture in color, then you need to choose the colors of your drawing.
Study the cat photo and try to identify the dominant tones, and then try to find matching pencils. When working on black paper, it is likely that you will need to choose pencils that are much brighter than would be required on white paper.
It is very important to maintain the opacity of the color of the pencil you want to use. Different brands pencils have different opacity, so be sure to try the pencils on the edge of the paper.
Fur delamination
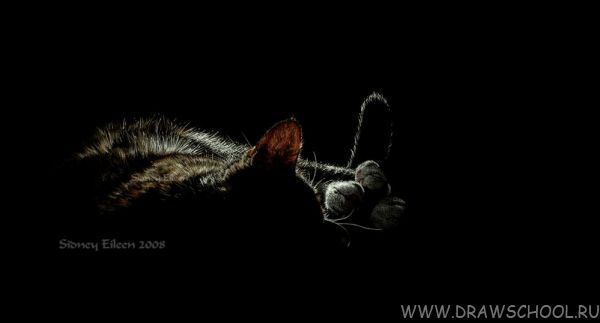
It is possible to achieve realistic fur in a drawing; for this, each hair must be drawn individually, the hairs must lie on top of each other so that the viewer gets the impression that this is real fur. I'm right-handed and always keep my hand steady on the drawing surface, so I worked from left to right on the drawing, finishing each section as I went. This process allows me to avoid smearing and distorting the finished parts in the drawing. So let's draw.
![]()
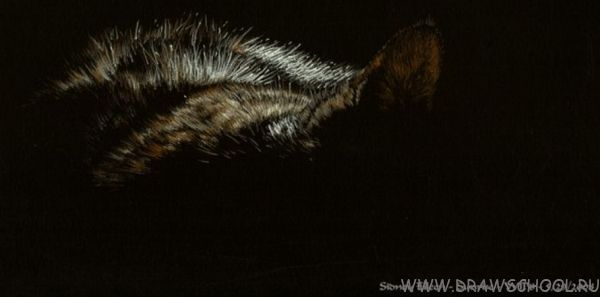
For the first layer, I chose Prismacolor's Peach Beige pencil and applied it lightly. With this pencil I define the areas that need to be colored, this serves as a base that is not completely black. Very little of this layer will be visible in the finished work, but without it, the drawing will not have a fully realistic level of depth.

The second layer is a heavy layer of Peach Beige, I create a strong background in some areas and fully define some of the hairs. The illuminated areas in the first section have now been identified.

I paint the third layer with Orange Mineral color.

In this layer I use Prismacolor's Orange Deco. This layer partially covers the Orange Deco with a softer orange. The brightness of Orange Mineral is softened by Orange Deco.

For the final layer, I used Derwent Chinese White to highlight the areas and define the white areas. I also added some tiny spots of white to show where the hairs caught the light particularly brightly. My white pencil, which I used for this step, is the only one not from Prismacolor. Because the white pencil from Prismacolor does not have enough opacity. I use white pencils from Lyra Rembrandt or Derwent.

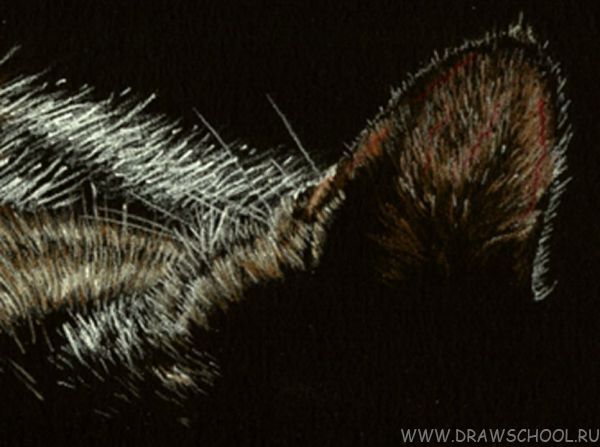
After completing the first part, I moved on to the ear area, I duplicated the bottom layer with a Peach Beige pencil in the fluffy area on the left.

Again, to match the overall coloring I used Derwent Chinese White for the highlight on the ear and whiskers.

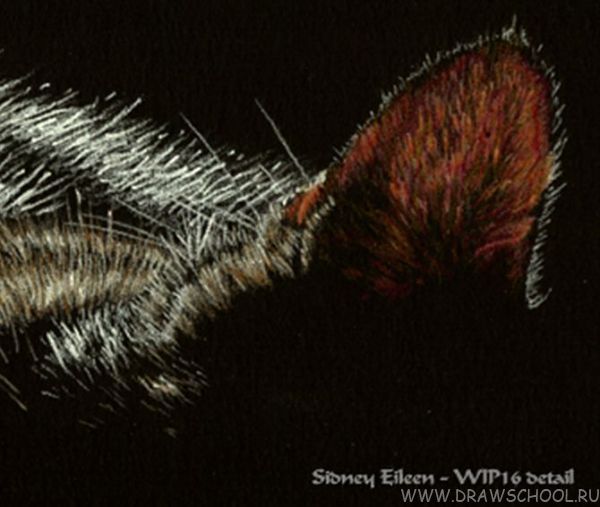
After that I added a layer of Salmon Pink to decorate some parts of the ear.

Despite testing the color on the edge of the paper, the Salmon Pink didn't go on as brightly as I wanted, so I added a layer of Derwent Chinese White to lighten the base of the ear.


After the ear was finished I moved on to the fur area on right side heads. As before, I started with a base coat of Peach Beige. In this area the image of all small parts, so I focused on developing custom visible hairs from the very beginning.

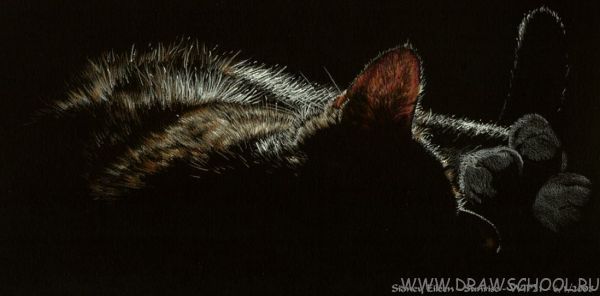
Most of the fur on the paws is white, so I applied Derwent Chinese White more densely on the left paw to define the shadows and lighting. I also added Pink Rose to the top paw pads.


The picture is drawn on 12x18 paper.
Source http://sidneyeileen.com
In addition to ordinary and aquarelle colored pencils, I would like to highlight pencils that are not quite ordinary in a separate review.
These are pencils designed for drawing on black and tinted paper (white pencils, as well as silver and gold), a multi-color pencil and pencils for shading and highlights Blender and Burnisher.
White and “metallic” pencils - I have them from several different manufacturers, but I cannot yet note a fundamental difference between better/worse, the differences are small. 
You can draw with them just like a regular pencil, just on dark paper (however, it seems impossible to me to scan a silver and gold pencil without losing a significant part of the effect they produce) 
Or you can draw “the other way around”, shading the light areas and leaving the dark ones - this is both useful as an exercise and gives very interesting results. 
I also really like how a pencil drawing on toned paper becomes more interesting and voluminous if you add white accents to it 
I haven’t been able to try out the shading and highlight pencils properly. Blender is a pencil for shading, Burnisher is a polisher to add shine. In addition, according to the manufacturer, these pencils can be used to apply highlights to the paper before applying color.
Test paints - you can see that the effect of shading and polishing is more noticeable on rough watercolor paper (left). Lines drawn before the colored pencil, on the contrary, are more noticeable on smooth paper on the right. Moreover, Burnisher weakens the color of the pigment, and Blender leaves clearer, almost white strokes (I got the impression that this is more due to pressing the paper) 
The shading effect is less noticeable on tinted paper, and the preliminary application of highlights looks a little different than on white paper. 
In general, I can say that I personally have never learned to consciously use these materials. Here in this picture I tried to use both of them - Burnisher for preliminary lightening of shiny places on the chestnut, and Blender for its final polishing. I don’t know how noticeable the effect is and whether it would have been much worse if I had not used them. 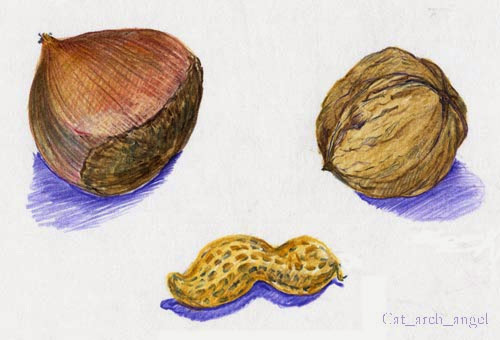
If anyone has interesting examples effective use of these pencils - please share!
The multi-color pencil became a recent discovery for me. I received it as a gift and it sat with me for quite a long time, just like a curiosity of unknown use. But the other day
Scratch(from the French Gratter - scrape, scratch) is a method of making a drawing by scratching paper or cardboard filled with ink or black gouache with a sharp tool.
Another name for the technique is waxography, sometimes also called scratching. Drawings made using the grattage technique are distinguished by the contrast of white lines and a black background, and are similar to engravings. And if you first paint a sheet of paper in different colors, the drawing will turn out to be very interesting and original.
Do you want to create your own painting using the grattage technique? Let's try!
Flower arrangement using grattage technique
For work you will need:
- two sheets of paper (important: one thick (for example, white cardboard - it will be a canvas for future work), and one regular one - for a sketch drawing),
- pencil;
- a pen that has already stopped writing;
- gouache set;
- brush;
- black ink or black gouache;
- candle.
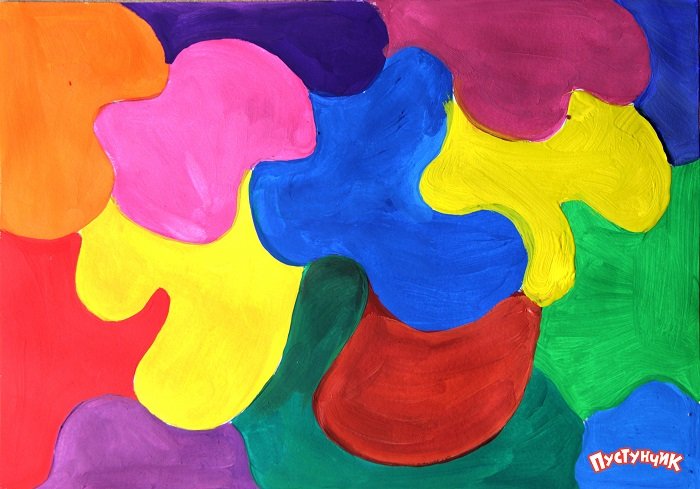
1. Take a thick sheet of paper (or white cardboard) and mark places on it with chaotic planes, which we will then paint in different colors.
The planes can be of any shape: in the form of spots, like mine, or in the form of circles or stripes. They can have clear contours, or smoothly flow from one color to another. It all depends on your imagination.

2. Once the planes are marked, paint them in different colors. Color range choose it yourself. It can be only warm, or only cool colors, or all the colors of the rainbow, like mine. When all the paper is painted, leave it to dry completely.
Little advice: use more light colors and bright colors, they make a good contrast with the black color.
3. If the paint has dried, you can safely move on to rubbing the paper. Take any unnecessary candle and generously rub the paper with it. It is important that the wax layer is thick, then it will be much easier to scratch the design. If you have a white coating, as in the photo, then everything is fine. But before moving on to the next step, check that all surfaces are well waxed.


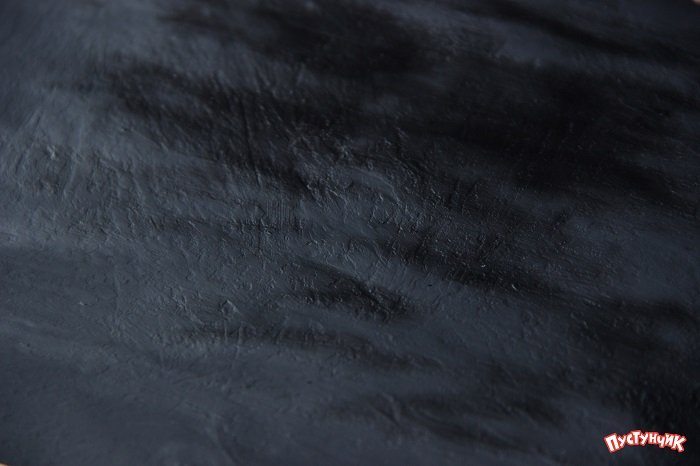
4. At this stage, cover the paper with black ink or gouache. If you cover the surface with black ink, you should first dissolve it with soap. This will allow the mascara to adhere better to the wax surface. We paint the paper tightly, leaving no white spots or streaks. We leave it until it dries completely, and at that time we proceed to the next stage.

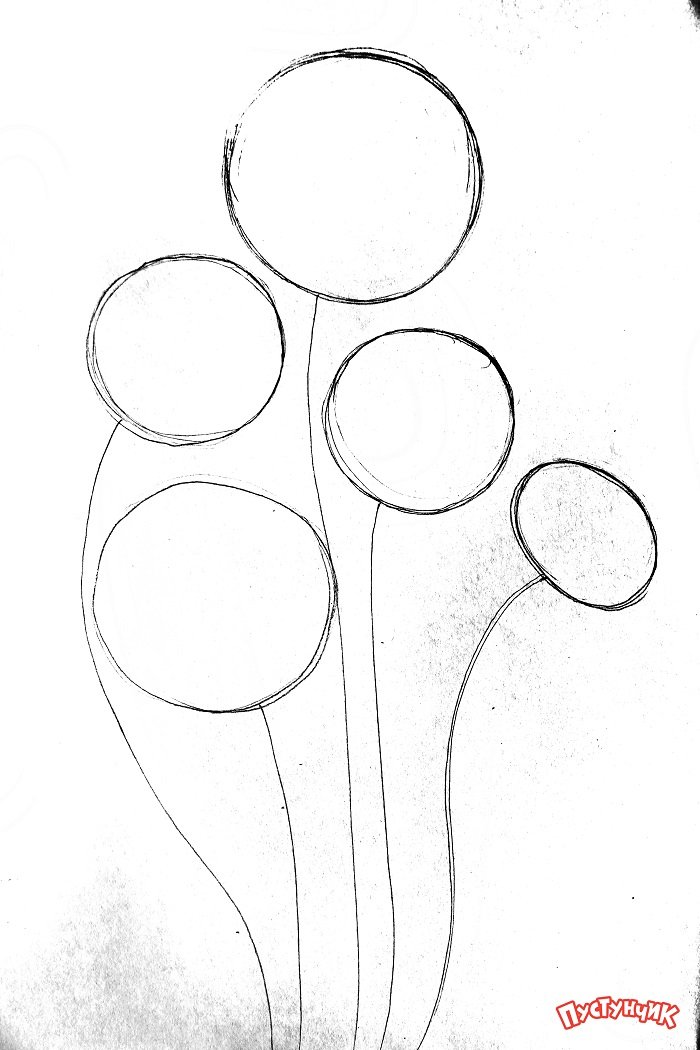
5. While the blank for the sketch dries is drying, let’s prepare a sketch of our future creation. I chose a flower arrangement. To begin with, we will use circles to designate the locations of future flowers and draw lines of the stems.
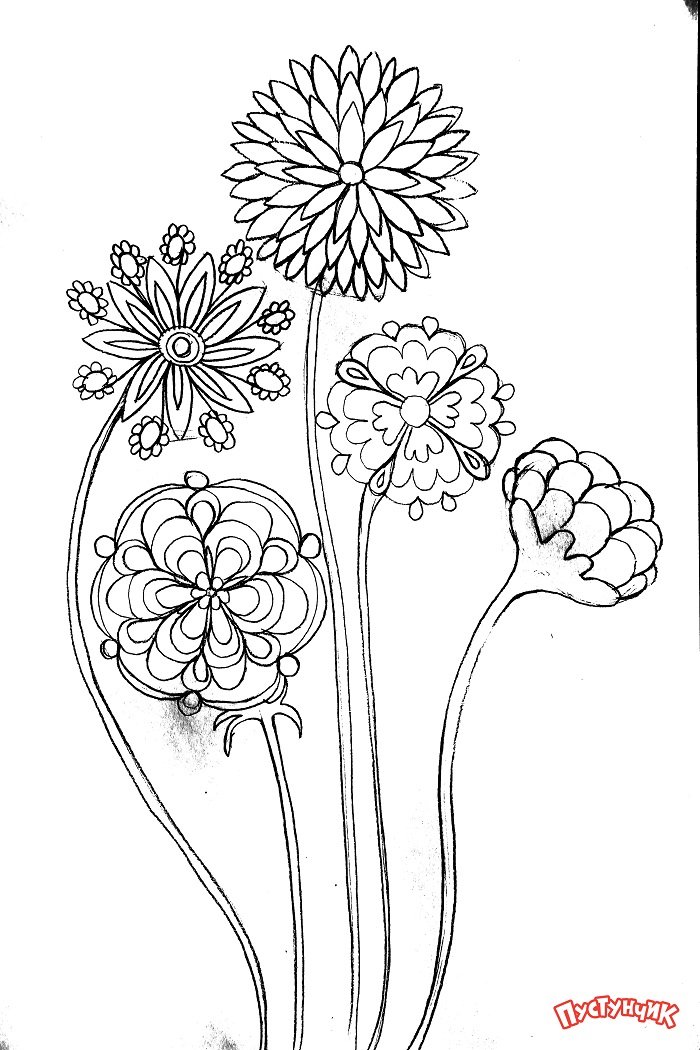
6. On the designated planes we draw a variety of fabulous flowers. You can come up with their shape, size, leaves yourself. Let your flowers be original, fantastic - this will give the drawing individuality. Draw thick stems.
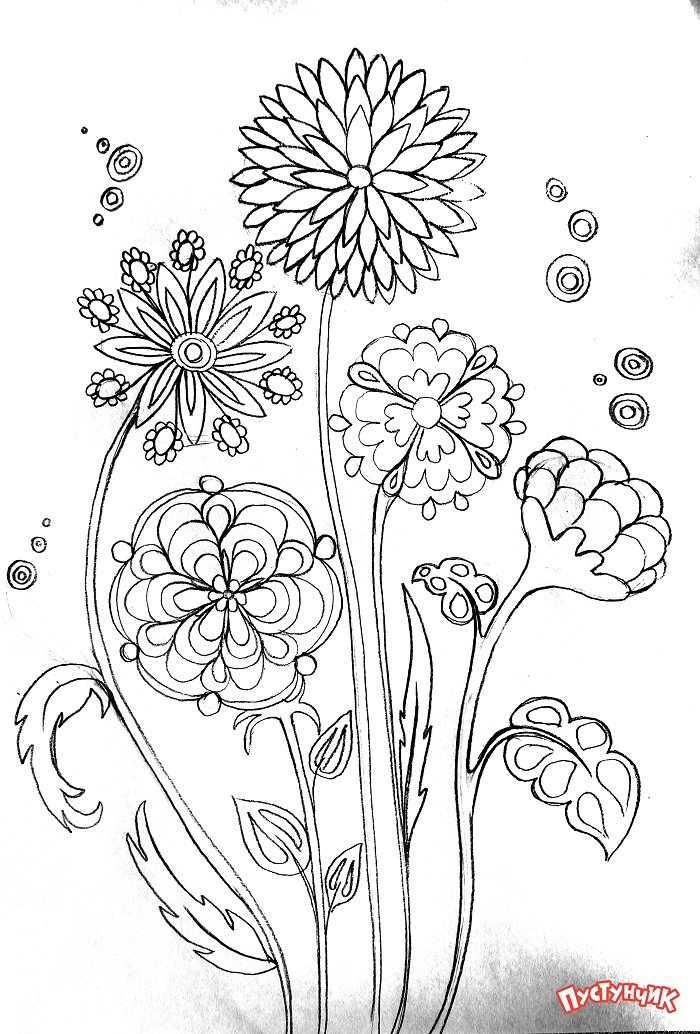
7. Add fairy-tale leaves to the flowers, and also add background details: butterflies, bubbles and any other decorations.
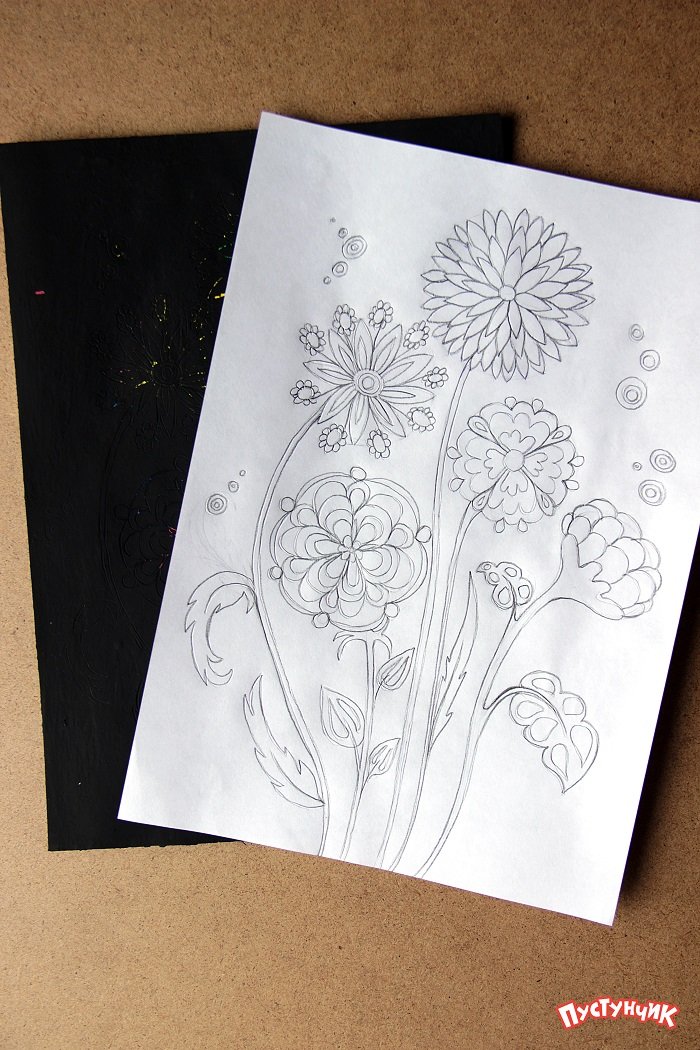
8. The sketch of the painting is ready. All that remains is to transfer it to the prepared black canvas. How to do it? Very simple.
Place the paper from the sketches evenly on top of the black paper so that the corners of the leaves match. Take a pen that has already stopped writing and draw the outlines of the sketch, pressing a little. This method will help you make an imprint of the sketch on black paper. Check that you have traced all the contours. When everything is ready, remove the sheet and you will see that the outlines of the drawing have been transferred to the paper, as shown in the photo.

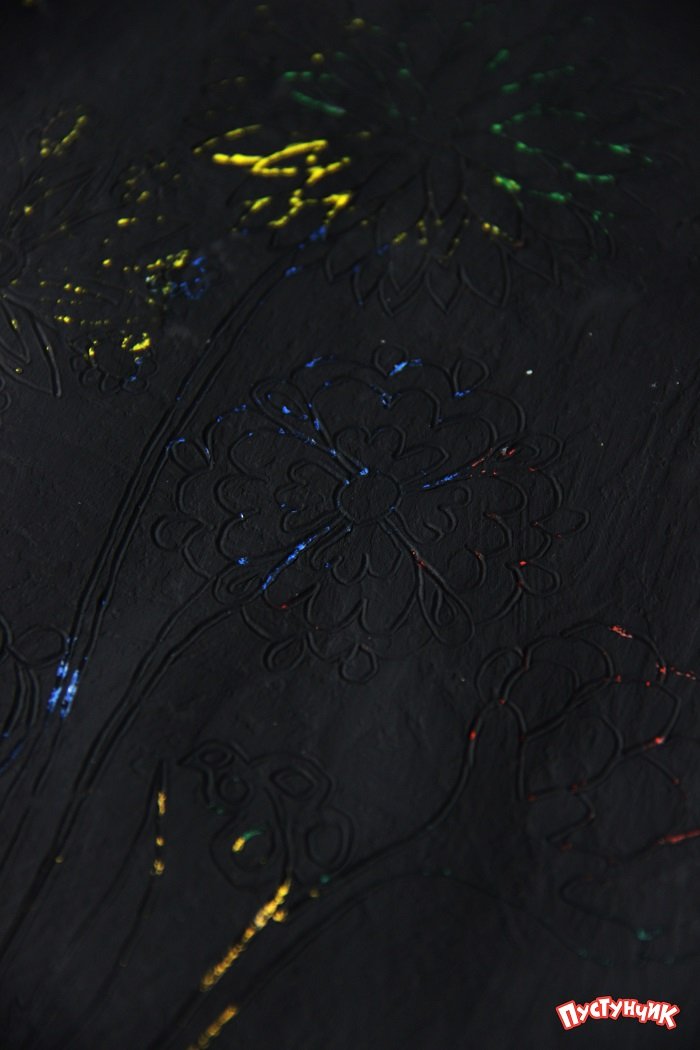
9. Now we can move on to the fun part! Start scratching the resulting contours with a pen that does not write, or with a sharp stick. If the layer of wax under the paint is thick, you will see how easily and pleasantly the design scratches.
By creating a drawing using the grattage technique, you will see how interesting it is to watch how different colors appear under the paint, and the flower takes on a fabulous coloring.

10. Scratch all the contours to the very end. Then you will get a drawing like mine. You can leave it like that, it’s already wonderful. You can also add various ornaments and shading for a more original look.
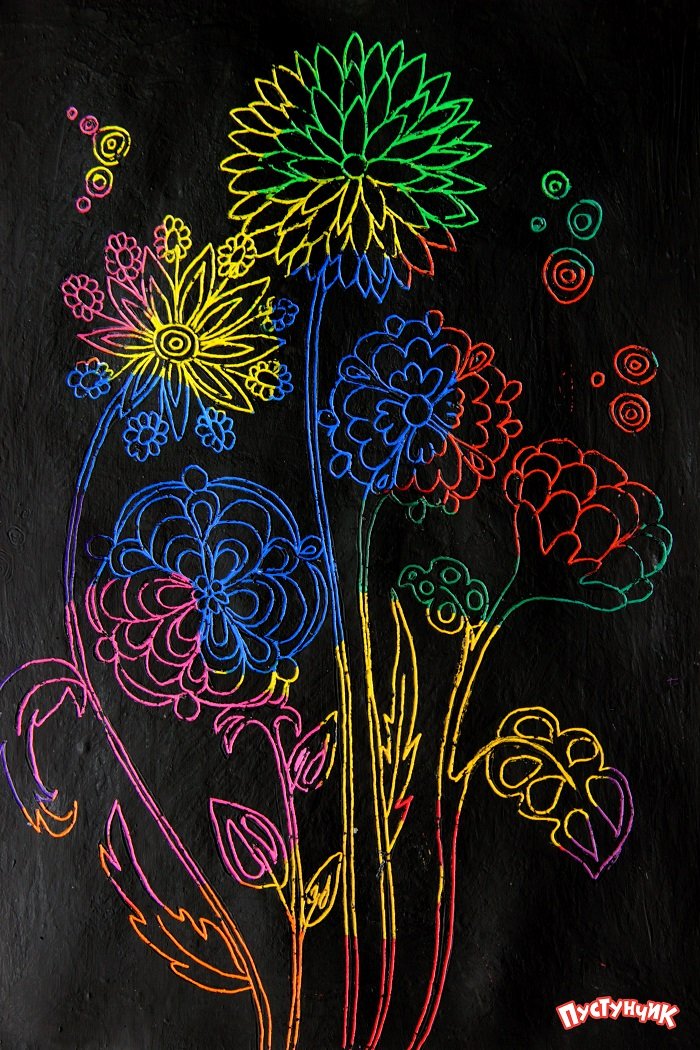
11. At this stage, add uniqueness to the drawing using various shading and ornaments. Some parts can be completely scratched. If desired, add grass and some background elements. It all depends on your imagination.

Congratulations, the drawing is ready! I decided to make this composition colored, so first I covered a sheet of paper with colored spots. You can also make black and white drawings. In this case, the sheet of paper is not covered with paints, but is immediately rubbed with a candle, and then with black ink or gouache.
Black and white grattages are similar to engravings and look incredible. Don't be afraid to imagine and experiment. Also try to draw without a preliminary sketch, immediately making scratches on the finished canvas. This will perfectly develop your imagination!


