How to make a large crystal from water. How to make a crystal from salt. We continue our work on growing beautiful salt crystals
Crystals are substances whose atoms or molecules are arranged in an orderly manner. Such formations have a symmetrical structure in the form of polyhedra. Crystals can have from four to several hundred facets; they vary greatly in size, but they always amaze with their “correct” beauty.
In nature, such formations are common, but at home you can grow crystals yourself; for this you will not need many available tools. But the result will be simply stunning and quite fast. In just a few days you will be able to admire your own salt crystal of an unusual, bizarre shape.
Himalayan salt, pink food from Pakistan
Does not come, as the name suggests, from the Himalayas, but mainly from Pakistan. Some Himalayan salts also come from Poland because Himalayan salt is not a protected trade name. Himalayan salt is a rock salt consisting of about 97-98 percent sodium chloride and some other minerals. Thus, its composition is practically no different from ordinary cooking salt. His pink color due to the presence of iron particles in it. Himalayan salt is finely ground into granules or commercially available as halite broths.
Salt crystal
To understand how to grow a crystal from salt at home, you don’t need special skills or knowledge, just attentiveness and desire, of course. So, you will need:
Glass vessel.
Wooden stick, pencil or similar object.
If you don't have salt on hand, there is a simple alternative way - just use sugar instead of salt. In fact, this process is absolutely identical to how to grow a crystal from salt at home. So you can choose the main material according to your taste.
Also, the taste is practically no different from table salt, it is only slightly softer. It is like any other food for everyday cooking and for seasoning at the table. Today we have a very special home experiment. We will learn how to make crystals with a substance as easy to find at home as salt. It's a risk-free experiment that's perfect for kids.

Small solid particles will appear at the bottom of the solution. With the help of a magnifying glass we can observe them better and appreciate the form they take. We can also focus on, for example, creating a circle on a piece of paper, which we will place under the glass exactly where it is. Throughout the day we will see how our small chosen crystal grows.
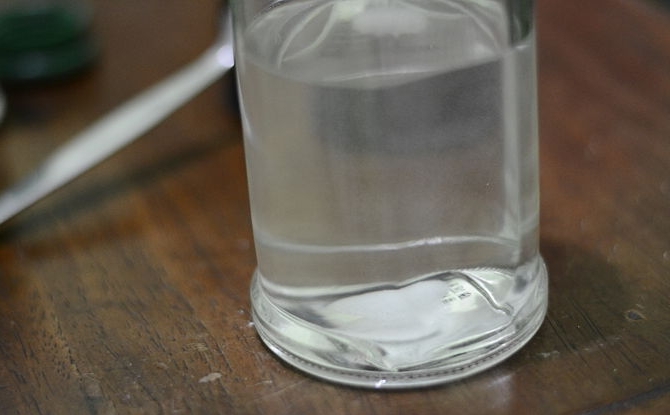
Pour water into the container. It works best, but you can use regular tap water.
Add a small amount of salt and stir. Repeat this procedure until the salt stops dissolving. You will understand this by the precipitation.
What's really impressive about this experiment is that the salt crystals all form squares or rectangles. Absolutely all of its sides form right angles with great accuracy and maintain them as they grow. Finally, we can make a sample of salt crystals. Using tweezers, we extract the ones we like best and stick them on cardboard, preferably dark. We can set them from smaller to larger sizes to easily observe how the crystals maintain their shape despite their growth.
Today we bring you a very simple experiment. You only need a little water and salt and you can make lots of salt crystals without leaving your home. Amazing, right? When the time comes when the salt is not dissolved, we just need to go to the microwave and heat our glass. One minute is enough.

Pour the salt solution into glass jar or a glass so that there is no sediment left.
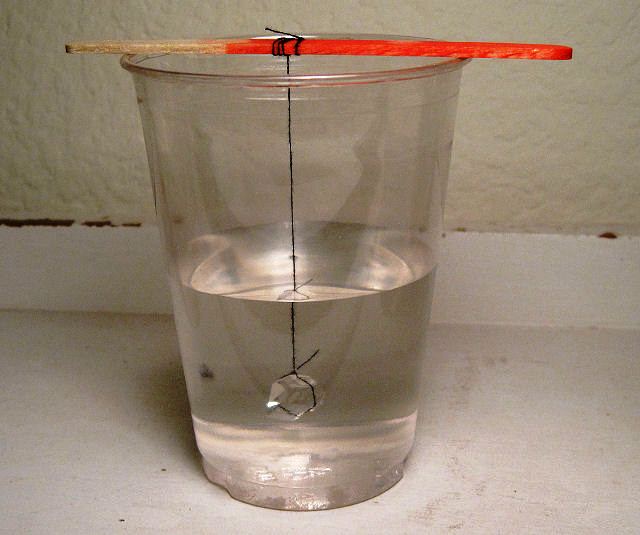
Select a large salt crystal and place it at the bottom of the jar. For best results, instead attach the crystal to a string and hang it from a pencil so that the string does not touch the sides of the glass container.
Taking great care not to burn, we remove the glass from the microwave and continue stirring until the salt has dissolved. When it's ready, we pour it into our plate. Now everything is ready. We just have to let it dry in the sun for 5 days.
After these 5 days this is the result. There are some solid materials that are capable of forming crystals, such as salt in this case, but, yes, under certain conditions. A necessary condition is humidity, which in this case is achieved with a saturated solution of water and salt.
![]()
Place the jar in a room with normal humidity (do not put the jar in the bathroom or kitchen) and wait. Due to the fact that the selected container is glass, you can monitor the process and wait for the desired result.
As the water evaporates, the salt particles bond together to form layers and layers. They form crystals because their molecules have a predetermined arrangement. If you notice, each crystal has straight shapes. This process is used in the salinas to obtain salt from seawater.
We hope you found this simple experiment interesting and that you make these salt crystals at home. Best of all, this salt we used is completely recyclable. And don't forget to take a look at our video. At that time we tried a salt solution and another sugar and we only got it when the salt was dissolved. This time we found this idea to make candy and after looking at the blog photos, who doesn't want to try it? So we took our old crystallization experiment to create sugar crystals in the form of delicious candy.
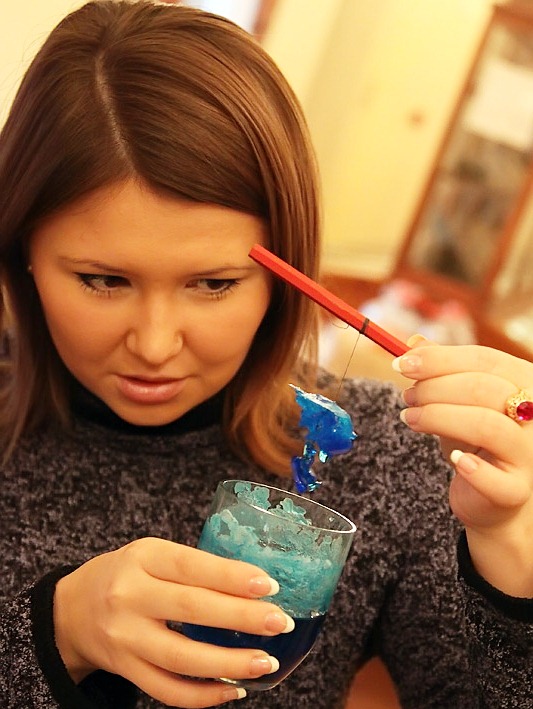
A way to grow a crystal from copper sulfate
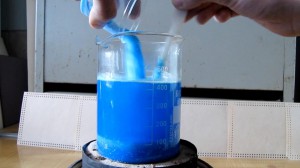
For those who want something more interesting, there is the opportunity to grow a beautiful structure of rich of blue color. To do this, we will tell you how to grow a crystal from copper sulfate. It should be noted that this substance is copper sulfate or copper salt, but the process of growing a crystal is still different from how to grow a crystal from salt at home. The thing is that copper sulfate is quite dangerous chemical element, which means it must be handled with care. You will need:
Crystal Growing Kits
In developing this recipe we can introduce various scientific concepts with which we turn into a science session in the kitchen. To get crystals we only need water and sugar, lots of sugar. We heat part of the sugar dissolved in part of the water, and when it dissolves, we add more and stir until we see that the sugar no longer dissolves, but settles at the bottom.
How to make a salt crystal at home, video
Once saturated we remove it from the fire, let it cool a little and throw it into a glass container. At this stage we add a little coloring to different mixtures to get colored candies. To support the caramel, we will use some wooden sticks, which we will soak in the mixture and "baszaremos" in sugar and allow to dry. This step will keep the stick of small sugar crystals attached, which will become the "seed" on which new crystals will grow.
Copper sulfate.
Heat-resistant flask for chemical experiments or glass jar.
A piece of copper wire.
Sandpaper.
Ballpoint pen refill.
Latex gloves.
Get started by making sure the copper sulfate does not come into contact with small children or pets. Prepare your materials and begin your experiment:
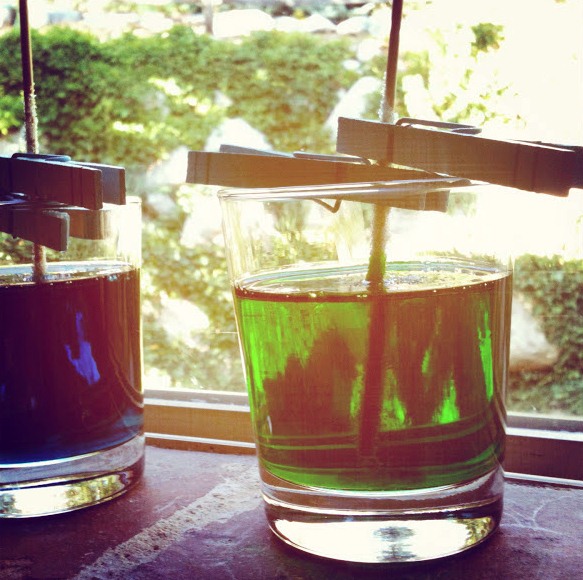
Once the sticks are dry, we place them in glass containers and let them hang with a clamp so they don't touch the bottom or walls of the container. Let me stand in sunny place, so that we can speed up the evaporation of water, and let's watch the crystals form on the stick until we get our "lollipops".
And we also see sugar crystals forming on the bottom and sides of the container. And to finish, here is a video of the steps we followed. Interesting video, which provides tips for improving good crystallization at home. The author speaks English, but more or less talks about it.
Wear gloves before starting work.

If you use pure copper sulfate from a reagent store, distilled water will do; for household copper salt, use . Heat the water to 60-70 degrees Celsius.

First, we must choose the material whose crystals we will grow. Almost any substance is suitable for crystal growth. For example: proteins, iodine, metals. Even air can be turned into glass when cooled to a certain temperature. IN normal conditions It is best to crystallize inorganic salts.
Home experiment: growing a personalized crystal
Table salt is not the best material. First, let's take any container and pour some of our salt into it. This gives a saturated solution. Each salt has its own solubility curve. The solubility curve is a measure of the number of grams of salt that can dissolve in 100 ml of water at a certain temperature.
Add copper sulfate a little at a time until a precipitate forms.
Pour the water into another container to clear the solution of sediment.
Using sandpaper, clean the copper wire, shape it into the desired shape and tie it to the thread.
Once we have prepared our saturated salt solution, it needs to be filtered while it is still hot. Sometimes filtering is not required. But if you buy chemicals from a garden store rather than special store, the solution should be cleaned of possible impurities.
Crystals form as a result of changes in the solubility of salts in water with changes in temperature. Excess crystals that cannot dissolve in the solution fall to the bottom of the container. After a day, we can notice that beautiful crystals are forming at the bottom of the glass. These crystals will be used as seeds.
 By the way, if you do not have copper wire, you can grow a crystal from copper sulfate at home using ordinary thread.
Using a ballpoint pen, hang the seed so that the wire does not touch the wall of the vessel.
The seed is a small crystal that is immersed in a solution. New layers of glass will continue to grow on it. Choose the most beautiful and largest crystal from the mass of crystals that form at the bottom of the cup, or that are easier to tie with thread.
You can tie string with a pencil to hang the glass inside the glass. Wait for the glass to grow. Over time, the glass will become larger and larger. This occurs because the water in the solution gradually evaporates, thereby increasing the concentration of the solution.
Since we have a solubility curve, we can know that the excess material that cannot be dissolved must go somewhere. And this is the substance from which our crystal is formed. If we didn't hang the seed, crystals would start to form anywhere on the bottom or walls of the glass.

Now leave it for a few days and observe the result.
After your crystal has acquired the required shape, dry it and coat it with colorless varnish so that over time the copper sulfate does not erode and the crystal does not disintegrate.
How to grow a crystal from sugar at home
One more thing to note: During the crystal growth process, the liquid in the bowl will gradually evaporate, and therefore the crystals will grow. But this is also a problem because when the glass no longer has a solution, she will not be able to continue growing the crystal. To solve this, add a more saturated solution to the vessel once or twice a month. The saturated solution should be prepared in the same way as before by adding salt in hot water.
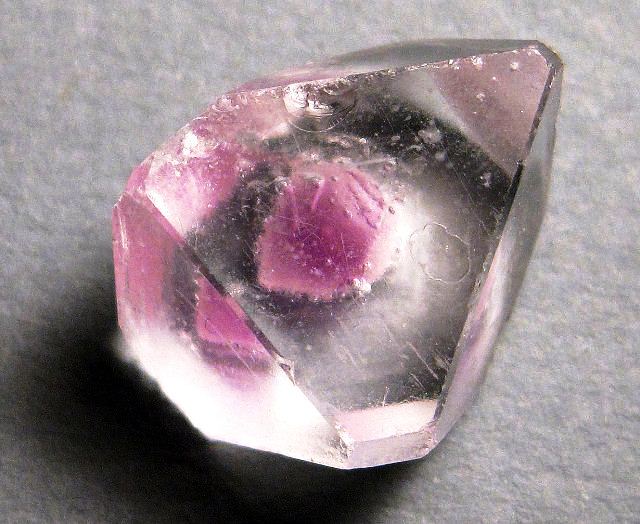
However, the hot solution should not be added. The saturated solution must be at the same temperature as the growing crystal. Over time, some stains or other dirt that could damage the glass may fall onto the grout. My potassium alum crystals are growing larger. As you can see they have purchased very interesting way. After about 3 months I was able to grow two beautiful potassium alum crystals.
Now you know how to grow a crystal from salt at home, and you can experiment. Use different seed shapes to create interesting crafts. You can add a little coloring to the water and salt (both regular food coloring and regular gouache paints will do). Use all your imagination, and then ordinary crystals from improvised means can become designer jewelry!
It is very important that you do not start mixing chemicals without knowing, as they may cause some unexpected reaction or release toxic gases. This advice is useful both for this experiment and for Everyday life, for example, if we mix bleach with detergent for cleaning, it is also toxic. Always read chemical labels to avoid crap.
You can get it from bullet houses or some chemistry labs. It's easier to get it in the first place. Water to dissolve the sulfate. This product comes in the form of sand, which we should try to leave powdery by crushing it with a solution.
Man strives to be on par with nature in everything. Today he can do a lot. Surrogacy, nanotechnology, to say nothing of artificially recreating the structure of minerals. And not in some super-powerful laboratory, but at home, one might say, on the kitchen table. Yes, yes, today anyone can find out how to grow a crystal, and even easily cope with it.
What is needed to grow crystals?
What do you need to do. We must first have everything very clean and sanitized, as impurities in the jars can break down the water, causing it to rot faster and breaking the balls and pocket. After disinfecting everything, continue heating the water. But if they want to supply more copper to prove it's going away, it doesn't change.
After all, this is an experiment and you need to “experiment.” When the water is very hot, we pour in the sulfate and we stir it until it dissolves as much as possible. We then go through a filter and wash and clean all the contents down to the jar so there is no solid residue as that will cause it to grow a crystal in the background and that is not what we want. We left it for three to four hours, after which some crystals began to appear in the background. Then we take them out and choose the biggest and most beautiful one.

Crystal at home

Crystal at home
When we hear this word, each of us imagines transparent, large, colorless or bright polyhedra with shiny ideal edges. They owe their exceptional qualities to their structure: crystals and amorphous bodies are distinguished by their existence in internal structure the first strict crystal lattice. If we imagine that a person has shrunk a million times and found himself inside a glass cube, then around him he would see chaotic piles of various molecules. But if you look inside even the smallest crystal, you can see a completely different picture: rigidly ordered rows of molecules, ions or atoms stretch endlessly on different sides, which obey the laws of strict symmetry that rule in the world of regular crystals.
To understand how common substances with a crystalline structure are in the surrounding nature, you just need to remember that most rocks consist of crystals. But the entire crust of the Earth is built from rocks.

Growing crystals is a very exciting activity, and if you do it with children, it is also educational.
And although we can match nature in creating crystals at home, first, perhaps, it would be worth familiarizing ourselves with the rules for growing a crystal from a solution.
Before studying how to grow a crystal at home, it is important to remember the basic safety rules when experimenting with toxic salts:
- You cannot use food utensils during the experiment, since their subsequent use during meals can provoke poisoning of the body;
- You cannot eat food at the same time as conducting experiments, which can also cause poisoning;
- You cannot use unknown reagents for experiments;
- All chemicals must be stored in sealed containers in a dry, safe place away from small children and animals. You need to make an inscription on it that will inform you about the contents;
- During experiments, you need to use gloves and protective clothing;
- experiments accompanied by even the slightest release of harmful compounds must be carried out in laboratory fume hoods;
- If the solution gets on your skin, immediately rinse the area with clean running water. If acid gets on your skin, you need to treat your body with a weak alkali solution. Well, and vice versa: when alkali gets on the skin, the affected area is treated with a weakly acidic solution. If the solution gets on your mucous membranes or in your eyes, you should immediately go to the hospital, and before that, rinse them with water.
After such instructions, you can begin to grow crystalline substances using even the most aggressive components. But it’s best to start with absolutely accessible, safe and even pleasant ingredients. Most popular experience - how to grow a crystal from sugar.

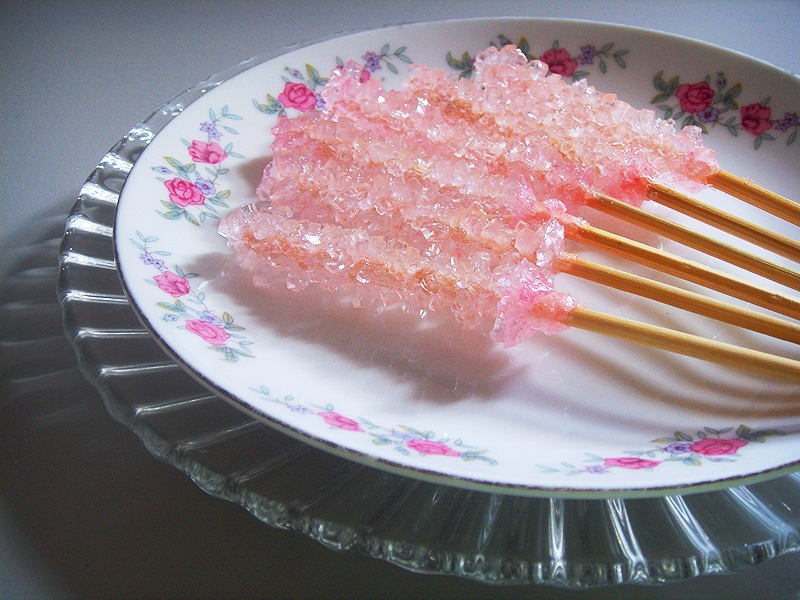
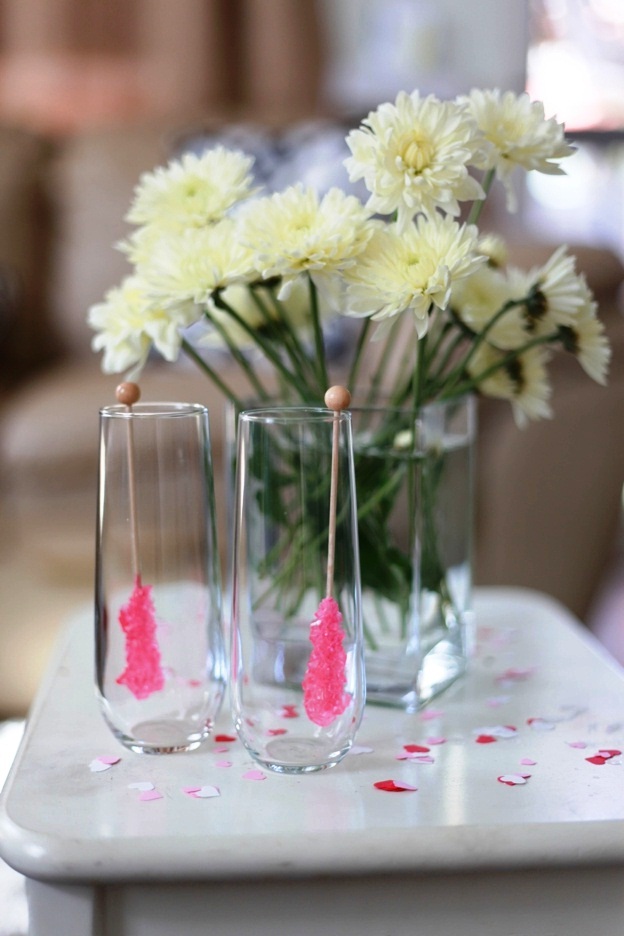
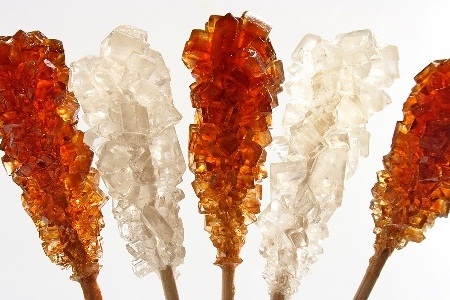
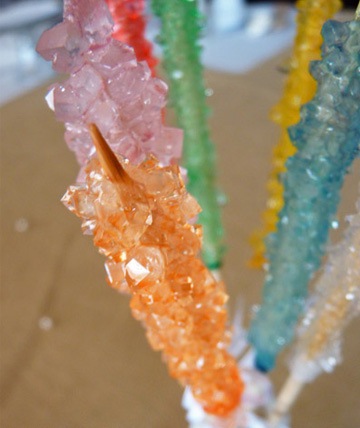
Children love sugar skewers.
Such crystals are often included with expensive types of tea and look very tasty and beautiful. So much so that you don’t even want to stir tea with them - it’s a shame! In addition, this stick alone costs about 160 rubles: you must agree, it’s very expensive. But you can grow them yourself much cheaper. So, for one sugar crystal on a stick you will need:
- water - two glasses;
- sugar - five glasses;
- wooden skewers or sticks for mini-kebabs;
- thin paper;
- pot;
- transparent cups;
- food coloring if you want to grow a multi-colored crystal.

When you have prepared the sweet solution, start preparing the “skewers”. Tie two twigs together. The first one will serve as a “fishing rod”, and the second one will serve as a fastening.

Place the twigs (or toothpicks) into the syrup and wait.

For that,. It only takes a week for a sugar crystal to grow.

After the seven-day period, enjoy the sweets.
It all starts with taking a quarter glass of drinking water and a couple of tablespoons of granulated sugar. The sugar is heated over the fire until it dissolves and produces syrup. Then a little sugar is scattered on a piece of paper, the stick is dipped in syrup and rolled in sugar. You need to make sure that its cubes stick evenly on all sides of the stick, which will make the crystal even. Then several similar sticks are prepared, which are left until they are completely dry, so that the sugar does not crumble when it gets into the hot syrup. After all, if this happens, then subsequently the crystal will have nothing to cling to and it will not be able to grow. Therefore, it is better to prepare the sticks ahead of time, for example in the evening, and leave them to dry overnight. Then take a saucepan, pour water into it - two glasses, and pour out sugar - two and a half glasses.

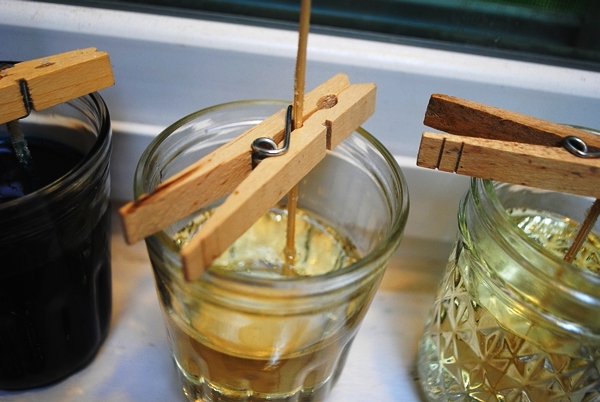
You can use clothespins as fastenings.
The syrup is placed on low heat and, with constant stirring, all the sugar dissolves. The remaining sugar - two and a half glasses - is poured into the resulting syrup and boiled until it is completely dissolved. After turning off the heat, leave the syrup on the stove for another 20 minutes. While it cools, the sticks are prepared. Take pieces of paper and pierce them with a skewer. There is no need to make the hole very wide, because the point is for this piece of paper to sit tightly on the skewer.


Then the hot syrup is poured into glasses. It is necessary that the hot syrup is poured, otherwise the crystals will not grow. If you want to know a way, how to grow a crystal at home, and even colored, then everything is simple: a little food coloring is added to the syrup. The workpiece is lowered into the glass, but so that the sugar does not touch its walls and bottom. And the paper in this case is both a holder for the stick and a lid for the cup, which protects the syrup from dust. The same procedure is done with all the remaining blanks: they are placed in glasses and left to grow for approximately 7 days.
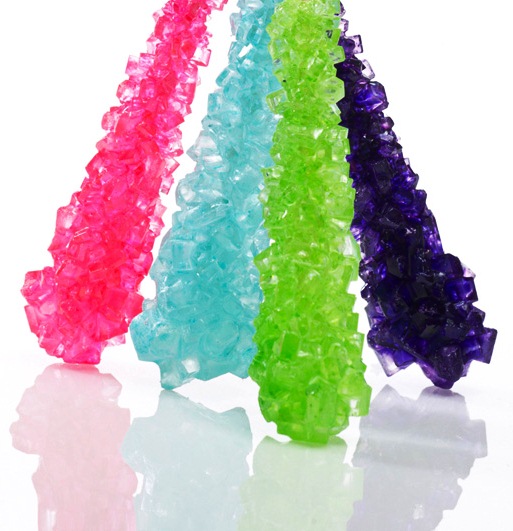
Sugar crystals

Sugar crystals
Sugar crystals


DIY sugar crystals
DIY sugar crystals
DIY sugar crystals
DIY sugar crystals
Children will watch this process with interest, as the crystal will grow larger every day. But you need to be prepared for the fact that they will all grow in different ways: some quickly, while others will need a much longer period of time. But when after a week there are no changes, you will have to repeat everything all over again. Most often, beautiful crystals grow in just a week. Several unready ones can be left to ripen for the same time. Well, have a delicious tea party! True, such a sugar crystal can simply be dissolved like a lollipop.

Sugar crystals
Sugar crystals

Sugar crystals
One of the most simple ways, how to grow a salt crystal at home, will require its performers not only to be clever with the solution, but also to stock up on remarkable patience. So:
To work you will need:
- drinking water
- small saucepan
- transparent glass container (the best option is a jar)
- pack of table salt
- silk thread.
Water is poured into the pan and put on fire, but not brought to a boil: the solution should be hot, but not boiling water. After heating the pan with water, salt is poured into it in small portions, and the solution must be stirred constantly. A new portion of salt is added when the previous one has already completely dissolved. The concentration of the solution should be such that grains of salt cease to dissolve in it. For the role of breakfast, the largest of the crystals from the already completely settled brine solution is selected.
Now the concentrate can be considered ready. It should be poured into a glass jar and allowed to sit for about a day. This must be done so that small, undissolved particles of salt fall to the bottom. On the second day you can see many small crystals in the jar. You need to choose the largest of them and take it out, and then tie the crystal to a thread or attach it to a wire. This will create a seed, the presence of which is important before how to grow table salt crystal. Then the solution must be poured into an empty container, but so that small crystals do not get in. When this is not done, particles of salt crystals will begin to take the substance from the solution to grow.
Then the seed is lowered into a solution poured separately, and you should be patient. But while the crystal is forming, there are some important tips you can learn about growing it. With rapid cooling of the saline solution, the crystal grows in a minimum time, but its shape will be geometrically irregular, but crystals grown with a gradual decrease in temperature will take longer, but will amaze with their perfect beauty. You should also not shake the jar with the growing crystal, just as you should not take it out until the process, in your opinion, is completely completed.

Boil water and immediately pour into a jar.

Add 2-3 tablespoons of salt to the mixture and stir with a spoon until even the fine particles are dissolved.

Add the rest of the salt and mix thoroughly.
Now you have a saturated solution ready.

Shake the jar well.

Tie a string around a pencil or stick.
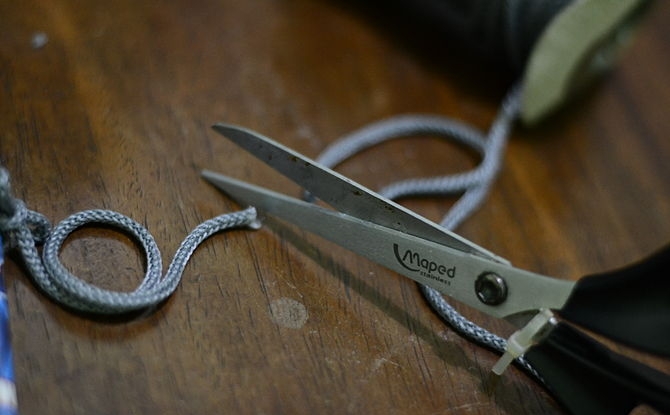
Trim the excess length so that the lace does not touch the bottom of the jar.

Place the end of the rope into the jar.

Leave the jar in a warm, sunny place for 1-3 weeks. Check the lace regularly; it will gradually become covered with white crystals.

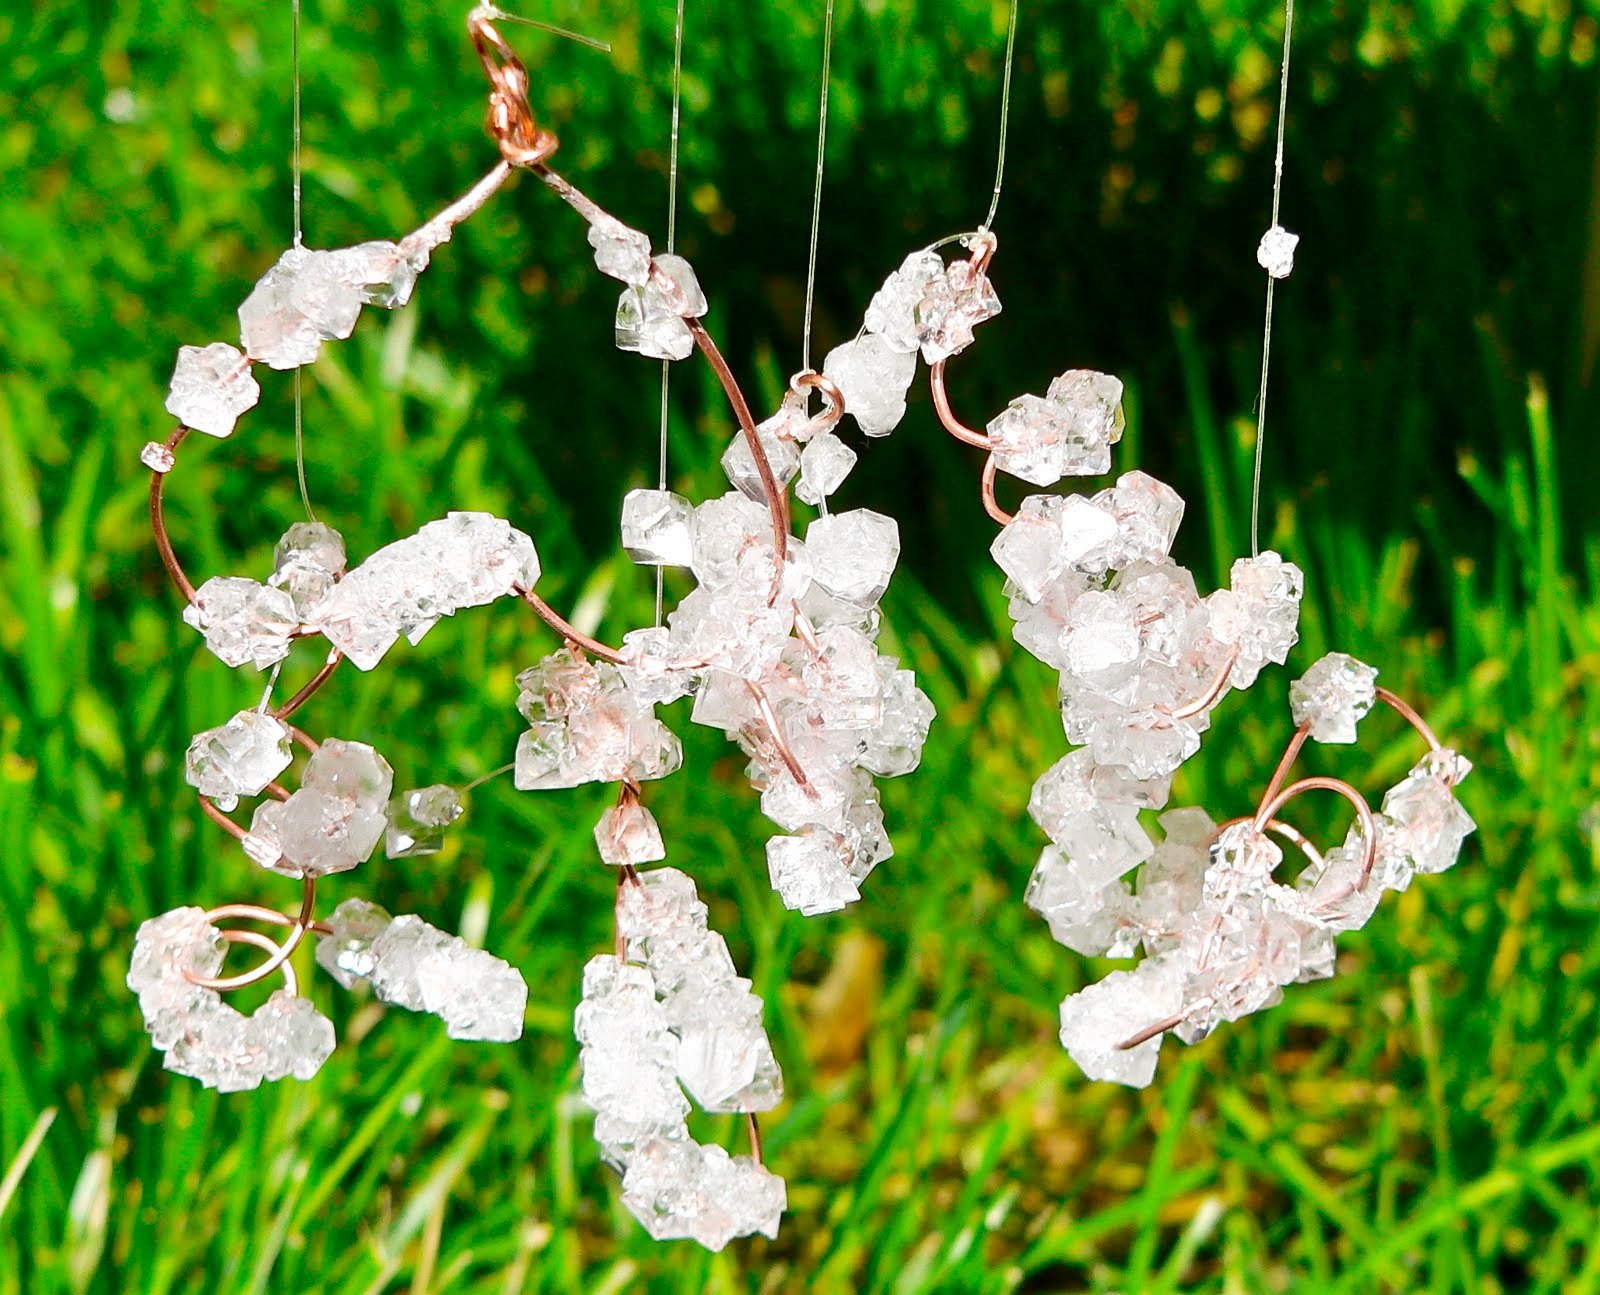
Instead of a rope, you can use an iron ring, then the crystals will grow in a circle.
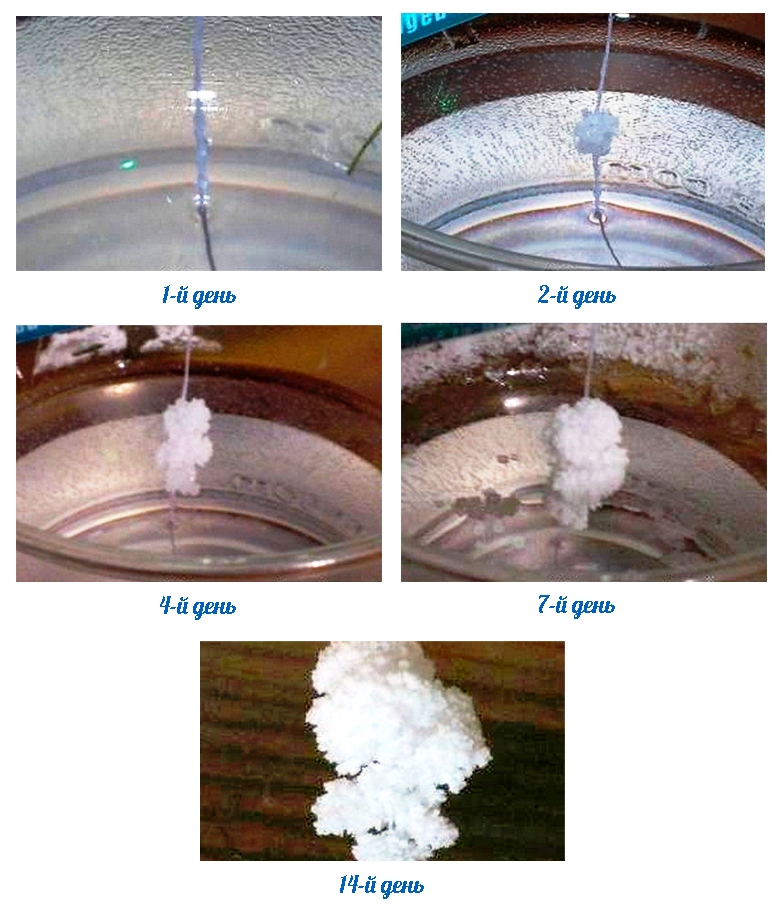
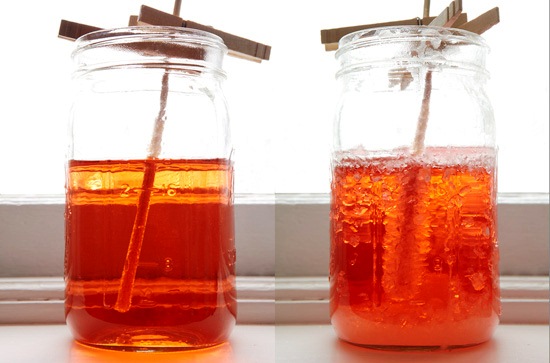
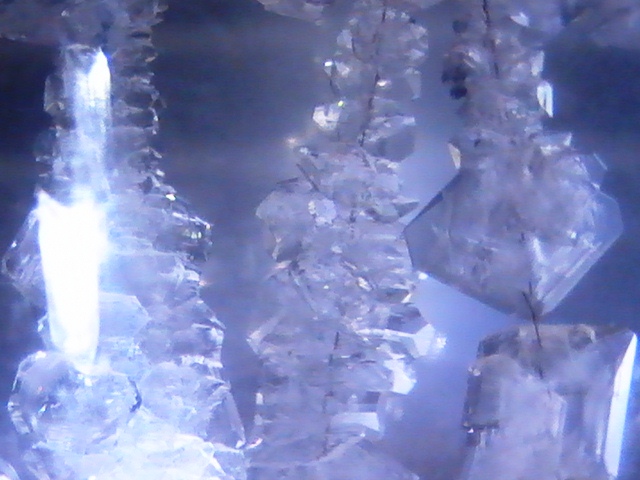
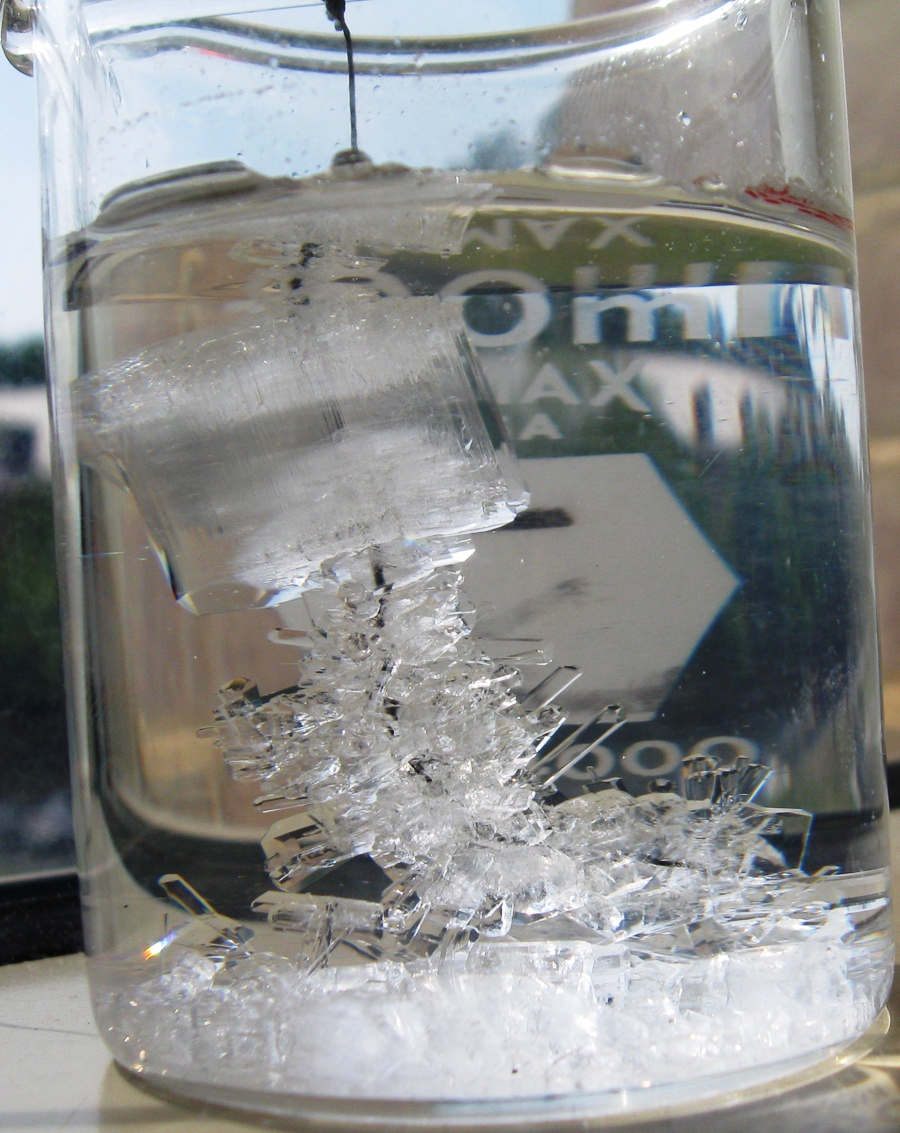
These pictures clearly show how crystals grow.

This is how the string with crystals will change over time. On average, it will take 2-3 weeks to grow a crystal.
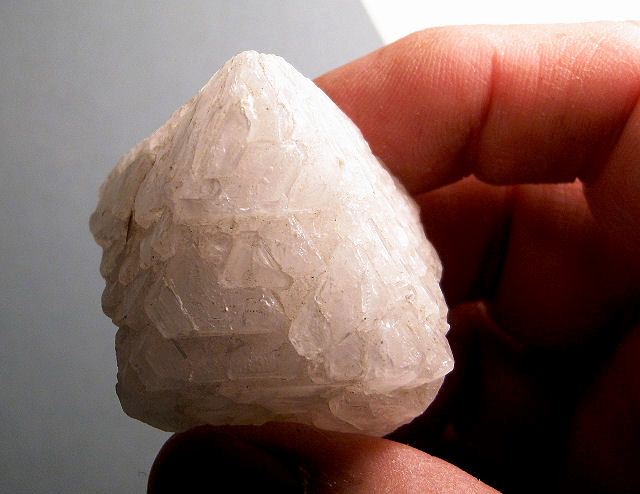
Very beautiful crystals grow not from ordinary salt, but from alum. Alum is a double salt and can be bought at any pharmacy, as it is a medicinal product that is used as a hemostatic and cauterizing agent. They are cheap - about 12 rubles. Now we will demonstrate a master class on growing crystals from alum. They turn out very correct and beautiful shape and grow faster than salt crystals.
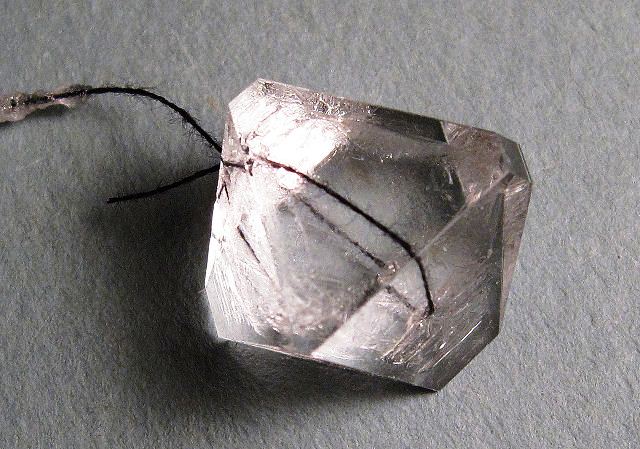
As you can see, this crystal correct form compared to a regular salt crystal.

Aluminum sulfate costs from 8 rubles and is sold at the pharmacy. It is often used as a styptic, for example when you cut yourself while shaving.

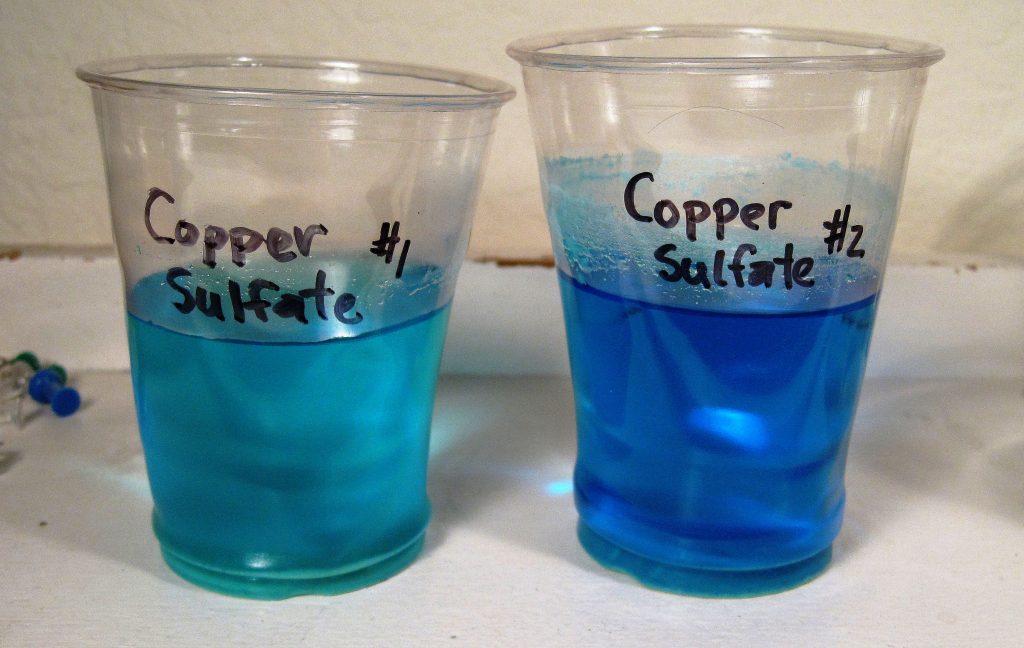
For the experiment, it is better to use two glasses so that you have a choice of good crystals. Bring half a liter of water to a boil and dissolve six tablespoons of alum in it. Leave the cups for a week.

This is how alum crystals grow within a week.

There is too much small alum in the second glass, which is why we immediately decided to grow crystals in two glasses, and not in one.
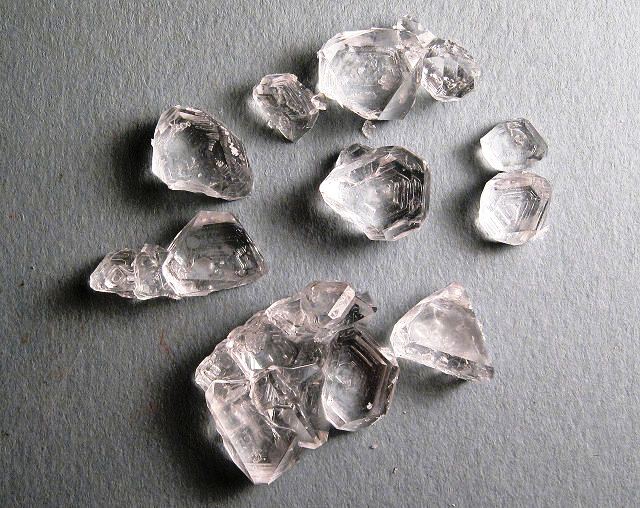
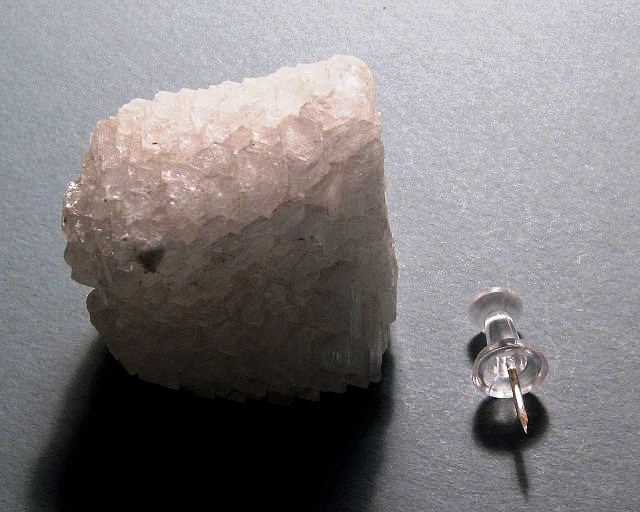
Select crystals of the correct shape and large size and place them on a paper towel.
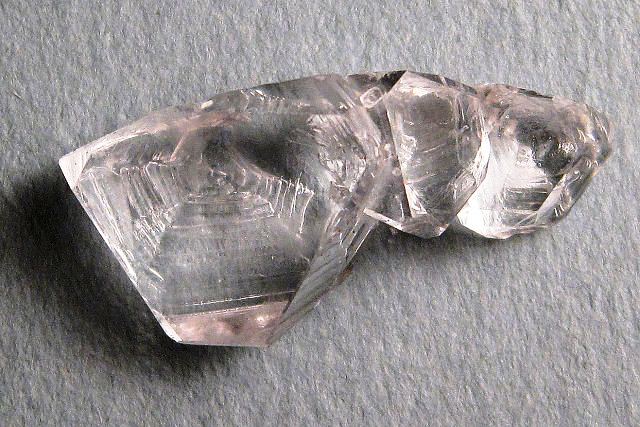
This is how we grew one large irregularly shaped crystal. If you don't want to grow such an awkward crystal, cut off a large part of it.
A separated part of a crystal. We will continue to grow it.

Tie the crystal to the thread.

It is very convenient to use an ice cream stick; it will not slip or fall, unlike a wooden pencil.
Place the crystal in alum solution, it is prepared in the same way, only the ingredients can be halved (a glass of water, 3 tablespoons of alum)
After a week, our crystal grew significantly.

The crystal has the shape of an octahedron. Remember, a crystal does not change shape as it grows, whatever shape you choose for the seed crystal is how it will continue to grow.

The structure of salt crystals is cubic, so all crystals have the shape of cubes, unlike alum crystals, which can have various shapes.

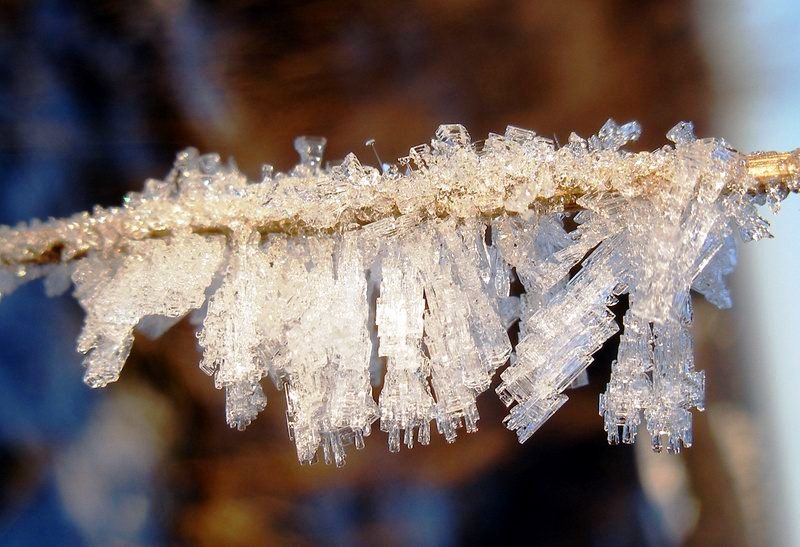
The photo shows how salt crystals gradually grow.
Depending on the saturation of the solution, crystals can grow more intensely or more slowly.
This crystal is about 2 weeks old.

And this crystal grew for at least 3 weeks.
If you want to conduct an interesting experiment with your child, choose bright materials and a rich solution, so the crystal will be more visible and interesting to the baby.
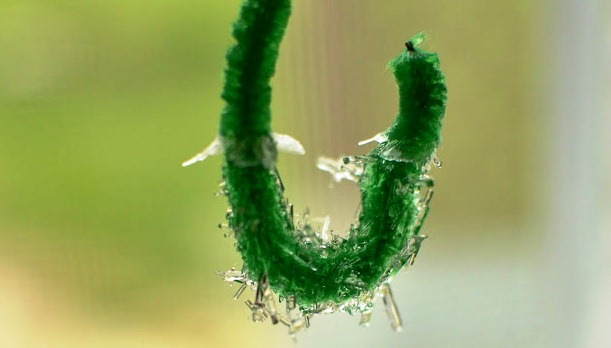
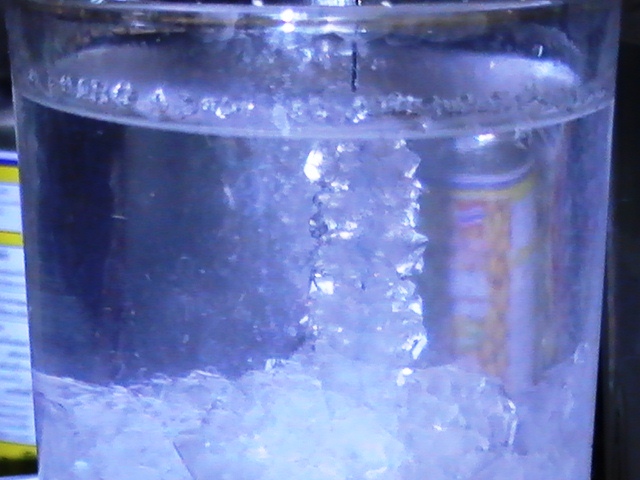
This kind of crystal can be grown on a cord or fluffy Christmas tree tinsel.

Make a solution and place a string in it.

After a week, natural processes will do their job and transparent “icicles” will appear on the string.
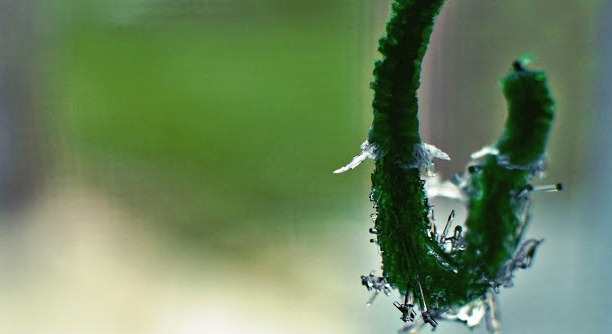
The salt grows in regular cubes or parallelepipeds.
![]()

Salt crystals at home
Salt crystals at home
Salt crystals at home
Salt crystals at home

Salt crystals at home

Salt crystals at home

Salt crystals at home

Salt crystals at home
Salt crystals at home
Salt crystals at home

Salt crystals at home
For the most avid alchemists, salt and sugar are not enough. In addition, they are interested in, for example, how to grow copper sulfate crystal. But the technique given below is suitable for growing absolutely all types of crystals.
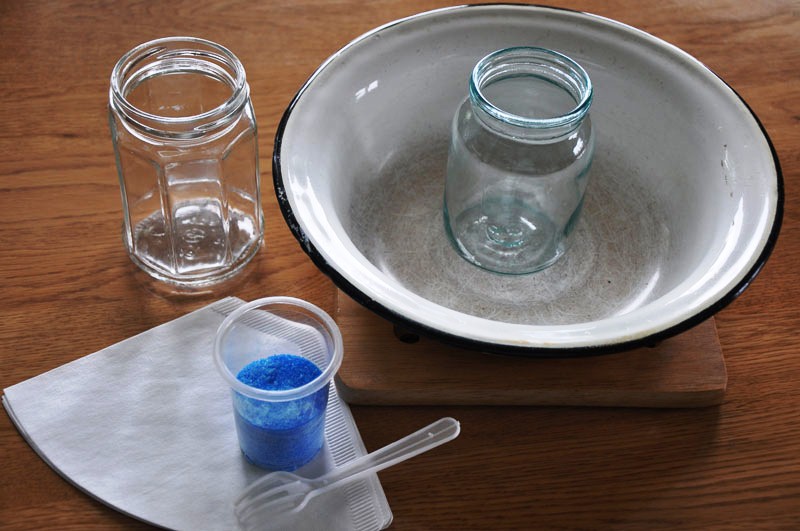
To grow a sufficiently large crystal from an aqueous solution of copper sulfate, you will need:
- glass or plastic container of any size, but preferably transparent and colorless, so that you can easily observe the growth of crystals in it. The plastic version is convenient because crystals do not grow to it. If the jar is larger, this will allow the crystal to grow much larger. But it is also important to take into account that the larger the jar, the larger the amount of solution will have to be prepared and the larger portion of the reagent will be required;
- copper sulfate or copper sulfate, which can be bought not only at a chemical store, but also at a gardening store. Although it will not be clean enough, this is not so important. Before you buy salt, you need to consider the substance. To do this, the package contains a small strip of transparent polyethylene, through which the bright blue powder should be visible. If there are large lumps, especially green ones, it is better to refuse to purchase, because such vitriol was probably stored at high humidity and is oversaturated a huge amount impurities. You will have to suffer with it when growing crystals, and therefore it is better to contact another similar store.

Growing crystals from copper sulfate is perhaps the most popular. They are beautiful in shape and grow quite quickly.

Copper sulfate is used in gardening and agriculture as a means to combat fungus and mold. Copper sulfate is quite toxic, so in experiments it is recommended to use disposable or non-food-grade containers and wash your hands thoroughly.
For the experiment we need 100 grams. copper sulfate per 100 ml of water. Stock up on 300 ml of water and 300 g. vitriol accordingly.
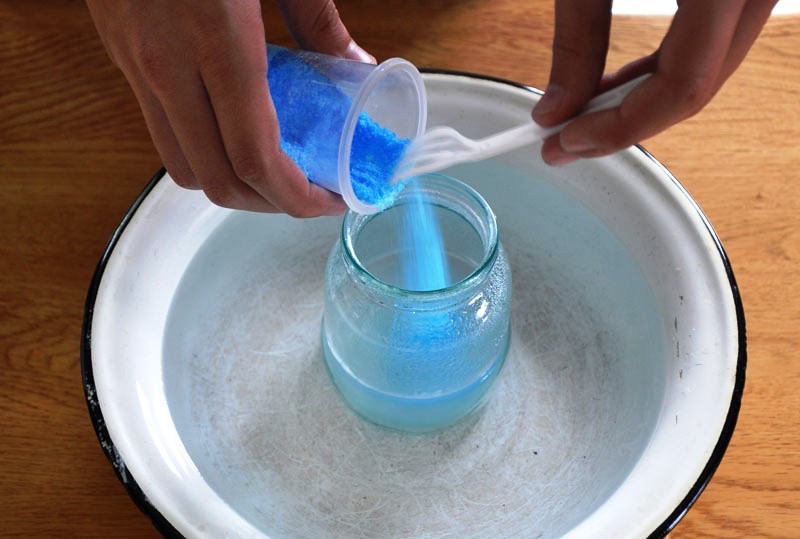
Place the jar in a water bath and pour into it hot water, dissolve 100 g in water. vitriol.

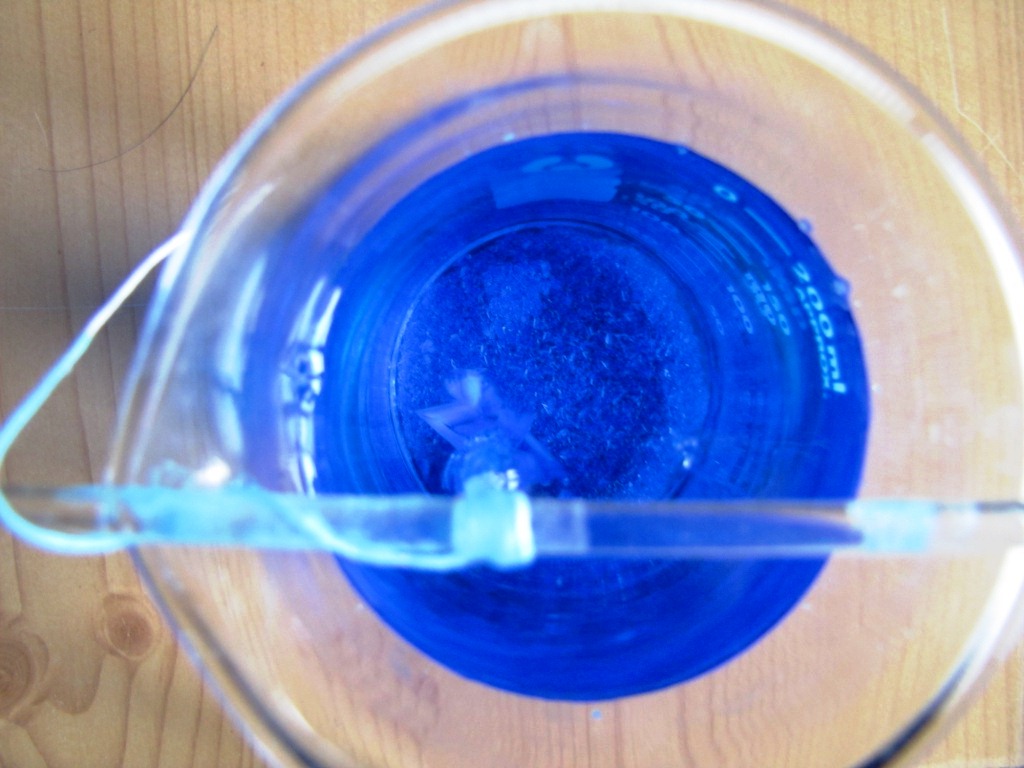
Pour after 10 minutes. vitriol from the first jar to the second. After a while, check the bottom of the jar, seed crystals should form there.

Try to choose crystals of the correct shape, 1-2 mm long. Dry them on a paper towel, try not to touch them with your hands, use tweezers.
Prepare 200-300 ml of solution and, tying the seed crystal with a thread, place it in the solution.
Having prepared in this way, nothing remains, how to grow a crystal from vitriol. So, take a container and pour copper sulfate into it. You don’t need to pour a lot, 100 grams will do for a start. Salt is poured in hot water(preferably, of course, distilled, but not necessary). Then you can use two ways. First, a seed is taken, that is, a small crystal. The more there are, the more crystals will come out. A little water is poured, and the solution is constantly stirred. It should become so saturated that the grains of salt at the bottom cannot dissolve. The solution is filtered while still hot and placed in a cool place, but not covered with a lid. On the second day, the bottom of the container is covered with a bunch of small crystals. You need to select a couple of them that are the smoothest and largest. You can choose according to your taste - those that you liked the most. The solution for crystals can be prepared in the same way, but add a little more water, cool, and then filter thoroughly.

Copper sulfate is a poisonous compound, however, it can be purchased at any garden store.
There are two ways to obtain crystals from vitriol: cooling and evaporation, but most experimenters still prefer evaporation.

It takes 4-6 hours to grow a copper crystal.

It should be noted that after a few hours the crystal will lose its shine as the water evaporates from it. To prevent this, coat the crystal with varnish. This way, it will not only remain shiny for a long time, but will also become non-toxic and can be handled without fear.

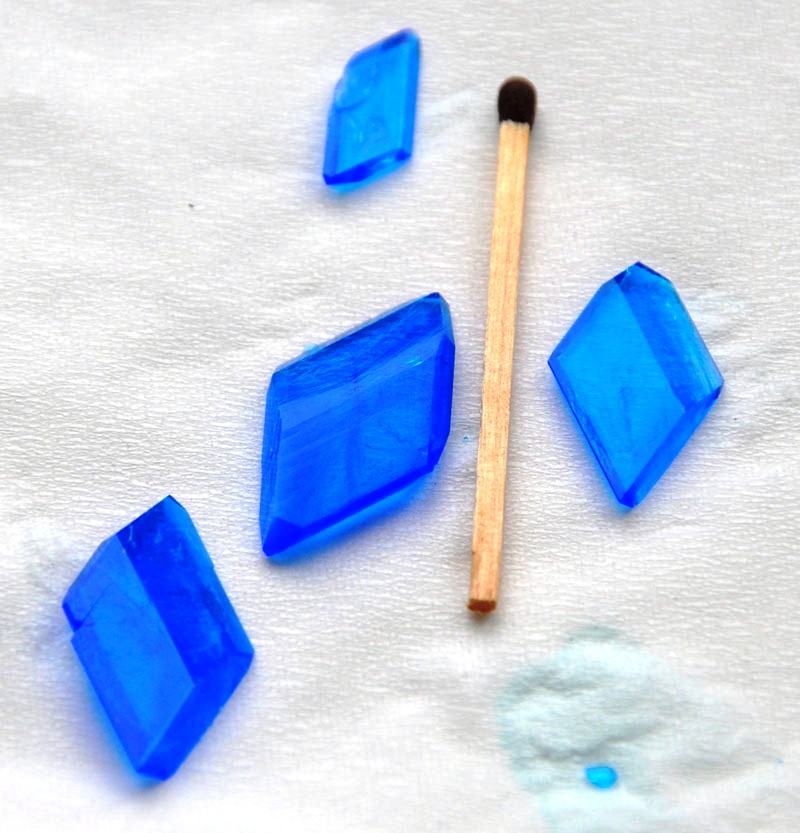
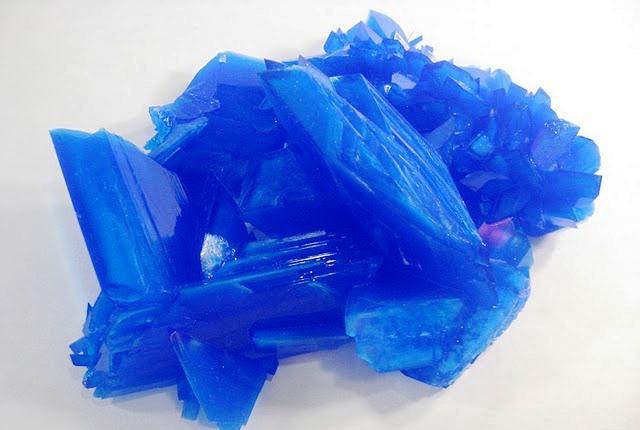
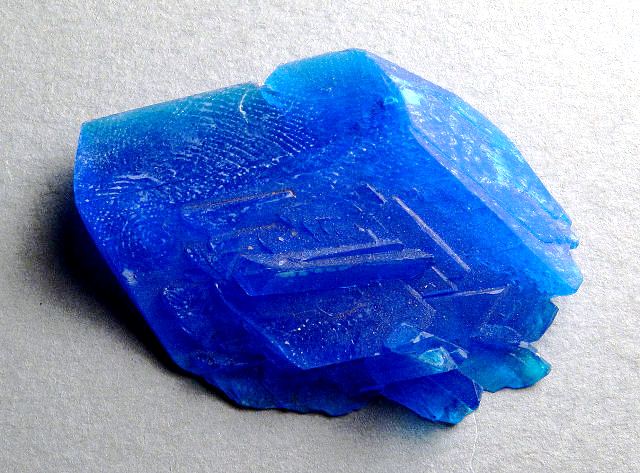
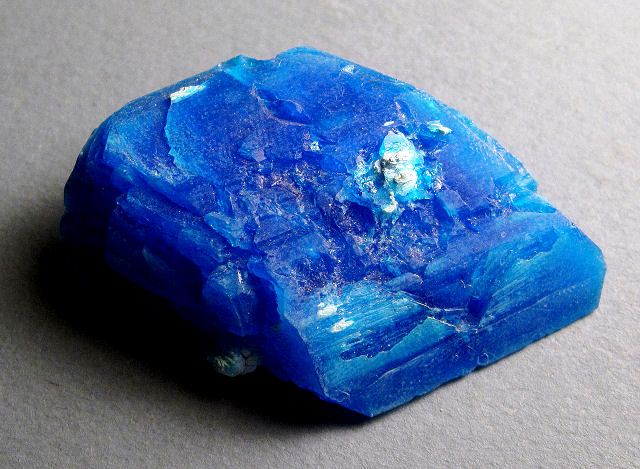
These wonderful crystals are the mineral chalcanthite. It is formed from copper sulfate naturally in nature.
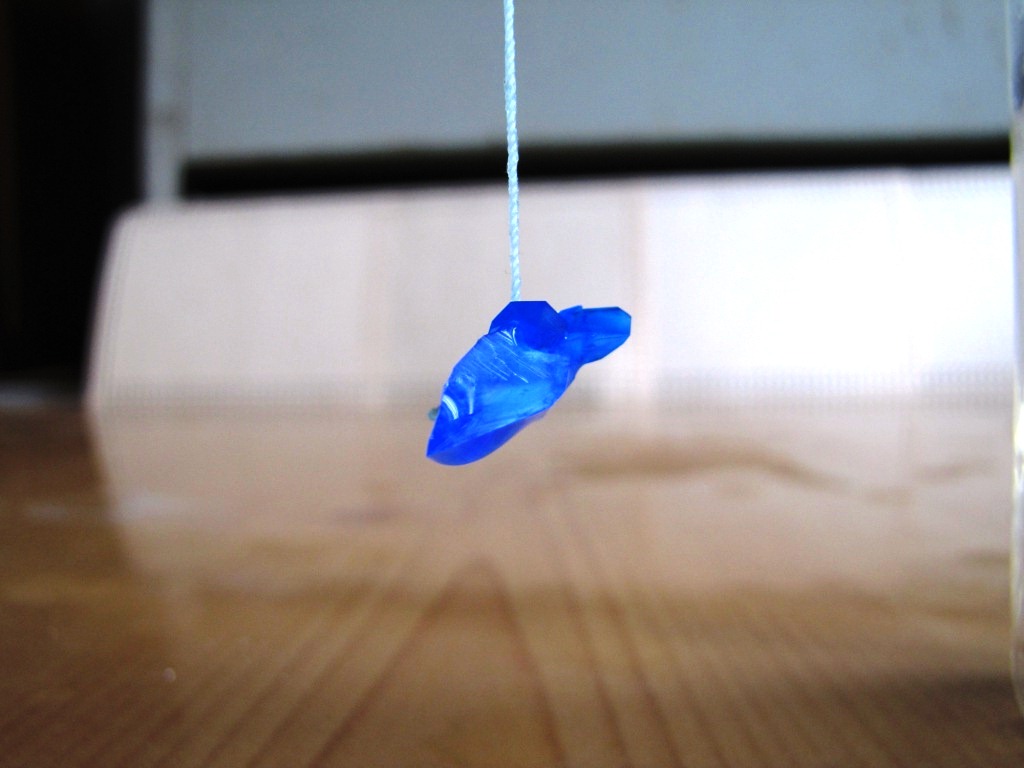
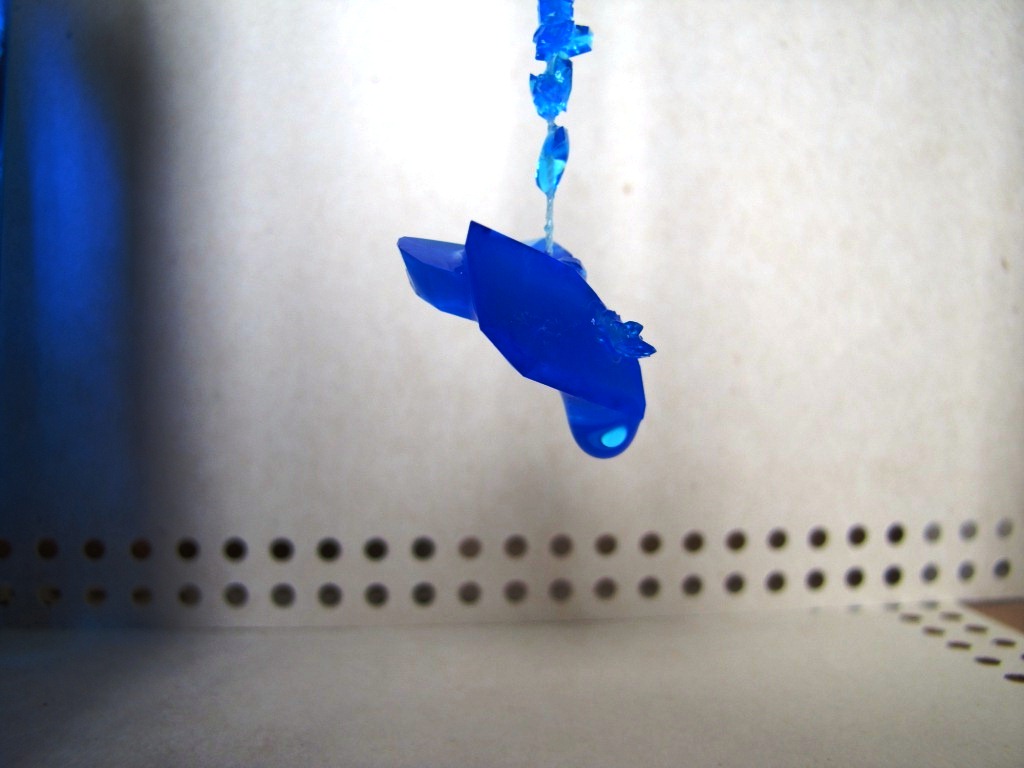
When the solution and seed are ready, you need to rinse the seed under running water, but you don’t need to touch it with your hands, since copper sulfate is still a chemical substance, and fingerprints may remain on the seed, causing the crystal to begin to take on an irregular shape. Then the seed is carefully placed in a container with a filtered and cooled solution. It can be placed on the bottom, as a result of which the crystal will grow only in width and length. The best option will hang the seed on the fishing line: when using a thread, many small crystals can grow on it, but this will not happen on the fishing line. The second end of the fishing line is tied to a pencil or other similar long object, and then the crystal is placed in the solution. The length of the fishing line must be adjusted so that the seed hangs on it in the middle of the solution itself. So the crystal should grow evenly in all directions. The container is placed in a place with constant temperature and covered with a sheet of paper. And not cardboard, under which even small crystals will grow for several months, but under thin paper only for several weeks. Once a week, the solution should be filtered to remove precipitated crystals. This will produce beautiful bluish-blue crystals with parallelogram-shaped edges. When their size is suitable for you, they need to be pulled out, rinsed in a running cold water, wipe with a napkin and cover with several layers of colorless varnish, and nail polish will also work. Such a crystal can be easily picked up and moistened with water, which will not harm it in any way, because the varnish will completely protect the fragile substance. But this should not make you handle them less carefully, so as not to accidentally destroy their beauty. Do you also want to become a magician and try to grow such a wonderful crystal with your own hands? Then don’t waste time, because you will need it to create an ordinary miracle!

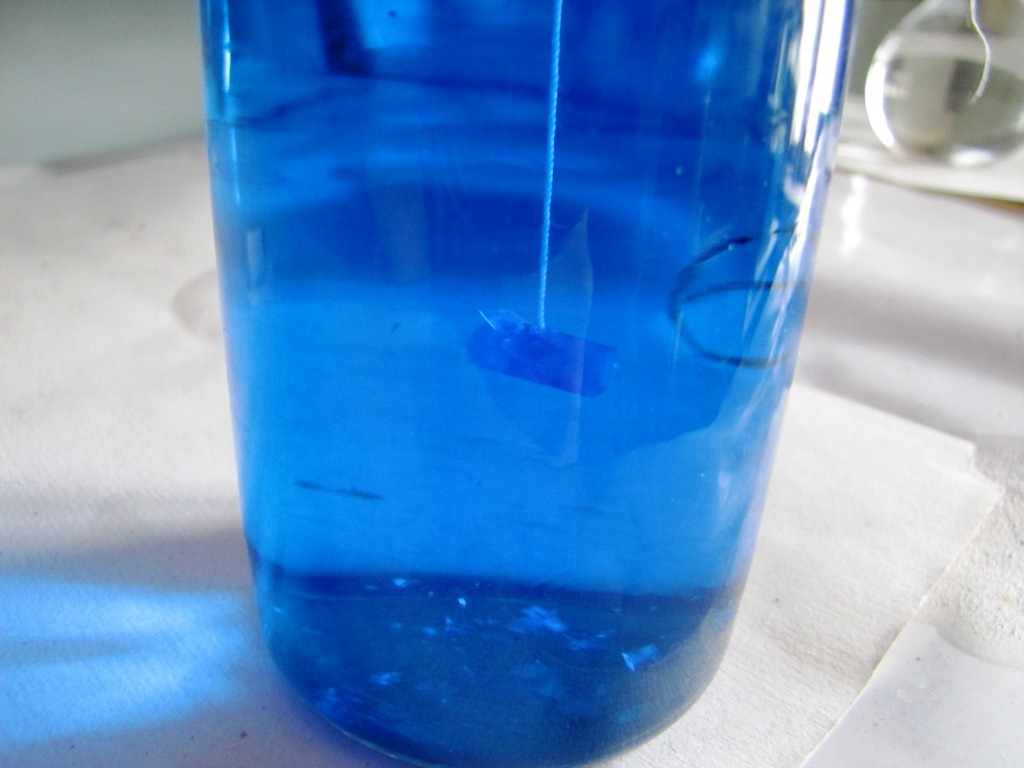
This is what the growth of a copper sulfate crystal looks like. The first day.
And so the crystal grew within a week. Eighth day.
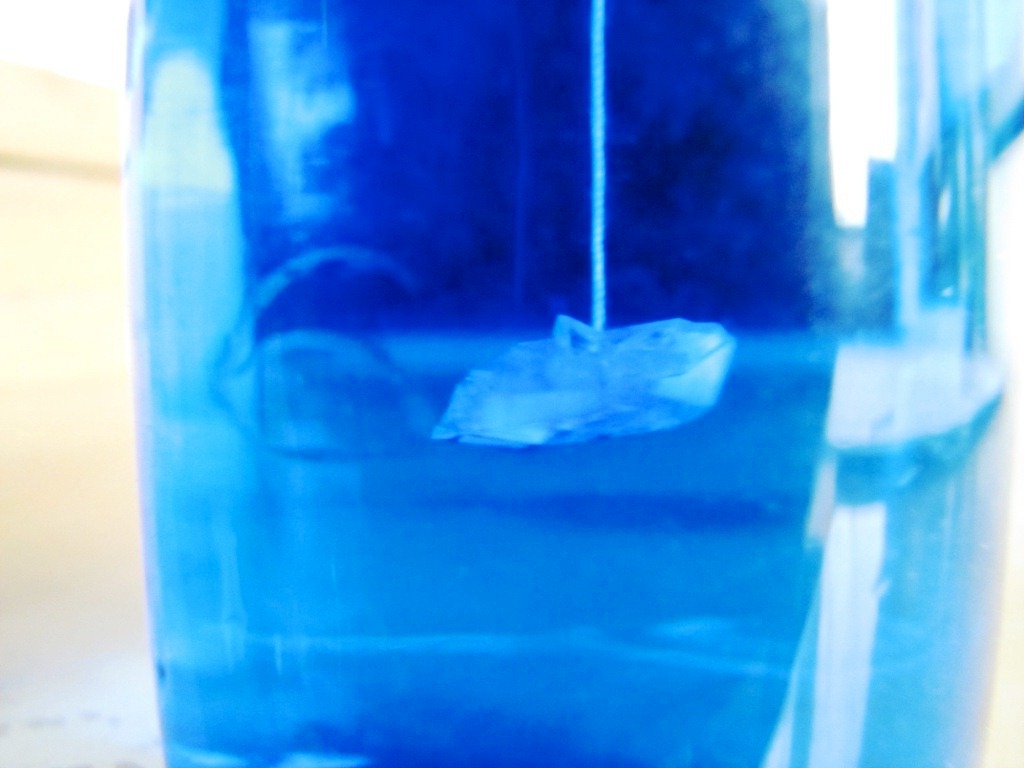
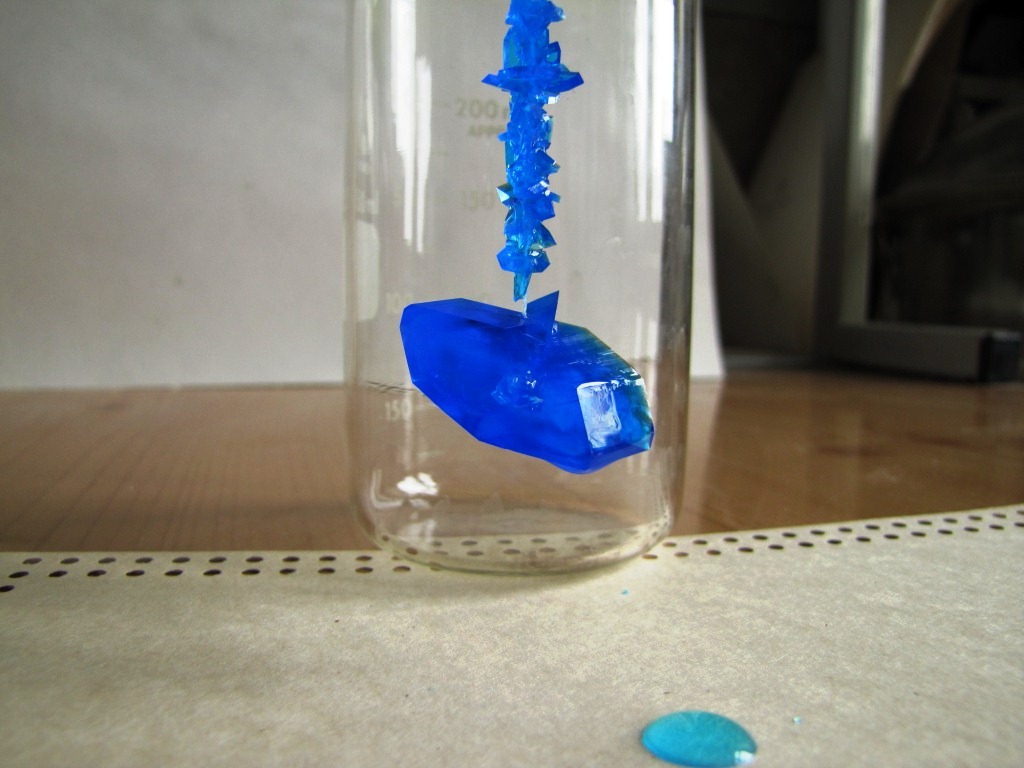
The longer a crystal grows, the larger it becomes.
In eight days, the crystal manages to grow 2 cm.
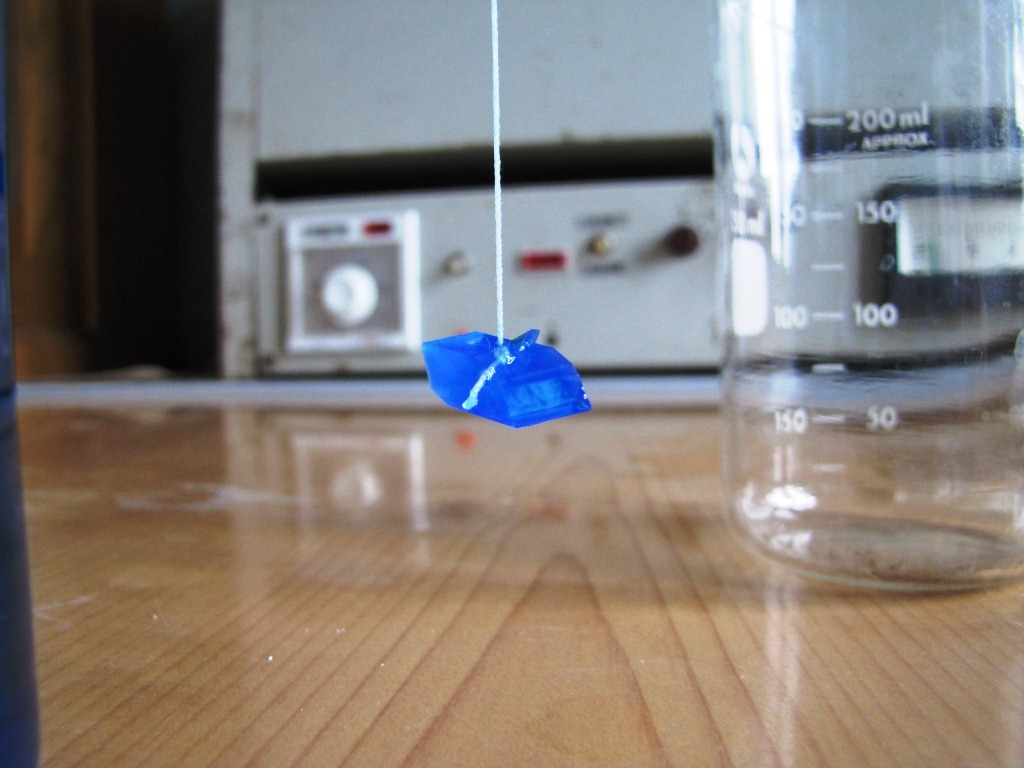
A deep blue color is a sign of a good crystal.

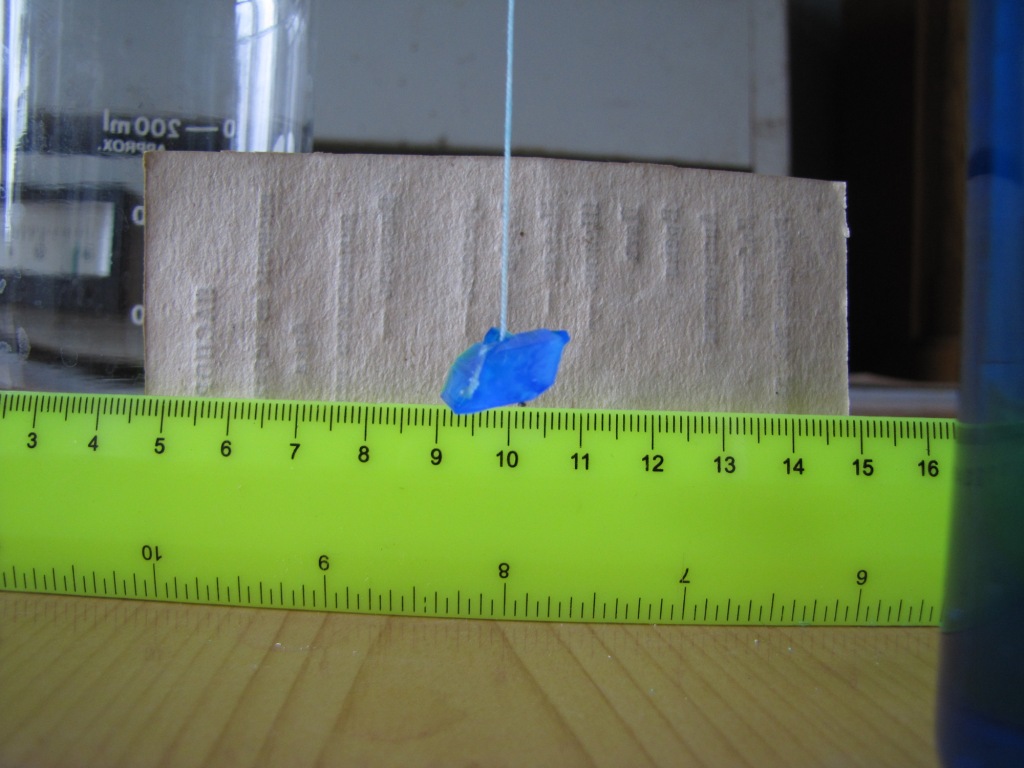
This is what the crystal looks like on the 11th day of growth.

Change the solution often, and do not forget to filter it.

12th day of growth.
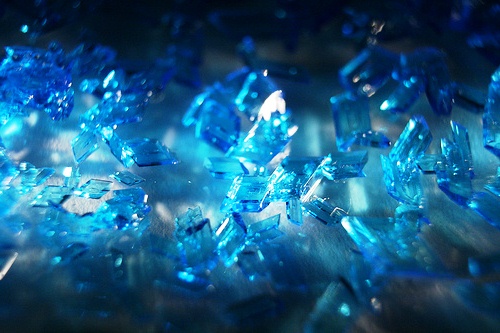
In copper sulfate, crystals grow in different shapes, but most often they are tracklin.
If you choose the evaporation process, then get ready that the crystal will grow for a long time - at least 14 days; during the cooling process it grows faster - only 24 hours, but it can be irregular and even unpredictable in shape.

When conducting the experiment, do not use iron objects, as the vitriol reacts with iron.

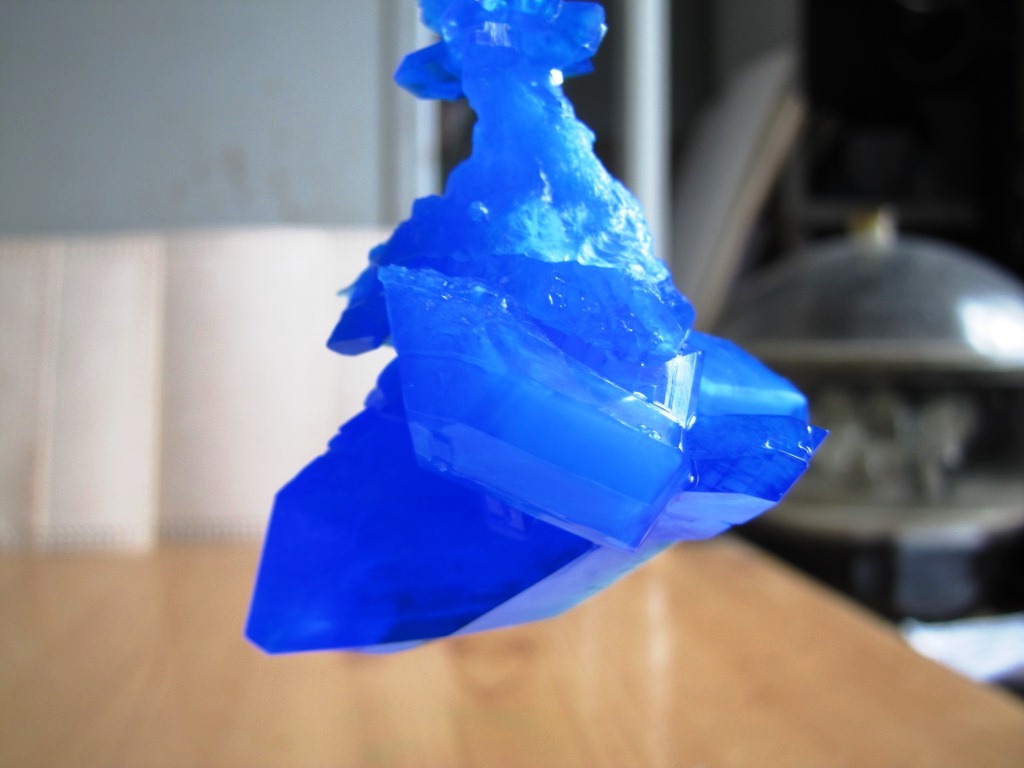
This crystal is already 22 days old.

You can even grow crystals for a month.
Growing a crystal is a painstaking task, but the result is worth it.

Conduct experiments with children, but be careful with copper sulfate, it is toxic.

This crystal is 42 days old.

A month and a half is not a long time, you can continue to grow until you get tired of it.
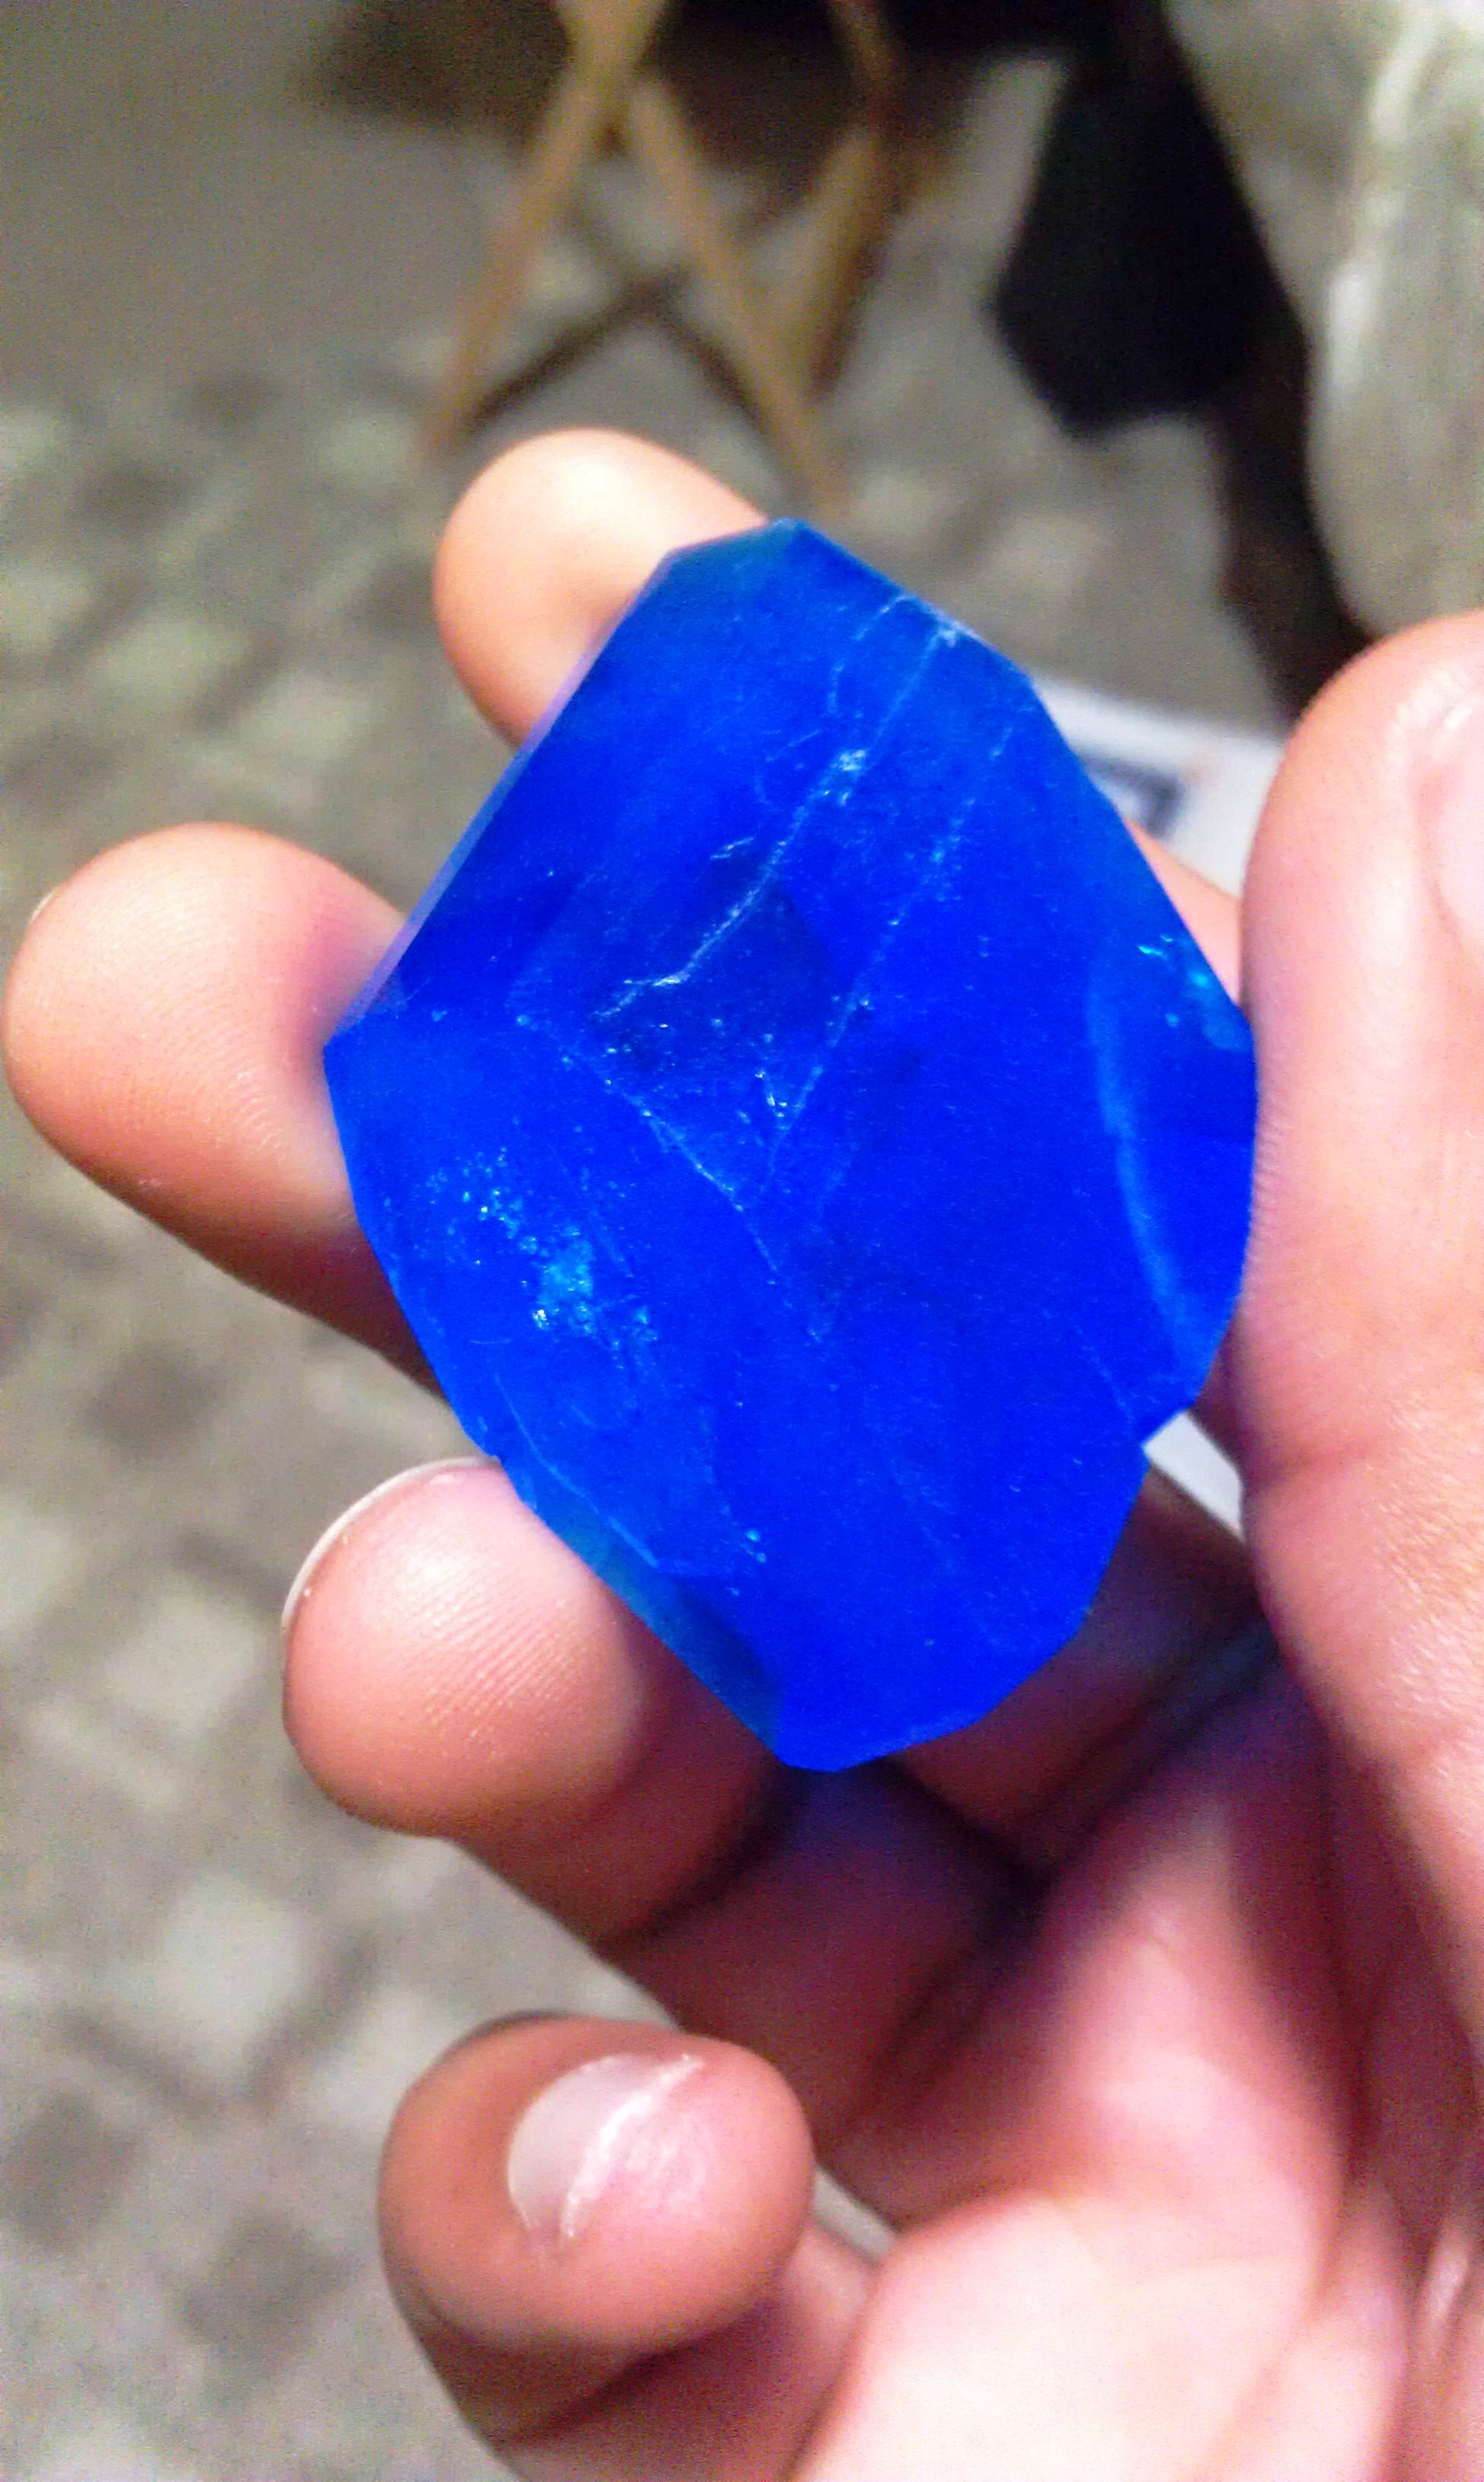
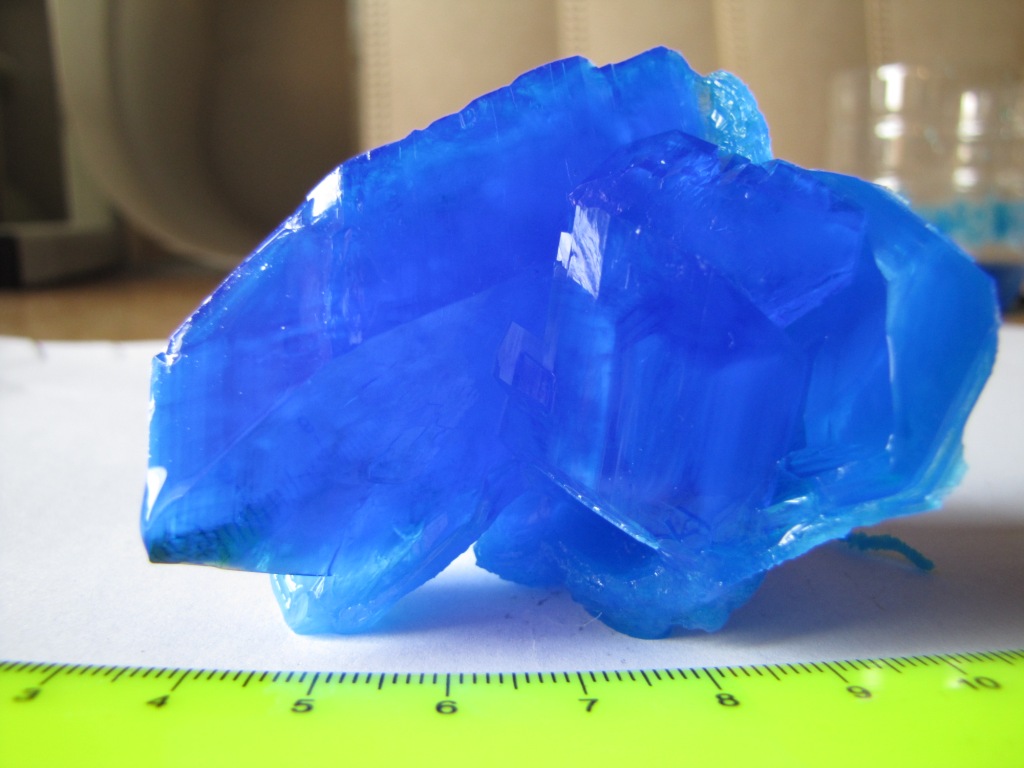
This crystal is 52 days old.

After the crystal has grown, it must be varnished, otherwise it will lose its shine. In 52 days our crystal grew 10 cm!

![]()


This video explains how to grow a crystal from ordinary salt.
This video explains how to grow a crystal from copper sulfate.


