When is the best time to root rose cuttings? How to propagate roses at home in the fall
Instructions
It is better to propagate those species that then grow and bloom beautifully without requiring grafting. These are roses: climbing; floribunda; Polyanthaceae; hybrid-polyantha.
Greenhouse varieties also reproduce well. Therefore, if you were presented with a beautiful bouquet and you want to have such flowers on your site, then root such cuttings. They are herbaceous (green, non-woody). This planting material is preferable for propagating roses.
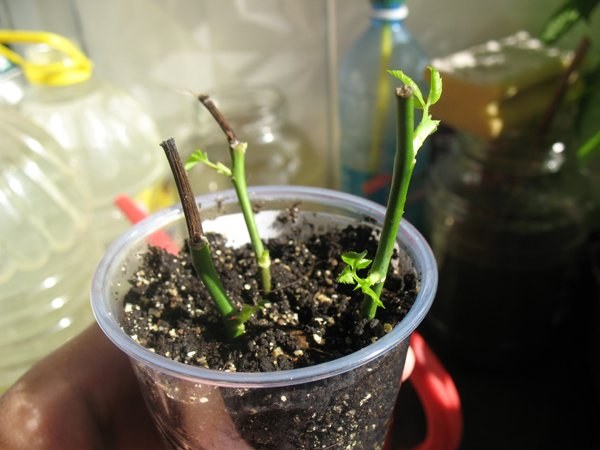
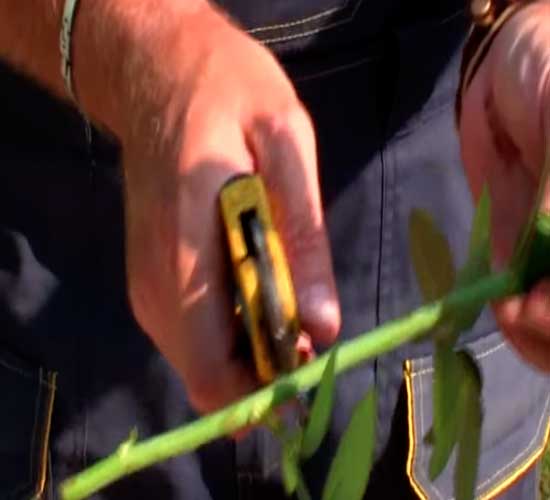
After a bud appears on the shoot you like, take a pruner and cut off a part of the branch 5-8 cm long. The cutting is taken from the middle part of the branch. It should have 2-3 buds.
The lower cut is made at an angle of 45 degrees, and the upper cut is made at 90 degrees. Remove the lower leaves to reduce moisture evaporation. Now you need to place the cuttings in a nutrient solution of heteroauxin (root) for a day, lowering the lower part into it by 4-5 cm. The temperature of the solution should be slightly warm (28-32 ° C).

Further rooting also occurs in water. It is poured into a jar, into which the lower parts of the shoots are lowered for 2-3 weeks. The container should not be in the sun, partial shade will do. Every day or every other day you need to carefully pour out the old water and pour in new water.
When the rudiments of future roots appear at the ends of the cuttings in the form of a light ball, you need to wait another week for the roots to appear. Then you need to put the planting material into the ground.
The cuttings are planted on the plot or at home in pots to a depth of 1.5-2 cm. The soil mixture must be light and nutritious. A little growth stimulator is added to the hole. It is poured with warm water
Roses are planted obliquely, under an injection of 30°C from ground level. Put on top plastic bottle, volume 1.5-2 liters. To do this, cut off the bottom and a little from the side so that it rests well on the ground and tightly covers the cutting.
If the bottle is rectangular, 5-liter, then the cutting is planted directly in the soil and only the bottom is cut off from the container. When the weather is warm, the cork is removed from the bottle. On cool days and at night it is not removed.
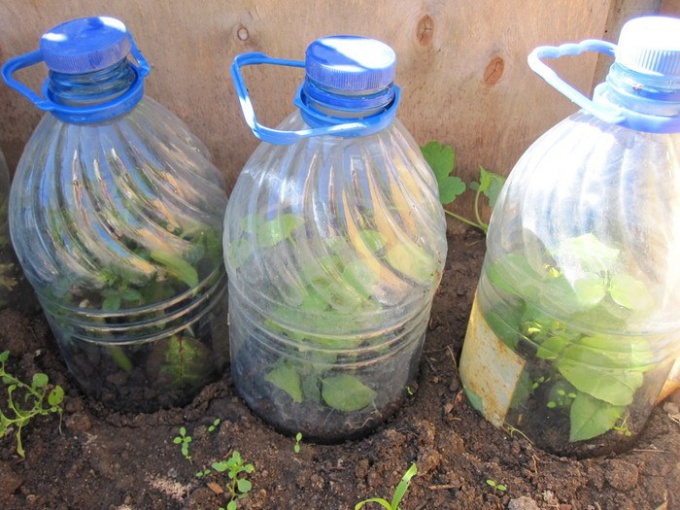
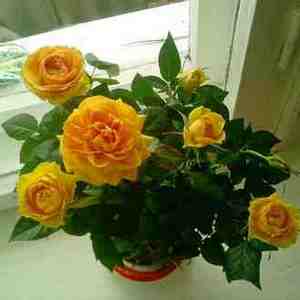
When the cuttings take root and young leaves begin to grow from the buds, the cover is carefully removed. This is how rose cuttings are rooted.
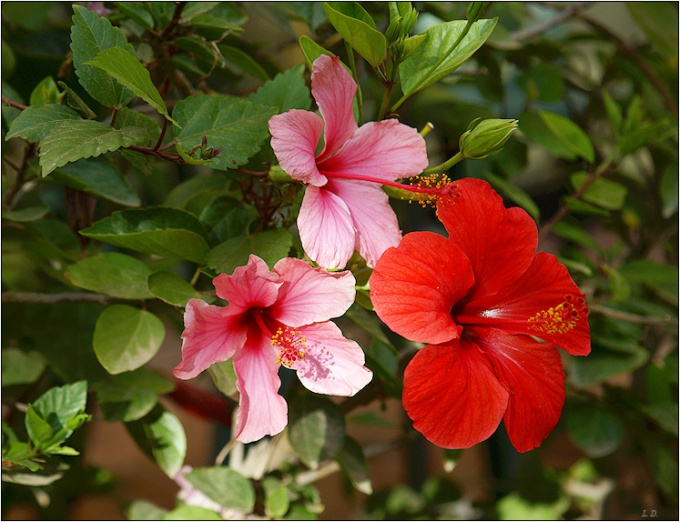
Chinese rose or Hibiscus is a plant of the mallow family, uniting 250 species, which came to us from tropical Asia. In Hawaii it is called the “flower of love” and local beauties often decorate their hair with it. The flower appeared in Europe about 200 years ago, immediately winning the sympathy of flower growers.
Instructions
The Chinese rose does not require complex care, it loves light (not direct rays) and moisture, propagate the Chinese rose can be done in three ways: Propagation by cuttings 10-15 cm long: At the end of summer, cut the rose cuttings. The cut must be made at an angle. Leave 2-3 leaves on the cuttings and plant them in pots with prepared soil - a mixture of peat and deciduous soil and sand, taken in equal parts. Cover the cuttings with jars. Flowers will take root in 2 weeks. This way to propagate Chinese rose can be used in another way.
Cut a few young rose shoots and place them in water. After waiting 2-3 weeks for the cuttings to take root, feel free to plant them in pots. Plants planted using this method grow slightly worse than in the first option.
Propagation by air layering: This method is good because it can be used to propagate not small cuttings, but large, woody branches. Having chosen a place on the branch for future roots, cut off all the shoots near it. Using a sharp knife, remove the bark from the branch in the shape of a ring about 1 cm wide. Coat the cut with growth powder. Below the cleaned area, tape a large piece of transparent film to the branch. To do this, you can use adhesive tape or tape. Pour soil into the film and moisten it well with water. Also wrap the upper edge of the film to the branch above the cut so that it is in the ground. Constantly check that the soil in the bag is moist. When the clump has grown well with roots, and this will take about 2 months, carefully cut it just below the roots and plant it in a large pot, water well.
Plant rhizomes of perennial vegetables such as horseradish and rhubarb. To do this, in the fall or early spring, dig up the mother bush and carefully remove part of the rhizome with dormant buds using a sharp pruner. Plant the plants on abundantly watered soil fertilized with organic matter and mineral fertilizers. It is most convenient to propagate sorrel, chives and other similar perennial plants by removing part of the “plot”. Dig up several specimens that thicken the plantings and transplant them to another bed. Pre-disconnect if necessary. Ground cover perennial flower beds and flowers are propagated in the same way.
Cut a few branches of black or red currants. Cut off the top and bottom parts so that cuttings with 5-7 buds remain. Place them in water in which you dissolve 1 tsp. "Ideal". When the cuttings take root, they can be planted in a “school” for growing. In the fall of next year, the seedlings will be ready to be transplanted to a permanent location. Another way to propagate bush plants is by digging. Bend 3-4 lower branches, pin each one individually to the ground with a wooden fork, sprinkle with compost soil, water lightly as needed cold water. At the end of the season (during spring digging) or at next year(if you dug in in the fall) the branches will grow independent roots. They can be cut with pruning shears, dug up and transplanted to a permanent place.
If you are just planning to organize a rose garden on your site, then you need to know some rules. And today I will talk about propagation, planting and growing roses from cuttings in spring, summer and autumn at home. This method is the most common and easy to implement, but it is not popular with experienced rose growers.
The thing is that growing roses from cuttings at home has a number of disadvantages:
- When growing roses in this way, their root system forms very slowly. A complete root system is formed in 3 years.
- In roses that are grown by cuttings, the root system is very poorly developed, which is why self-rooted roses do not like transplanting.
But this method also has its advantages. Such roses do not produce wild shoots and have a neat and attractive bush shape.
Propagation of roses by green cuttings at home in summer
Planting roses from cuttings is carried out mainly in the summer. Best time for cuttings this is mid-June to the end of July. If you have a greenhouse and you are going to grow a lot of roses, then you can plant roses from cuttings in the spring in March - April.
Preparing rose cuttings for planting
Cuttings are prepared from annual, semi-woody shoots that have already flowered. Cut off the middle part of the shoot, 4–6 mm thick. up to 25 cm in length. Each cut cutting should have at least two (but no more than three) leaves. Above the top leaf, the cutting is cut 5 mm, and from the bottom bud the cut should be 2 - 3 cm.
When making cuts along the edges of the cutting, try to keep the cuts even and smooth. If the cuts turn out torn or damaged, this will subsequently lead to rotting of the cuttings. The leaves of the cuttings are cut in half. This is done so that during rooting excess moisture does not escape from the leaves of the cuttings.
To increase the chances of survival of cuttings, they can be kept in a solution that stimulates the formation of roots. The shoots are immersed in the solution with the lower cut and left for 12 hours in a cool place. After the cuttings have been treated with stimulants, they are washed in running water.
Do not allow the solution to come into contact with the leaves, as this may harm them.
How to plant rose cuttings in the ground
If you are planting rose cuttings in open ground, then try to choose a shaded place where the likelihood of direct sunlight is minimized. The thing is that under direct sunlight the leaves of the cuttings may fall off. And if there are no leaves, then the cuttings will not take root. 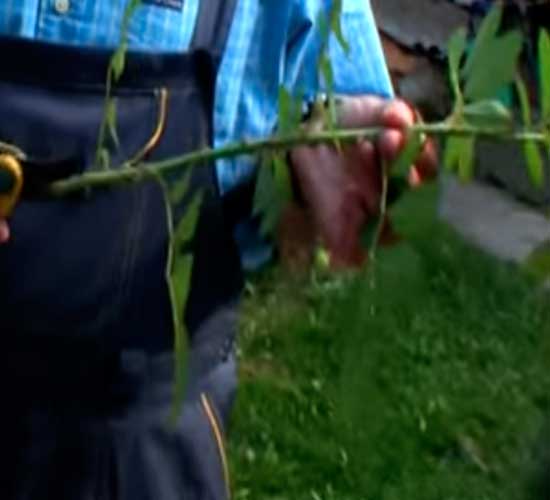
The cuttings are planted in damp sand, which is first disinfected with a solution of potassium permanganate. Deepen the shoots into the sand to a depth of 1.5 - 2 cm. Plant the cuttings at such a distance that their leaves do not touch each other and do not shade each other. After planting, the cuttings are covered with glass jars, or a small greenhouse is built over them.
For normal rooting, it is important to provide the shoots with increased humidity. To do this, spraying is carried out several times a day. This is a tedious task, so you can purchase a special rain installation if you have such an opportunity.
Check cuttings regularly and remove any that are rotten.
The appearance of the first roots occurs after about 2 weeks and during this period you can begin hardening the cuttings. Every day, open the greenhouse slightly for a few minutes, increasing the time every day. The shelter can be completely removed approximately 2 weeks after the start of hardening.
For better development, rooted cuttings are fed every two weeks with nitrogen fertilizers.
Cuttings rooted in summer do not have time to ripen before the onset of frost, therefore, they need good shelter. Such cuttings can be placed in the basement in an inclined state for the winter and buried with damp sand.
How to grow a rose from a stem cutting
This is the most common and most affordable way propagation of not only roses, but also any plants. Roses can be propagated in this way in spring and summer. You can take shoots as planting material:
- The green part of the plant (herbaceous);
- Semi-lignified;
- Part of a fully woody, mature shoot.
The process is completely similar to the previous one, with the only difference being that the cuttings are cut from the side branches. Green cuttings are cut from one-year-old shoots at an angle of 45C. Under the lower bud, a cut is made at 1.5 - 3 cm, and the upper cut is made at 2 - 3 mm. over the kidney. Choose cuttings with healthy and undamaged buds.
Green cuttings are cut into lengths of 7–15 cm (look at the size of the mother bush). If you take cuttings that are too long, they will not take root well and will hurt for a long time. The lower leaves of the cuttings are completely removed, and the upper ones are cut in half.
Semi-lignified cuttings are cut from lateral, non-flowering shoots. The cuttings are cut to 10 -15 cm in length. The lower leaves are removed completely.
Cut cuttings are treated in a growth stimulator. Instead of a growth stimulant, you can take aloe juice. In order for aloe juice to have maximum amount useful substances, stop watering it 2 weeks before cutting the leaves. The cut leaves are placed in the refrigerator for two weeks and only after that the juice is squeezed out of it, into which the cuttings are immersed for 12 hours. 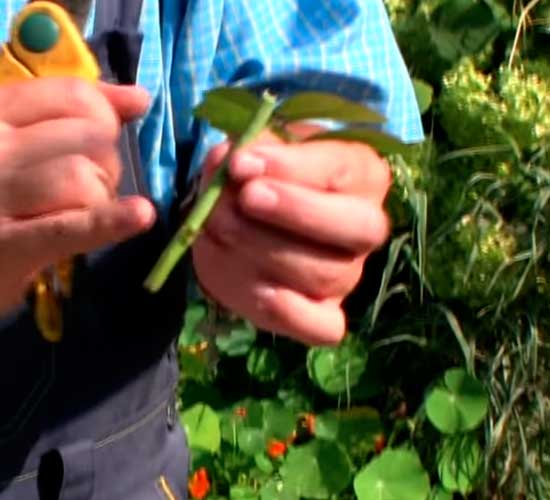
Before planting the cuttings, you need to prepare a pot with soil. A layer of drainage is poured onto the bottom of the pot, which is covered with 5–7 cm of soil, and a layer of wet sand is placed on top. Using a pencil, make a hole in the sand and place the cutting in it. Green cuttings are deepened to a depth of 1 cm, and semi-lignified ones to a depth of two cm.
You should not plant cuttings deeply, as this can lead to rotting. After the cutting is planted, press the soil around it with your fingers (or using a pencil) to prevent the formation of air pockets. The cutting is placed in the ground at an angle. Then, watering is carried out.
For rooting to be successful, it is important to ensure soil and air moisture. If the humidity is insufficient, the cuttings will die. Humidity can be maintained by covering the cutting with a glass (or plastic) container. You can cover the pot with rose cuttings with a plastic bag. If you cover the shoots with a bag, then you need to stick sticks (or pencils) along the edges of the pot and pull the bag over them. The bag is secured to the pot with an elastic band. 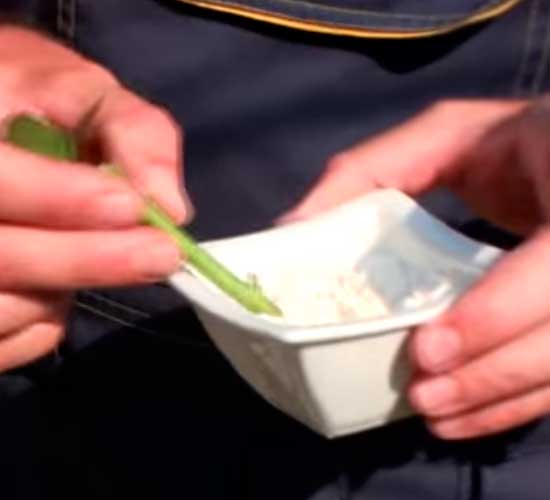
Pots with rose cuttings are placed in partial shade, or in a bright place, but it is important that they are not exposed to direct sunlight. The shoots are sprayed daily. If you covered the cuttings with a jar, then you need to wipe off droplets of water from it twice a day. As for the plastic bag, you can turn it over every day.
When the cuttings take root, they need to be hardened off. To do this, remove the shelter for a few minutes every day, increasing the time every day. After a couple of weeks, the cover can be completely removed.
Well, that’s all I wanted to tell you about propagating, planting and growing roses from cuttings. At the very beginning, I mentioned to you that experienced flower growers rarely use this method, but for beginners it is great way breeding roses In the following articles I will talk about how to graft a rose and whether it is possible to grow roses from seeds.
I hope this article was useful to you and you got answers to your questions. It would be nice to hear about your experience, so I look forward to your comments.
Roses known to mankind for thousands of years. And although lately they are sometimes considered banal, no one will deny their beauty. Scientists have developed an incredible number of species and varieties of roses, but they are not even going to stop.
Almost in every garden there is at least one bush of these wonderful flowers. Roses are also perfectly adapted to home conditions.
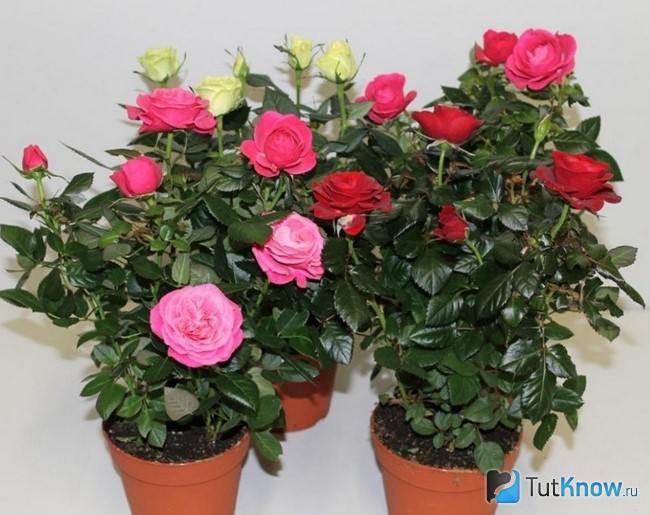
Varieties of indoor roses
The most popular varieties.
Bengal red. This variety is the most common. Bengal rose is unpretentious and blooms profusely. The only drawback is the lack of smell. Feels great at temperatures below 25 degrees. There is no need to trim it. The exception is diseased or dead branches.
Polyantha roses. They have a pleasant smell and are not fussy. Polyantha roses belong to the following varieties:
Care
Indoor roses are far from the most whimsical plants in the world. However, for them to bloom profusely, careful and skillful care is required.
It's important to know that roses, grafted on rose hips are very difficult to grow. Therefore, it is better to give preference to roses that were grown from cuttings.
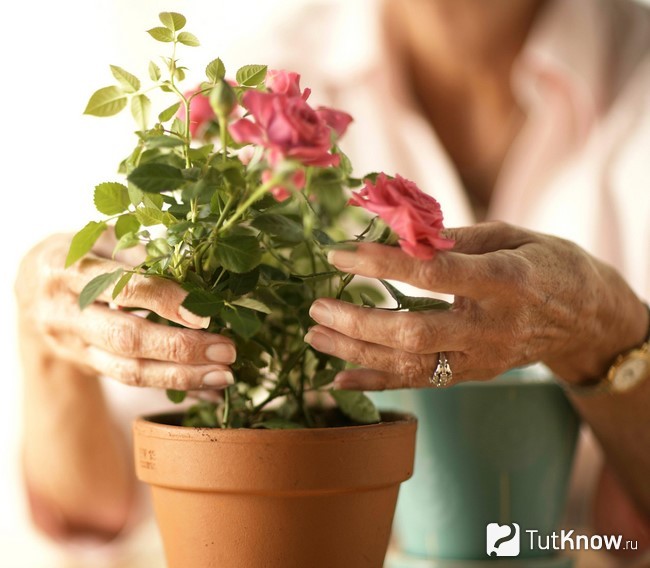
What to do after purchase? Just now brought home The rose bush should not be immediately transplanted into a new pot. It is advisable to place the plant on an east or southeast window. Let the rose get used to the new conditions.
Watering
Roses love abundant watering, especially during the active growing season. The water should be warm and stand for at least a day.
Absolutely It wouldn’t hurt to spray with cold boiled water or a solution with special fertilizers. However, you should not do this too often, even in hot weather.
Temperature
Roses They feel comfortable at temperatures from 10 to 25. But they are very afraid of overheating. Therefore, the plant should be placed on a western or eastern window, where the influence of the sun is usually not so strong.
The soil
Roses need nutrient soil:
- turf land (4 parts),
- humus soil (4 parts),
- sand (1 part).
You will also need complex fertilizer in the form of granules.
Sold in stores ready-made soils for indoor roses.
Pot
New pot must be larger than the container in which the rose was brought home. The difference in diameter is from 2 to 4 cm, in height – from 5 to 7 cm. The pot should not be too large.
Overhead height parts of the plant should be equal to the height of the pot. A ceramic or new pot (just bought) should be left in warm water for a couple of hours before planting.
The old pot should be washed using a stiff brush, but without detergents.
Like most plants, roses, require good drainage. This can be achieved using expanded clay. For a pot with a drain hole, the drainage layer should be 1 cm. For a pot without a drain - 3 cm.
Transfer
Transplant The rose is needed at a time when the moon enters its growth phase. This must be done carefully - make sure that the root ball does not collapse.
Directly Before transplanting a rose from a store container, you need to water it generously and then let the water soak in. This will take about a third of an hour. After this, the container is turned over and shaken slightly.
Plant you need to hold it with your hand. In this situation, the root ball should come out easily. The plant is then lowered into the pot. The roots are sprinkled with soil until the distance from the soil to the edge of the pot is 2-3 cm.
As By adding soil, the soil needs to be compacted. There is no need to water the rose immediately after transplanting.
Top dressing
Fertilize the rose begin a month after transplantation, when the active growing season begins. It is enough to feed twice a month with solutions of complete mineral fertilizer and root fertilizer.
Alternative option– spraying with weak solutions of special foliar fertilizer. Sick or just transplanted plants should not be fed. It is also undesirable to do this in cold and rainy weather.
Care at different times of the year
 In summer It is important to ensure that the plant does not overheat. You also need to cut off wilted leaves and check for diseases and pests.
in autumn When the night temperature begins to drop to 15 degrees, the rose needs to be moved from the balcony to the room. The south window is the ideal place.
After the end of flowering and the formation of buds, you need to start preparing the rose for wintering: reduce the frequency of watering, stop feeding.
Usually, before wintering When the moon is in its waxing phase, the rose is pruned. This is done so that next year it begins to bloom on time and abundantly.
Most varieties indoor roses need a cold winter. Optimal temperature in winter – 15 degrees. At this time, the plant should be watered rarely - 2 days after the soil dries.
in spring They begin to water the rose more abundantly - each subsequent watering no later than 1 day after the soil has dried. Also, the plant is placed in the brightest place and begins to be fed once a week.
When the spring frosts end, the rose can be moved to the balcony, but first in the shade and only after half a month to a bright place.
Reproduction
For propagation of roses Need very nutritious soil and good drainage.
Simplest and an effective method of propagation is by cuttings. In the period from late spring to early autumn, you need to cut cuttings from mature branches. The lower cut is oblique and 1 cm below the bud, and the upper one is straight and 5 mm higher. Cuttings need to be rooted in water or a mixture of light soil and sand, and immediately.
With dried With cuttings everything will be much more complicated. The water poured for the first time cannot be changed, only refilled as needed. When the roots are more than 1 cm long, the cuttings are planted in the soil.
Need a bright place, but protected from direct sun. When the buds begin to grow, the cuttings are buried 1 cm in sand and covered with film.
Young rose needs a temperature of at least 18 degrees.
Diseases and pests
More often The rose is susceptible to powdery mildew. Treat the plant by washing it with a soda solution (2 tsp per liter of water). Before washing, you need to cover the surface of the earth with polyethylene.
Procedure repeat every two weeks until it disappears white coating. If this does not help, you will have to resort to special means: topaz, foundation, etc.
Prevention powdery mildew and similar fungal diseases include timely cutting of faded shoots, moderate watering, loosening the soil after watering and ventilating the room.
Sometimes Aphids settle on rose leaves. If there is not much of it, you can remove it manually. Otherwise, insecticides will help.
Winter and autumn enemy number one of roses is . It can kill a plant in just a couple of days. Therefore, it is advisable to carry out prophylaxis approximately twice a year using insecticides (fitover, intavir, etc.)
And for the most curious, we invite you to watch a video about indoor roses
Indoor roses require increased attention. Find out what they prefer and how to propagate them from cuttings and seeds. Set up a real greenhouse at home.
What to do after buying a rose?
After beauty lovers buy indoor roses in a store and bring them home, sometimes the plants begin to wither and eventually die. To prevent this, pay attention to your purchase. Of course, flowers with a large number of buds attract attention to a greater extent, so these are the ones that are purchased most often, but you need to pay attention to the young shoots; if there are any, then feel free to buy the plant.
When you bring it home, there is no need to create too hot conditions. Place the pot on a cool windowsill, where the temperature is +20–+25°C. Give the plant a couple of days to acclimate. After this, pay attention to what soil the decorative rose is planted in. If it is in peat, then you need to replant it in special soil for these plants; in such soil the roots will receive enough moisture. After all, peat dries out quickly, and indoor roses are moisture-loving and in such soil will not be able to provide themselves with enough water and nutrients.
Before replanting the plant into new soil, carry out pest prevention. To do this, do soap suds, wash the leaves on both sides with it, then rinse them clean water. Pay attention to the roots, if they are rotten, then trim these areas.
Prepare a suitable size pot for the plant and replant it in new soil. If your indoor rose has flowers and buds, trim them, then it will have enough strength to take root in its new place. To increase immunity, it would be good to spray your home rose with a growth stimulant, such as Epin. Place the pot with the lovely flower in a bright place where the temperature is about +25°C; when the plant takes root, you can lower it slightly.
If you decide to buy an indoor miniature rose in winter, place a fluorescent lamp over it, spray it once every 2 days if the air in the room is dry due to heating devices.
There is no need to spray them too often, as high humidity can lead to fungal diseases and pests. Therefore, if the air is not dry, it is better to spray the plant or give it a shower only once a week.
Indoor roses - care
Contrary to popular belief, roses do not like excessive heat, so the temperature should not exceed +25°C. The plant will feel best on an east or west window. In the south, an indoor rose will overheat in the summer, so you can place it here only in the cool season.
You need to water the rose abundantly; if the soil dries out, the plant may die, especially during flowering. Overwatering is also harmful, so pour out excess water that has not had time to be absorbed from the pan after 20 minutes.
An indoor rose blooms for a long time, so it needs to restore its strength with the help of nutrients, which are provided by rose fertilizers. For indoor plants, you need to use liquid organic and mineral fertilizers (alternating them), which are intended for this plant and are sold in specialized stores.
In the spring, when it gets warmer, and in the summer, it is better to take the indoor rose out into the fresh air, placing it in the yard or on an open loggia. Here the plant feels great. Experts recommend cutting off the first buds so that indoor roses can gain strength and get stronger.
Caring for them requires close attention. Follow appearance plants, promptly remove wilted flowers, drying leaves and twigs. From spring until almost August, nitrogen, phosphorus, and potassium should be present in fertilizing. At the end of summer, nitrogen must be eliminated to prepare the plant for winter.
It would be good to put roses on the balcony in the fall, where the temperature is about +10°C. With the onset of severe cold, place the pot with the plant between the frames or on a cool windowsill or on a glazed balcony, where the temperature is around +10°C.
The dormant period of the rose lasts from October to February. Don't be alarmed if your indoor rose turns yellow. The leaves take on this color and fall off as the plant prepares for fall/winter rest. At this time, reduce watering; there is no need to feed the rose.
In mid-February, transplant the decorative rose into new soil and place the pot with the plant in a warmer room. Then new leaves will soon appear on it, and in March the rose will delight you with its first flowers. In order for flowering to begin at this early time, you need to prune the roses when the first buds appear. To do this, the branches are shortened by a third, and the plant itself begins to be watered and fed more abundantly.
Propagation of indoor roses by cuttings
The best time to breed such charm is summer. June cuttings are considered the most suitable for this. Trim the faded branches, make an oblique cut, so that each has 2-3 buds and about the same number of leaves. When rooting them, make sure that the buds are facing upward. The lower cut should go under the bud; it will help the roots grow faster, as they will draw nutrients from the bud.
All buds from cuttings must be removed, as well as excess leaves. Leave 2 sheets, cutting half off each. Then the branches are placed for a day in a solution of a substance that stimulates root formation. Seedlings can be rooted in:
- a jar of water;
- ground;
- potato tubers;
- flowerpot.
An interesting way to propagate roses in potatoes. This vegetable contains moisture and starch, which will help better rooting. Tubers are washed and diseased, damaged, and rotting ones are discarded. A cutting is placed in the center of the potato, deepening its lower part by 2 cm. You can first mark this place on the tuber with a knife. Next, the potatoes are placed in a pot with clean sand so that top part the tuber was sticking out a little. The seedling is also covered on top glass jar or a plastic container or a transparent cellophane bag.
For better rooting, seedlings are watered with a solution consisting of:
- 1 glass of water;
- 2 tsp. Sahara.
Roses are propagated in the ground as follows. The cut cuttings are placed in a mixture of humus, chernozem, peat, and sand is poured on top 2 cm. Then the cutting is immersed obliquely and shallowly into this soil mixture so that its lower part is in the sand, not reaching the ground. Cover the top with a film or a jar, and lightly spray as necessary.
To root in a flowerpot, expanded clay is first poured into it, and fertile soil is poured on top, the last layer consists of sand. The cuttings soaked in the root formation stimulator are planted in the same way as when rooting in the ground.
Rose propagation by seeds
Growing indoor roses from seeds is a fun activity. Over time, a small seed will turn into a small lush flowering bush. Planting material can be purchased at the store or using your own plants.
Those who have roses in the garden know that after flowering the petals fall off, and in the place where the flower was attached to the stem there is a seed pod. The same applies to indoor roses. You need to let the seed pod mature and then collect the rose seeds at the end of summer without waiting for them to fall off.
Cut the seed pod in half and remove the pulp. Place the seeds for 20 minutes in a 3% hydrogen peroxide solution to disinfect. After this, the planting material is not dried, but cooled for some time so that the rose seeds undergo stratification. The same applies to purchased seeds.
Soak cotton pads, cloth or paper napkin in the same hydrogen peroxide solution. Place these materials in a plastic box, sprinkle seeds on them, cover with the same cloth or cotton pads, also soaked in the solution. Place cellophane on top with small holes made in it.
All this needs to be put in the vegetable section of the refrigerator for 2 months. Inspect the seeds periodically; if condensation appears on the cellophane, ventilate. If the fabric or cotton wool dries out, moisten it.
At the end of the specified period or earlier seeds roses will begin to sprout. Then take them out of the refrigerator and plant them in bowls or small peat pots with light soil. Indoor roses are grown at a temperature of +18–+20°C, with daylight hours increased to 10 hours. To extend it, use special lamps.
Do not over-water the still weak bores, as this can lead to blackleg disease. When the buds appear, pick them off. This will help the plant grow stronger and its root system develop well.
It is better to buy rose seeds at the end of summer. They are laid out in bowls with damp soil and lightly sprinkled with damp sand (4–5 mm). First, the containers are kept in a room at a temperature of +18–+20°C, then they are put in a refrigerator or basement, where the temperature is +3–+7°C.
Stratification is carried out for 1.5–2 months. Inspect the containers so as not to miss the moment when the shoots appear. Then, without delay, place the pots on a bright, cool windowsill, provide additional light and moderately water the seedlings. When the small pots are too small for the sprouts, transplant them into larger containers. Next, care for your home rose as described above.
For more information on propagating indoor roses and caring for them, see here:


