Applying decorative plaster yourself. The nuances of applying decorative plaster
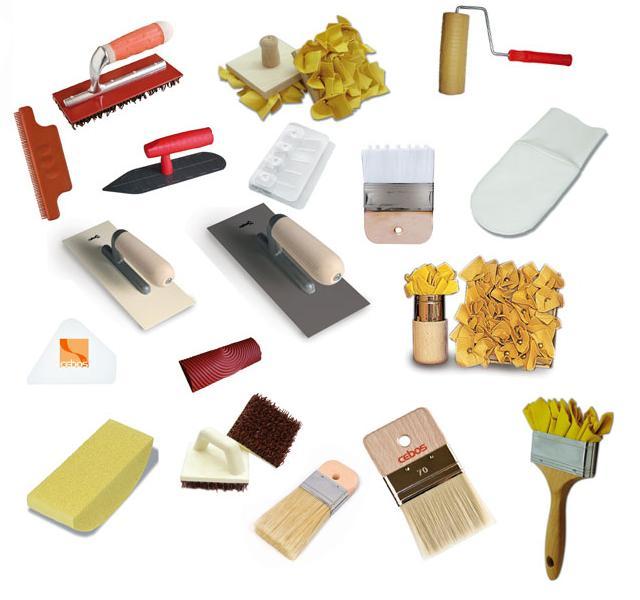
Decorative plaster for walls is a wonderful environmentally friendly and moisture-resistant material. There are many ways to apply it to a surface, each of which can give a unique design depending on the flight of imagination of its author. Let's look at some of them. To work you will need the following:
- decorative plaster;
- paint grater;
- putty knife;
- primer;
- rollers;
- paper;
- textile;
- brushes;
- polyethylene film;
- sponge;
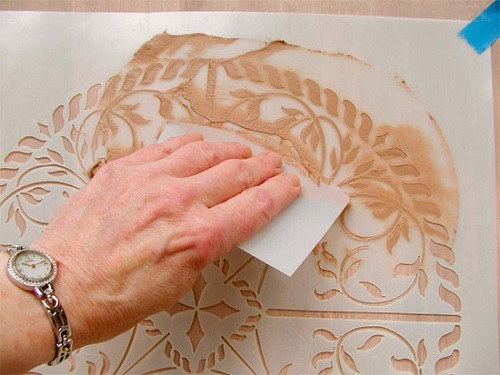
- stencils.


![]()

This is all. Good luck with your work!
In this article we will talk about ways to apply decorative plaster with your own hands. The process itself is not complicated, but it will require your attention and accuracy. Well, first things first...
Method 1
Applying decorative plaster to walls with your own hands. Sequence of work
Today, a great variety of different wall finishing options have been developed, but decorative plaster has earned particular popularity and love due to its combination of aesthetics and ease of application. Applying decorative plaster with your own hands will not require enormous effort or special experience (although you may have to practice). In addition, when you finish finishing the walls, you can clean them with detergents without fear of water or these substances damaging the finish.
Thus, plaster is one of the most practical options for wall decoration. If you do everything correctly, the plaster will serve you for many years without requiring repair or restoration.
How to choose decorative plaster
Choosing plaster is a very important stage, but it is not particularly difficult. Plaster can be classified in different ways. For example, depending on what kind of surface you get at the end of the work, or on the method of applying the coating. And if with the second characteristic everything is more or less clear (having heard “roller” in relation to finishing, you will understand that the plaster is applied with a roller), then let’s dwell on the types of surfaces in a little more detail.
So, decorative plaster can be:
1. Structural. If you are offered “structural plaster” in a store, this means that special granules have been added to the paste, which, in fact, is any plaster. For example, pebbles or wood fiber - depending on what surface this finish imitates.
2. Flock. This type implies that tiny multi-colored grains will be placed on top of the glue.
3. Venetian. This is one of the most luxurious types of plaster, which is made using marble flour. As a result, your wall will look like marble.
4. "Semi-antique." Realistic imitation of “scuffing”.
In most cases, decorative plaster is a homogeneous paste with the addition of a certain pigment, which gives it color. However, when choosing plaster, think about whether you want a smooth wall or if you prefer an unusual texture. In principle, you can create a spectacular relief using ordinary plaster, but it is much easier to initially buy so-called textured plaster. If in the first case you will need to create the relief manually, then in the second you simply apply the plaster to the wall in an even layer.
The base of the plaster is also important. Based on what is included in the base, all decorative plasters can be divided into the following types:
- Mineral. This is a very fireproof material, which is usually used for exterior decoration.
- Acrylic. This is one of the most common types of plaster, which is most often used for finishing residential premises.
- Silicate. There is an opinion that this type of plaster can be harmful to health, so it is better not to purchase silicate plaster for your own home, even though silicate material is the easiest to apply.
How to prepare a surface for decorative plaster
Like any other finishing work, the application of plaster begins with the surface of the walls being prepared for further processing. This is done as follows.
If there is old finish on the wall, it must be removed and then the surface must be thoroughly washed to ensure the wall is as clean as possible. When the surface is dry, take sandpaper and carefully level the wall: there should be no irregularities left on it. Please note that both applying the plaster and preparing the surface should take place at a moderate room temperature: it should not be too cold or too hot.
After cleaning and leveling the wall, the surface must be coated with a primer, which will provide better adhesion between the wall and the decorative plaster. If there are any elements on the wall that could cause rust, such as dowels, they should be insulated - otherwise the rust will penetrate into the wall covering
How to apply decorative plaster
Once you have prepared the surface, you can proceed directly to applying the plaster. Applying decorative plaster to walls with your own hands requires following the instructions that come with the material. Carefully read the manufacturer's recommendations before starting work.
You need to dilute the plaster correctly (only if it is not silicate - this plaster is sold ready-made, but, as we have already said, it is better not to apply it in residential premises).
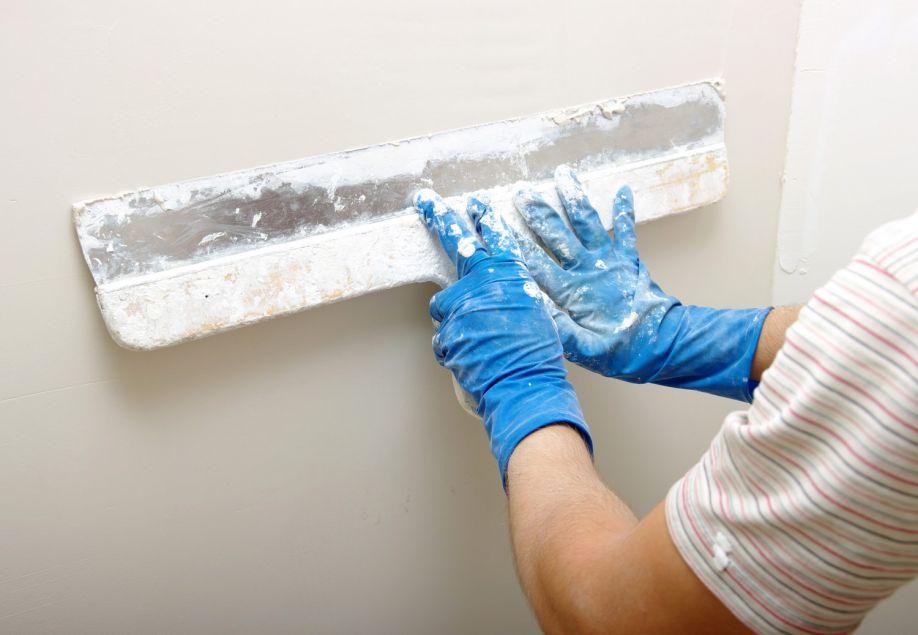
Plaster is applied to the walls using a stainless steel spatula or a plastic trowel. The choice of application tool depends on what the material manufacturer recommends.
Please note: when working with decorative plaster, you cannot use steel tools, otherwise rusty marks will inevitably appear on the surface of the wall.
Approximate list of tools required for applying plaster:
- Container in which the mixture is diluted .
- Spatulas (trowels).
- Ironing iron.
- Painting tape - you can use it to protect surrounding surfaces.
- Roller or mitten for application.
- A damp cloth - you will use it to clean your instruments
- Wax - they need to coat the plaster after finishing the job to make the coating more durable.
- Gloves.
Before you begin applying plaster, turn off all heating appliances. If the room is very hot, the plaster will harden too quickly, which means it will be difficult for you to work with it.
Do not leave the can of material open throughout the entire work. This is necessary so that the material does not lose its properties, and also in order to protect the plaster from debris or excess moisture getting into it. The correct method for applying plaster will be indicated on the packaging - a lot depends on what kind of plaster you have chosen.
The packaging with the material should also indicate the drying time of the plaster. The work can be corrected, but only until the plaster hardens. As soon as this happens, any attempts to change something will cease to produce results, on the contrary: by running a tool over a dried surface, you risk damaging the plaster and completely ruining your own work.
Most often, decorative plaster is applied using a trowel or spatula, and then leveled using a roller.
If you chose textured plaster with fine grains, you will need a spray gun to apply the material to the wall. Don't forget to cover nearby surfaces with masking tape, otherwise you'll get them dirty. In addition, make sure that the plaster is applied in an even layer. The thickness of the layer can be a couple of millimeters, or even more. Apply the material continuously, without pauses.
There is another way. The prepared solution can be sprayed onto the wall using a stick and a broom. However, don’t be discouraged if you fail to apply the plaster correctly the first time using this method. You can either practice spraying it on another surface, or use the easier first method.
How to give plaster texture
If you initially chose the so-called textured plaster, then the relief on the wall surface will appear by itself, without additional effort. But you can create a spectacular relief of the wall surface without the help of special materials. So, if you apply the material with infrequent, broad strokes, the wall will turn out visually smooth, but small “strokes” using a spatula will give the wall a more original and interesting look.
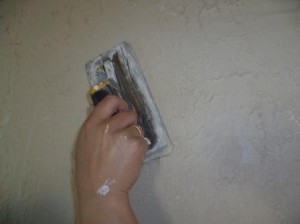
To get an unusual grooved surface, you can use a special grater, or you can give it a relief with the same spatula. It is better to do this together with an assistant: one applies a fairly thick layer of plaster, and the second immediately forms the texture before the material has time to harden.
Plaster is very plastic: it can be given almost any shape - the main thing is to practice first, because this procedure requires experience. Please note that if this is your first time working with this material, or if you have no experience and have undertaken to do not the usual smooth finish, but a textured one, then you most likely will not be able to achieve the desired effect the first time. So you need to practice on cardboard first to get a beautiful relief.
Drying speed of decorative plaster
The drying time for this finish is several days. More exact time depends on the type of mixture, its composition and manufacturer. The time required for the material to dry completely must be indicated on the packaging.
In a couple of days the plaster will dry and you can touch the walls without any problems, but complete drying will only occur after a week or so.
Method 2
Is it possible to make decorative plaster with your own hands without experience and without knowing what materials are used for finishing? An ordinary person who decides to make renovations in his own apartment with his own hands will have an unequivocal answer. Of course, it’s difficult to make such decoration as in the photo (I’m not talking about the masters), but if you really want, for example, to make an unusual decoration of the walls in the kitchen or in the hallway, but you’re pretty tired of the wallpaper, what should you do?Most often, the person who started the renovation is not a specialist in decorative plaster, and even more so does not know what materials are needed, for example, to apply Venetian plaster, or in what sequence to carry out all the operations.
So, let's begin. What materials you need: putty (Turkish “satengips”), fugenfüller (for sealing seams in drywall), primer (in principle, you can use any), paint (for example, triora No. 7, or choose one suitable for painting decorative plaster), color for paints (what color is needed here, choose that color), glaze (Trior company with the “silver” effect). Everything according to the materials.
By tool: drill with a mixer (for stirring the putty), a pair of spatulas large and small (for applying the mixture), a trowel with rounded corners (for forming the structure of the decorative coating), a grater with sandpaper (for leveling the plaster), two rollers with a large and fine lint (for painting), a sponge (for applying glaze), well, that’s it, more details on tools for painting.
On the walls: in principle, with this method of applying decorative plaster there is no need to particularly prepare the walls, since the decorative layer will be relatively large and can hide all small unevenness. But, of course, if the walls are very uneven, then it is better to level them. The main preparation is priming, that is, before applying decorative plaster, we prime the walls.
So, we have prepared the materials and tools, let’s begin: mix the putty and fugenfüller in a bucket in a ratio of approximately 1:1. Instead of fugenfüller, you can use rodband or isogypsum plaster, but in this case the structure will be a little rougher than when using a mixture with fugenfüller.
Next, apply a layer of putty approximately 2-4 millimeters thick to the wall with a regular spatula. By quadrature, let’s say, as much as the mixture is mixed, apply that much at a time, well, usually with such a layer it turns out to be from 4 to 6 square meters, that is, half of a small wall can be immediately sealed.
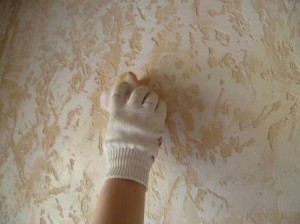
The next stage is the formation of the structure. There are many ways and it is not necessary to use a trowel; you can go over the applied layer of plaster with a regular sponge or sponge roller, for example, you can buy a special roller to form the structure of decorative plaster. There are many ways, but if you want to do something unusual, you can simply try, for example, on a piece of drywall, creating your own method of decorative plaster, especially since you can find many samples of ready-made decorative plaster on the Internet.
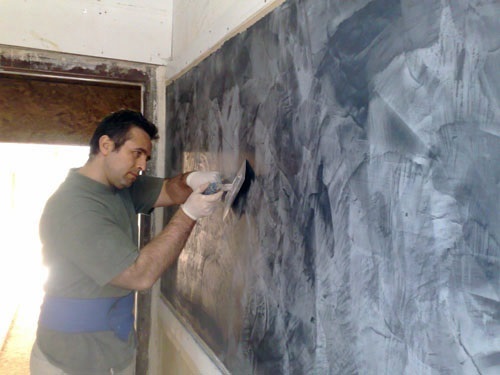
So, we form a structure with a trowel, doing it this way: we lightly press the trowel to the plaster, and as if we are trying to “tear” it from the wall. With such movements we go over the entire layer of putty, slightly short of the end of the layer, about 2-3 centimeters - this is necessary so that after applying the next layer of putty, when forming the structure, there are no visible seams at the joint of the plaster.
We smooth the resulting structure with circular movements of the trowel - try it experimentally: if you don’t like the design in some place, we make the structure as described above and smooth it. At least 20-30 minutes before the plaster begins to dry, so there is time.
We applied the structure, corrected it in some places (as without this, after all, for the first time), we wait until it dries. Usually, at normal summer temperatures, it will dry the next day, after which further processing can begin.
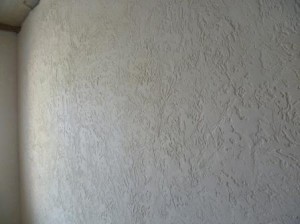
Unpainted wall decoration with decorative plaster looks approximately the same as in the photo. I repeat once again - this is one of the methods of decorative plaster that can be done with your own hands without large material costs.

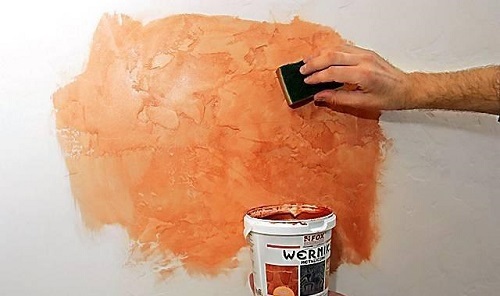
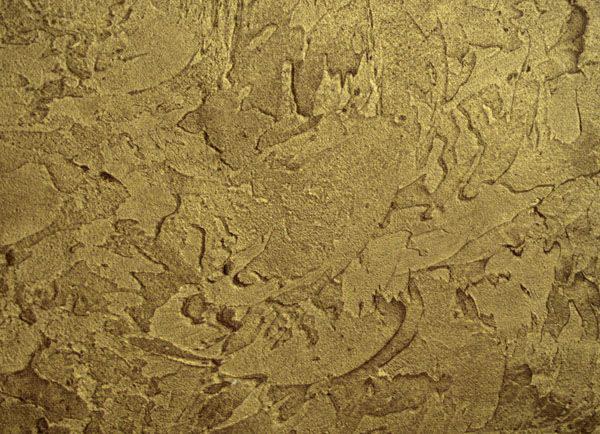
When painting, we immediately apply the background with a long-haired roller to paint over the structure. A beige background was used in the photo.

Next, use a short-haired roller to apply the main layer of paint, that is, the short hair prevents the paint from covering the main background. It turns out that the background paints over the recesses of the plaster, and the main paint paints over the top.
We wait for the paint to dry for about 30-40 minutes and proceed to the final processing of the decorative plaster with glaze.
A few words about glaze. In the photo, glaze with a “silver” effect was used, slightly tinted in beige color.
The glaze is applied with a sponge. There is nothing complicated here, the main thing is not to make omissions.

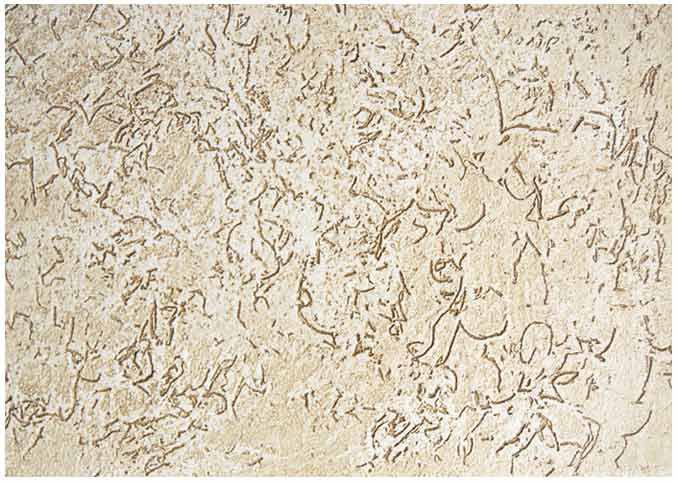
Well, your DIY decorative plaster is ready. Try it: there are a lot of options and ways to decorate walls, the main thing is to use your imagination, and, we hope, this article was able to help you with the difficult repair.
Many novice builders have a question: Is it possible to apply decorative plaster on plaster? It is worth paying attention to this issue, since it is primarily financial issue, and then the question of beauty. If you master the technique well, you can save on costs.
You can do this job perfectly yourself without turning to specialists. Worth considering:
- What is decorative plaster?
- How to apply it?
- What tools are needed?
Features of the material
By decorative plaster we mean mass. It is used to decorate different types of surfaces. Because she has an attractive appearance, then it is called decorative. After all, when it is applied to the wall, it looks quite aesthetically pleasing.
In order to start plastering the walls, you will need two types of materials. The first type includes textured plaster.
For more information about decorative textured plaster, watch the video:
Another type of material is structural plaster.
The first type of material can have a different base - lime, gypsum and polymer. When it is in prepared form, it is a plastic mass. It's pretty easy to change. Thanks to various suitable tools, the shape is changed and a beautiful relief is obtained.
It is worth noting that the material already contains a coloring agent. However, after testing and polymerization has occurred, the wall needs additional painting. And sometimes it’s enough just to tint it.
The surface will look even more beautiful if it is treated with metallics and pearlescent pigments.
What can we say about the structural compositions? They less plastic than textured ones. Thanks to mineral granules, which they contain, and the texture is formed. Quartz, marble, granite and more play an important role. Relief is achieved due to the fact that the grains are either on the surface itself or inside it.

In specialized stores you can find several other types of materials. Including products made from fibers, as well as almost transparent mixtures for plaster. They are used less frequently than the previous ones. Therefore, we will not talk about them.
In principle, there are other types of materials on the market - fiber products, translucent plaster mixtures, etc. However, they are used quite rarely, so it would be more advisable to focus on more common finishing techniques. Let's talk about how to apply decorative plaster to plaster.
Necessary tool
First of all, it is important to decide what tool you will need to apply the plaster. Interestingly, in some cases you can use one spatula. However, if we are talking about fast work, then this will not work. This option is only suitable if a specialist has taken up the matter.

You can't do it without a masterful approach. In order for the work to be successful, it is important to use the following tool:
- especially for mixing work - a large capacity container;
- for direct work – a small container;
- a drill with a mixer attachment;
- trowels for plaster;
- trowel;
- plastic and metal graters;
- different spatula sizes;
- having hard bristles, flat-shaped brushes (one of them is a brush);
- sponge of rigid structure;
- a roller with a pattern to create relief on the walls.
As you work, you may need more tools, but these will suffice to get you started. The main thing is to purchase everything in advance, so as not to be distracted from work later.
Preparing the walls
We are preparing the foundation for a strong future decorative composition. It is worth remembering that it is quite possible to apply decorative plaster on plaster. The only question is how correctly the walls were prepared. Let's talk in more detail about the stages of working with plaster.
The first thing we do is remove everything unnecessary from the base. When you approach the plaster layer, make sure that it does not fall off over time. Each case is individual and you should decide for yourself whether to remove the plaster completely.
How to determine what is best in your case?
Take a heavy hammer and start tapping the entire surface. Determine whether the material begins to crumble or remains in place. Also identify possible voids using a characteristic sound. If all this is missing, then you can safely apply decorative plaster to the old plaster.
Now it is important to determine what condition the surface is in. Find out if it has cracks, crevices or any other defect. Use a cement compound to fill all these voids. Once you have applied the curing repair mixture, prime all walls using a penetrating agent.
This will require about two layers of primer, but no less. Before applying another coat, stop and wait about 5 hours for the material to dry completely.
After these steps, the first primer layer is applied to the walls. The thickness of this plaster should be 20 mm. Thanks to this approach, the base will be reliable and the entire surface will be smooth. It is important that any large differences are eliminated. In some cases Instead of basic plastering, putty is applied.
At the same time, when the material dries, do not sand it, because adhesion will decrease. This applies to the processing of gypsum board. What can we say about different types walls? How is plaster applied to them? Wood and the material that is created with its use are distinguished by hygroscopicity.
During work, the putty may begin to get wet at the base and become deformed. Also, the drying mode of the plaster itself will be disrupted. Therefore, if you decide to treat wooden walls, then use a primer that contains components that protect against moisture.
If the surface is rough (plastic or plywood), then use a coarse abrasive. After all, without this, the plaster will begin to slide off it. What can you say about the metal elements that you will encounter during repairs? If you use a decorative composition for processing, then over time rust stains will appear on them.
What to do? Use an anti-corrosion coating and you will avoid unpleasant moments.
Varieties of structural compositions
Let's consider spraying a “fur coat”. We have determined what is suitable for the plaster base for decoration, but now it is important to determine what finishing technology we will use. As for structural coatings, they are quite easier to apply than others. It's worth starting with them.
“Fur coat” is one of the types of decorative coatings. He is quite popular and is based on cement-sand mortar. We mix everything 1 to 3. That is, for 1 part of cement we put about 3 parts of sand. Now we apply everything to the walls using sprays.
There is a special plastering machine that facilitates the process of applying plaster. After all, its work is based on the fact that the resulting pressure begins to eject the solution. In this case, the mixture adheres to the walls and the necessary relief appears on them.
What to do when you don’t have a typewriter and there’s nowhere to get one? Then a simple broom will do. For this they take right hand and begin to lower into the solution. Take the amount you need, but not much. When the broom is brought closer to the surface, it must hit the stick (it was held in the other hand).
Another technique is also interesting. Using a brush. To do this, you need to take it with long pile. Place some solution on it. Now run the board over it. Show some effort and move it towards you. When the bristles straighten, the solution will reach the surface in the required small amount.

Another thing that can be used is a metal mesh placed on a wooden frame. To do this, the structure is placed against the wall and leveled. Pressed down with bricks. Now, using a trowel, the solution is applied to the surface. Remove the mesh and then eliminate any defects.
Use a brush to smooth the wall.
We use mineral granules
Applying such compositions is quite simple. Among them, one of the most popular was the “bark beetle.” This type of plaster looks looks like wood, which is damaged by insects. Applying the composition is easy and not difficult. To do this, it is necessary to prepare and level the walls in advance using a plaster composition.
Apply a decorative mixture to them. In this case, you will need a grater. The angle of its holding is about 60 towards the wall. You should not make the applied layer thicker than the largest grain in the composition. This is important to adhere to. When you have already applied the mixture, dry the wall.

And as soon as you notice that your hands no longer stick to the surface, you can begin decorative plaster. Take a plastic grater and place it completely against the wall. Apply a little pressure and move further.
When movement occurs, the grains begin to move and at the same time leave grooves on the walls. This creates a beautiful drawing. This process is not over yet. It is important after the final work (drying and processing) to paint the surface using acrylic pigments.
Features of textured plaster
This type of surface is somewhat different from the previous one. How? It is important that the person who does this has a certain skill in his field. After all, the processing technique does not entirely affect the result. Relief in this case looks like painting or sculpture.
Therefore, if you decide to use this option, then practice in advance to understand how best to behave with the given material. It is important to apply the base coats first. Of course, the work is applied to a leveled surface. The base of the first layer is a couple of millimeters thick.

This will ensure adhesion. This is the background for future design. It is worth paying attention to one detail. Since the material is applied to the base in a small layer, it is important to paint it in advance in the color you need. To do this, pigment is introduced into the plaster for application and mixed.
It is necessary to thoroughly dry the base until the tools no longer leave marks when you press them slightly onto the surface. Now you need to use a spatula to apply several strokes to the surface.
Use only a small amount of the mixture, especially if you are just starting out.
The thickness of the application layer should be thin - about 3 mm. And at the end this thickness is half a millimeter. The way you direct your strokes will influence the type of painting you end up with. If this is a “Venetian” finish, then direct them in a chaotic manner. But if it’s “raining”, then make diagonal movements and apply markings first.
As an alternative to spatulas and graters, you can use brushes. Then we apply greasy plaster to the base and begin to level it with a grater. In the end, you need to process everything with a hard brush. Thanks to the marks left by the bristles, you will get an interesting relief on the wall.
You can use another interesting technique. Using polyethylene film. No special tricks are needed here. Polyethylene is glued onto a pre-applied 2 mm layer. It should have a lot of folds. We wait until the material dries.
After a couple of hours, the film is removed and an unusual relief pattern is obtained. However, there is some advice. Do not suddenly remove the film, because in this case the coating will be damaged. But don’t overexpose the film. After all, its parts will dry to the base, and the plaster will come off along with it.
The option of using a roller is suitable for those who are not confident in their abilities. Buy a special roller. Thanks to its protrusions and depressions, a pattern is formed. It is imprinted on the plaster that has not yet hardened. So her appearance will be very beautiful. It is also acceptable to use a regular paint roller.
However, to do this you need to pluck the lint out of it. You can also wrap the working part with a cord or other tool to create folds.
Conclusion
To summarize, we can say that decorative plaster can be freely applied to plaster. The disadvantages include the need for additional treatment of the walls, preparing the surface for applying a new layer of plaster, as well as testing the strength of the old layer of plaster.
The advantages include saving time on removing the old layer of plaster and financial costs for additional work.
Decorative plaster with proper preparation walls and the skill of its application, it is easily applied and becomes a beautiful part of your interior. At the same time, it will be very durable and practical, but provided that it is applied in compliance with all the described conditions.
A finishing material such as decorative plaster is not cheap, nor are the services of a professional to apply it. Of course, it all depends on the type of material, manufacturer, chosen texture and desired effect. But the basic principles of operation are the same in all cases and differ little (if you look at it in a simplified way). Therefore, you can always learn how to apply decorative plaster yourself. It will take many hours of practice to perfect this art, although again, it all depends on the desired effect and the chosen material. It will be easy to work with one solution, but nothing will work with another, no matter how hard you try.
Types of decorative plaster
Without going into details, it is worth dwelling on the types of decorative plaster. It is necessary to understand what kind of material this is, because the selection of tools and the application of decorative plaster itself depend on this.
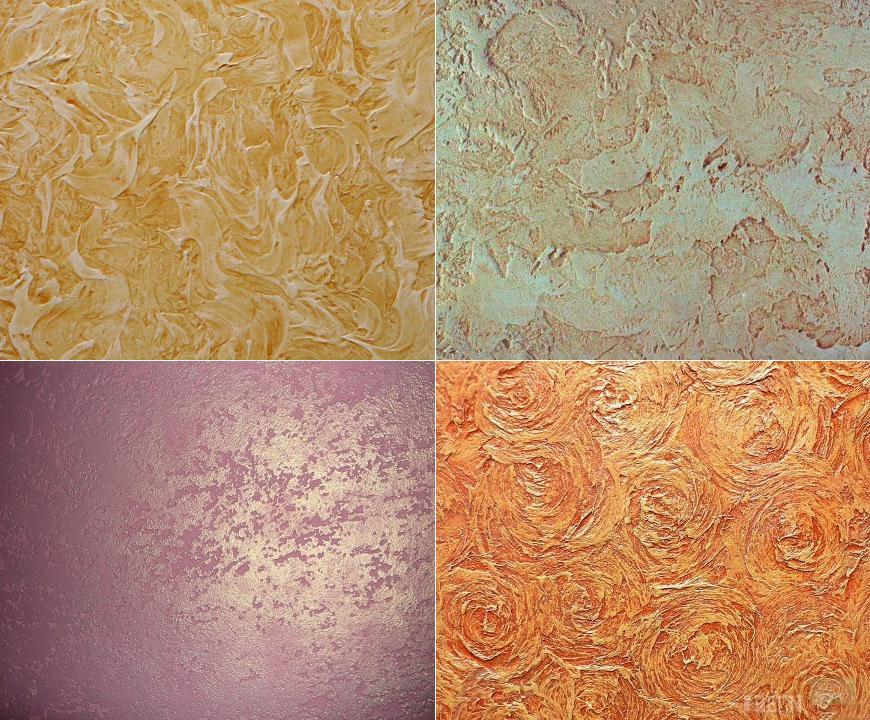
This is what coatings made with Venetian, textured and structural plasters look like, respectively.
- Venetian plaster is sold in the form of a thick plastic mass. Often it is translucent, but I use it to imitate natural stone(mostly marble). It refers to mineral plasters, which use crumbs or flour of various minerals as a filler. Using the Venetian, smooth surfaces are created. The main role in working with such material is played by the application technique.
- Textured plasters are presented in the form of a thick, homogeneous mass with plastic properties. The material is applied in an even layer, and then the texture is formed using various devices. Such mixtures are most often used to create intricate surfaces, because they are easy to work with. Working tools play a key role when working with such material.
- Structural materials contain various granules. It is this filler that plays a decisive role in creating the desired surface. These granules form grooves and hollows when applied.
Methods for applying decorative plaster greatly depend on what fillers are used in the solution. It is one thing to work with cement-based plaster and quite another to use polymer-based silicone solutions. However, if you delve into this issue, you can get to the point where you have to describe the intricacies of working with many varieties of decorative plasters from different manufacturers. For a beginner, the division into textured, structural and Venetian decorative plasters will be quite enough.
 Various tools and techniques are used to create different effects.
 Everyone's favorite simple budget putty belongs to textured materials. A plastic solution based on gypsum is applied in an even layer, and then the desired texture is created using various devices.
Scope of application and difficulties encountered
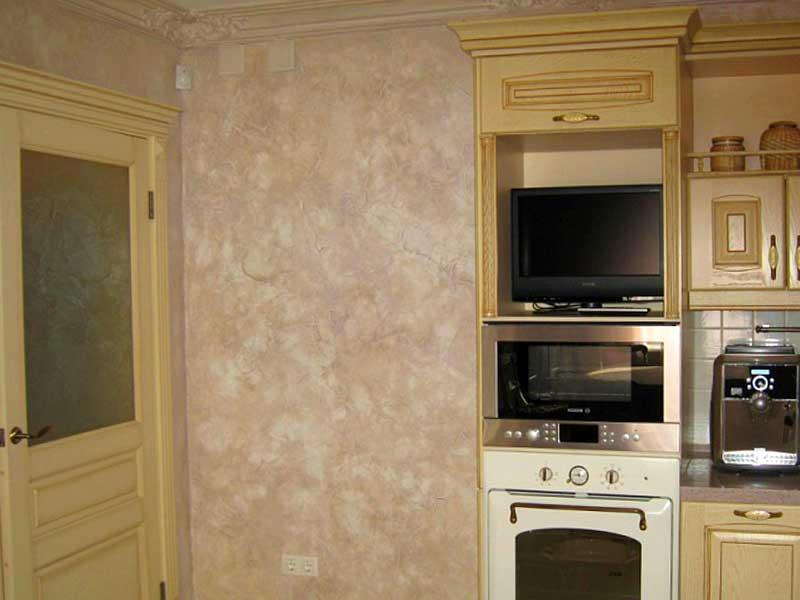
Do-it-yourself decorative plaster can be applied indoors and outdoors. If we are talking about facade finishing, then in the vast majority of cases structural materials are used for these purposes. They don't cost much, but the decorative effect won't be as beautiful as it could be. It's quite suitable for the façade. We are more interested in interior decoration, where people use decorative plaster for its intended purpose - not only to decorate walls, but also to create a unique atmosphere that will please the eye.
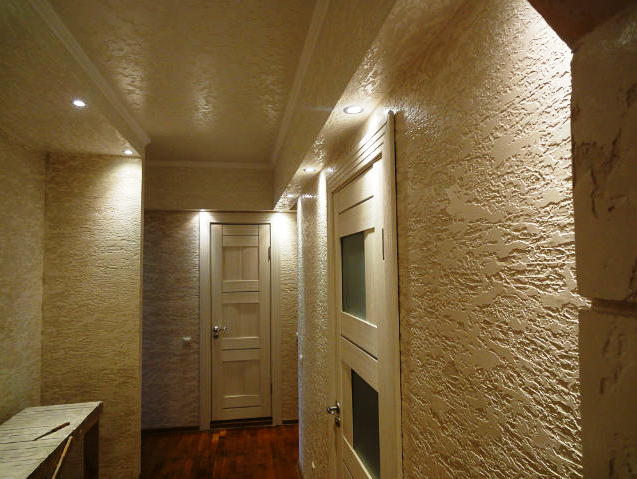
Where in the apartment can decorative plaster be applied?
- In the corridor and hallway, it is best to use structural mortars with fine-grained filler. The smaller the filler, the more beautiful the pattern will be. Such materials have increased wear resistance and can withstand mechanical loads well.
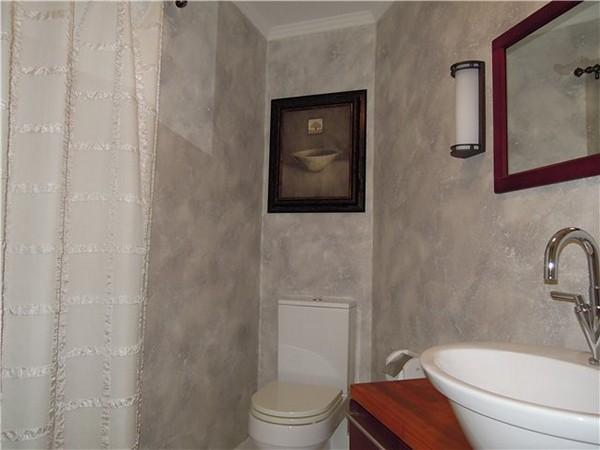
- Decorative plaster finishing of ceilings can be done using Venetian. This is the best option, since the ceiling is already perfectly smooth, which is a necessary condition for simulating natural materials. The coating can be protected with varnish and wax, which will save it from moisture in the kitchen and bathroom.
- If Venetian is suitable for the ceiling of the kitchen and bathroom, then it is not necessary to use it for the walls, because it will be too expensive. Textured materials are ideal for the walls in these rooms.
- The bedroom and children's room can be decorated with both textured mixtures and Venetian. This is a matter of taste and financial capabilities.
- In the hall, due to its large area, structural plaster with a fine texture looks good.
- The columns must be finished with Venetian so that they become “marble”. You can do the same with arches, but you need to think about the transition between the arch and the wall.

Knowing where exactly the decorative plaster will be applied, you will understand what material you need. And after that you can study all kinds of application techniques.
What tools might be useful?
The following tools may be required for work:
- Metal trowel. It is necessary for any work, and you cannot do without it. The trowel should be made of stainless steel. Otherwise, after some time, rust may appear on the finished coating. To work with the Venetian, a special Venetian trowel is used.
- Putty knife. Another essential tool. It should be small in size so that it is convenient for them to collect the solution from the bucket. Using a spatula, the solution is applied to the trowel in the required amount, and then the trowel is transferred to the wall. Sometimes a wide spatula is used to replace a trowel.
- Plastic grater. It is mainly used when working with structural decorative plaster. It is used to smooth the surface, catching the granules contained in the solution. As a result, a “bark beetle” (“lamb”) texture is formed.
- The brush is used when working with textured mixtures. With its help, various roughness and swirls are created.
- Roller. Decorative plaster is sometimes applied using a regular roller. After this, the material is smoothed with a grater, creating a decorative coating. So, a roller is rarely used; more often it is used to roll over an already applied solution to form a coat.
- Textured roller and stamps. Using a stamp or textured roller, similar patterns are created on the wall.
- Decorative plaster is rarely applied with a spray gun, but such a tool can come in handy.
- Other devices. This includes applicators, sea sponge, crumpled cellophane, a foam roller covered with a rope and other tools that are used extremely rarely or are created independently. All of them are used only when working with textured decorative plaster.
 For various works use different tools
 It is also worth mentioning that not all mixtures are sold ready-made, and some of them will have to be prepared yourself. To do this, you will need a plastic container and a drill with a mixer attachment. Even if the solution is sold ready-made, its color is usually white. After adding the toner, the mixture will need to be mixed. This can be done with a trowel, but for greater efficiency you should use a mixer.
Required skills and where to get them
You can't do without working tools. Some you will need to buy, but some you can do yourself (only relevant for working with textured mixtures). But even if you have the right tools at hand, you can’t do without skills. Where can I get them to know how to apply decorative plaster? You can go to a master class, but it costs money, and each master has his own opinion and is used to working with certain products. You can read information materials and watch video lessons, and then try to bring everything to life.
Whatever path you take, you will have to act at your own peril and risk. Therefore, we recommend purchasing the material with a reserve so that part of it can be used for training. You will also need to buy several pieces of plywood on which to hone your skills. When the technology for applying decorative plaster has been perfected on a plywood board 2-3 times, you can proceed to practice on the wall. You will already have an idea of how the whole process works in reality. Here you will only find out general features work, because it is simply impossible to consider all aspects at once.
Final touches before application
You already know where you want to use decorative plaster, and what kind of material you need. You now have a rough idea of the tools needed and what type of decoration they are suitable for. You could proceed directly to application, but you will have to wait a little. The work surface can make all the difference.
 The thinner the layer of decorative plaster, the smoother the surface should be.
 In most cases, the decorative material is applied in a thin layer, which means that all the unevenness of the wall will be visible through it. Therefore, the working surface must be clean and smooth, free from dents, chips and cracks. In the case of the Venetian, the wall must be brought to a perfectly smooth state.
Then a layer of primer is applied. It is important to select soil depending on the type of solution. It is advisable that the decorative plaster and primer be produced by the same manufacturer. Then the best effect from their interaction will be achieved.
The primer is a light liquid that is used for better adhesion between the working surface and the applied coating. In other words, the primer acts as the glue that makes the solution stick to the wall and not fall off.
Application technique in general
The technique of applying decorative plaster greatly depends on the selected product. Therefore, we will focus on three large groups: structural, textured and Venetian plasters. Let's look at them in general outline, and if you need more detailed information, then in the “Effects” section of the site all the nuances of the work on creating specific patterns and drawings are described in detail. The “Manufacturers” section contains detailed recommendations for applying decorative plaster of various brands. Next, generalized information will be presented that will be useful for beginners to form a general impression of the work.
Structural plasters for the most inexperienced
Structural plaster is applied in a layer, the thickness of which should be comparable to the grain size of the filler (written on the packaging). After this layer begins to harden, it begins to be smoothed with a plastic grater. The movements can be horizontal, vertical, circular or cross. You should start working with a grater after the surface stops sticking to your hand.
River sand, quartz, mica and other minerals can be used as a filler for structural plaster. This affects the cost of the product, as well as slightly on the appearance of the finished surface.
You can run the grater over one place for as long as you want. If you don’t like the drawing, you can change the direction of movements and see what happens next. This application of decorative plaster does not seem difficult, so anyone can cope with this work.
Textured plasters for people with imagination
The textured solution is also applied to the wall in an even layer using a trowel. However, you can form the texture immediately after applying it or wait until it begins to dry. If you work right away, you can walk over the liquid solution with a regular roller to create a fur coat. Or simply press the entire surface of the trowel against the wall, and then tear it off, pulling the mortar onto yourself. The essence of these methods is to “pull” the solution from the wall in any way. Then you need to wait until the material dries and smooth it with a smoothing iron or trowel.
The same patterns can be created in other ways. You can apply one even layer and wait for it to dry completely. And then scoop up the solution onto the entire surface of the trowel and, using light touches, transfer it to the wall in various places. We wait for the solution to dry and rub it with a trowel in different directions. The result will be a coverage known as a world map or islands.
 The decorative effect is greatly enhanced by painting the surface
 As a result of applying textured decorative plaster using various techniques, the following effects can be obtained (the list is not complete, this is only a small part of the possible options):
- Travertine.
- Wave.
- World map.
- Boulders.
- Fur coat.
- Tree.
- Crinkled fabric.
The dried coating can also be treated with textured rollers. These tools already have an imprint on the work surface, allowing you to create a pattern on the wall. These patterns will be of the same type, but working in this way is very simple. You need to roll the roller along the wall and the pattern is ready. There are many techniques and methods for working with textured mixtures, but describing them would take too much time.
Venetian for experienced craftsmen
If you have never worked with mortar before, it is better not to start with the Venetian. Its decorative effect is simply excellent, but the cost is too high, and the technique is complicated. You will need to level the surface to a perfectly flat and smooth state, which can already be a challenge for a beginner. Venetian decorative plaster is applied using a trowel of the same name “on the strip.” This means that the layer of applied material should be as thin as possible.
 Ironing, waxing and sanding create a glossy finish
 There should be 2-5 layers in total to achieve the desired effect. To make the coating more decorative, it is necessary to work with several colors or shades at once on each layer of coating. In this case, a beautiful shimmer and depth of color will be created. It is highly advisable to iron the finished coating (pass it over the dried coating with a trowel under pressure many times to create a gloss). After this, the coating will need to be varnished or waxed (this can also be done “by stripping” or using a special sponge). Then there will be a polishing process using a grinding machine. A mistake at any stage will ruin the appearance of the coating.
In conclusion, it is worth summarizing the most important things. Venetian plasters are expensive and very difficult to work with. Structural materials are created with a “bark beetle” texture. They are not expensive, they are easy to work with, but the decorative effect may not be beautiful enough. Textured materials are the most suitable in terms of price to quality ratio. You can always experiment with them, use your imagination and create unique coatings.
Once you see a room whose walls are decorated with decorative plaster, you will surely be seized by the desire to build such beauty in your apartment. And then show it to your friends and acquaintances, incredibly proud that you did it all with your own hands. The desire is there, all that remains is to find out how to properly apply decorative plaster on the walls with your own hands so that your rooms, and perhaps individual rooms, are different from most other standard apartments. Trying to understand the secrets of craftsmanship, let's take a closer look at all the subtleties of decorative plaster.
To begin with, let’s not take risks and take as an experiment a small part of the room, for example, one wall in the room, which is an original design solution. Let's try to decorate the wall with decorative plaster.
Before starting work, it would be a good idea to carefully read the information presented in this article, including video materials. From them you can learn about the technology of applying plaster, what materials and which manufacturers are best to buy, and what tools should be used.

Having enriched yourself with knowledge, you should rush to the store to get the necessary materials building materials. You need to choose the material slowly, in consultation with the seller. Having weighed everything and calculated, you can buy the source material, as well as the necessary tools.
By the way, the main tool for carrying out the work will be a trowel, which is a steel or plastic spatula equipped with a comfortable handle.
Now let's talk about the plaster itself. It's usually sold in an 8kg bucket with "texture paint" written on it. The plaster is produced in white color, and if there is a need to give the plaster a certain shade, then you should buy the desired color. Experts advise using Tikkurila; such paint is not cheap at all.
Thus, to finish a wall with an area of 3 sq. m on average will cost about one and a half thousand rubles, while decorative plaster costs 400 rubles per 8 kg, and if you buy a cheaper color, you can make a pretty decent coating at an affordable price. You should proceed from a consumption of 1-2 kg per 1 sq. m, depending on the thickness of the layer.
The first step in applying decorative plaster will be thinning the plaster; this must be done in accordance with the instructions indicated on the packaging. Plaster can be sold ready-made. According to the recommendations, the wall should be pre-primed, which will ensure more reliable adhesion of the plaster to the surface. Then, using a narrow spatula, a layer of plaster is applied to the trowel. Then, using a trowel, apply a thin 1-3 mm layer of plaster to the wall and level the surface.
By following this technology, you can cover any surface with decorative plaster. With such a decorative finish you can do whatever you want, because the plaster has high ductility and can accept various shapes. Among other things, using a nap roller you can give the plaster a different texture. Then smooth it out a little with a spatula. Instead of a roller, sometimes an ordinary sponge is used.
In other words, you can give decorative plaster a particular look using your imagination and creativity. A wonderful texture is obtained if you use a brush and apply broad strokes with it. To give the plaster a special texture, simple spatulas, figured rollers, and notched spatulas are also used. Sometimes plaster is applied in two layers.
There is also plaster that contains marble chips. When applied with a regular spatula, you already get a rather interesting texture in the form of chopped wood. This type of plaster is called.
We will do it simpler - take a narrow spatula and give the necessary relief with smooth and wave-like movements. Decorative plaster will look original and unique.
After 24 hours, even a thick layer of plaster will dry, all that remains is to paint the coating in the desired color, matching the color of the wallpaper and harmonizing with the interior of the room. The paint will adhere properly if applied with a sponge or roller. Another way to add color to the coating is by tinting the plaster - diluting it with paint in a certain ratio. This option is considered more practical and of higher quality.
Among the many ways to decorate rooms, decorative plaster is a fairly new and modern method that can give your apartment originality and freshness.
DIY decorative plaster of walls: sea foam effect. Video
Another way to add an original texture to decorative plaster is the effect of sea foam. To do this we need two plastic spatulas: one large and the other small. We take the finished mixture onto a large spatula and level it with tangential movements. As a result, we should get a drop-shaped state of the plaster. Now we carefully apply the plaster spatula to the wall, thereby transferring these droplets to the wall.
After 15 - 20 minutes, you can begin to smooth out the drops. We take a small spatula and smooth out the droplets without effort, wiping the spatula with a clean cloth each time. That's it, we have a sea wave texture.
Decorative plaster. Application instructions. Video
Another video about the use of decorative plaster. Complete instructions with examples of wall texturing, after looking at which you can easily finish the walls with your own hands. Good luck to everyone, make your premises beautiful and unique!


