Making jewelry with your own hands. Natural semi-precious stones. We complement the interior with a tree made from coffee beans
DIY beaded jewelry has recently become a must-have accessory for many fashionistas. A variety of rings, necklaces, earrings, and bracelets made from small or large beads can be purchased in workshops or ordered individually made by professional craftswomen or talented needlewomen. In addition, for many girls, creating jewelry from beads and beads with their own hands has long been a favorite pastime.
Tools and materials for beaded jewelry
To create unique beaded jewelry, special tools and materials are required.
If you decide to engage in this type of creativity, prepare the following tools, materials and equipment:
- tongs - necessary for pulling a needle that does not pass freely through the bead;
- scissors;
- nail file – used for filing sharp edges of metal fasteners;
- pencil.
If you are going to create your own beads, necklaces or earrings, you will need nylon thread.
In the process of making jewelry can be used different types beads
The following types of beads are known depending on the material used in their production:
- glass;
- plastic;
- ceramic;
- metal.
Considering the shape of the beads, they come in the following types:
- simple - ordinary beads with holes for stringing;
- bugles – is a modification of beads in the form of elongated tubes with holes for stringing;
- cutting - short tubes with a hole for stringing.
Based on size, this handicraft material is divided into 8 numbers. Depends on the size of beads used appearance products. Beads come in matte and glossy, mother-of-pearl, in a variety of colors and shades.
Craftswomen use bead needles to create jewelry. Such devices are thin flexible needles 5 cm long. Known numbers are 10, 12, 13, 14, 15 and 16. Most often, needlewomen use a bead needle No. 12, as it is ideal for almost any type of bead. When the product is almost ready, you will need beaded fittings to connect its elements together.
DIY bead and pearl jewelry master class
DIY beaded jewelry for beginners and inexperienced craftswomen are distinguished by their simplicity. If this is your first time deciding to weave a necklace or bracelet, you will definitely need a DIY bead jewelry master class.
Using this master class, you will get a magnificent piece of jewelry - a bracelet and a ring, connected to each other by a beautiful beaded chain. When creating such jewelry, not only beads are used, but also beads.
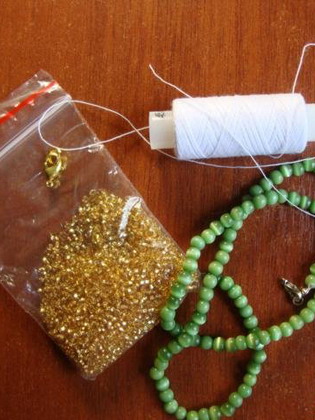
You will need the following materials:
- large pink beads;
- 2 large pearls;
- scissors;
- silicone thread.
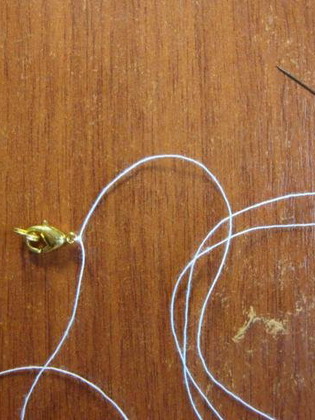
Making this decoration from beads and pearls with your own hands consists of the following steps:
Cut the silicone thread for the bracelet and ring. It is easy to determine the length of the required segment: measure the girth of your hand and finger, and add a few centimeters to connect the jewelry.
Now start weaving the bracelet: string white and pink beads onto a silicone thread, alternating different colors 2 pieces each.

You need to string the beads until the desired length of the bracelet is reached.
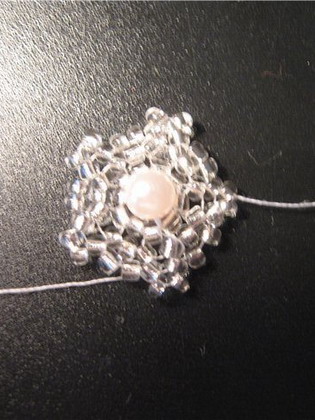
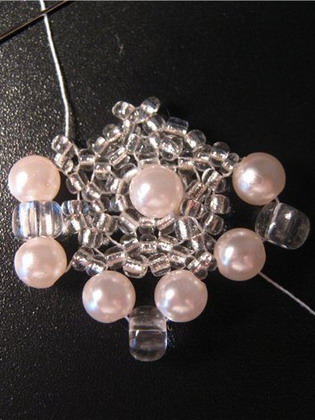
Next, take a large pearl and thread the two ends of the thread through it. They need to be folded in such a way that they meet each other halfway, simultaneously creating the effect of connection and fastening. You can move on to the next stage of creating the decoration.
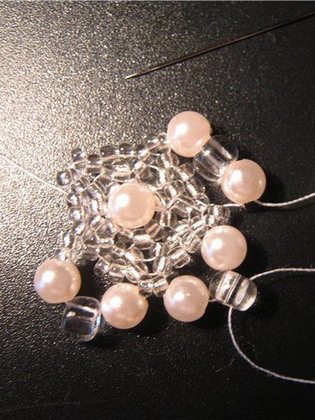
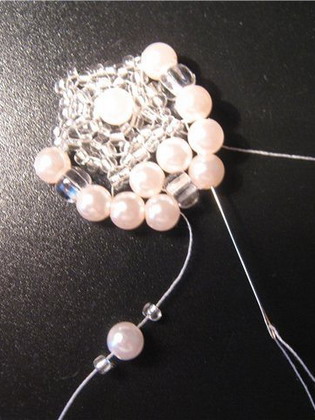
Place beads on the two ends of a silicone thread with a length that will reach your middle finger in the same way as for a bracelet, placing a large pearl in the middle of the ring.
Do-it-yourself finished bead decoration in the photo below:

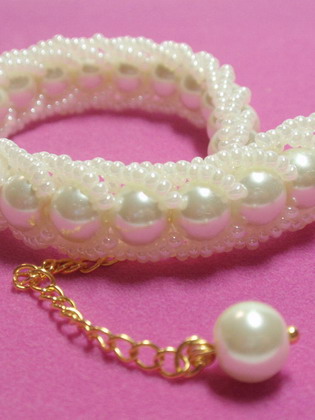

It will become a worthy decoration for graceful women's hands. It should be noted that it is more suitable for young fashionistas; mature ladies should choose more luxurious and elegant jewelry.
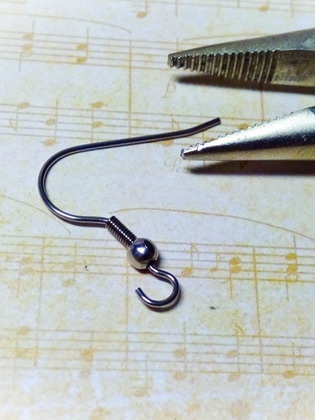
DIY bead earrings
Tassel earrings are suitable for creating both a casual and formal look.
To make such a simple bead decoration with your own hands, you will need the following materials:
- ear wires;
- pins;
- caps;
- silver beads and blue colors №10;
- bead thread;
- two blue crystal beads;
- tape 7 mm wide;
- bead needle;
- round nose pliers;
- pliers.
Making decoration:


Cut the ribbon approximately 6.5 cm long. To prevent it from unraveling, you can melt its edge with a lighter.

Take a bead thread approximately 50 cm long. Tie a tight knot at one end and thread the other through a needle.


Use a needle to go through the entire row of beads in the opposite direction, except for the last bead, as it will be the anchoring one. Pierce the ribbon, fix the bead row, retreat approximately 1 mm, and begin the next row.
Complete the second row in exactly the same sequence as the first. In total, you should get 15 of these low beads; when they are collected, you can begin to design the beaded decoration.
Take a pin, use pliers to make a double eyelet on it so that it is durable and reliable. Using this eyelet, sew the pin to the ribbon and continue twisting it, piercing it along with the pin.

When you twist the ribbon all the way and stitch it, the beaded bottoms will take on a tassel shape.

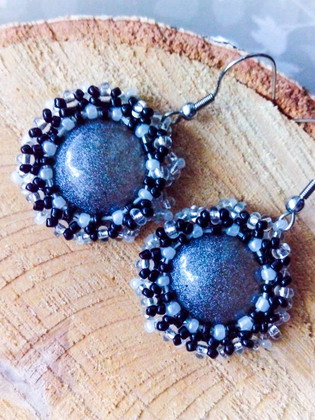
Put a cap and one of the blue beads on the finished tassel, attach the wire.
The sequence of making this bead decoration with your own hands is shown in the video below:
Even a novice craftswoman can make such tassel earrings on her own.
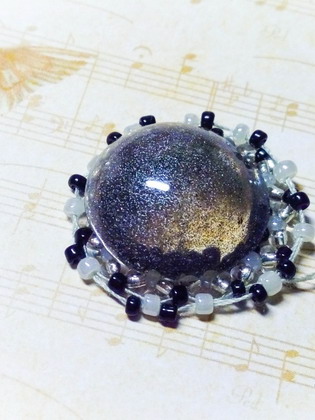
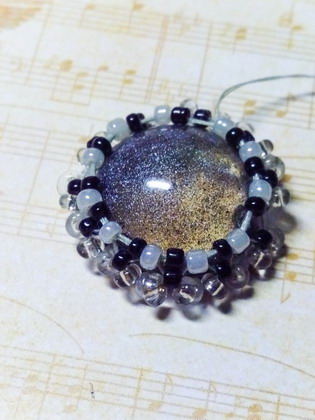
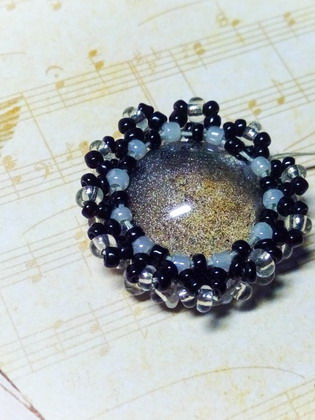
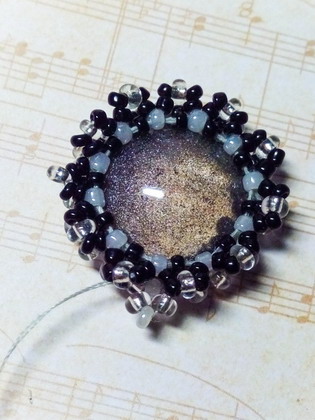
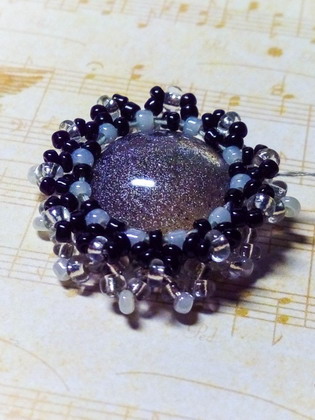
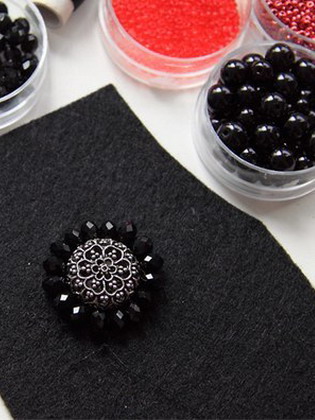
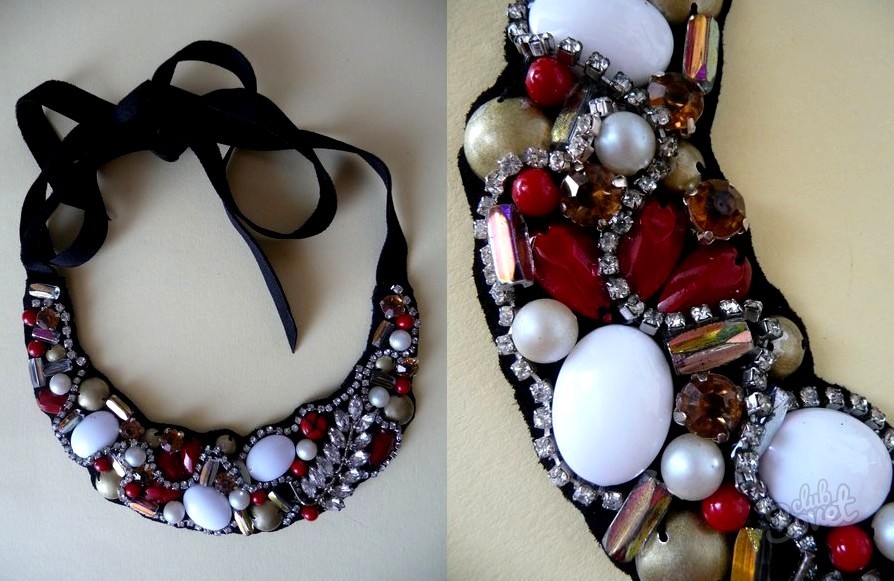
DIY neck decoration made of silk, beads and felt
DIY silk and bead decoration looks original, luxurious and elegant.
To make it you will need the following materials and tools:
- Shibori silk ribbon – 7 cm;
- Czech beads No. 10;
- soutache of three colors;
- glass cabochon;
- large beads;
- cutting;
- felt;
- cardboard;
- artificial leather;
- glue, thread, scissors, pencil.
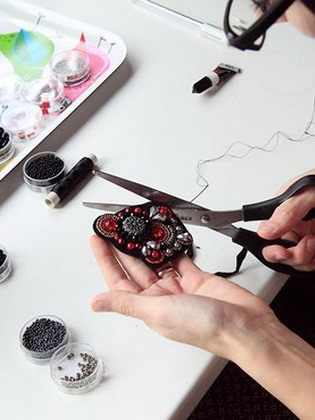
This decoration from beads and felt is made with your own hands in the following way:
Sew the edge of the ribbon to the felt using regular stitches. You can lay the shibori silk ribbon in any way you like. It lays down in beautiful waves, it can be bent and even twisted. Trace the tape laid and fixed on the felt with a pencil.
Now sew the shibori ribbon to the felt along the contour, using simple stitches. Glue the cabochon at the top next to the ribbon.
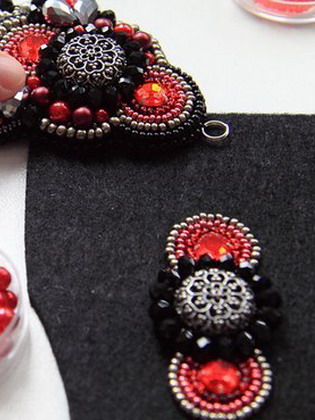
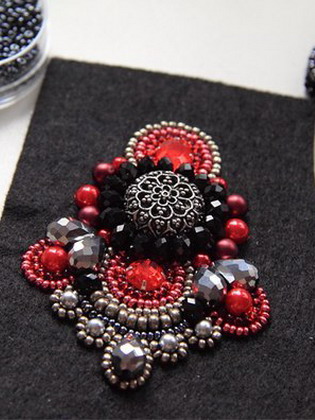
Soutache of three colors - depending on the chosen color of the ribbon, so that they look harmonious, sew them together to form a tight cord. Wrap the soutache around the cabochon and sew it to the felt.
Fold the ends of the soutache onto the back side of the felt and sew them so that they are not visible.
![]()
Sew the trim, beads and beads to the silk ribbon, laying them out in random order. At this stage of decorating, you can lay the ribbon in beautiful waves.
Make a loop from the suraj and sew it to the wrong side of the felt. The pendant should hold its shape well; to do this, attach it to the cardboard, trace it with a pencil, cut it out and glue it to the felt.


Cover all edges of the finished pendant with beads using the “American” method.
You can hang this beaded neck decoration on your own on a chain or leather cord.
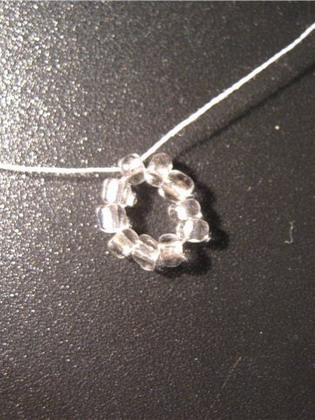
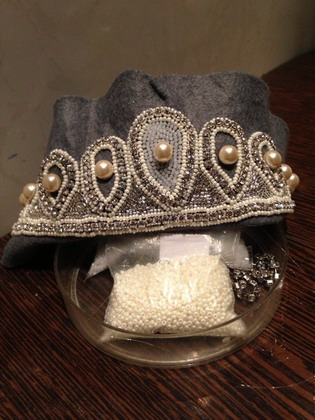
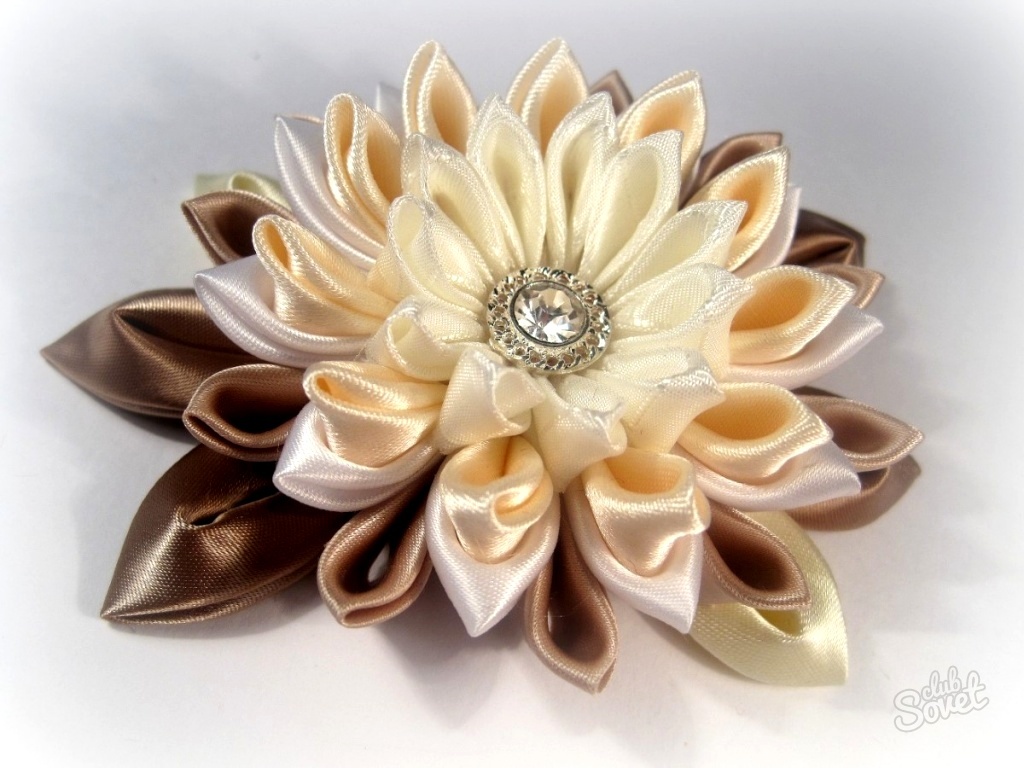
How to make a hair decoration from beads and wire with your own hands
DIY beaded hair jewelry is not only original and beautiful, but also pleasant and very interesting. A tiara with a flower will perfectly complement ball gown, it can also be worn even with a wedding dress.
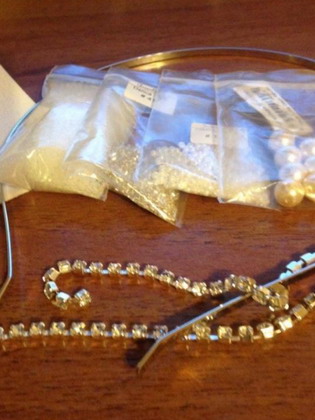
To make a beaded tiara, prepare the following materials:
- thin metal hair hoop;
- wire – 1 mm and 0.4 mm thick;
- beads – golden and silver;
- beads different sizes;
- pliers.
You can make this decoration using beads and wire yourself by following these step-by-step instructions:
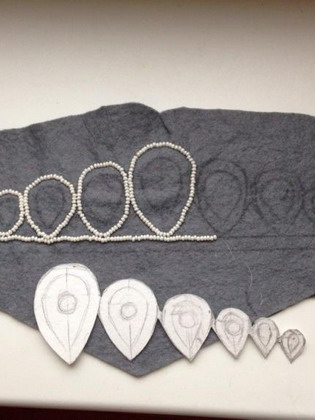
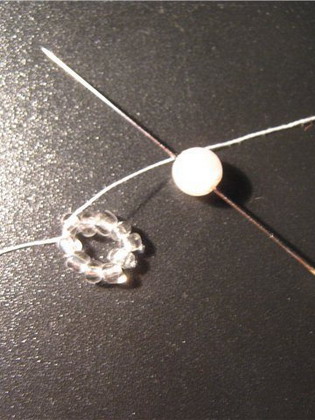
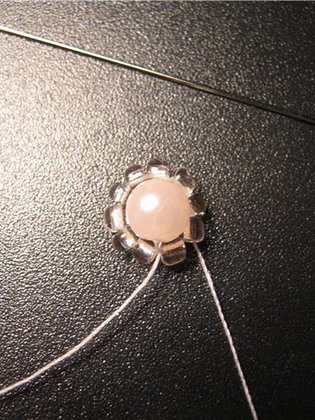
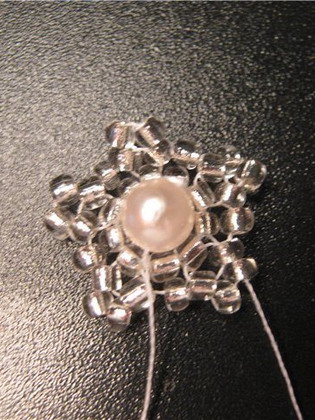
Making a tiara should begin with the formation of the flower itself. To do this, cut a wire approximately 0.8 m long. At the end of the wire, fix a large bead and form a loop.

Under the bead, twist the wire into a spiral and form flower petals, there should be five of them in total. Try to get all the petals same shape and size.
Twist the remaining wire and decorate it with a large bright bead, this will be the middle of the flower.
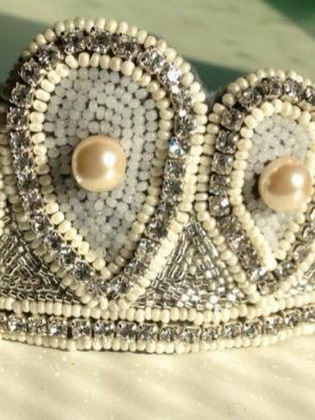
Now you need to braid each petal with beads. To do this, start stringing beads onto a thin wire, alternating them with glass beads and small beads. Tightly braid the petals with this wire. Make two more flowers using the same pattern, but slightly smaller.

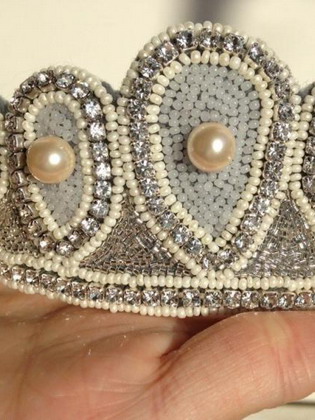
When three flowers are ready, start decorating the hoop with beaded flowers. First, fix the small flowers on the hoop, then attach the large ones.
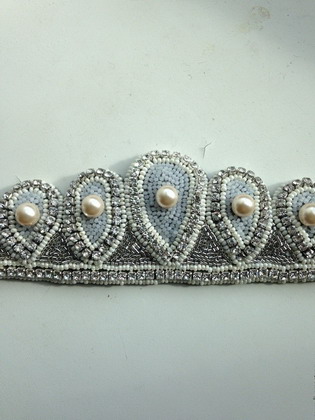
A beautiful beaded floral tiara is ready.
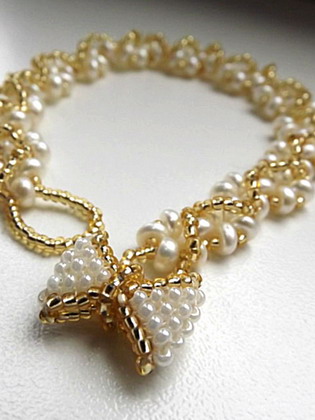
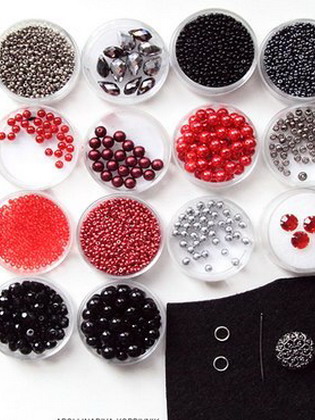
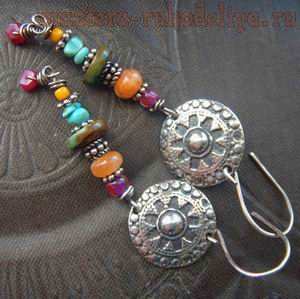
DIY bracelet decoration made of beads and stones
To make such a decoration from beads and stones with your own hands, prepare the following materials:
- Czech beads No. 10 – about 10 grams;
- chipping of natural stones - about 25 cm low;
- bead needle, bead thread and scissors;
- accessories – pins, caps, clasp;
- round nose pliers, wire cutters.
Decoration creation process:
Cut the bead thread to a convenient length - up to 1.5 m, and pick up the material in the following sequence: bead, pebble, 3 beads, pebble, two beads. Close this set into a ring and tie it in a knot, this is what 1 repeat looks like, there should be three such repeats in total in one row.
Every woman dreams of arranging her home so that it becomes the coziest corner where she always wants to rush from work and gather with her family, celebrate holidays or simply enjoy the tranquility of home. DIY home decorations are becoming increasingly popular today. After all, as you know, various little things add coziness to the house, which are in harmony with the decor and with the mood of all household members.
And of course, who doesn’t want to decorate their home before the holidays - for example, a birthday or New Year - with various little things of a suitable theme! But you will have to spend a lot of money on decorating the rooms, because such trinkets in specialized stores are not as cheap as they seem. Therefore, the best option would be to make home decorations with your own hands, the creation of which will also be a fun activity for you and even for your children.

It is possible to complement and refresh the interior of any room with the help of exclusive flower pots, and for this you do not have to run to the stores, you just have to look for old pots that are lying around idle. Using scrap materials and faceless, lying around pots, you can make wonderful crafts to decorate your home with your own hands.
There are many ways to decorate flower pots. So, for example, you can use paint from balloons or wrap them with coarse multi-colored threads, glue fringe or ruffles around them.
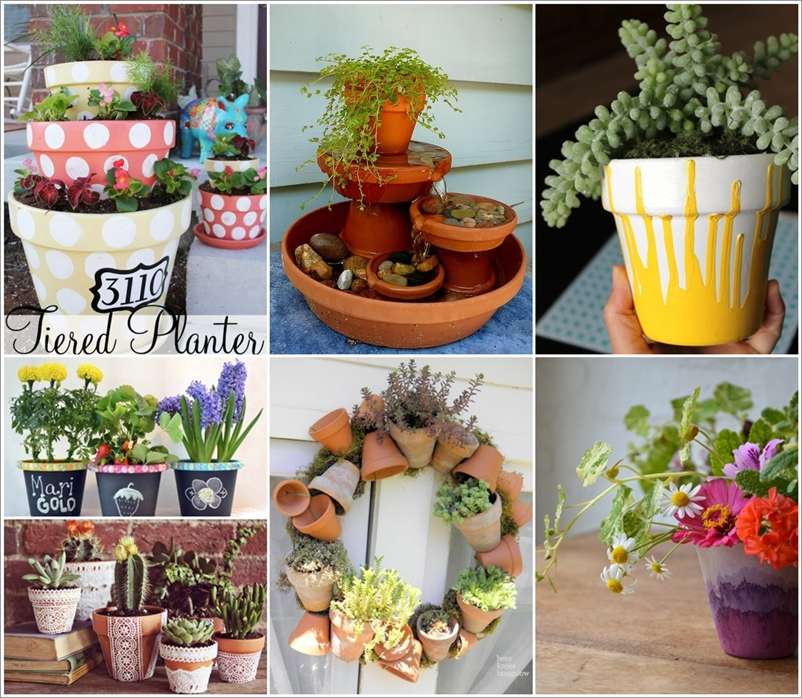
Using scrap materials and faceless, lying around pots, you can make wonderful crafts to decorate your home
Another interesting option is to cover old flower pots with beads, beads, sequins or appliques, which are finally varnished.
The knitted clothes with which they are wrapped will bring originality to the pots. To do this, you don’t have to start learning knitting yourself; just choose an old knitted sweater or a boring scarf and use scissors and a needle and thread to create a new fashionable garment for a flower pot.
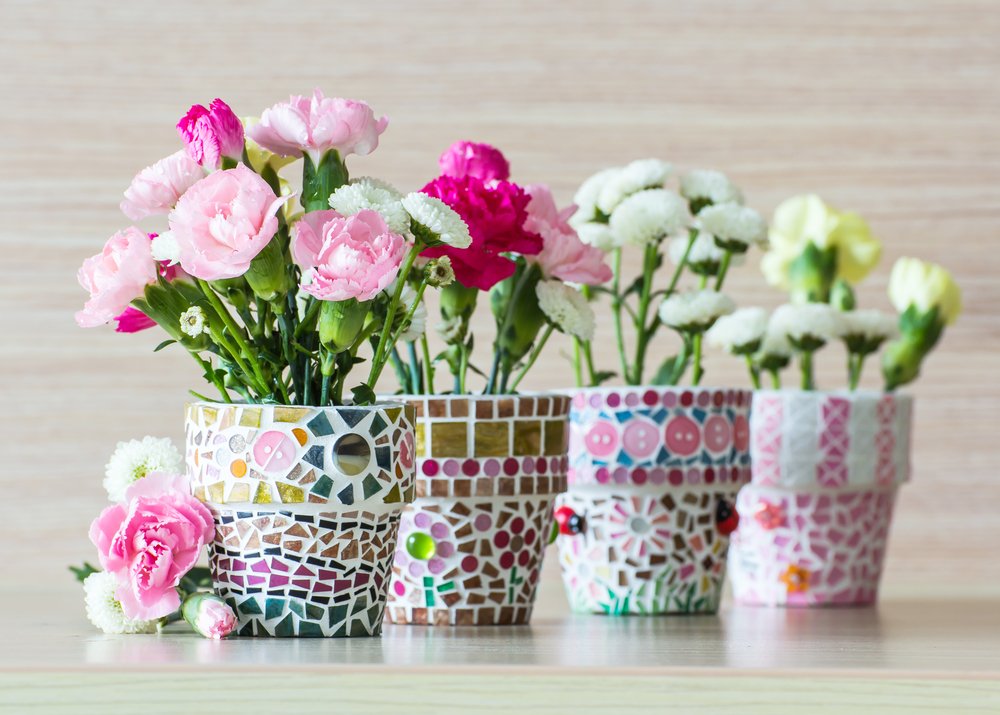
It’s a little more difficult to make a colored mosaic for pots, but the result will be so impressive that you won’t regret the time spent. So, to decorate with mosaics you will need the following material:
- colored glass, pebbles or pebbles;
- “hot” glue (PVA is also possible);
- tile grout;
- brush.
In order not only to paste over the pot, but also to lay out a drawing, you should prepare glass pieces of several colors. Initially, the desired design is laid out on paper and only then transferred to the surface. First, glue the image and only then process the rest of the flower pot.
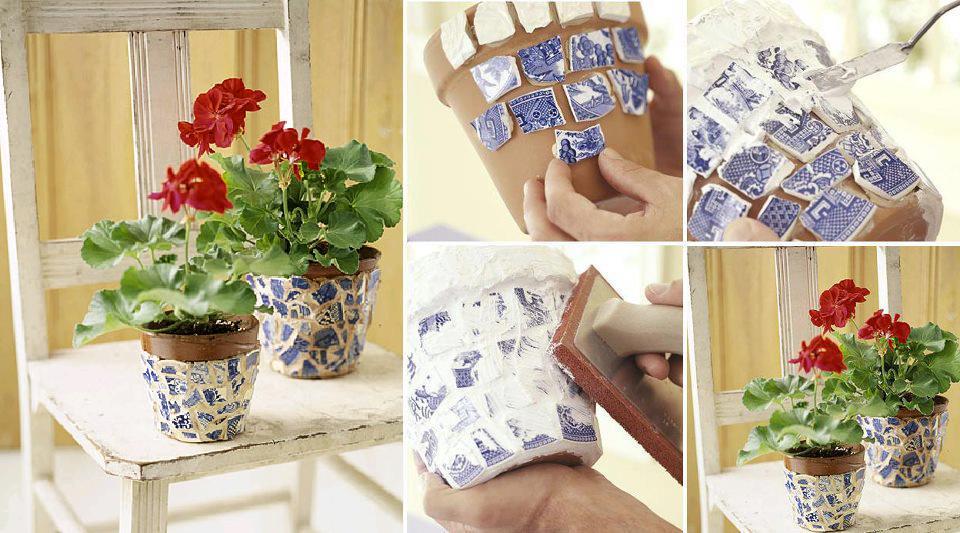
After the entire pot is decorated with glass, tile grout is applied on top. If at this moment some pieces of glass fall off, it’s okay: in a day, when the pot has dried, you can glue back the fallen elements.
After treating the pot with grout, you need to wait 15-20 minutes and use a damp rag to wipe it off the glass. The grout is reapplied after a day and also washed with a rag. After another 24 hours, the product is finally varnished - and the original decoration you created is ready.
No one else will have cushions like these again.
When there is a sofa in the living room, it’s just furniture, but if you decorate it with a couple of cute pillows, the room immediately feels cozy and warm.
Advice! To decorate pillows, you can embroider a pillowcase yourself, and not just with threads, but using beads, ruffles or other elements.
It’s easy to sew sofa cushions yourself. If you don’t have enough time for this, you can buy a couple of inexpensive small pillows in the store and, using your imagination, create a lovely decoration for your home from them, inspired by some suitable photo from the Internet.
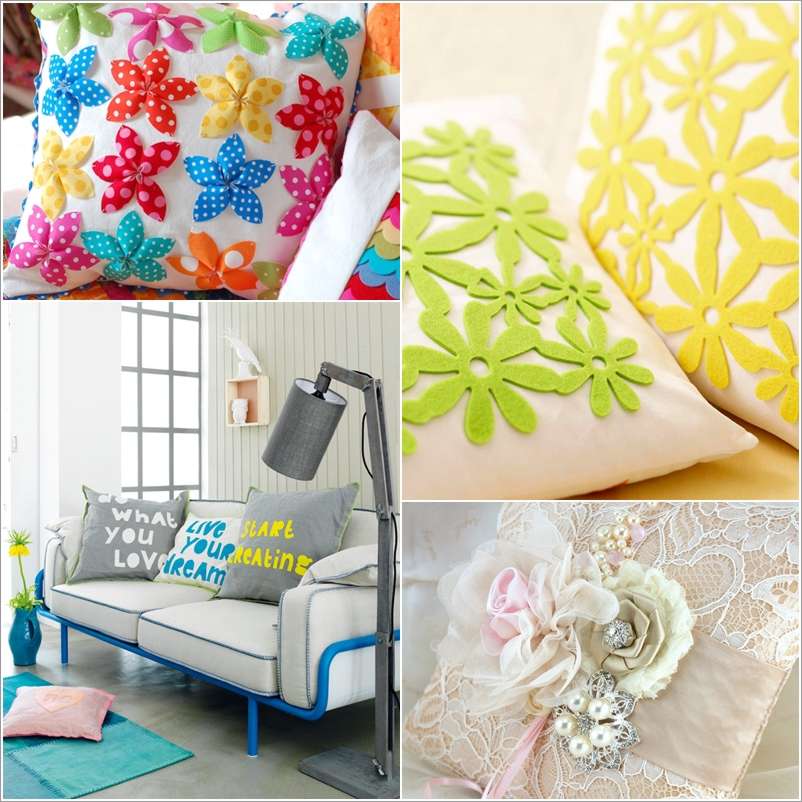
It’s easy to sew sofa cushions yourself
For greater convenience, it is better to make appliqués not on the pillow itself, but on top of the pillowcase, which can be removed and washed or changed. And there are many options here. You can prepare the applique yourself and sew it on. Or use an iron to glue a finished purchased decorative element - this will not be difficult at all. The material for the pillowcase can be silk, velvet or any other fabric that matches the interior of the room.
Modern sofa cushions do not have to be square - you can make them round, like animals or in the shape of letters, for example. If you still decide to sew a pillow yourself, you can use scraps of different fabrics rather than a uniform fabric. For padding, it is better to choose hypoallergenic material.
DIY decorated vases
Everyone knows perfectly well that in stores you can choose a vase to suit every taste, color and size, but it is not always possible to spend the amount written on the price tag for the vessel you like. And sometimes you just want to decorate your home with something original and exclusive.
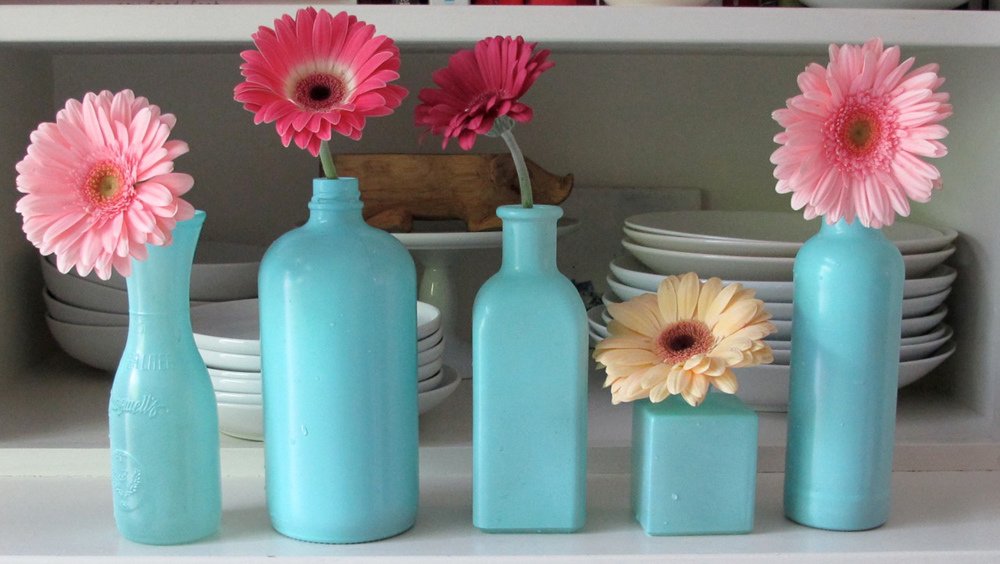
Advice! An easy and excellent solution would be to use a glass bottle of any original shape.
After first removing the label, remove any remaining glue from the bottle, then place a bouquet of dried flowers in the bottle. And finally, the entire composition is sprayed with spray paint in a silver or golden color, or any other color - the main thing is that the craft looks harmonious with the room decor.
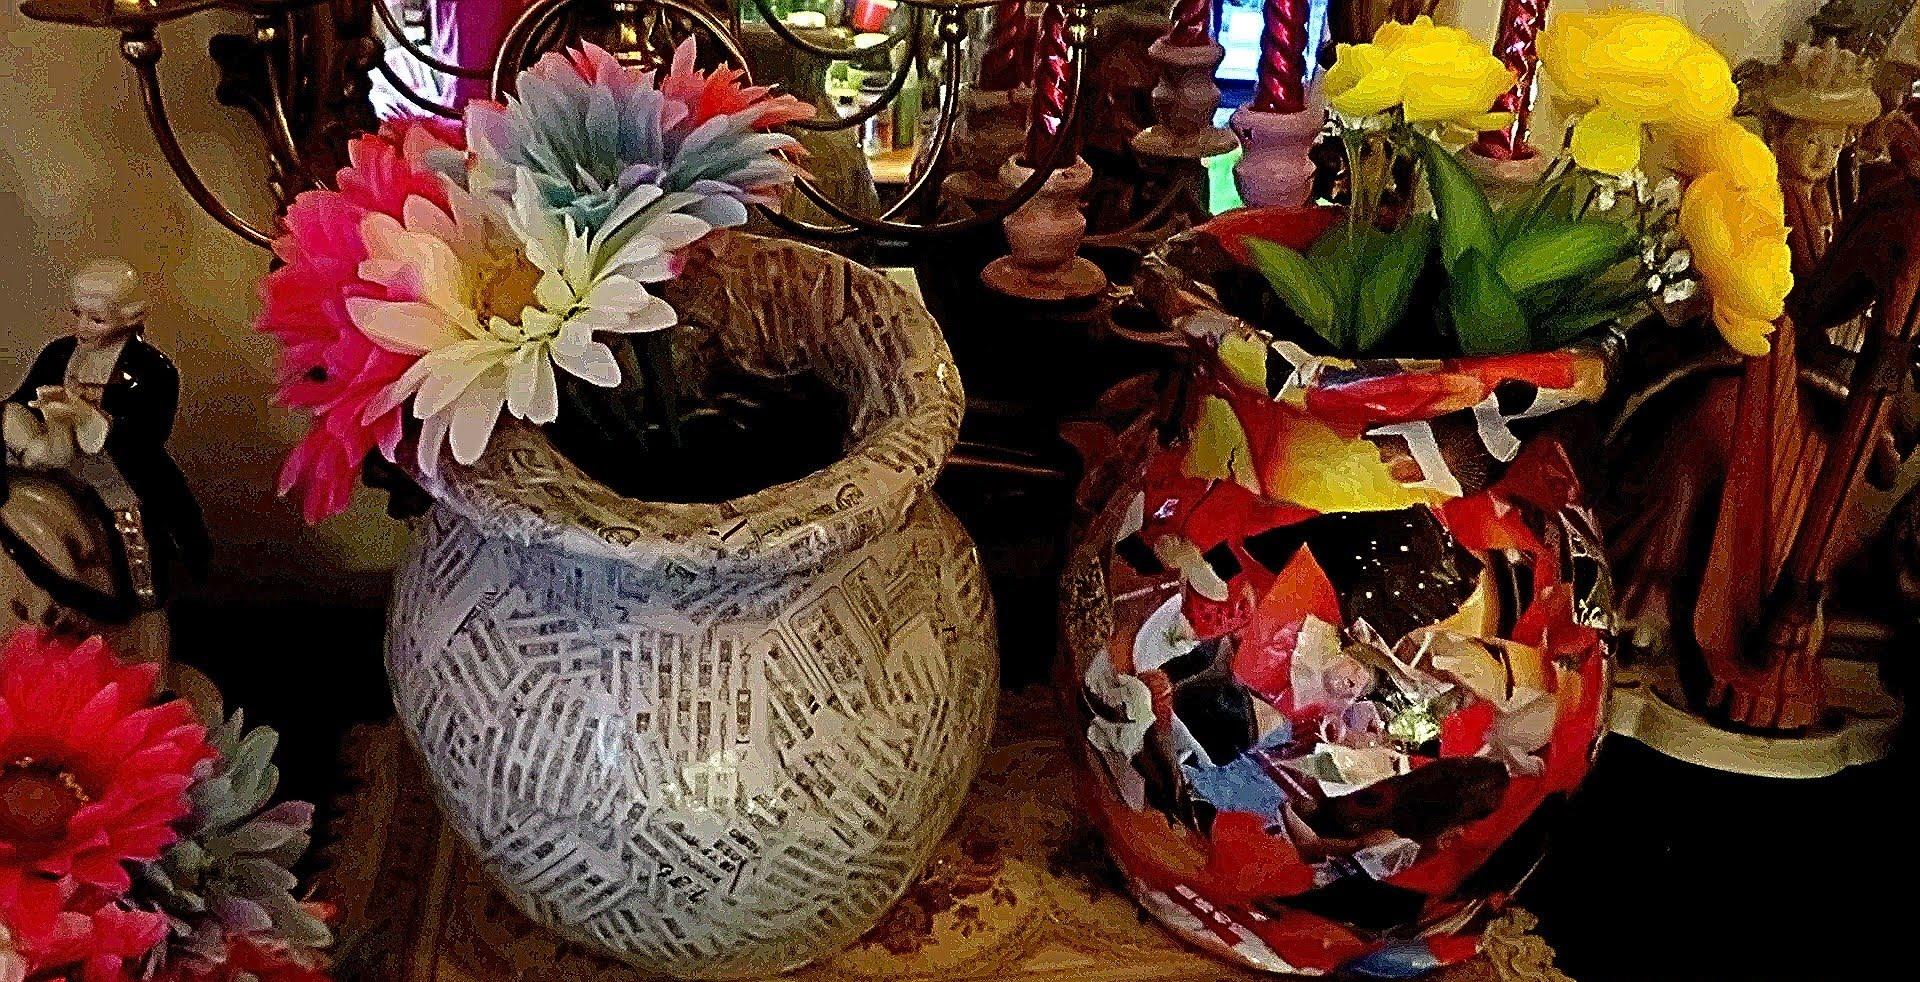
You can create an original vase decor with your own hands from paper, and since it is also simple, feel free to involve your child in such an exciting activity - as a result, home decoration and a good mood are guaranteed. For such a vase you will need:
- glass bottle, glass or jar;
- corrugated paper of different shades (or you can use pieces of pages from a fashion magazine);
- PVA glue;
- small scissors.
The selected paper should be cut into uneven pieces of different sizes. Apply glue to the prepared bottle and apply pieces of paper one by one in a chaotic manner. Treat the entire bottle this way. Next, when the first layer is pasted, apply glue on top again and add more pieces of paper. We do this until the entire surface is covered. At the end, we treat the craft with glue again and wait until it dries. If you have acrylic varnish in your house, you can varnish the product, but even without this coating the vase will look great and will become another home decoration made with your own hands from scrap materials.
We complement the interior with a tree made from coffee beans
The coffee tree will not only decorate the rooms, but also fill them with a magical aroma. Made with your own hands, this original and beautiful tree will be an excellent present for any occasion, as well as a cute decoration for your home.
To make a tree from coffee, you should prepare the following material:
- large coffee beans;
- plastic ball;
- brown paint;
- glue;
- gypsum;
- small flower pot;
- Styrofoam.
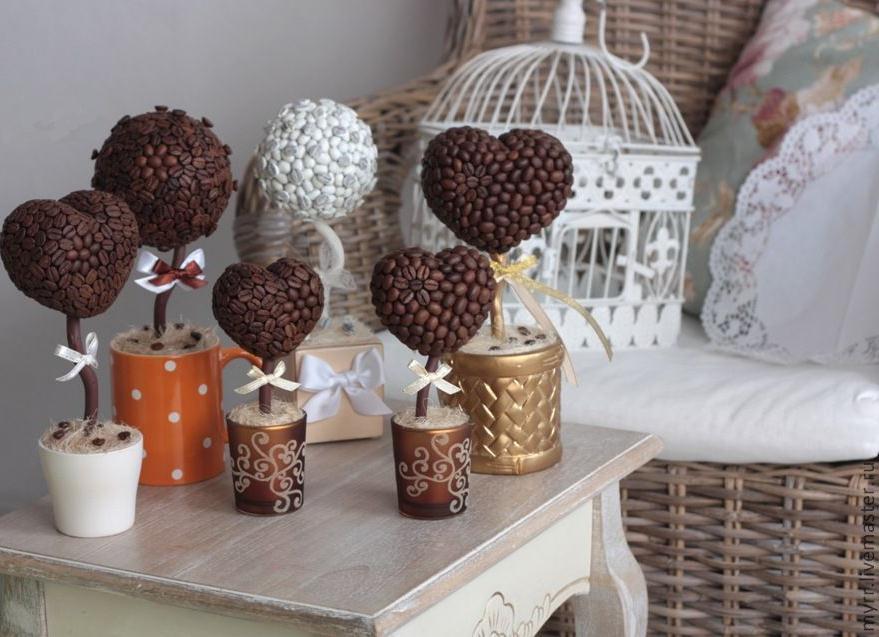
The coffee tree will not only decorate the rooms, but also fill them with a magical aroma
First of all, we color the ball in Brown color, so the original shade will not appear from under the grains glued on top. After the paint has dried, we pierce a hole in the ball into which the tree trunk will go, and begin to cover it with grains.
For the trunk, you can use any stick or branch, which will be wrapped with rope, ribbons or anything else you wish. We insert the barrel into the hole made in the ball until the end, and we also glue coffee beans around it for better fixation.
Before securing the tree in a pot, you should wrap a piece of wire around the base of the trunk. We put the finished tree in a pot and cover it with polystyrene foam, then dissolve gypsum in water and pour it into the pot. When everything is dry, the craft is ready. If you want, you can decorate it further.
How to decorate your home for a birthday
Birthday is a wonderful holiday for every person, regardless of age. Therefore, many people like to decorate their home to maintain a festive atmosphere and, of course, to the delight of their children.
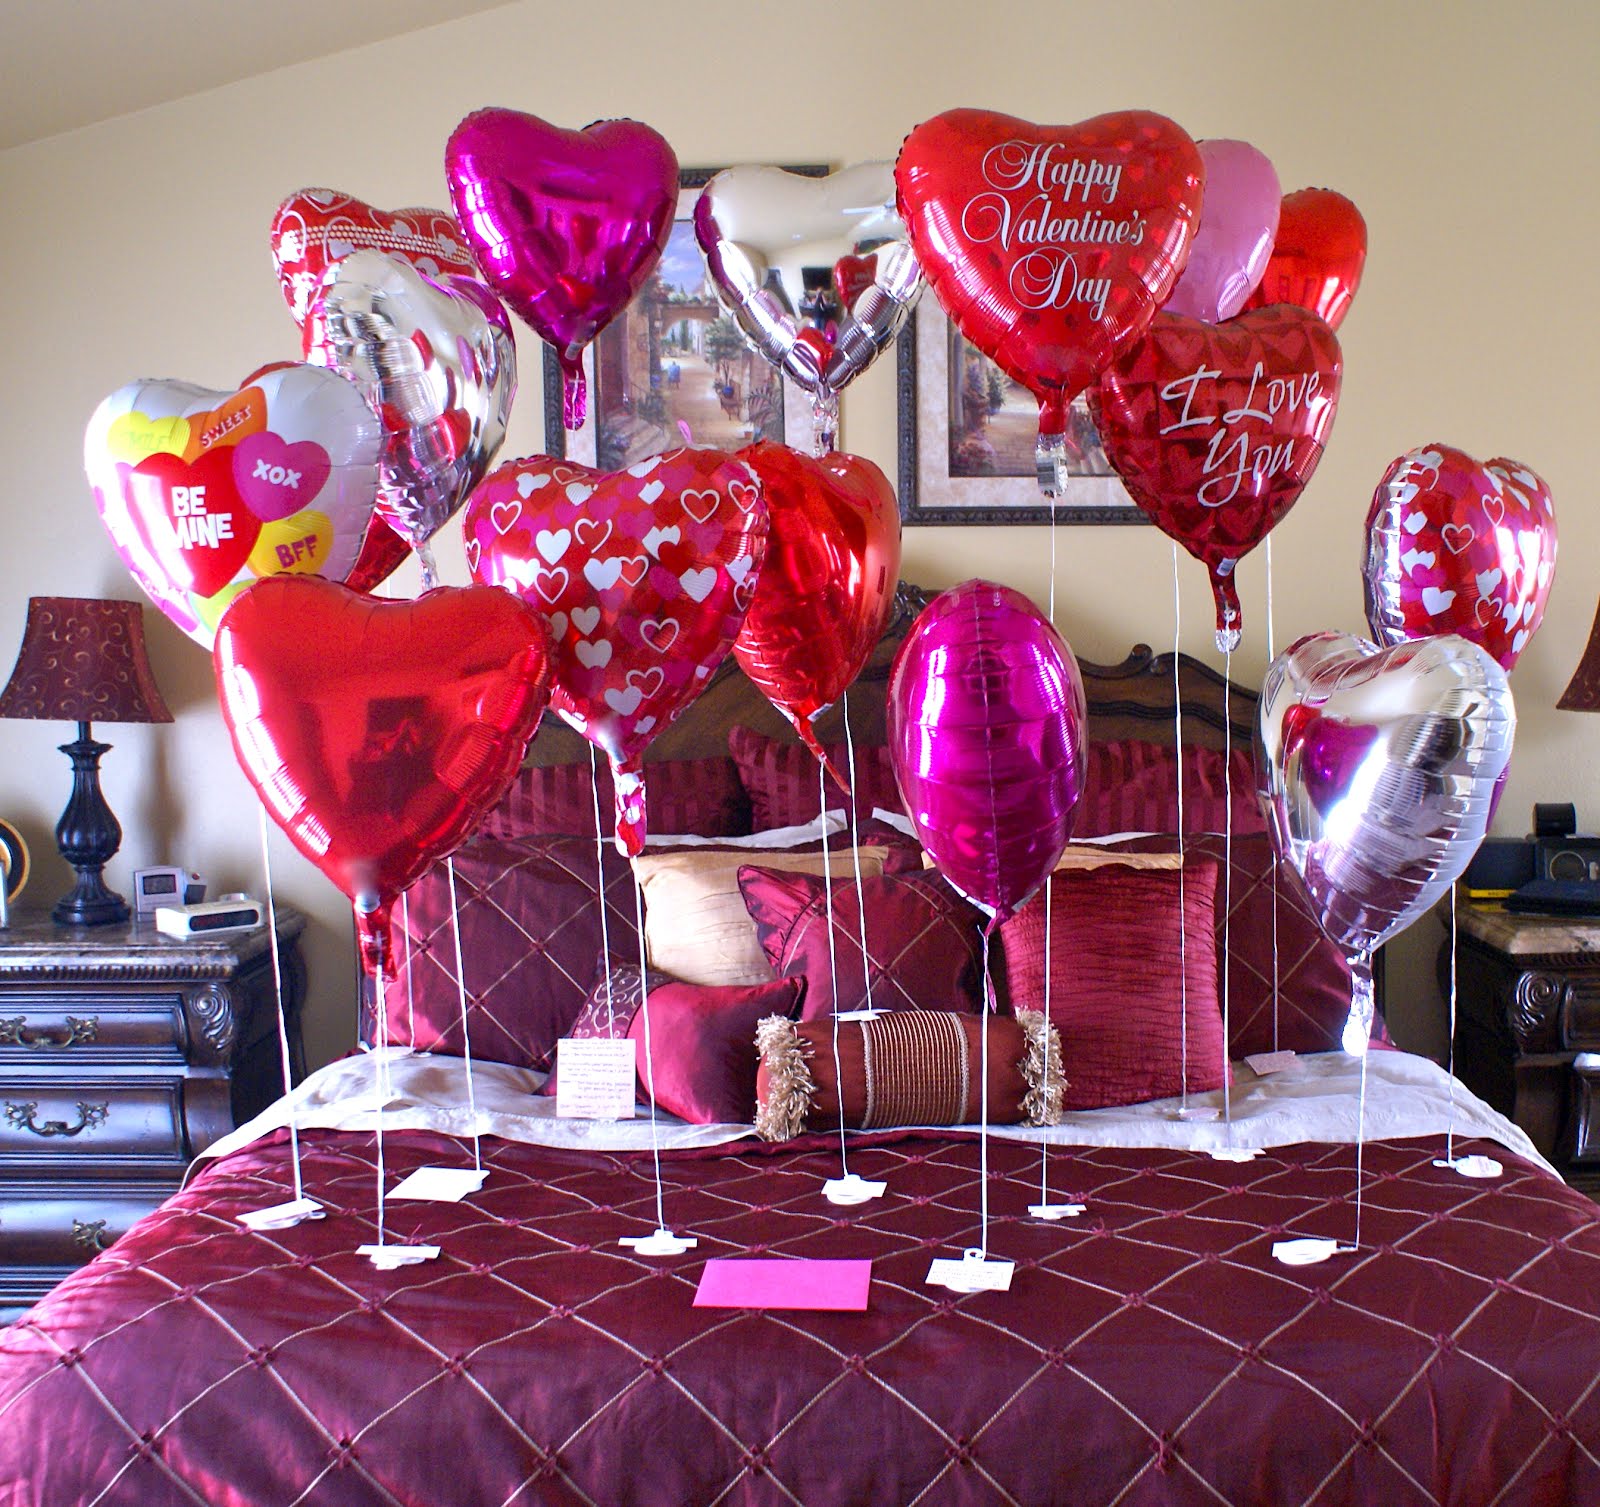
First of all, when decorating rooms, they remember balloons, without which no one can do children's party. But in order for the balls to really bring pleasure, it is better, of course, to make a composition out of them, to come up with something original - then it will not be just a bunch of balls, but a real decoration.
Pictures made from multi-colored balloons attached to the walls or ceiling will look beautiful; you can also use ribbons for decoration.
When decorating your room, think about balloons
Another fun option is to scatter inflated multi-colored balloons randomly across the floor. This idea will appeal to children who will happily play with the balls.
Advice! If Balloons Fill it with helium and tie satin ribbons instead of threads, then you can attach interesting photographs to the ribbons.
This idea will surely please both the birthday boy and the guests.
In addition to balloon decorations, there are other interesting ideas for decorating your home for a birthday with your own hands. For example, using multi-colored crepe paper, you can make bright garlands, elegant pom-poms or other decorations and hang them around the room. Draw posters with congratulations on sheets of whatman paper - you get something like a congratulatory wall newspaper.
New Year's decorations made for the home with your own hands will always bring a festive mood. It will help to completely complete the decoration festive table setting table. To do this, use a New Year's themed tablecloth and napkins; spruce branches can be folded into an interesting composition and decorated festive table. You can also make bright notes with wishes for your family and guests.
Therefore, to the question of how to make home decorations with your own hands, you can answer: there is nothing simpler, the main thing is your desire and imagination!
A girl with exclusive jewelry always attracts attention. And you don’t have to buy designer jewelry; you can make an original accessory with your own hands. Take note of a few ideas to create your own little masterpiece.
It's very easy to make a bracelet for your wrist. We choose a thick fabric, sew a wide ribbon from it, and put a backing inside, for example, felt. Along the outer area of the bracelet we glue beads, rhinestones, and pendants in a free order. We attach metal half rings to both ends of the tape, like on bag straps. We connect them with a clasp, check all the elements for strength and wear them with pleasure.

Hand-made jewelry doesn’t end there, but on the contrary, it’s just beginning! Get inspired by ideas, use your imagination and create for your own pleasure!
Well-chosen jewelry that emphasizes your individuality will make its owner stand out from the crowd. When everyone is wearing standard mass-produced crafts to create a unique look, it’s time to start making your own jewelry.
After all, no one can choose a style and color combination that is ideal for your character and appearance better than you yourself. In addition, handicrafts are in a great way calming down and relieving stress - during monotonous work, ideal solutions to all sorts of problems often spontaneously come to mind.

Usually, making jewelry to order is considered a very expensive and elite business, accessible only to ladies from high society, since ordering an individual piece of jewelry from a master jeweler is far from cheap. But as soon as a person begins to make jewelry with his own hands, all the difference in financial situation fades into the background - everything begins to depend only on the originality of the imagination and the taste of the performer himself.

Products created by hand can be perfectly matched to the color of hair, eyes, face shape, color and type of suit or dress - all at once. It is the possibility of limitless self-expression in creativity that attracts more and more people to this practical and useful form art. Today, in the assortment of specialized stores you can find an endless variety of accessories and materials for making jewelry yourself. And finally, when people begin to approach this matter creatively, much more opportunities open up for them to communicate live with “colleagues” from different countries world - exchange of experiences, heated discussions and recognition of one's creativity.

So, let's begin this exciting and promising activity. The first step is to collect and carefully study more information on this topic. On the Internet there is a large number of fascinating sites dedicated to all kinds of handicrafts. We study the information approximately in the following sequence: general provisions, materials for making jewelry, necessary tools (selected according to the intended materials), information about master classes or courses that interest you, techniques for making jewelry from different types materials. Also, it is advisable to immediately find a widely visited specialized forum on this topic, where you can always get answers to constantly arising questions.
DIY jewelry, materials.
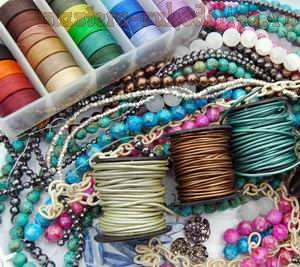
In the first place, among the source materials, of course, are all kinds of beads and beads. All types of jewelry are made from them - bracelets, earrings, necklaces, beads, brooches, etc. A material that shimmers with all the colors of the rainbow or imitates all types of precious and semi-precious stones allows you to turn almost any idea of a needlewoman into reality.
The assortment of the online store provides such a wide selection of all kinds of beads that at first, your eyes just run wide. Beads are produced from plastic, wood, glass, metal, mother-of-pearl, stones of various colors, shapes, transparency and sizes. You can make unique beads yourself - from pebbles, bones, shells, colored beans, fabric, buttons covered with lace, knitted balls, leather, etc.
The next option, which also gives a wide field for imagination, is knitted jewelry. You can knit with crochet and knitting using yarn, wire, decorative braid, various threads, etc. There are a huge number of educational instructions on knitting and various patterns on the Internet. Once you have sufficiently mastered the technique, you will be able to create your own designs. Using knitting, you can make pendants, brooches, bracelets, and also complement any product made from other materials.


AND the last stage in creating jewelry, there will be a selection of suitable accessories for jewelry. Its selection should be approached most carefully, since the strength of the decoration’s fastening depends on it to prevent its loss.
Online storeLucita– Stones and accessories for jewelry
DIY jewelry, where to start?There is probably no woman who does not dream of being special and unique. You can create your own individual style and add a twist to any standard wardrobe with the help of handmade jewelry. Handmade jewelry has always been valued, and over the last few years it has been a fashion trend and not without reason, because it carries the author’s design and the warmth of the hands.
Learning how to create jewelry is not at all difficult; this fascinating process provides enormous scope for self-expression and creativity. Having mastered the technique jewelry making, you will be able to create a designer accessory, be it a necklace, earrings or bracelet, to go with any outfit, not only for yourself, but also for your loved ones. Don’t forget about the benefits of such a hobby: ready-made kits Jewelry made from natural stones is quite expensive; it is much more profitable to make them yourself, choosing materials and design to your liking.
Jewelry can be created using a wide variety of techniques: modeling (polymer clay, ceramics), lampwork (melting glass beads), Wire work (working with wire and metal), they can be made from textiles, leather, beads, epoxy resin and other materials. But all these techniques require certain knowledge and experience. The easiest way is to create a decoration from ready-made elements; this is accessible to everyone, even if you have never held pliers in your hands.
What do you need to start making jewelry? In addition to a little patience and a little more time, you will also need materials. They must be of high quality and specialized.
Currently present huge selection modern and interesting materials to realize any jewelry fantasy.
Of course, you can take old beads lying around at home and string them on a fishing line, securing the entire structure with a knot, but it is unlikely that such a “decoration” will last you long and will more likely resemble a craft rather than an original work.
The choice of elements should be taken carefully so as not to get confused with their impressive assortment, use these simple tips
When choosing beads, take into account their color combinations with each other, and also calculate the required number based on the length of the product.
First you need to decide on the most important component of the future decoration - beads. They can be of completely different shapes, sizes, made of natural stones, glass, acrylic, faceted, smooth, etc. When choosing beads, take into account their color combinations with each other, and also calculate the required number based on the length of the product.

Decide on the basis of the decoration. Basically, when creating bijou, two types of assembly are used: professional jewelry cable (it is thin, but very strong and flexible) (f.6), or assembly on pins and pins(more labor-intensive method).
If the beads used are too heavy, you can use wire.
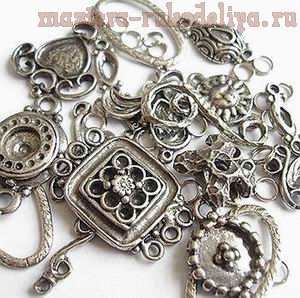
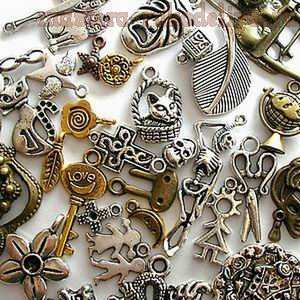
Once the beads have been selected, you can proceed to selecting metal fittings. It comes in silver, bronze and copper shades. Silver fittings are suitable for classic jewelry; bronze and copper shades are perfect for creating jewelry in ethnic and vintage styles. With the help of various metal elements, jewelry looks more interesting and rich. Such elements include caps for beads, rondels, spacer beads, connectors(with their help you can make multi-row beads and bracelets), frames for beads.
The central element of a necklace always looks interesting - a pendant; it can be one, or several at once; for attaching the pendants you will need bails and holders.
Locks come in various options: toggle, carabiner lock, hook, magnetic lock, etc. The most convenient toggle lock, but you should keep in mind that a product with such a lock will have a fixed length, and with the help carabiner lock and the length of the extending chain can be slightly changed. Magnetic clasps look stylish and neat, but are only suitable for light jewelry; if heavy, they can come unfastened, and this is completely uncomfortable.
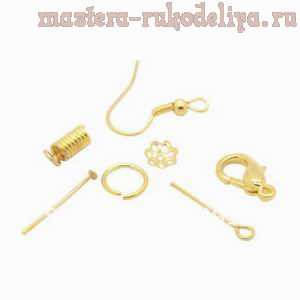
To secure the ends you will need Callots, crimps, welt protection, connecting rings. For an unusual design, use ribbons, cords, chains.


