How to make butter from cream. We make homemade butter.
Please advise how you can make good oil at home? Does anything need to be added to it?
At first, I also couldn’t make good homemade butter, although my cow produced very rich milk. Having studied many books describing the technology of making oil, I developed my own, which is most suitable for use at home.
After milking, I filter the milk through 4 layers of gauze and leave it to settle for about two days. Occasionally I ferment the milk, and then the sour cream can be removed after five hours. If I remove the top from one bucket, I immediately put it in the churn and churn. If a couple of buckets of milk have accumulated, then I mix the sour cream removed from them and certainly let it ripen for another 3-4 hours.
I place the ripened sour cream in a bucket of warm water so that it warms up to 110 (no less!). And when I’m in a hurry, I do it even simpler: I pour a glass of warm water into the skimmed mixture and into the butter churn.
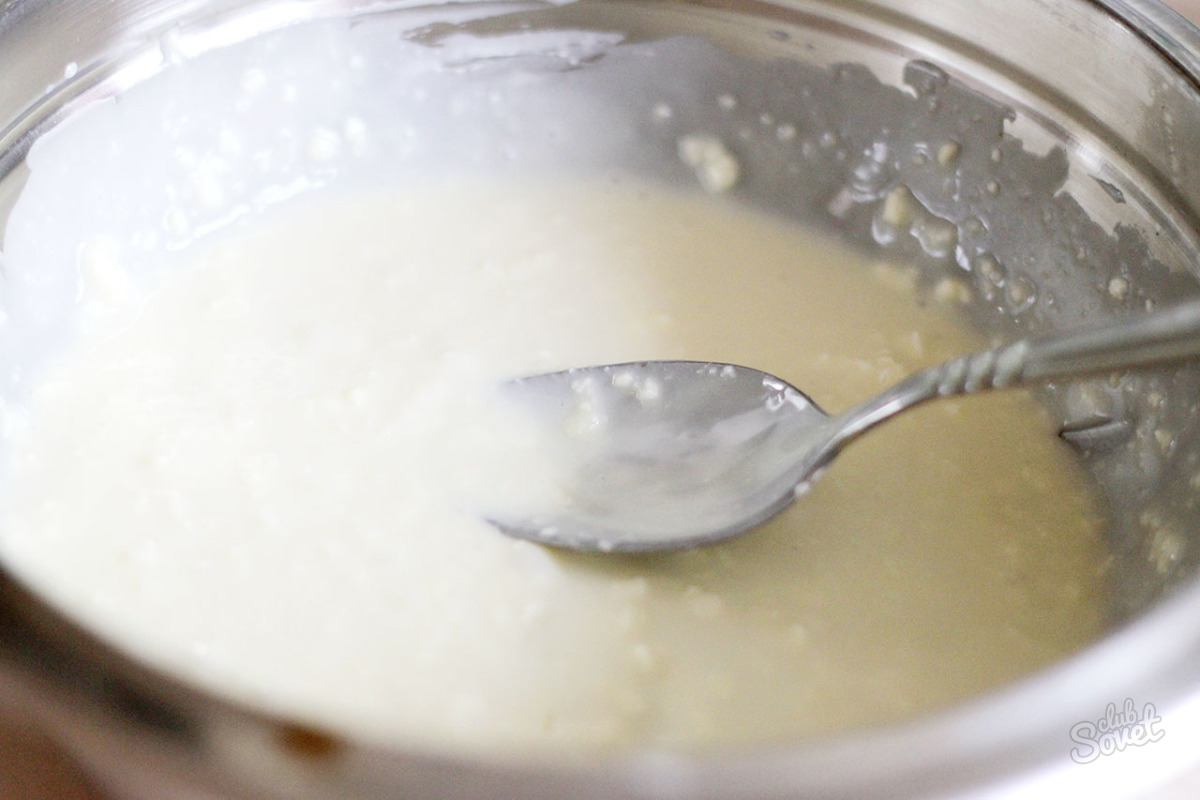
There is no need to churn before creating a whole piece, because in this case the oil will not be washed out and there will be impurities in it. The process must be completed when grains of fat appear. That's when I start rinsing.
Each grain of oil is perfectly rinsed and freed from whey. How do they do it? After draining the whey from the churn, I fill it with water at room temperature and again crush the grains. Subsequently, I change the water again and beat the butter again. After rinsing it in two waters, I remove the fat with a slotted spoon onto a plate and squeeze it with the lid of a butter churn. And since the oil was in grains, it is perfectly pressed and shaped, becoming hard. After these manipulations, I take it out into the cold.
Homemade butter It’s great to keep it in a dark place, in slightly salted well water. But it has important so that it is completely immersed in water. The oil can sit in it for 20 days, but the water needs to be changed periodically. You can, of course, keep it in the refrigerator, but there it comes into contact with air, which is why it decomposes more quickly.
In summer, the oil comes out rich and has a beautiful yellow color. This is because summer varieties contain a lot of carotene (vitamin A), which gives the oil its bright yellow color. The winter product is light, which means it has a low carotene content.
Homemade butter from cream
I also make it with cream. After removing them from the milk (I don’t have a separator), I let them stand for 3 hours and start churning. Then everything is the same. In this case, you need to churn for a longer period of time than when using sour cream, but the butter comes out sweeter.
A very fragrant butter is obtained from melted sour cream - similar to Vologda - with a nutty smell. Ordinary sour cream is placed in the oven and left until it turns brown. Subsequently, it is cooled and placed in a churn.
For longer storage, you can prepare salted butter. In this case, you need to remember a simple rule: add salt in an amount of 2% of the volume and during the churning process, and not after the oil is produced.
Butter makes wonderful ghee. I put the piece in an enamel pan without water. When boiling, I remove the foam, and in order for the non-fat impurities to settle better, I sprinkle a little salt. After about 30 minutes of light boiling I select top part spoon or let it harden, and then separate the yellow part of the pure melted butter from the lower whitish sediment.
You won't get good butter if you feed slop to a cow instead of grain fodder. I would like to make a warning regarding some foods. Feeding feed grains and peas to a cow will cause the butter from her milk to crumble. There is also no need to get carried away with compound feed.
Churn
And now about how to make a butter churn. This simple thing has been serving me for several years now.
To make a butter churn, you can use any significant container (not aluminum): a jar, a can or a tank. For example, I adapted a five-liter bottle for this purpose. glass jar. The lid of my butter churn consists of two planks. The bottom board fits tightly into the neck, the top one covers the edges on top, for this reason it is 2 cm wider. The planks are connected with screws.
A hole about 8 millimeters in diameter is drilled in the middle of the lid to insert a rod - a wooden stick. A recess was made around this hole in the top board so that the sour cream removed from the jar during the churning process does not spread, but flows back into the jar. The rod penetrates freely into the hole in the cover. The diameter of this stick is one and a half millimeters smaller than the diameter of the hole.
At the bottom, the rod ends in a wooden cross with strips at both ends so that the cross is pressed tightly to the bottom of the can.
If the neck of the container is wide enough, the crosspiece can be tightly fixed to the stem, but if it is narrow, it is best to make a collapsible one and, for greater strength of connection, use a piece of fabric when assembling inside the container.
I fill the jar 1/3 full with sour cream. You can cook up to 800 grams of butter in it at one time. I knock it down for 20-30 minutes. After the container is filled, I lower the rod with the cross inside, press the lid tightly into the neck and, lifting the rod up and down, churn the oil. This is the technology.
Butter is a nutritious product, without which it is difficult to imagine a complete breakfast for any person. Is it made from cow's creamed butter, which is common in many grocery stores? In fact, the technology for producing a real creamy product dates back to ancient times, when our ancestors made butter with their own hands without the help of powerful equipment.
Production technology
Not many people know that the first butter appeared 3000 years ago in India. Industrial production of this product was based in Italy - it was there that early XIX century, mechanical devices were invented for the production of a fatty product, which became the ancestor of butter. What oil is made from is known to everyone today. It is worth noting what exactly was considered the pride of domestic manufacturers.
The quality of this product depends on several factors. There is not a single ingredient or technological process that can be replaced with any analogue. The quality of raw materials, control at each stage of production, strict adherence to technology - all this together allows us to obtain a high-quality creamy product.
How is butter made?
On an industrial scale, both first and second grade milk can be used. In many European countries, there is no such thing as second-grade milk at all, but domestic producers successfully use raw materials that have obvious disadvantages for the production of butter. Moreover, this does not contradict sanitary and hygienic standards.
How is butter made? The production of this high-calorie product is a rather complex technological process, each stage of which is extremely important and requires compliance with all standards. Final goal- concentration and release of milk fat. On an industrial scale, butter can be produced in two ways:
- Mechanical whipping of cream with a fat content of 35-40%.
- Conversion of heavy cream (70-85%).
The first method allows you to obtain a higher quality and tastier creamy product, but this method does not allow you to achieve high results in terms of productivity.
Creaming
Knowing what oil is made from, you can begin to study one of the technologies for its production. First of all, high-quality raw materials, that is, cream, are cooled and kept at a temperature from +2 to +8 ° C. At this time, the cream ripens, its viscosity increases, as well as the formation of specific fat globules, which will subsequently become the center of fat crystallization. The lower temperature allows the cream to ripen faster, and mechanical rotation further speeds up the technological process.
The high-fat raw materials are then placed into oil press drums, which are either ordinary wooden barrels or rotating metal cylinders. Mechanical shocks contribute to the formation of oil grains, which are essentially crystallized particles of oil fat. As soon as the buttermilk begins to splatter, the rotation process stops and washing of the butter grain begins. To increase the stability of butter, calcined salt is used. After this, the entire mass is passed through special squeezing rollers, through which a fairly dense and homogeneous layer is formed, ready for packaging, packaging and storage.
Converting High Fat Cream
The essence of this method is to convert an oil-in-water emulsion into a water-in-oil emulsion, which occurs using thermomechanical processing. This process produces high-fat cream with a fat content of 72.5% or 82.5%, respectively. After this, the cream is passed through an oil converter, due to which it acquires a specific structure characteristic of butter. This technology makes it possible to obtain a creamy product that differs in many respects from butter obtained by churning cream.
After all the manipulations have been completed, the butter must “ripen” - it is kept for several days at a temperature of +12-16 °C to complete the crystallization process.
Surely many have noticed that at room temperature, butter seems to “spread” - this is the result of non-compliance with the temperature regime.

Real butter
Having figured out what butter is made from, we can identify several main characteristics of a high-quality creamy product. Choosing it in a store is not so easy, since most labels have the same inscription - “pasteurized cream”. In fact, there is a special gastronomic classification of real butter, based on which the following types are distinguished:
- A traditional product with a fat content of 82.5%.
- Amateur butter, the fat content of which is at least 80%.
- with a fat content of at least 72.5%.
All other percentages are water and a small amount of buttermilk. Only experienced producers know how to make butter not only tasty, but also healthy. The technology for producing such a product is directly related to those methods that were used long before the advent of mechanical units. Back in the days Soviet Union high quality products were marked with the GOST sign, which has now been replaced by R 52969-2008. This designation indicates that the contents of the package will delight you with a pleasant taste familiar from childhood.
Cooking at home
Today it is rare to find a family that does not care about their health and proper nutrition. Good health and strong immunity depend on the quality of food, which is why many people strive to buy only high-quality food or prepare it themselves. How to make butter at home? The answer to this question is provided by Jamie Oliver's recipe, which offers an easy way to make a high-quality creamy product.
The following ingredients are required for preparation:
- Heavy cream - about 400 ml. The fattier the starting material, the more oil the final result will produce.
- A small amount of calcined salt "Extra".
- Mixer.
- A charge of positive emotions.
The process itself is not complicated. The main thing is to choose high-quality cream with the largest percentage fat content

Technology for making homemade butter
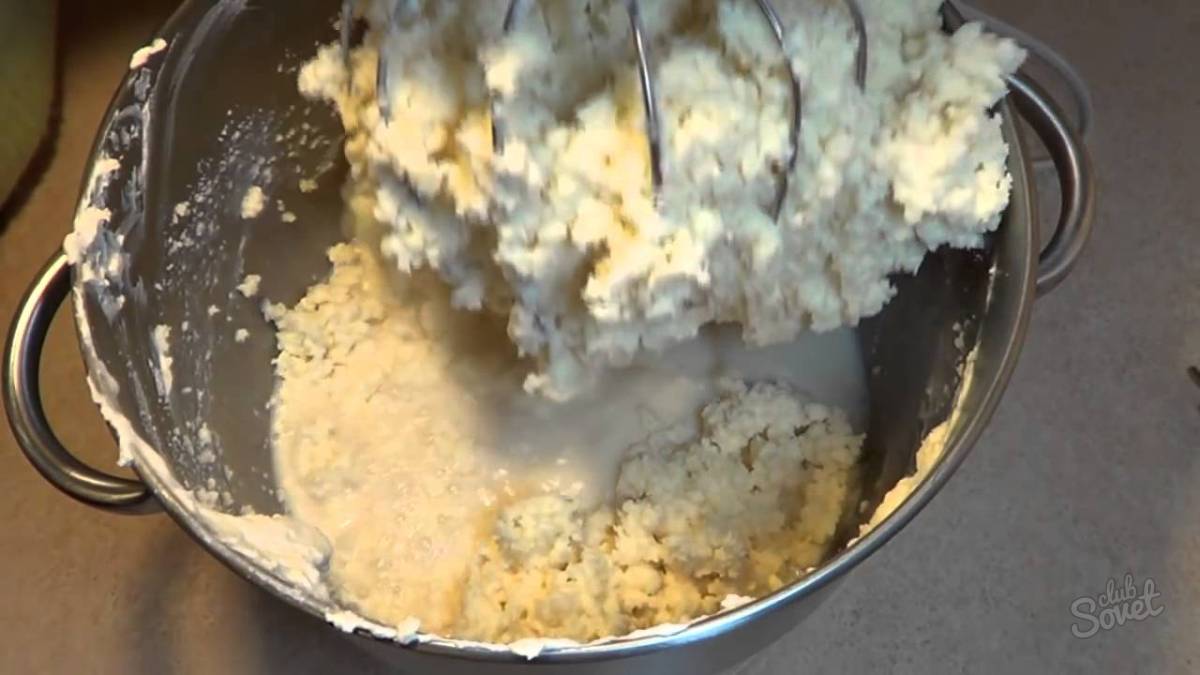
Before you do homemade oil, you need to prepare a fairly deep (preferably metal) dish. First of all, you need to thoroughly beat the heavy cream using a mixer. This is performed at maximum power of the equipment for 10 minutes. Then the creamy mass should rest a little, after which the process is repeated again.
Literally after 15 minutes you will notice that the liquid cream has turned into a small amount of butter. The liquid obtained as a result of whipping must be drained and continue mixing the cream at high speed. As a result of whipping three times, you should get something vaguely reminiscent of butter. This is not the end of the technological process yet.
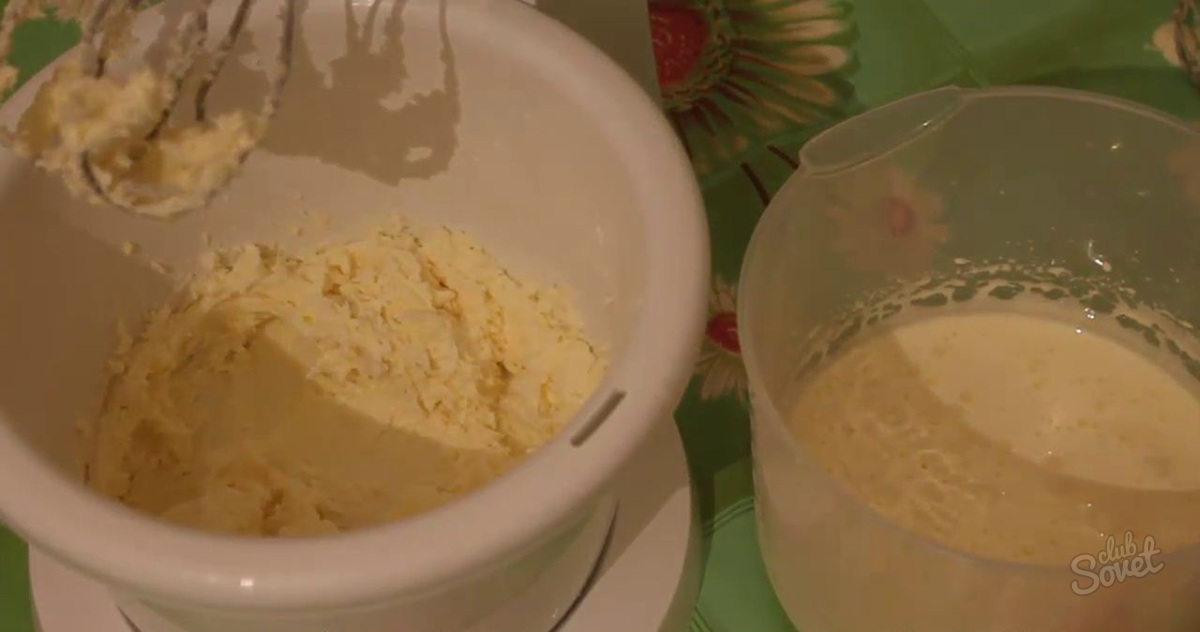
Using a regular spoon, the butter is collected into a lump and left for some time to “ripen”. After some time, excess liquid should be released from this mass. After this, the butter is laid out on parchment and salted, folded in half, kneaded again. This procedure can be performed several times for more thorough mixing.
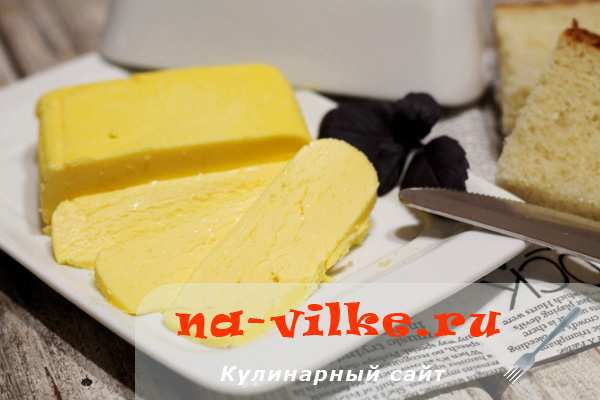
Homemade butter is ready. 400 ml heavy cream (33%) should yield about 150 grams of butter.

A few more facts about butter
Unlike how a creamy product is made, it requires careful adherence to each stage of the technological process and high quality of all ingredients. Only a real creamy product spreads softly on bread, does not crumble, and has a rich yellow and has a pronounced taste and aroma.
There are several more types of butter, in addition to those indicated just above. For example, there is also a creamy product with fillers that improve its organoleptic characteristics.
Not only is it used to prepare oil cow's milk and cream. Buffaloes, goats, sheep, yaks and even zebu (in India and African countries) - all these animals are a source of natural raw materials, which will become the basis for butter.
07/13/2017 at 13:00
Until I get the site administration to remove the recipe or correct it, I will make my own adjustments.
1. The recipe is wrong! Whipping the cream takes a maximum of 7 minutes. Start beating at first speed, then go to 3, then when you see buttermilk, reduce it again to 1, otherwise it will splatter.
But that is not all! We drained the first batch of buttermilk, continue whisking, draining a new batch. We stop only when the mass stops releasing liquid. But after this, the oil must be washed in cold, purified, preferably distilled, water. Until the moment when it is transparent. If you have beaten out all the buttermilk before, once will be enough. If the water is cloudy, repeat the procedure. It is best to drain the oil in a colander with a very fine mesh or holes.
After rinsing, you can beat the mixture again with a mixer to knock out the remaining water. This will extend the life of the product.
2. You can add salt to taste (it is also a light preservative), sugar, but ALWAYS add dried herbs, never fresh. This is a good base for mold and various pathogenic flora! “Spreading” is, of course, good, but do you need it? You will never be able to comply with sanitary and hygienic requirements at home, even if you sterilize all tools and utensils. With dairy, you're playing the lottery.
2. After forming the mass and an hour in the freezer, cut into pieces. Not into HALVES, but into pieces, which you use within 3 days in the refrigerator. Without preservatives, without preliminary pasteurization of products, you will not be able to protect your body.
Shelf life is not 6 months in the freezer. The shelf life is limited by the expiration date of the cream! Considering that you will not sterilize containers and tools when making butter, breaking the seal of the packaging (by opening a bottle of cream), then even less. If you place the finished product in the freezer, the shelf life is no more than a month and 3 days in the refrigerator. 5 days maximum, but at this moment even I, a physician by training, will not give a guarantee.
In connection with all of the above, if you have a small family, use no more than 300 ml of cream! This volume is enough to obtain about 160 - 200 grams of oil. If your family is large, increase the portion. Play it safe, cook the mass more often, it’s not that labor-intensive!
3. Never take cream from the market! You don’t know the manufacturer, what the cows were sick with, whether they were given antibiotics, whether the period after antibiotics was met when the milk cannot be sold to the buyer. Buy products that have an expiration date, for example, in stores that sell organic products. Yes, there are also questions, but at least a small amount of confidence in the purity of the product is present. Everything is whipping normally, the author misinformed you!
At the market, you cannot track the transportation of dairy products from the supplier to the point of sale. Under what conditions did it take place? The “fresh” milk is often out of date!
5. A question arises for the site moderators: why are such home-grown grief - the authors and their recommendations - subject to moderation?
6. Why doesn’t Rospotrebnadzor monitor such sites for the quality of information published in publicly available sources?
Answer
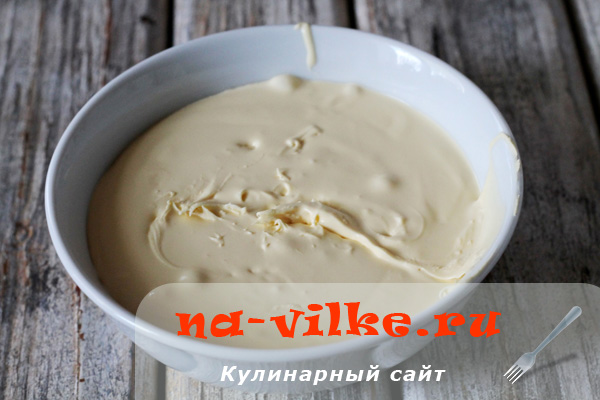
If you have a jar of heavy cream or country sour cream at home, then you can safely start preparing natural butter. You shouldn’t even compare the result with a product purchased in a supermarket. There are no herbal additives, harmful preservatives, or artificial colors in homemade butter, because it is based only on natural ingredients. This oil can be given even to small children without fear. This recipe will be useful for adherents of a healthy diet.
The method of preparing homemade butter is very simple, and the necessary equipment - a blender and mixer - can be found in the kitchen of almost every housewife.
Recipe Information
Preparation time: 40 min.
Number of servings: 200 g.
Ingredients:
- Cream – 1 l.
Recipe
Note to the owner:
- In order for homemade butter to have a rich yellow-orange hue, at the end of cooking you can add 20 g of natural carrot juice to it (mix the butter and juice thoroughly using a blender, spoon or masher). But it should be remembered that due to the presence of juice in the composition, the oil spoils faster. Therefore, it must be stored at low temperatures and use within 3-4 days.
An invariable attribute of the table for breakfast or lunch is butter. So fragrant, tasty and healthy. Let's cook it at home and delight our family.
You will need heavy cream or fat sour cream in an amount of at least 1 liter. Prepare the container in which you will beat the original milk product. The ideal option is a deep container with a rough surface inside for whipping with a mixer. A blender can also cope, but with a small amount of sour cream/cream, since it heats up quickly.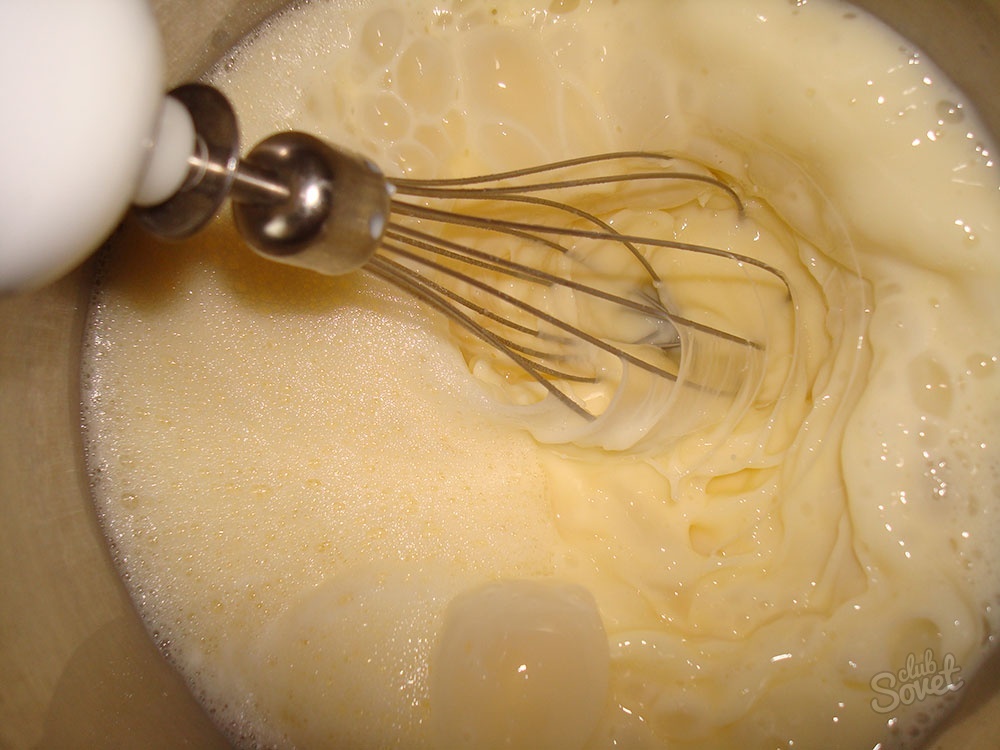


At the end you will get 300-350 grams of ready-made delicious homemade butter. The total time spent on its preparation varies from 40 minutes to 3 hours. You will see that homemade butter is not as yellow as store-bought butter, it is more “live”, has a different taste, and is more aromatic. And it is also imbued with your energy and love, which gives your family and friends health and good mood!


