Learn to knit from rubber bands. Step-by-step weaving of a fishtail bracelet. How to weave a simple bracelet from rubber bands on a slingshot.
Over the past two years, children all over the world, as well as their parents, have been enthusiastically weaving a variety of jewelry from colored Rainbow Loom rubber bands. Such baubles were invented quite a long time ago, but the hobby gained mass popularity only after the American Ching Chong, who once worked for the famous Nissan company, watched his daughters weave bracelets on their fingers, and decided to join creative process. Since weaving on fingers is not very convenient, Chong was unable to do anything. But the resourceful dad showed ingenuity and invented special devices that facilitate the process of creating bracelets.
Overseas hobby of Russian teenagers
With the help of special forks, machines and hooks, connecting multi-colored elastic bands became much easier, decorations began to be made faster, and many new patterns began to appear. All of America, and after it Europe, was gripped by a real mania for weaving. In 2014, Rainbow Loom sets were even recognized as the best creative toy of the year.
Soon the hobby reached Russian children and teenagers, as well as their mothers and fathers. The pioneers tried to weave with their fingers, kitchen forks, pencils and assembled machines themselves. Even bank rubber bands and rubber bands from hairdressing kits were used to create bracelets and toys. Some ordered Rainbow Loom sets from foreign virtual stores.
A little later, original sets for weaving from rubber bands appeared in Russia, as well as their more budget-friendly analogues, of which they managed to produce quite a lot. Now almost every Russian schoolchild can boast that they have woven at least one bracelet from rainbow rubber bands. Moreover, not only girls, but also boys are interested in weaving. And even parents sometimes can’t resist and get involved in creativity.
 People usually start weaving with the simplest patterns. As a rule, on each bag of rubber bands and in each craft kit you can find instructions for creating. You can even weave it on your fingers.
The first rubber band is put on the index and middle fingers. First, twist the elastic band in a figure eight. It turns out to be a kind of infinity, stretched out on the fingers. The next elastic band is pulled on top without any twisting, and the bottom one is removed - it seems to hang on the next one. Next, put on the third rubber band, and the second one is removed from the fingers again. Then a fourth rubber band is put on the fingers, and the third is carefully removed. This way you need to repeat a couple of dozen more times. One elastic band is put on, and the previous one is removed. This creates a kind of chain of multi-colored rubber bands. Once it reaches the desired length, all that remains is to connect the ends using a special s-shaped or c-shaped plastic lock, sold complete with elastic bands.
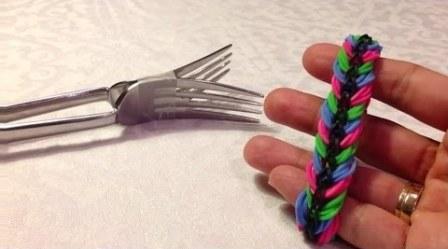
For greater convenience, you can use a special fork for weaving, somewhat reminiscent of a small slingshot, and a hook that allows you to easily and quickly pick up the bottom elastic band.
You can complicate the process a little and weave a so-called “fishtail”. To do this, at the very beginning, after the first rubber band, not one, but two rubber bands are pulled onto your fingers or fork. Then everything is done in the same way, the bottom elastic band is constantly removed and a new one is added on top, just instead of one, two stretched colored elastic bands remain on the fingers all the time. Or you can add another rubber band at the beginning and leave three stretched elastic bands on your fingers each time. In this case, the bracelet will be even tighter, although more rubber bands will be needed to cover the wrist.
By alternating different colors or choosing elastic bands of the same color, you can create many interesting variations.
Connecting the machine
No matter how convenient and quick it is to weave on your fingers, only with the help of a special machine can you master truly complex and large patterns. Some people think that making a bracelet from rubber bands on a machine is much faster and more convenient, while others are afraid to approach a device that seems difficult at first glance. If you limit yourself to weaving only the most primitive decorations, you can safely get by with only a special hook and forks.  But to create many complex patterns, weave toys, handbags and many other stylish little things, you will definitely need a machine.
To make it less intimidating to start mastering the machine, you should first watch a few video lessons. Then weaving will not seem so complicated.
Types of machines
There are different machines for weaving rubber irises. Some are shaped hollow posts, others are made in the form of regular pins. There are special machines where the posts for stringing rubber bands are arranged in a circle or oval. With their help it is convenient to create some toys, as well as patterns in the form of flowers, snowflakes and stars. There are machines where the columns are installed in two, three or more rows, one after another, or with one of the rows offset, when the columns are in a checkerboard pattern. One of the most convenient and versatile are weaving machines with the ability to move the posts, installing them in the desired order.
Chain of rubber bands on the machine
It is worth mastering weaving on a machine from the simplest patterns. Then the principle of weaving using a machine will immediately become clear and, having made sure that making a bracelet from rubber bands on a machine is not as difficult as it seems at first, you can move on to something more complex.
The simplest and fastest version of a bracelet made from rainbow rubber bands is, of course, an ordinary chain, which can be made even on your fingers. This is where we should start.
- Step one
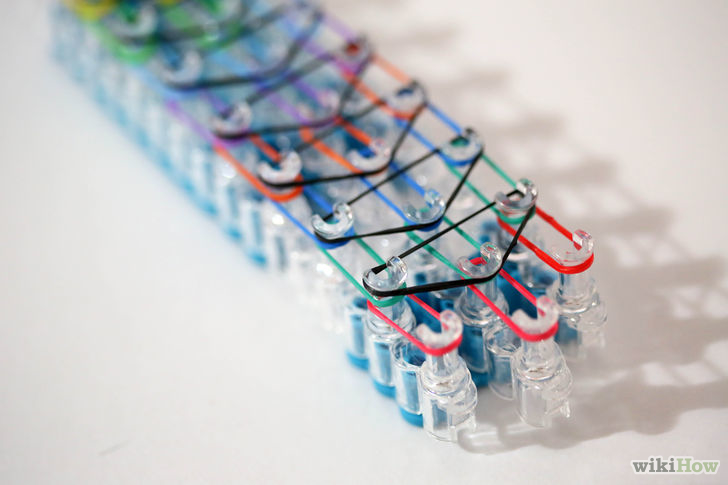
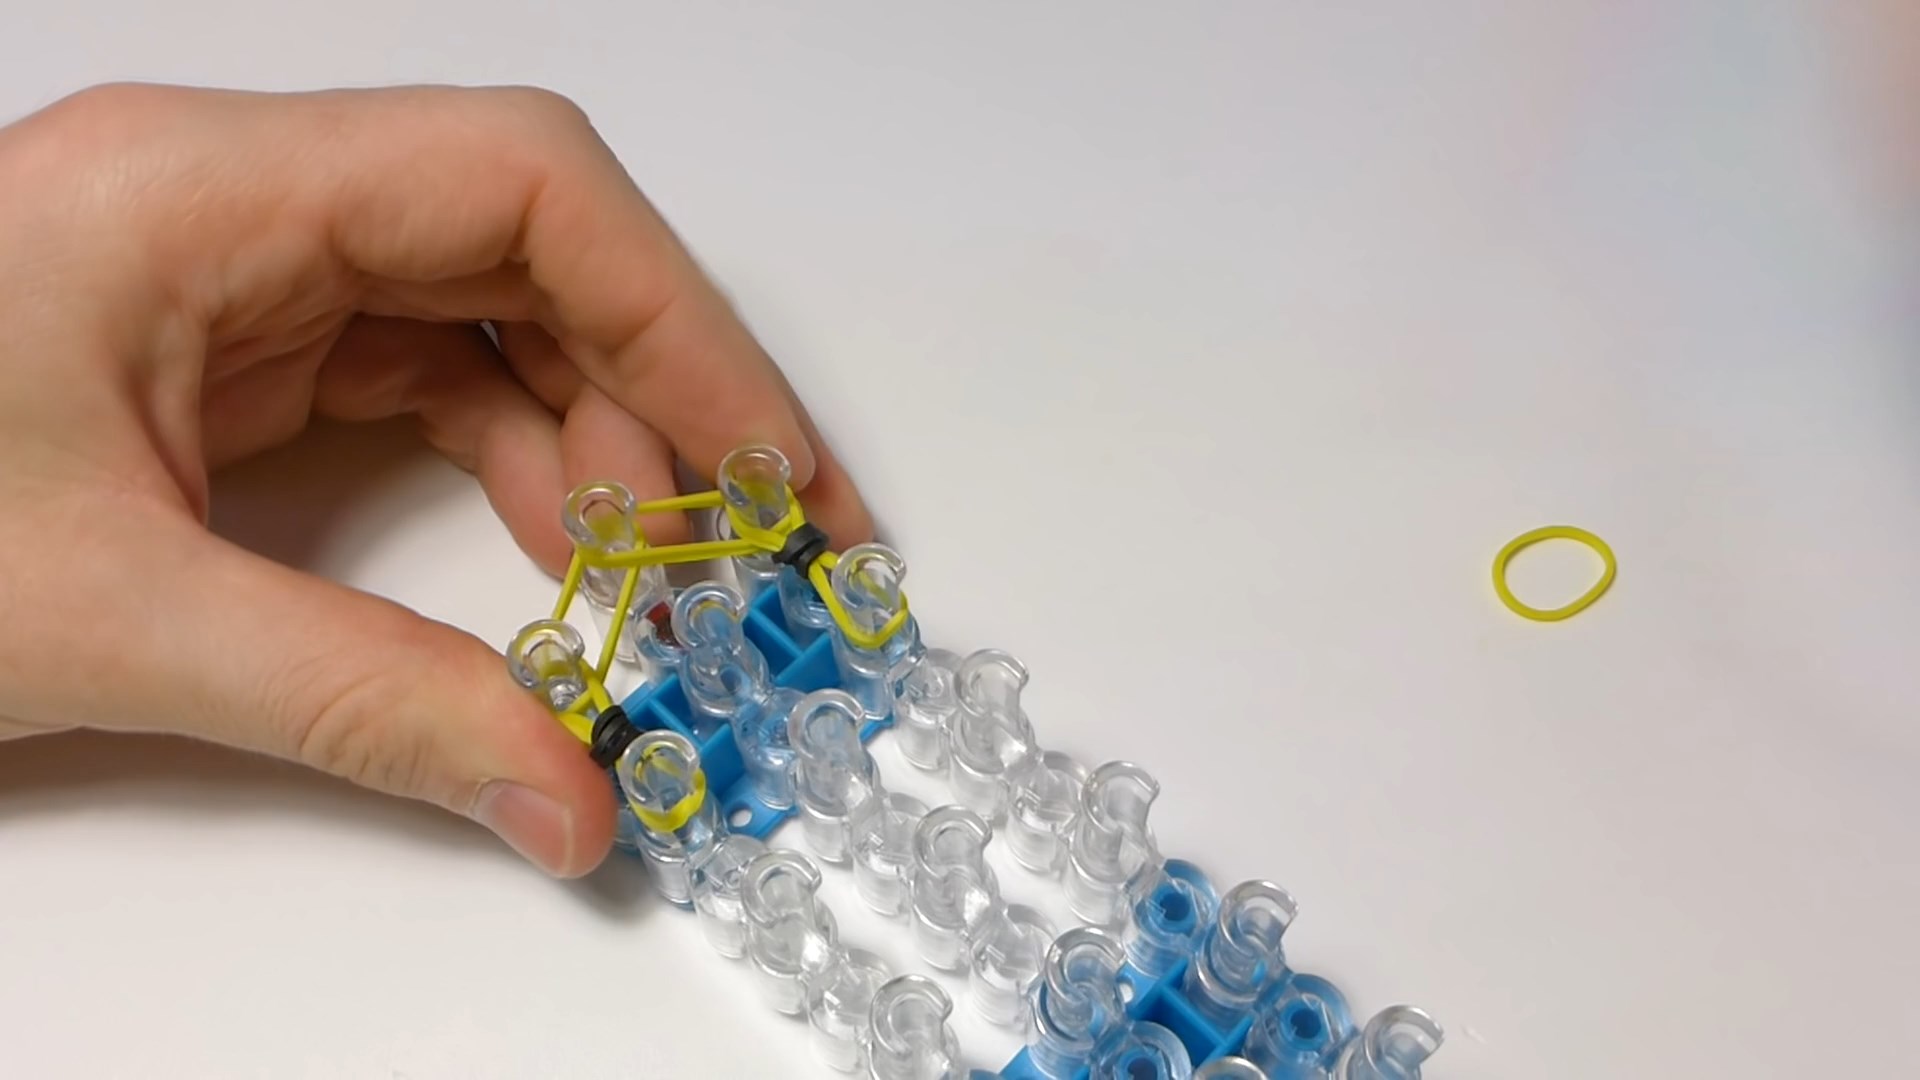
The first step, of course, is to prepare your equipment. For weaving, you will need a machine with offset columns in a checkerboard pattern so that the columns from the first row are located between the columns from the row opposite. When weaving a chain, only two rows of columns will be used. The posts at the beginning of the weaving should be located away from you in the form of the letter “U”. Well, don’t forget about the elastic bands of the chosen color, as well as the hook.
- Step two
Take the first elastic band and stretch it diagonally across the first column closest to you and the first column of the adjacent row. Next, take the second elastic band and put one end on the column farthest from you, where the first elastic band is located, and the other end diagonally on the nearest column of the adjacent row.
- Step three
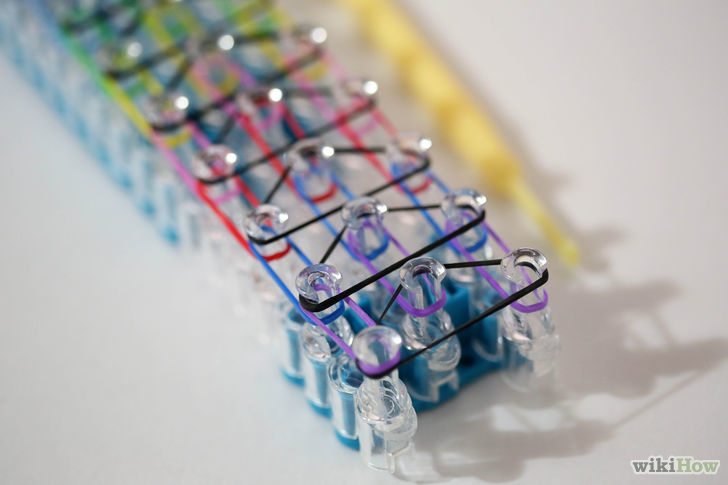
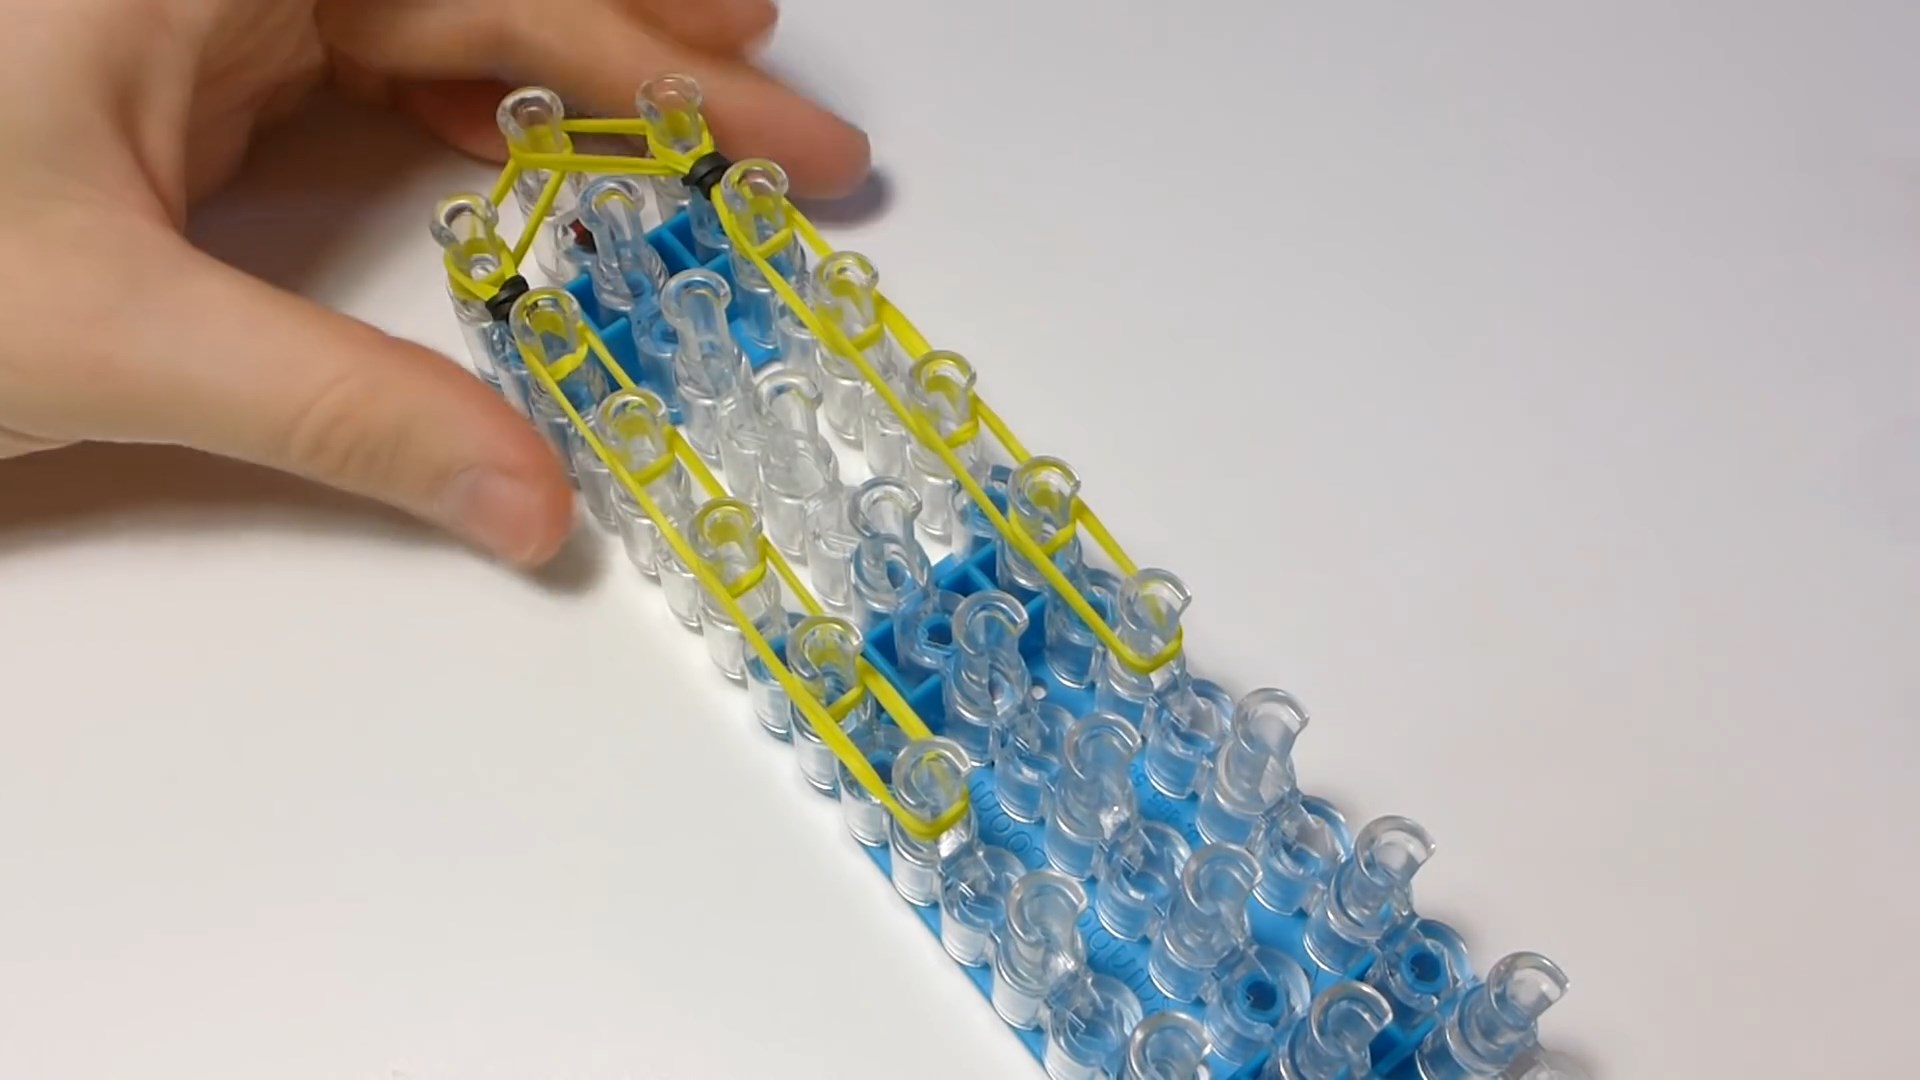
The third elastic band is stretched over the column where the second and the column in the adjacent row are stretched. This creates a zigzag pattern. All other rubber bands are tightened in a similar way along the entire length of the machine. After this, the machine is turned so that the grooves in the posts are directed towards you. This will make it easier to pick up the elastic bands using a hook.
- Step four
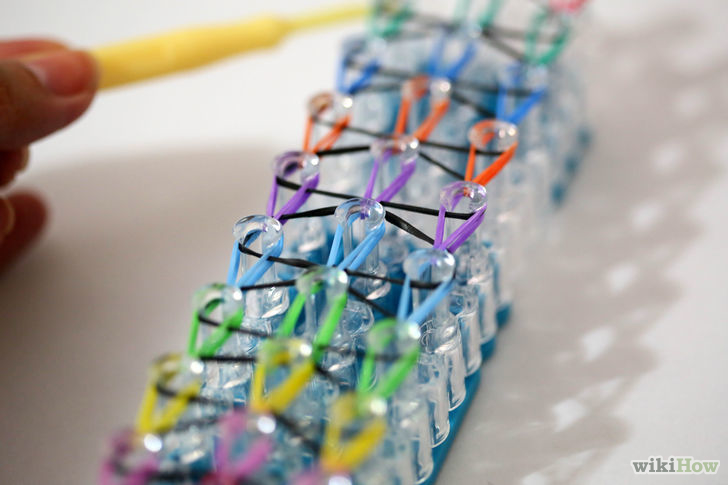
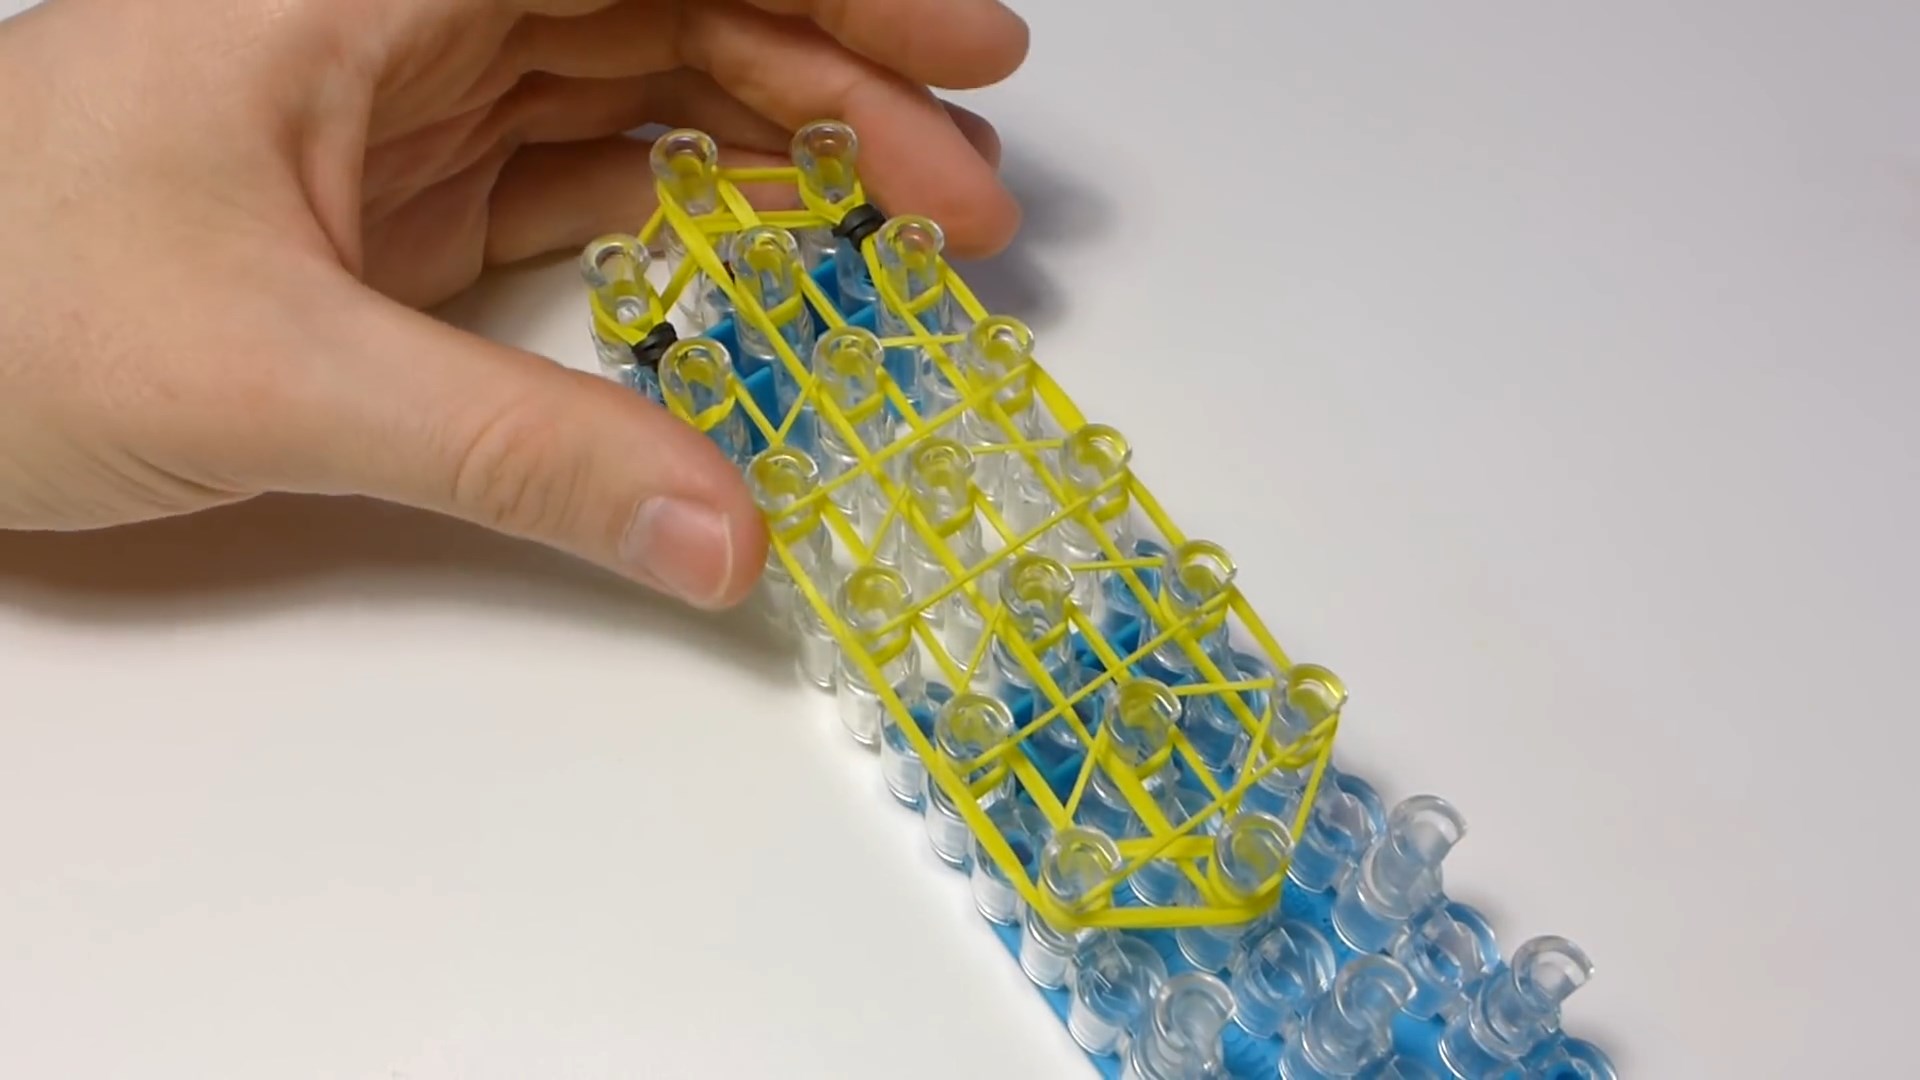
There is one rubber band on the peg closest to you. Also, one elastic band is located on the peg farthest from you. All others should have two elastic bands. You can proceed directly to weaving. We start weaving from the first nearest peg, on which there are two elastic bands. Carefully hook the bottom of the elastic bands and remove them, and then put them on the nearest peg in the next row. Thus, there are three elastic bands on it, the bottom of which must be removed and thrown onto the nearest diagonally peg of the adjacent row. Similarly, you need to repeat with the rest of the elastic bands along the entire length of the machine.
- Step five
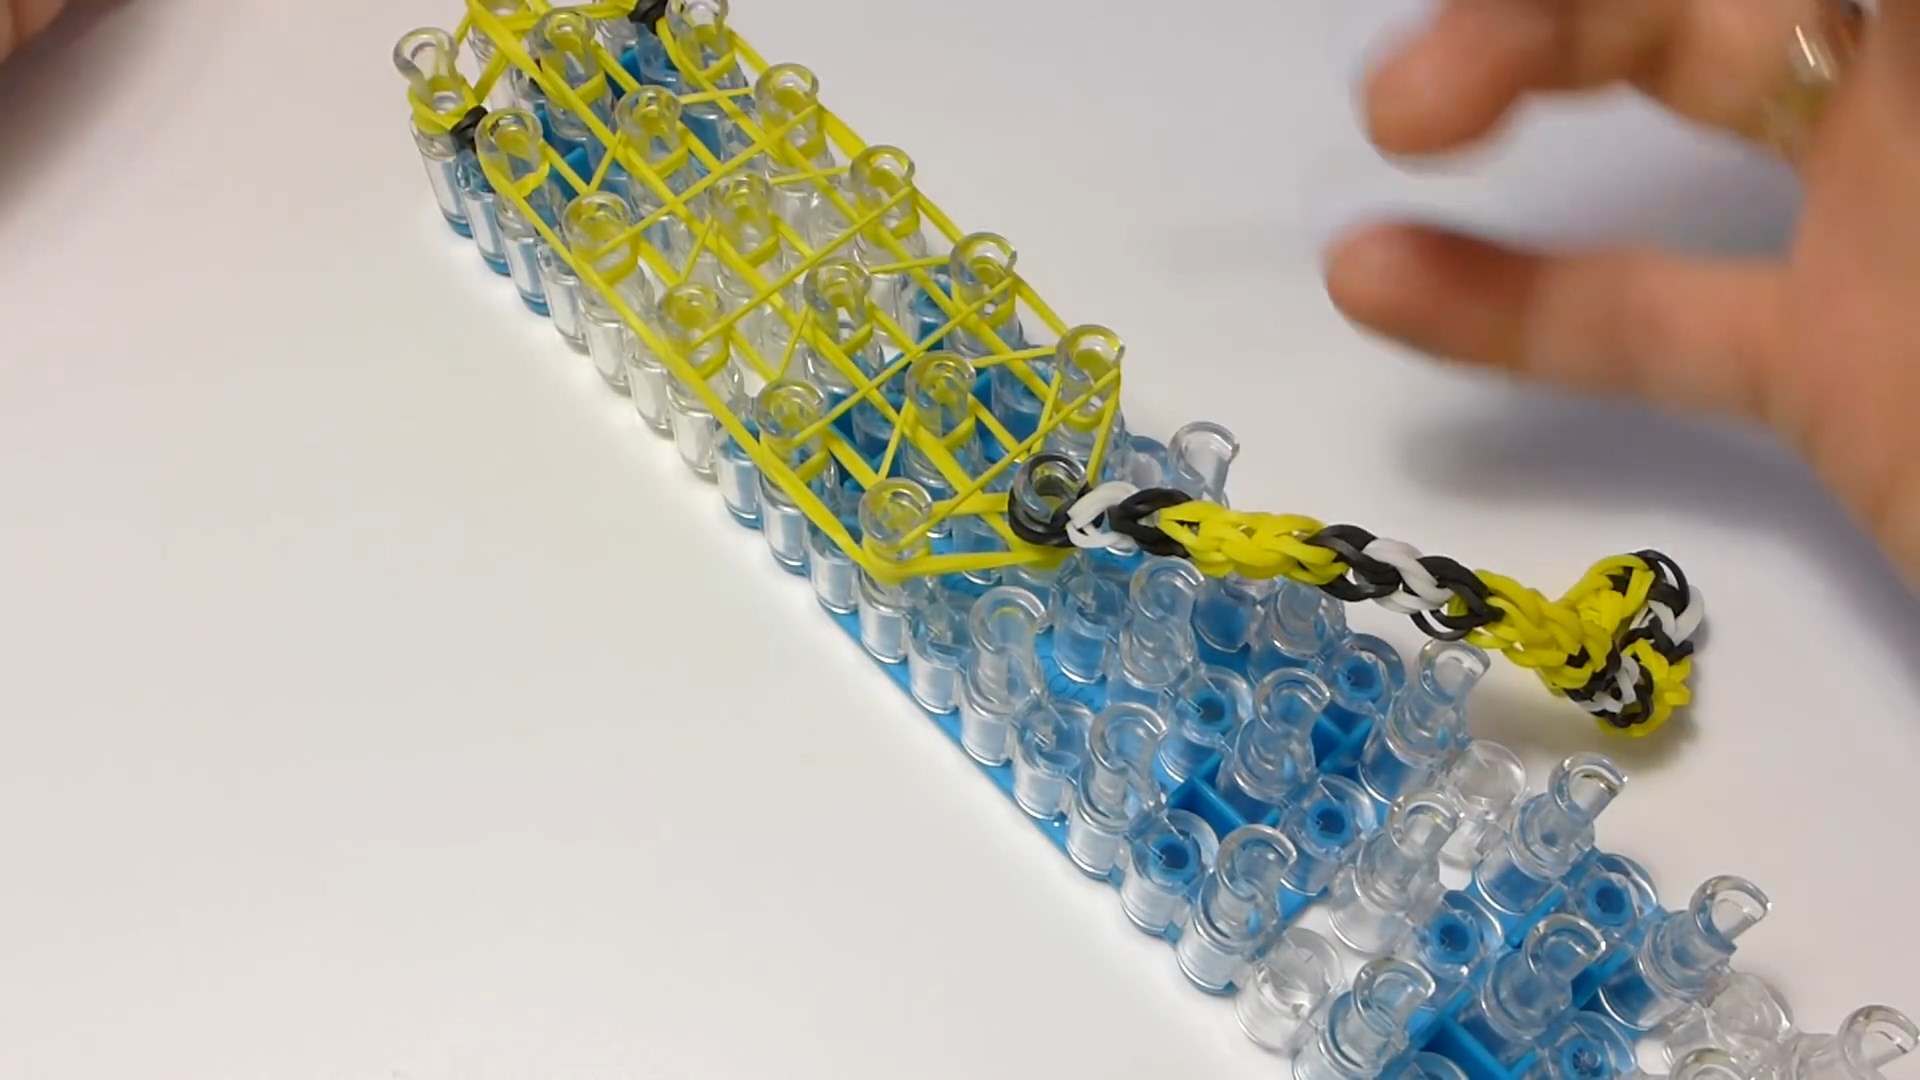
If everything is done correctly, then the machine will have a pattern resembling circles linked in a checkerboard pattern. There is very little left to do. You need to attach an s-shaped or c-shaped fastener to the last elastic bands. Then, starting from the last column, the entire bracelet is carefully removed, and the ends are connected using a clasp.
The chain bracelet made of rubber bands is ready. It may seem that weaving it with a fork or even with your fingers would be faster and easier. This is true. But thanks to this bracelet, you can understand the very principle of working with the machine, which will greatly facilitate the process of weaving more complex patterns.

Flower bracelet
A bracelet with patterns in the form of flowers or stars looks interesting on your hand. Of course, it is more difficult to make than a chain, but the result will please you.
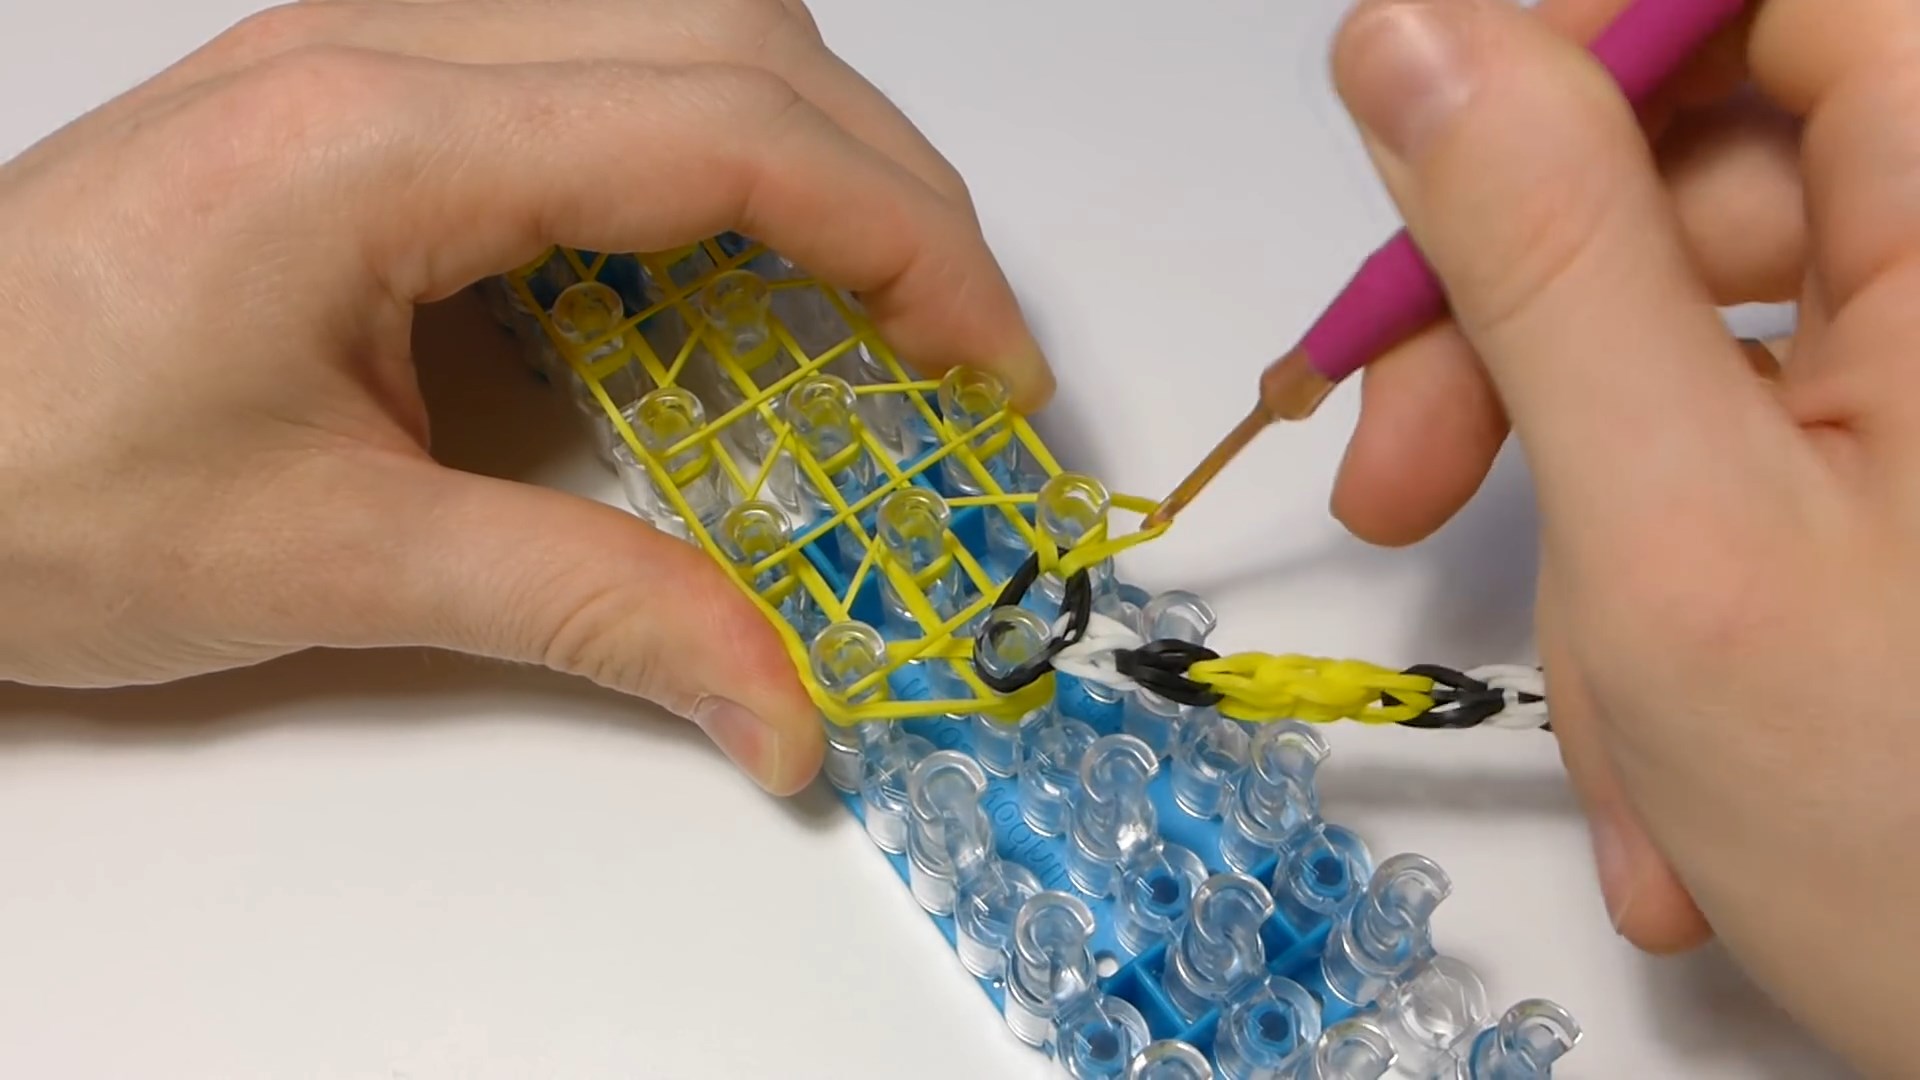
For this pattern you will have to use three rows of pegs. The outer rows are parallel to each other, and the middle one is shifted relative to them in a checkerboard pattern. The first elastic band is pulled over the peg of the middle row closest to you and the first peg of the leftmost row. The second elastic band is located on the first peg of the left row and the next peg of the same row. The next elastic band should also be in the left row - on the second and third peg. So, one after another, elastic bands are put on the entire left row. The last of the elastic bands is pulled onto the penultimate peg of the left row and diagonally onto the last peg of the middle row. Rubber bands are put on the rightmost row of pegs in the same way. In this case, you need to start from the same central column from which all weaving began.

Once all the elastic bands are around the perimeter of the machine, you can begin to create a floral pattern. You need to start the first flower from the second column in the middle and the second peg in the right row. An elastic band is stretched between them. The next elastic band is pulled onto the second peg of the middle row and the first peg of the right one. Then the elastic is placed on the second and first pegs of the middle row, then on the second peg of the middle row and the first peg of the left. The second peg of the middle and second peg of the left row are used next, followed by the second and third pegs of the middle row. This way you get a flower with the center located on the second peg of the middle row.
The second flower begins with an elastic band stretched across the fourth column of the middle and the fourth column of the left row. Moving clockwise, a flower is formed with the center located on the fourth column in the middle row.
The third flower is made in the same way, but with the center on the sixth column of the middle row. In the same way, you need to make flowers so that the entire machine is filled with them.
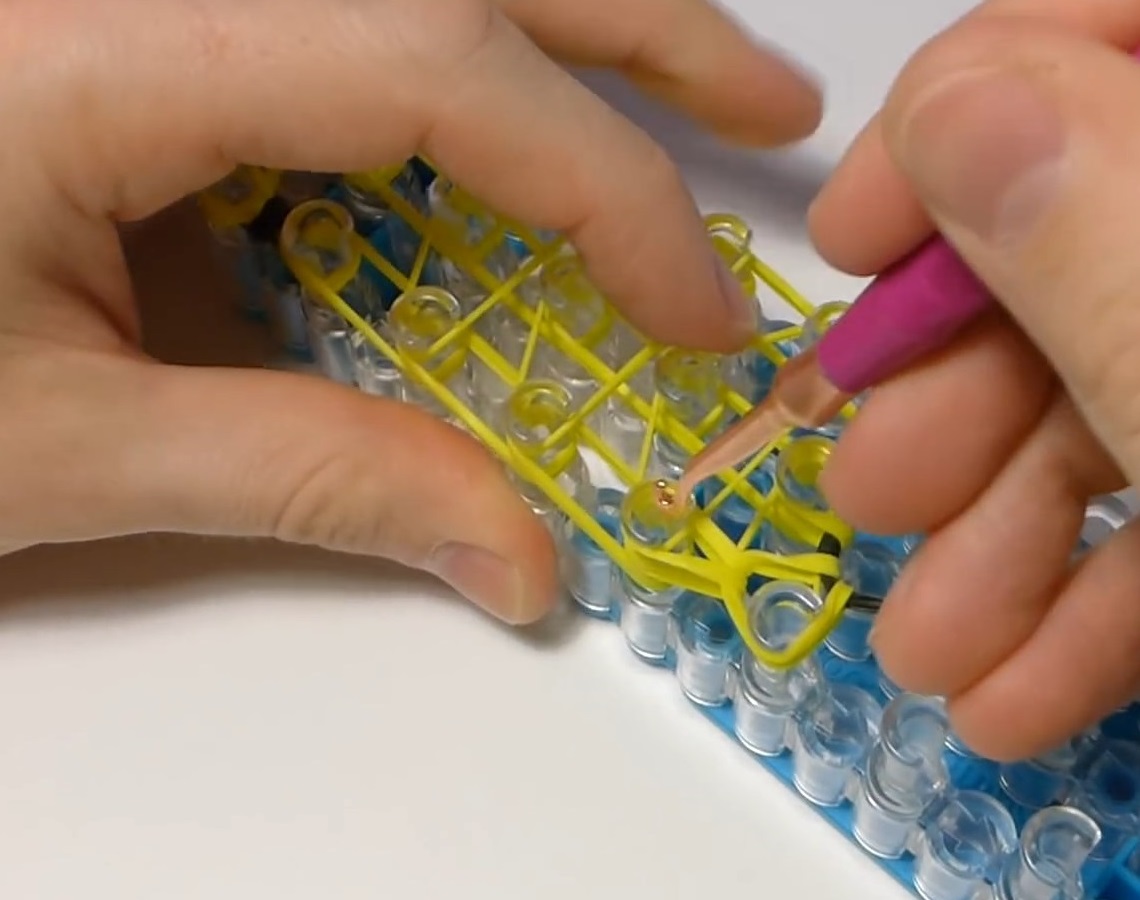
Now you need to put a folded elastic band on the outer column in the middle row. Also, elastic bands folded in half are put on each of the columns where the centers of the flowers are located. After that preparatory work can be considered completed.
Now you can proceed directly to weaving. The first thing you need to do is turn the machine so that the flower that was made most recently is right in front of you. The lowest elastic band on the first column of the middle row must be carefully removed and put on the column that is central to the flower closest to you. Next, remove the elastic from the third column in the middle row and put it on the center of the second flower. A similar operation is carried out with each of the flowers.
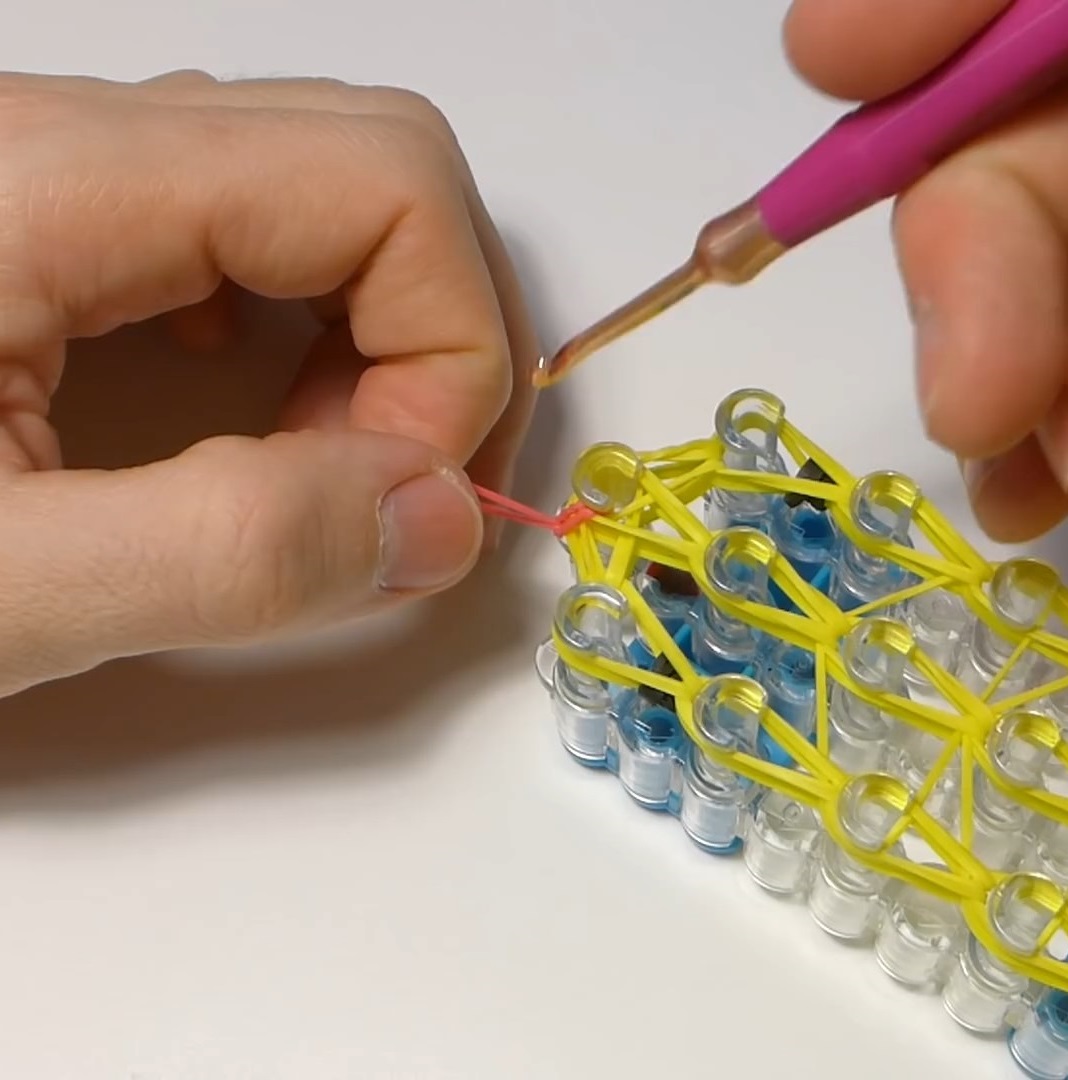
The next step will take a little longer. You need to remove each elastic band that forms a flower petal from the central peg of this flower and carefully put it on the peg where the second end of the same elastic band is located. In this case, it is important to start with the lowest elastic band, located on the central peg, and move further counterclockwise.

Then you need to weave the pattern around the perimeter. To do this, you need to start with an elastic band stretched between the first right and first center pegs. The edge of the elastic band that is put on the central peg is carefully removed and put on the right peg, where the other end of the same elastic band is located. Then do the same with the elastic band that is stretched over the first central and first left columns.
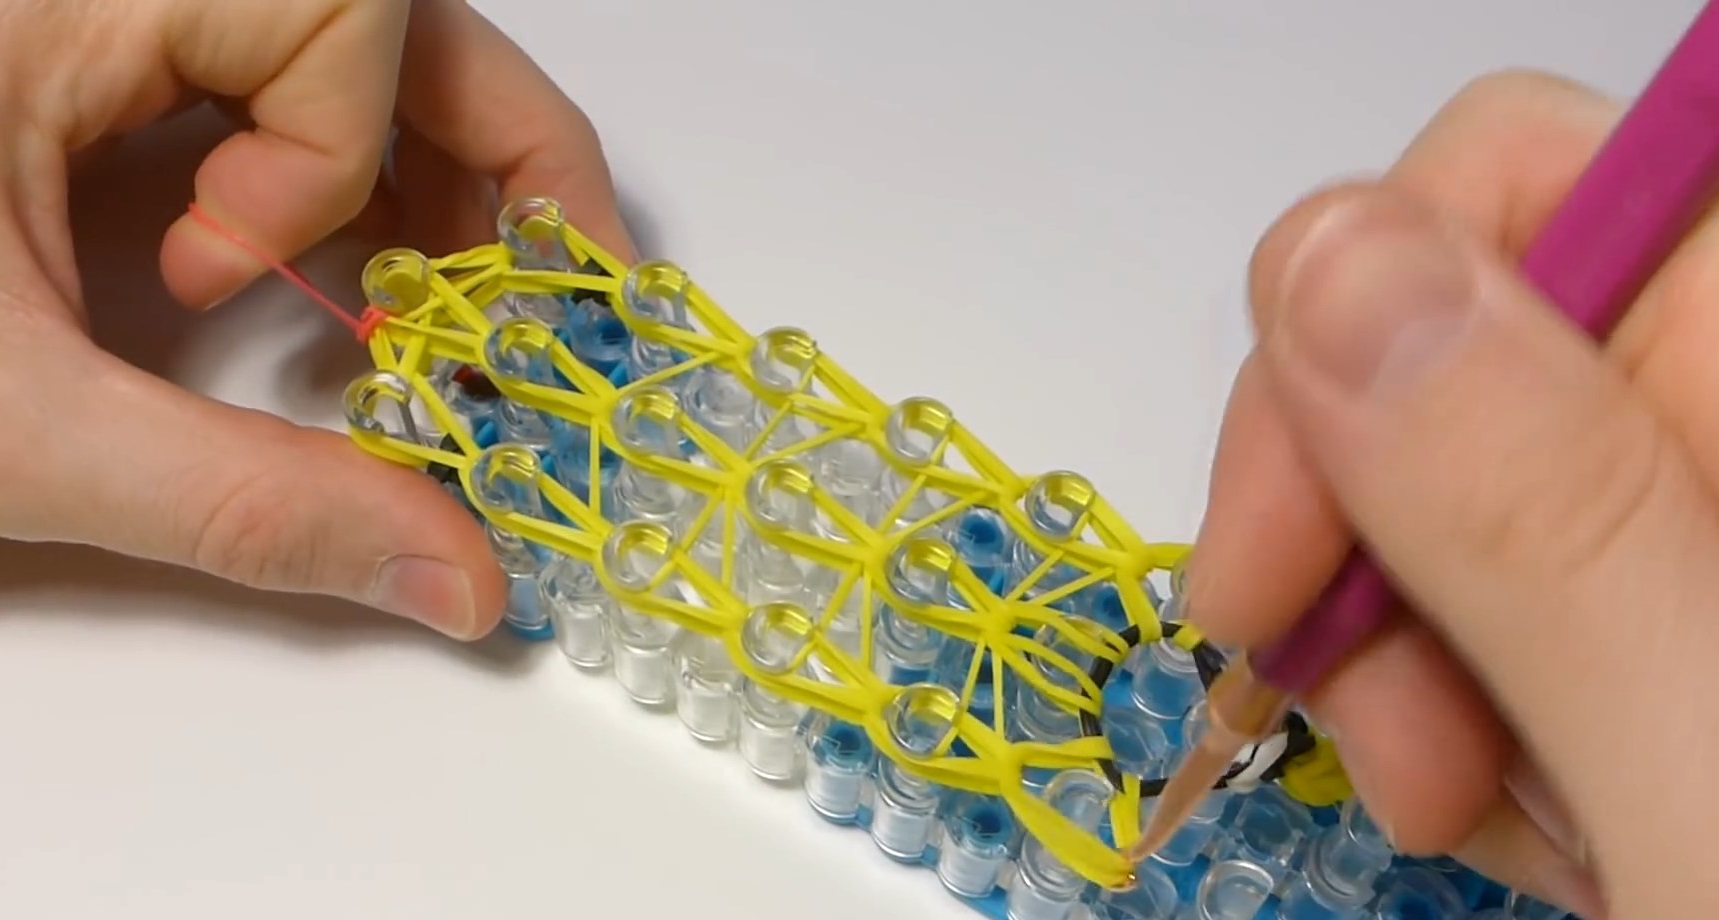
Next they move on to the elastic band stretched between the first and second columns in the left row. The edge located on the first left column is removed and put on the second. Then comes the turn of the elastic band, which is stretched between the second and third columns of the left row. Next, the entire row is woven in a similar manner. In this case, the elastic band stretched between the last left and last central columns is woven last. Exactly the same operations are repeated with right side.

All that remains is to add an additional loop on one side of the outer peg, secure an s-shaped clip on it, then remove the bracelet from the machine, lengthen it on one side, weaving a simple chain so that it is enough to fit around the wrist, and connect the ends of the bracelet with an s-shaped clip .
Triple bracelet
Another interesting option for a bracelet that can be woven using a machine is a triple braid. This pattern is relatively easy to weave.
This pattern looks very beautiful in a rainbow design. To weave, you need to install the loom posts in the same way as in the version with a floral pattern. First, three elastic bands of the same color are stretched. The first is stretched between the first and second pegs of the left row, the second is located between the first and second pegs of the middle row, the last should be between the first and second pegs of the right row. Next, three colored elastic bands are stretched between the second and third columns in the left, middle and right rows. The machine is filled in the same way along its entire length.
Then you need to move on to neutral colored elastic bands. Black is perfect. The first elastic band needs to be pulled between three posts: the second left, the second central and the second right. The next elastic band is put on three thirds of the column. The same is repeated along the entire length of the machine. After this, the machine needs to be turned so that the vertices of the triangles formed by the black rubber bands point in the direction opposite to you.

Now you can start weaving. Take the edge of each colored elastic band closest to you and put it on the peg on which the other end of the same elastic band is located. All colored elastic bands are woven in the same way. The last colored elastic bands are woven and all three are put on the last peg in the center row. Then a black elastic band is threaded through them and secured with an s-shaped clasp.
Now the entire bracelet can be removed from the loom, lengthened using a woven chain and the ends connected with a clasp.
In addition to the three bracelets described, you can weave many more interesting things on the machine and even create your own patterns.
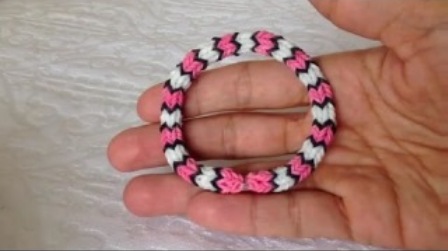
This simple rubber band bracelet has a simple but very colorful design. There are many options for designing a bracelet. You can use two colors - the main one, which connects the rings, and also the color of the rings themselves.
Video on how to weave a simple bracelet from rubber bands “Colored Rings”
Before weaving a simple one, you need to decide on the color of the rubber bands. In our example, we use three colors - the main one, and two colors for the rings - we alternate them. But you can alternate a larger number of colors, take variegated or two-color elastic bands for these elements. This simple bracelet is woven from rubber bands on a machine.
To weave a simple bracelet from rubber bands you need to take:
. Elastic bands of three colors - our main color is yellow, and we will also use red and blue elastic bands.
. Machine - you will need two rows of machine, the posts should be positioned opposite each other, with the open sides of the posts facing you. For weaving, you can also use a mini slingshot machine.
. Hook.
. S-shaped clasp.
Weaving a simple bracelet from rubber bands “Colored rings”
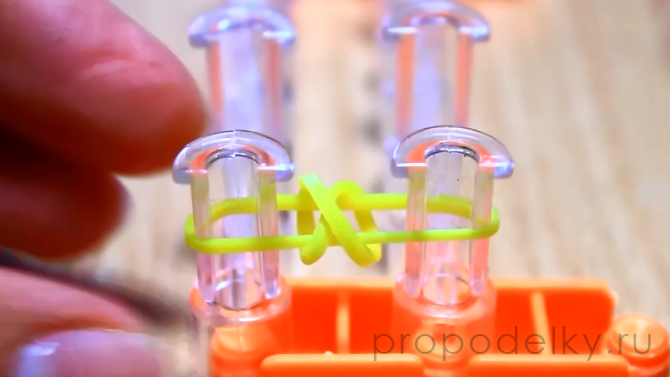
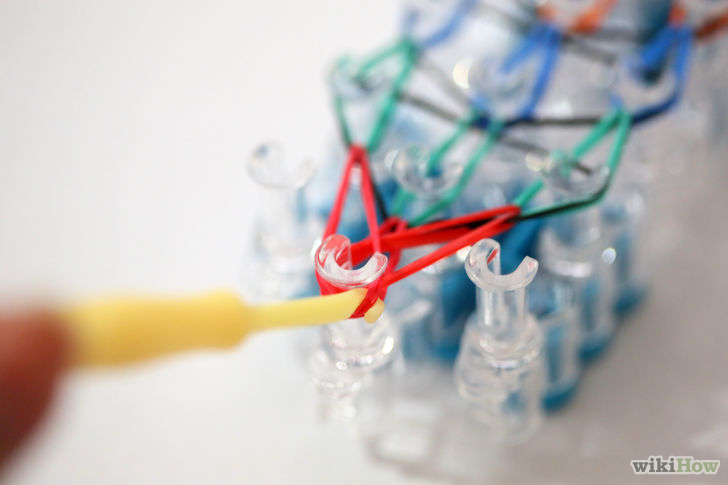
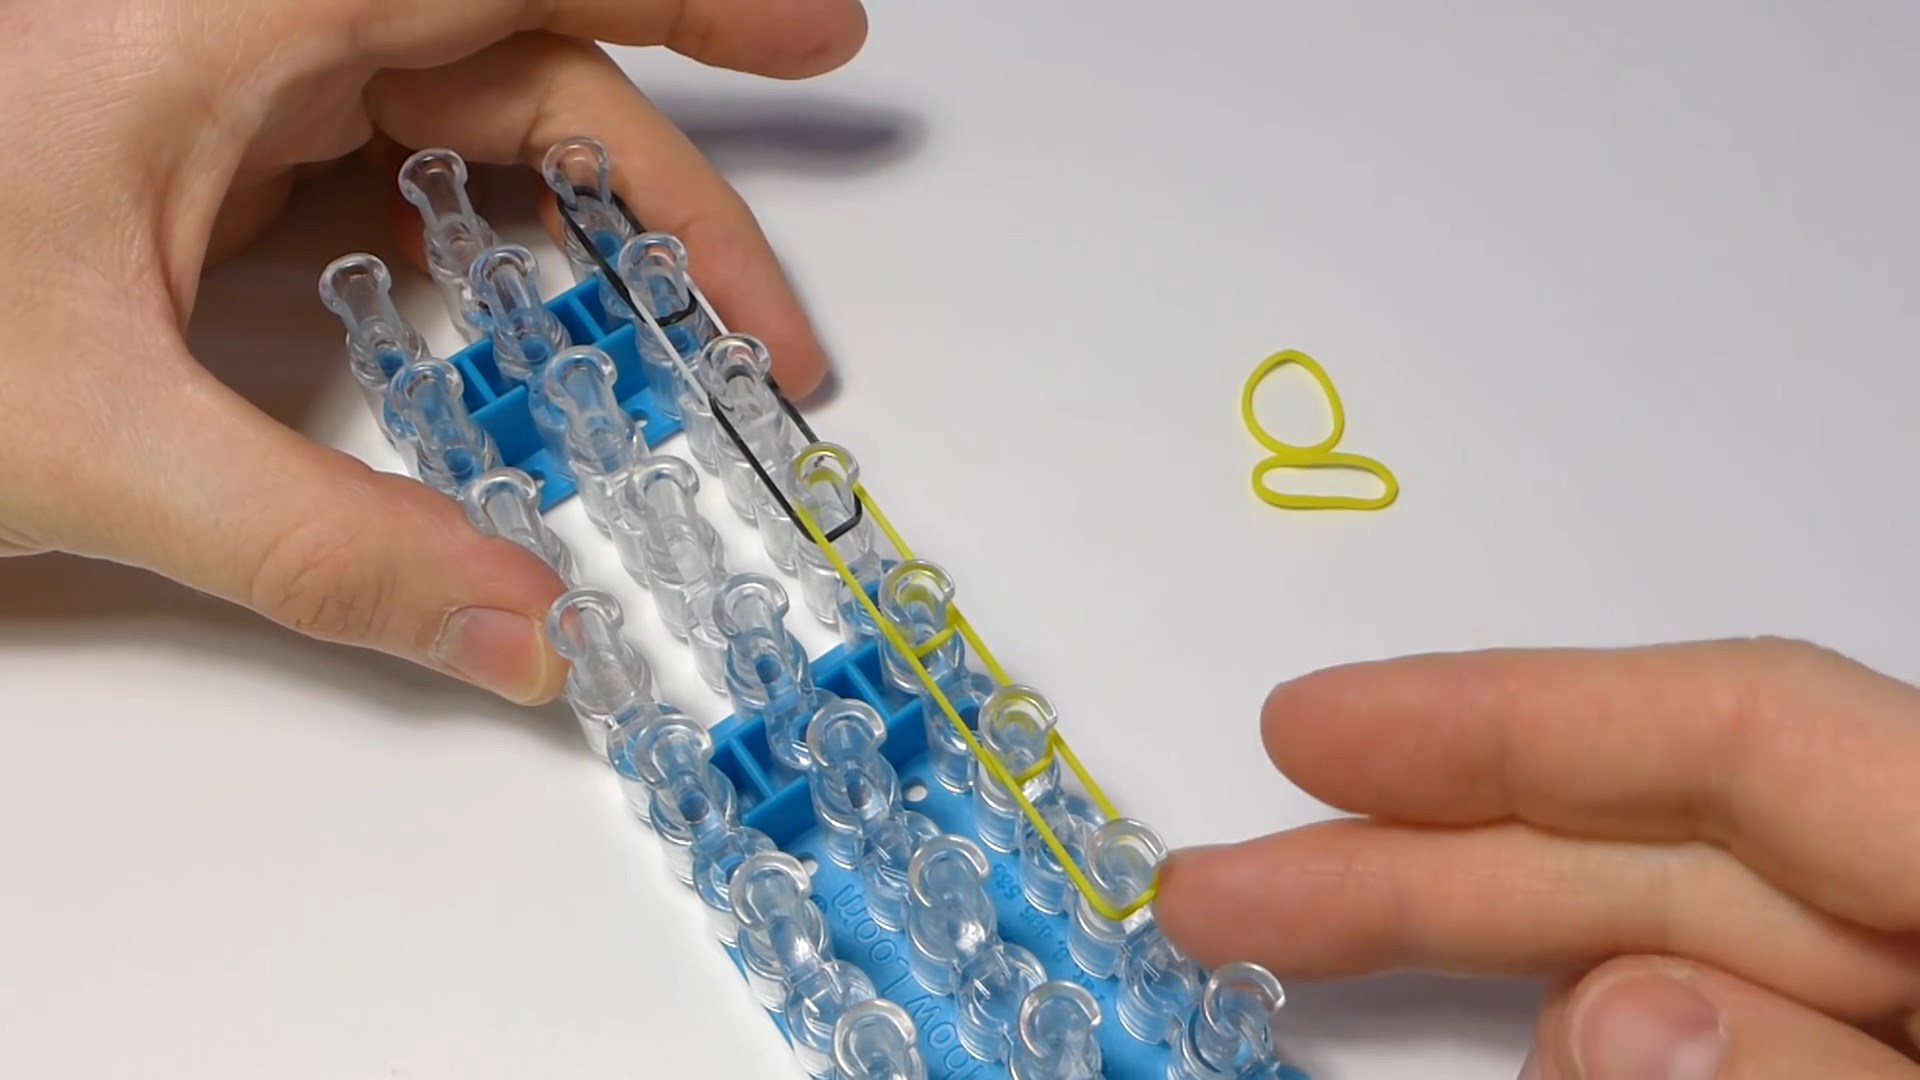
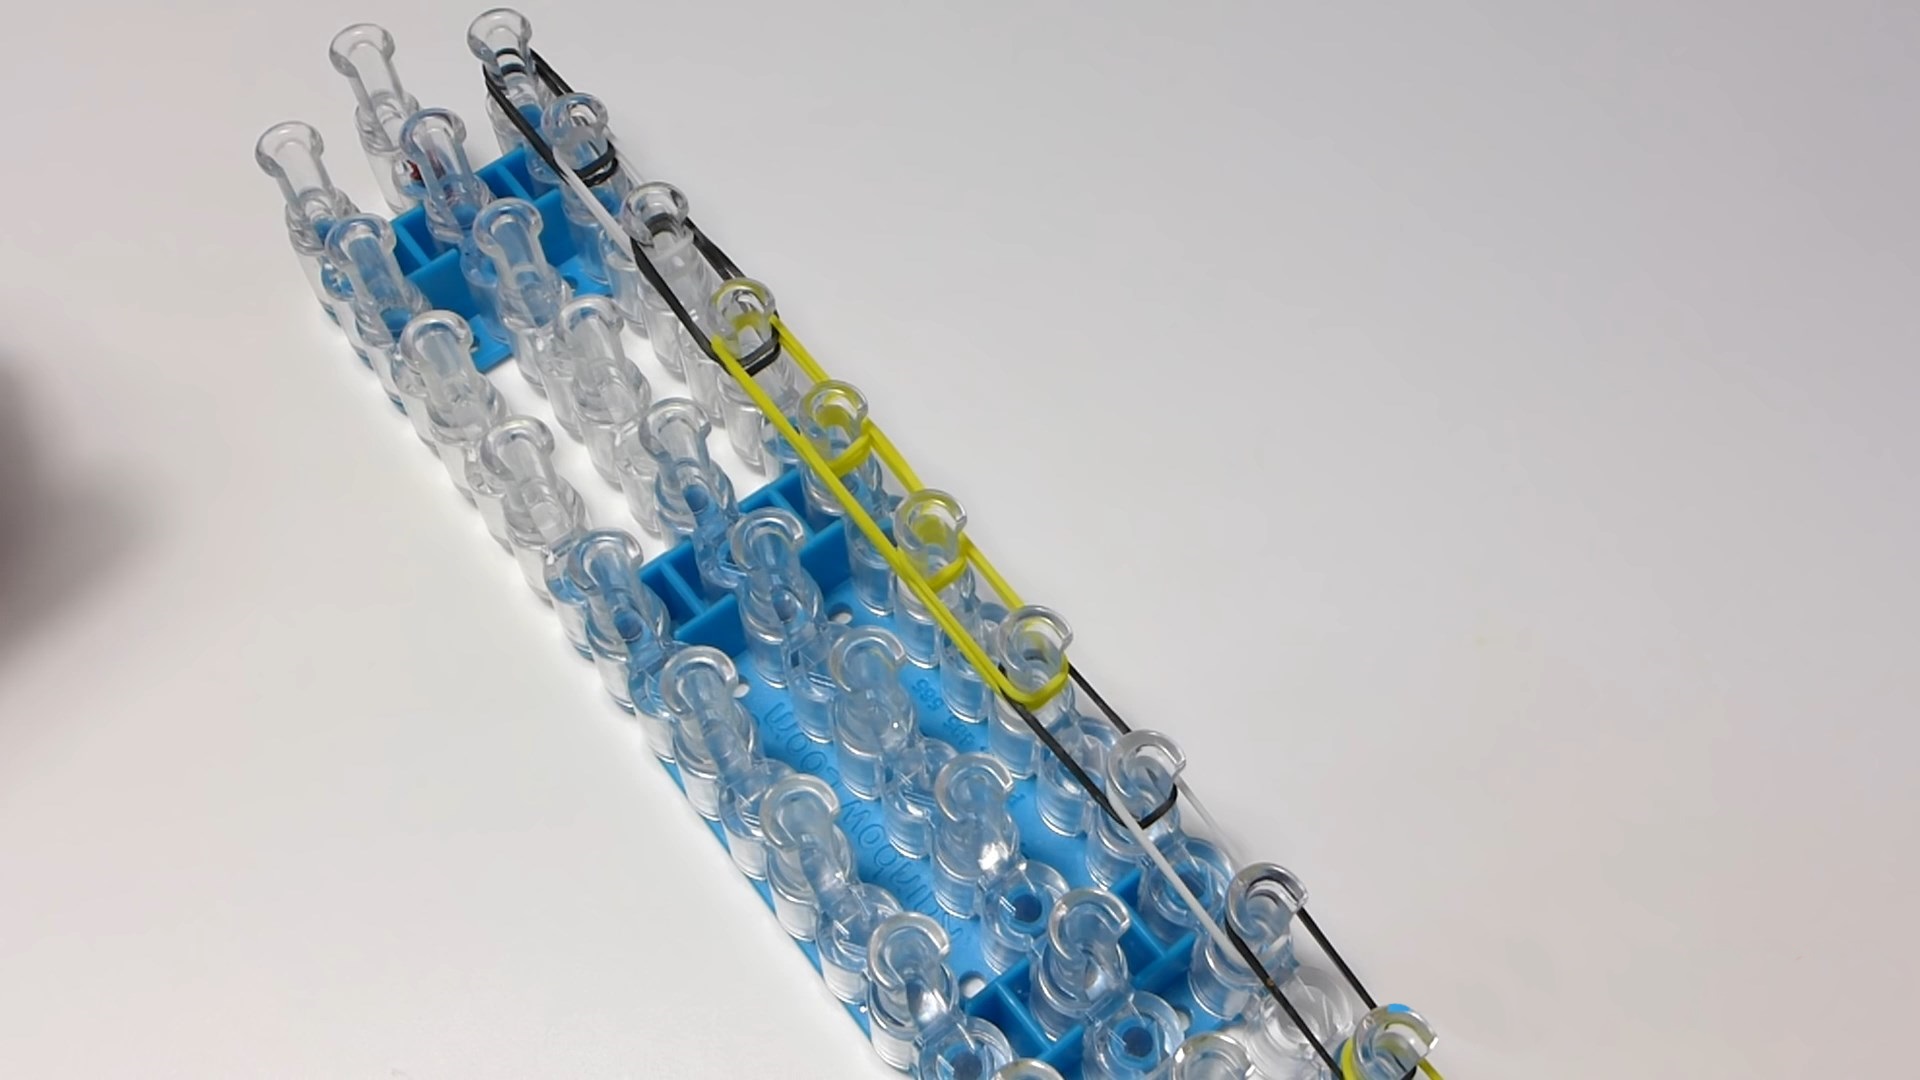
1. So, let’s begin our master class on weaving one of the simplest bracelets from rubber bands, “Colored Rings.” Take one rubber band yellow color and put it on two posts, twisting it in a figure eight. Take another elastic band and put it on two posts in the usual way.

2. Take the hook, wind it from the outside of the right column, grab the bottom elastic band and throw it into the middle. The same needs to be done on the right column (for more details, see the video “Simple bracelet made of rubber bands Colored rings”).
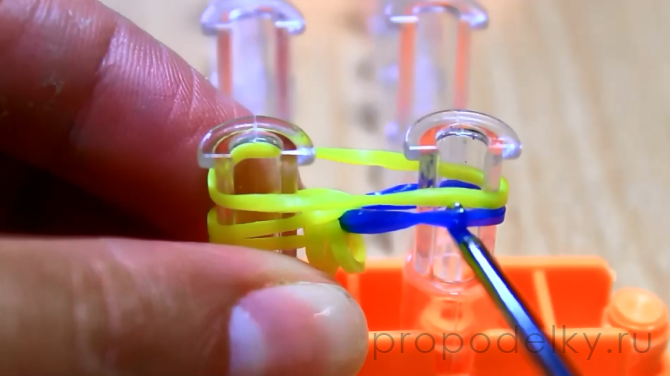
3. Take a blue elastic band and throw it over the right post in two turns.

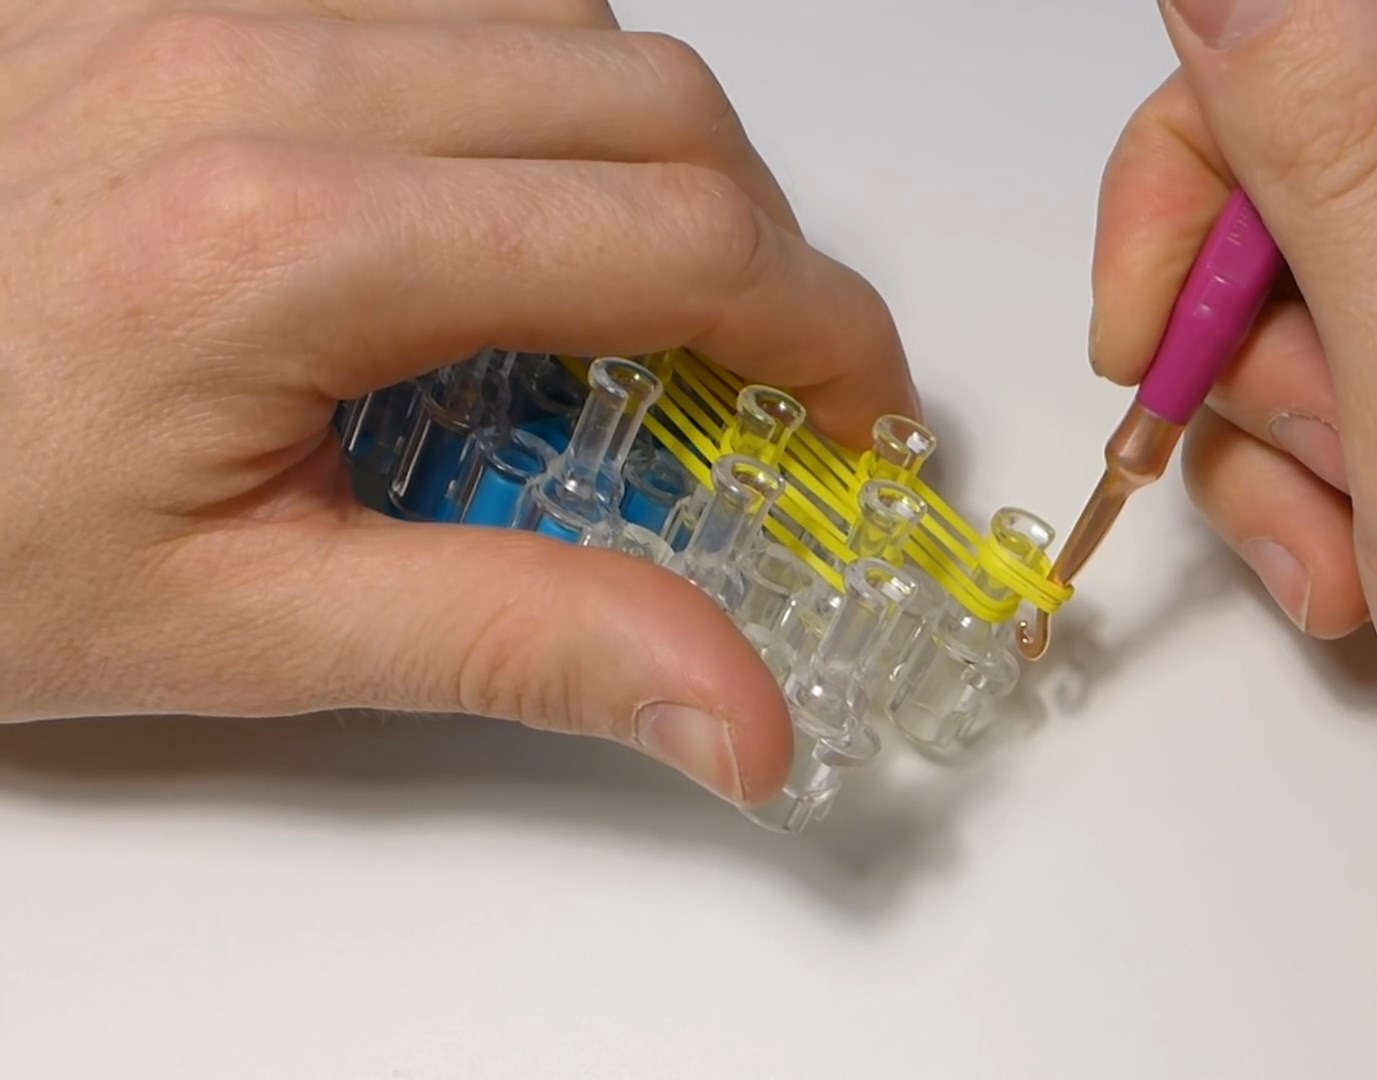
4. Insert the hook inside the right column, grab the lowest (yellow) elastic band, and stretch it out, put the loop caught on the hook onto the left column.

![]()
5. Throw another yellow elastic band over two posts.

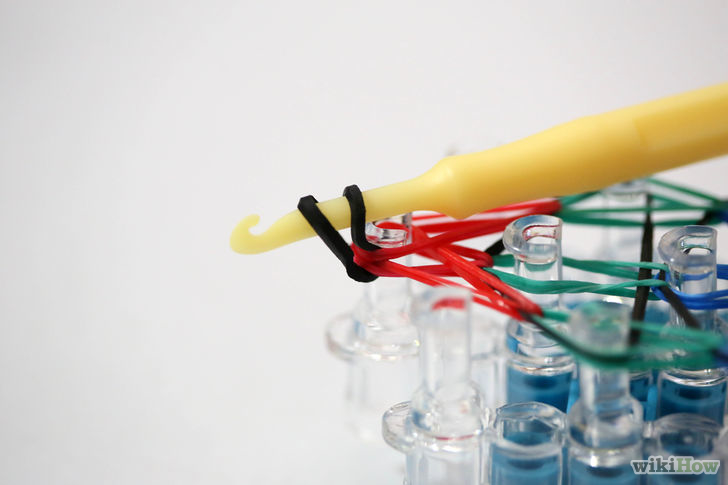
6. Grab a double blue elastic band from the outside with a hook and drop it from the post to the middle.

7. Grab the last (third) elastic band from the outside of the left column with a hook and throw it from the column to the middle (watch the video “How to weave a simple bracelet from rubber bands Colored rings”).
![]()
8. Place a double elastic band, now red, on the right post.

9. Insert the hook inside the right column, grab the lowest (yellow) elastic band, and stretch it, put the loop caught on the hook onto the left column.
For beginners, weaving from rubber bands on a machine can be an interesting activity and a new hobby. Most likely, young needlewomen will like this new hobby. For weaving you will need a special kit: a plastic loom, small multi-colored rubber bands, a special hook, and fasteners. A complete set of necessary materials and equipment can be purchased at a craft store. As a rule, the kit also includes instructions and easy weaving patterns.
Using a machine, you can weave jewelry and three-dimensional figures from rubber bands. It’s worth understanding the principle of operation, and then you can move on to more complex crafts. This activity is quite exciting for both children and adults.
Weaving Basics
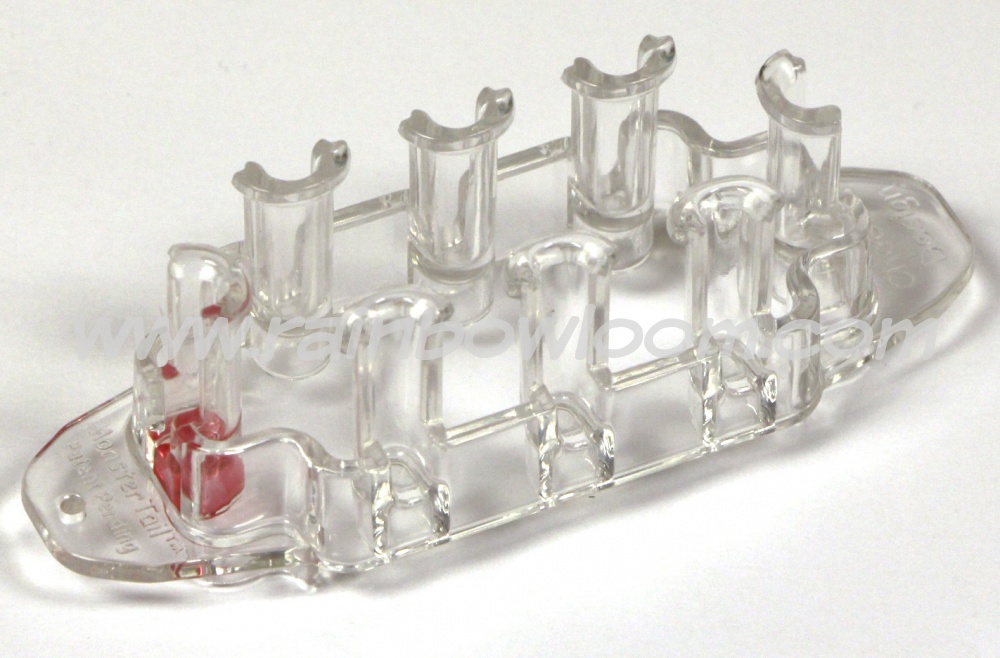
To work, you will need a special loom, small multi-colored elastic bands, a hook, fasteners, and beads. All this can be bought separately or purchased for children ready set for weaving (for example, “Monster Tail”).

It is worth saying that there are two types of machines - professional and children's. They differ in size and functionality. The machines make the work easier in many ways, since all the weaving is clearly visible. Professional machines are quite large and can extend and take a convenient shape. You can create small crafts and decorations on a small machine (for children) or on a slingshot. You can also weave jewelry without a machine, for example, on your fingers or using forks.
Those who have never woven from rubber bands should start with the basics, namely, try to weave simple multi-colored bracelets. This is not difficult to do, you just need to follow the instructions step by step.
To work you need to prepare:
- machine;
- colored elastic bands (black and rainbow colors);
- hook;
- clasp.
Progress:
- Install the machine with the open part away from you;

- Place three elastic bands of the same color in each row on two adjacent posts;

- Alternating colors, repeat step 2 along the entire length of the machine;

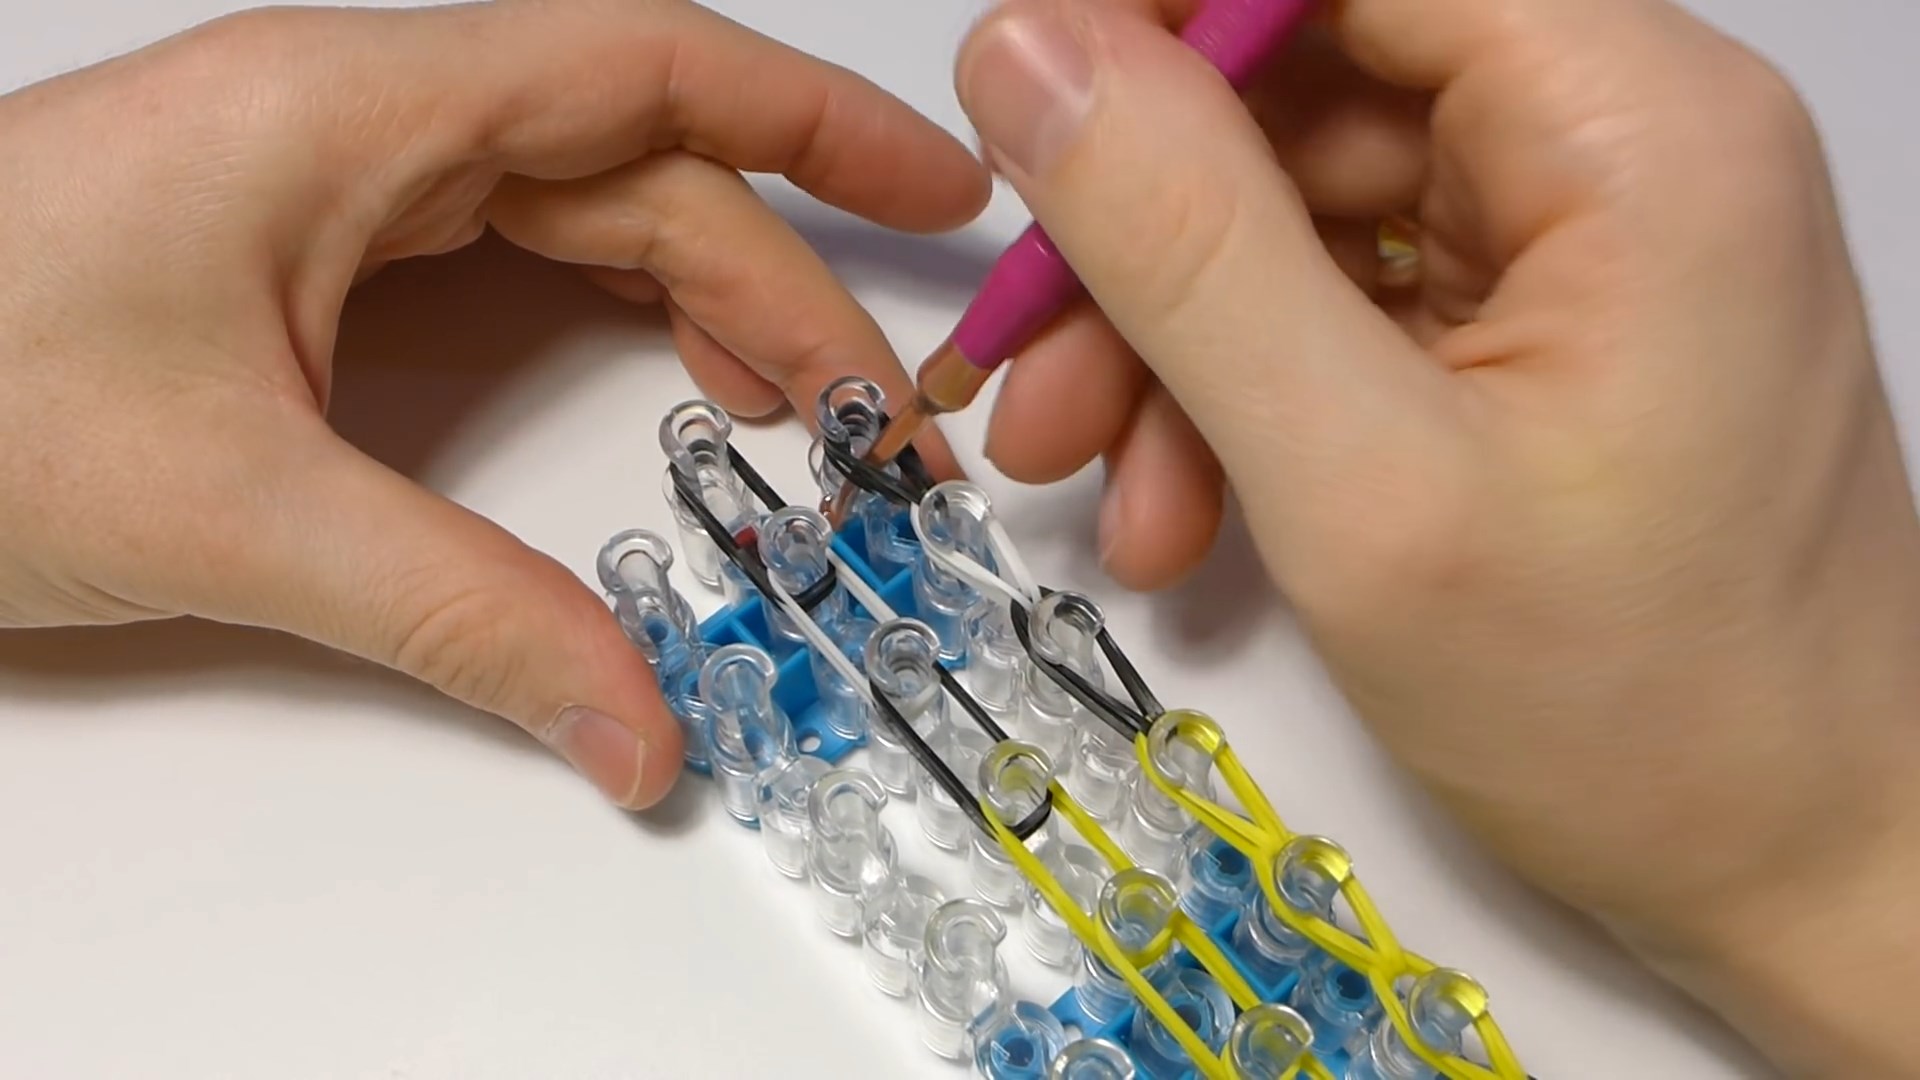
- Using a black elastic band, starting from the second column in the central row, hook the columns from the right and left rows (repeat along the entire length of the machine);
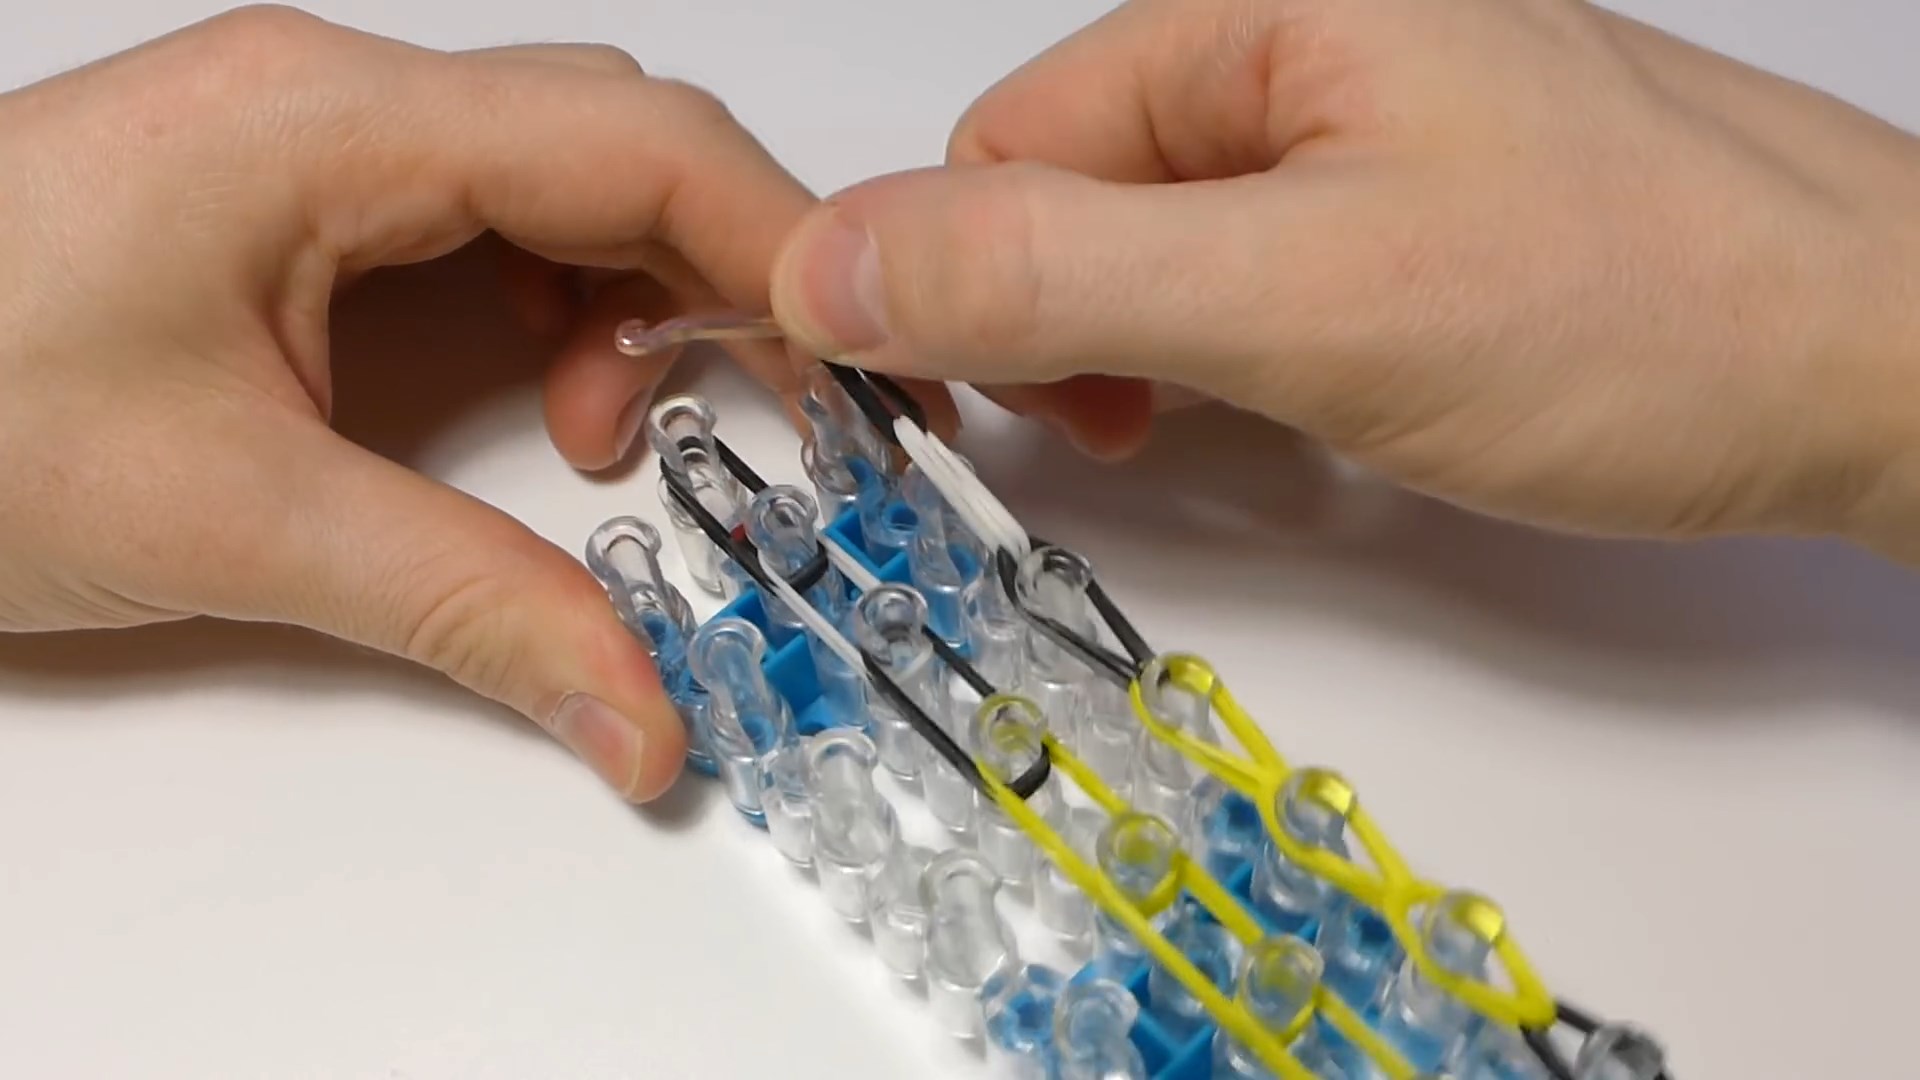
- Turn the machine over and start weaving: pick up a colored elastic band with a hook and throw it onto the adjacent peg (where its end is located);

- Repeat step 5 until the end of the machine;
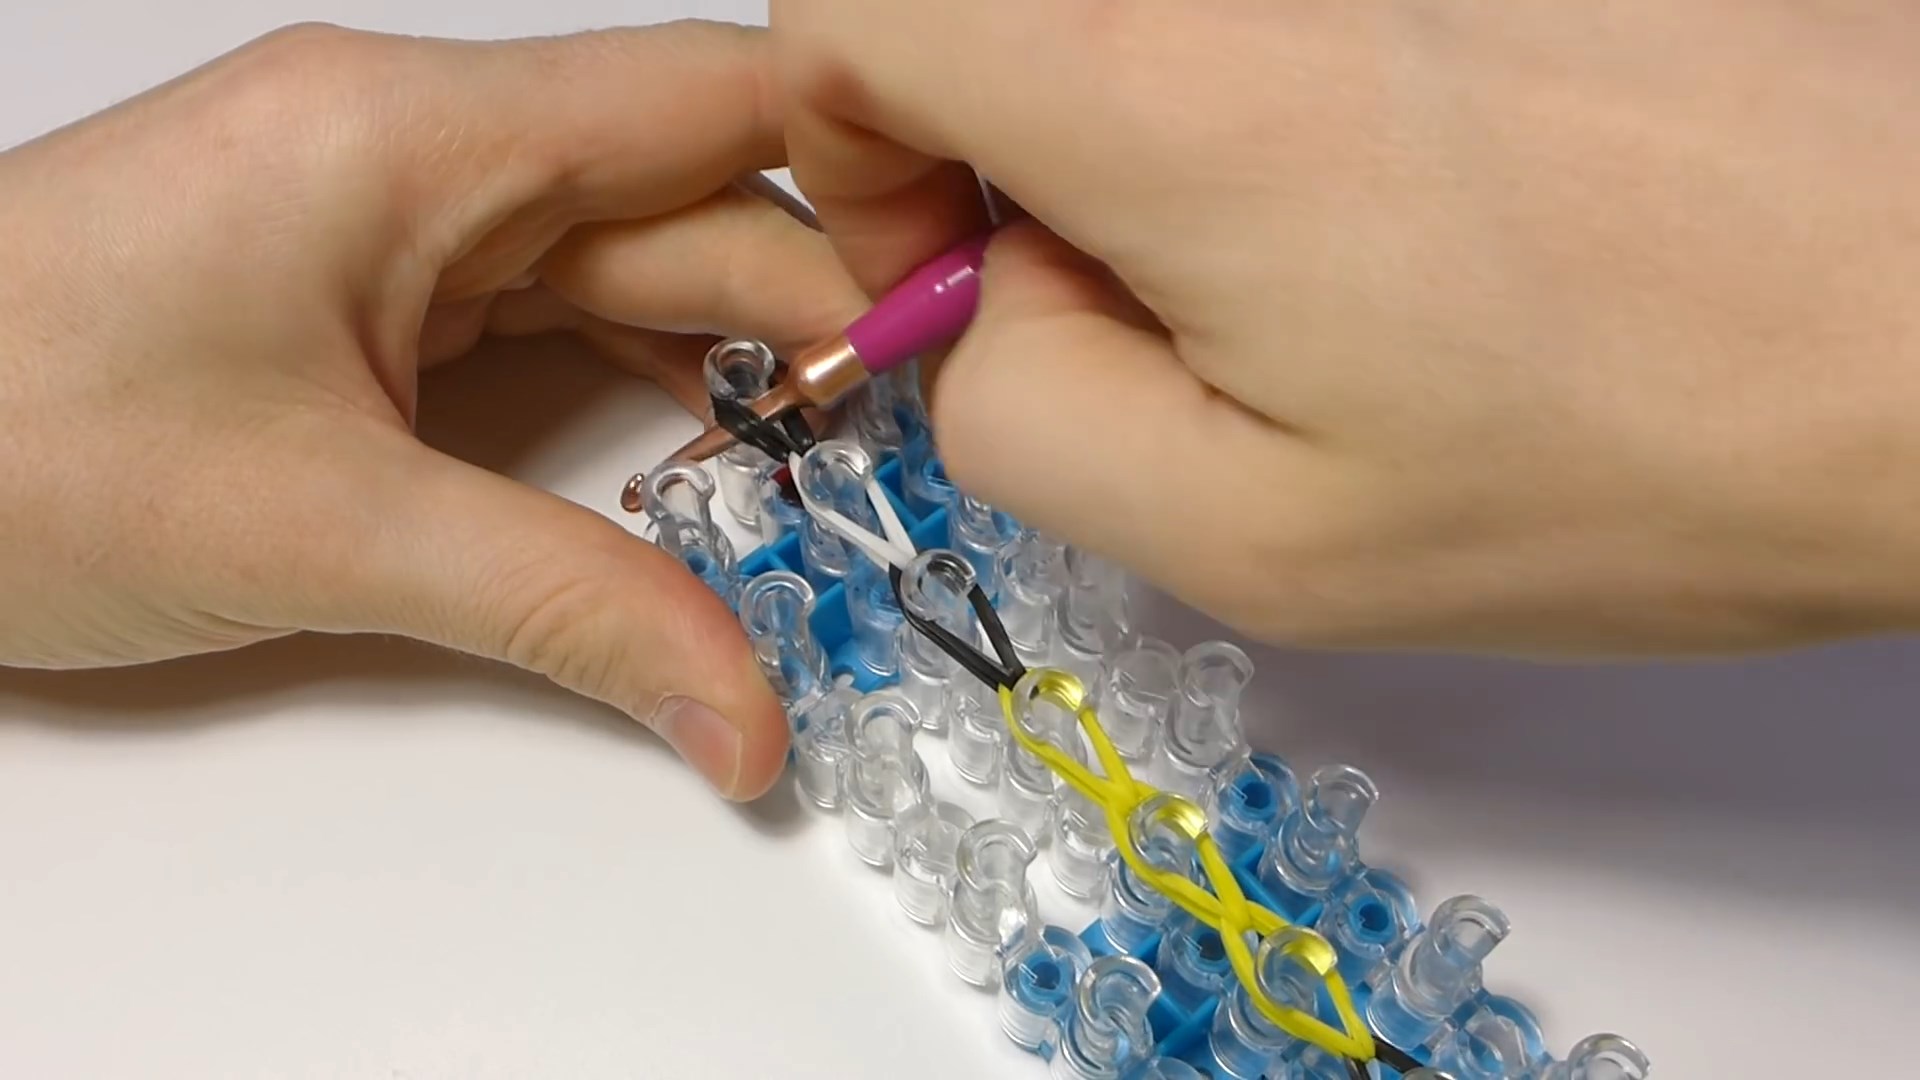
- At the end, transfer all the loops to the central post;
- Through the loops of the post, pick up a separate black elastic band and pass its loops through the hook;
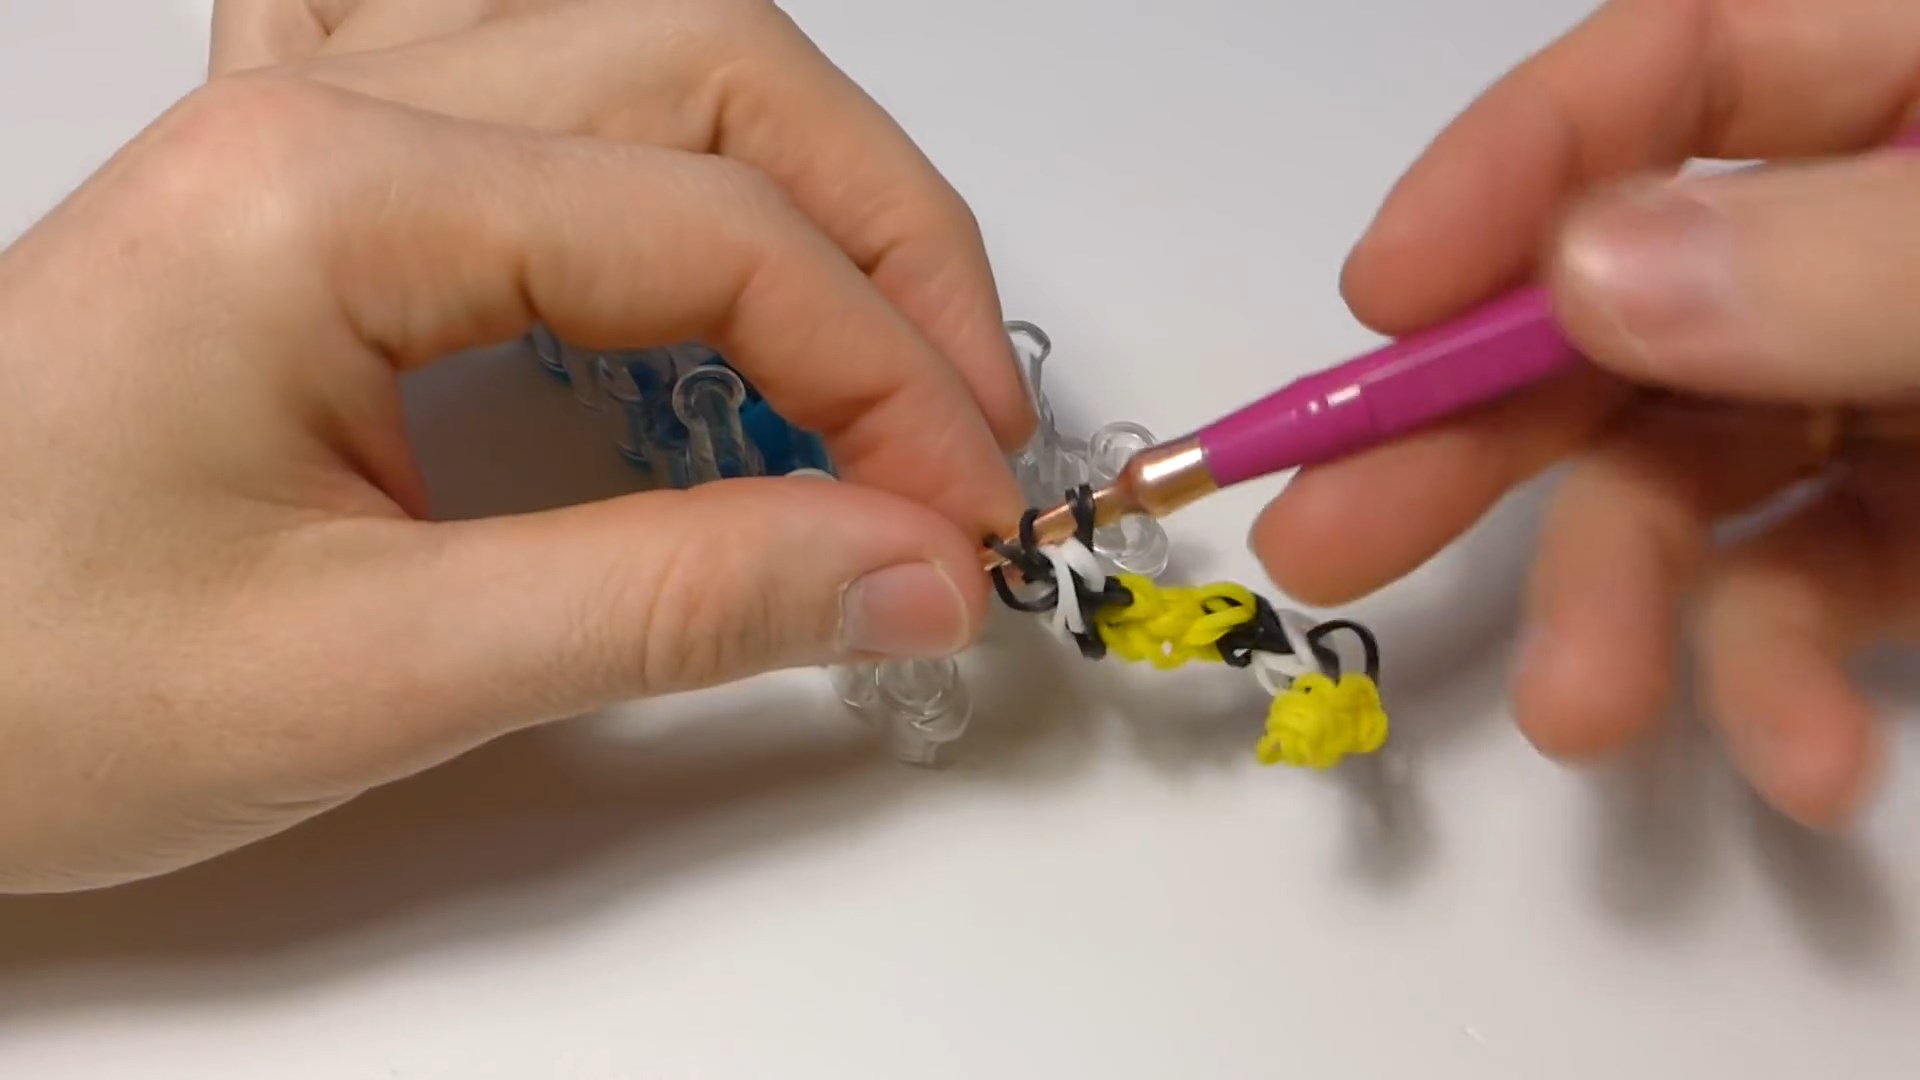
- Carefully remove the bracelet from the machine;

- Make a strap according to the principle of point 5, putting the end of the bracelet on the first post;


- Connect the ends of the bracelet using a clasp.

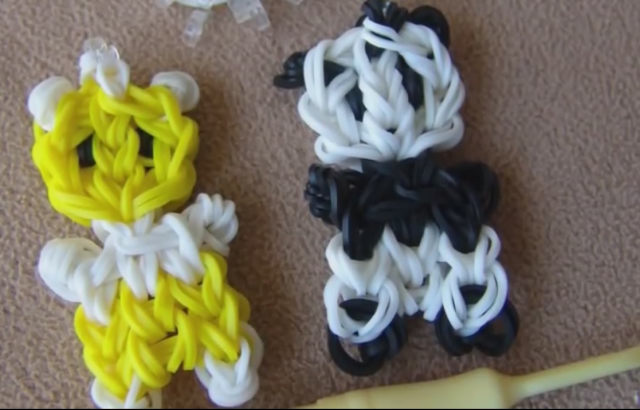
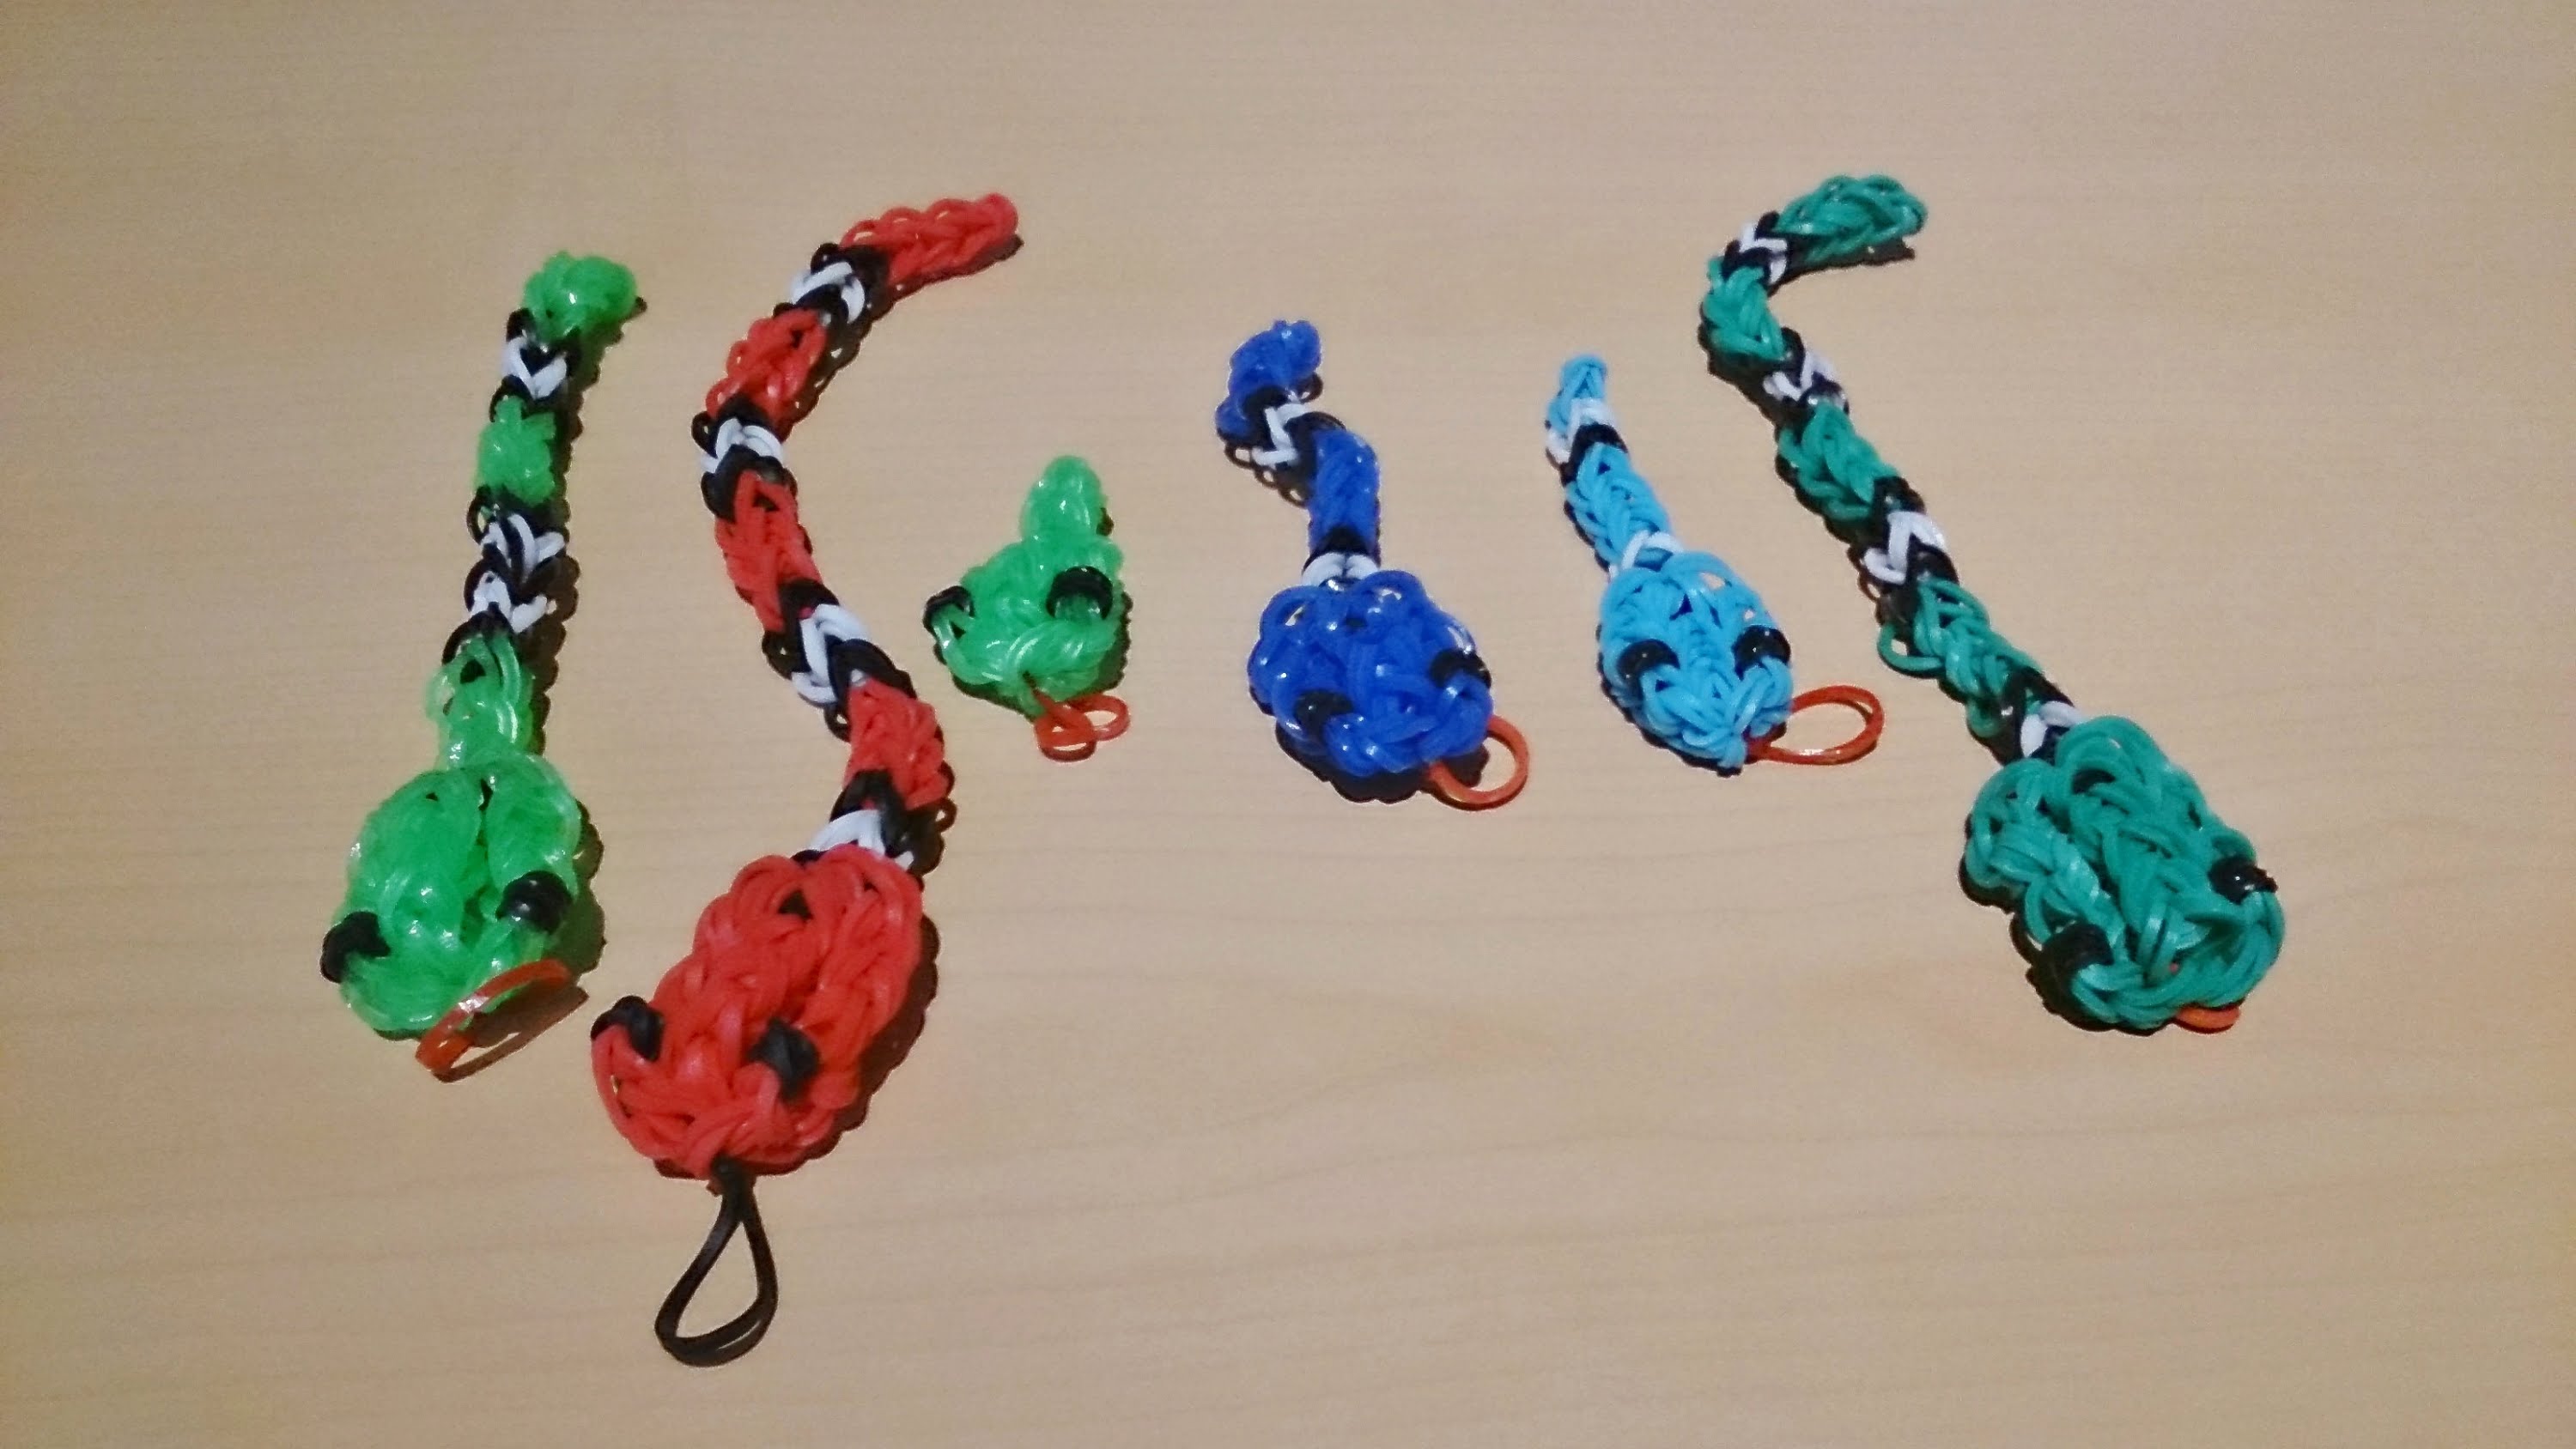
Woven rubber bands can be used to make funny animals, dolls and various objects. You can play with them or use them as a keychain.


![]()
Cute snake
For beginners, in order to understand the general principle of weaving three-dimensional figures, a master class on creating a snake from rubber bands is suitable.
To work, you only need a machine, a hook and multi-colored elastic bands (in in this example– yellow, black, white, red).
Weaving pattern:
- Pull out the central row and install the machine with the open side facing the master;
- Place elastic bands, alternating different colors, on every two columns (12 elastic bands in total);
- Make a second layer on top with the same colors;
- Repeat steps 2 and 3 for the adjacent (central) row;
- Throw one elastic band over the outer column of the adjacent row in 4 turns;

- Start weaving from the outermost column (point 5): insert the hook inward, pull back and grab two loops;
- Remove the loops with a crochet hook and transfer them to the adjacent post (do it along the entire row);


- Carefully remove the resulting tourniquet and put the outer loop on the first column of the central row;
- While pulling back the “tail,” insert the hook inside the post, pick up two loops and transfer them to the adjacent post (step 7);


- Remove the resulting tail from the posts;

- Throw two elastic bands crosswise over the outer center post;


- To make eyes: wrap a black elastic band around a hook 4 turns, pick up a yellow elastic band and pull it through the skein;

- Put on the elastic bands with “eyes” on the right and left;

- Pull four elastic bands in two layers onto the outer rows of the machine, as in steps 2-3;
- Stretch the elastic bands along the central row and connect the two rows with elastic bands crosswise;


- Throw cross elastic bands across three columns along all rows (it should look like in the photo);

- Attach the tail to the future head: put the outer loop of the tail on the central post;
- Insert the hook inside the post, pick up the two lower loops and pull them onto the adjacent right post;
- Repeat point 18 for all remaining loops (two on adjacent columns);

- Make 6-7 points for all rows (left, right, center), pull all the last loops onto the central column;


- Make a tongue by pulling a red elastic through all the loops of the center post and tying it with a knot;

- Using a hook, gradually remove the weave from the loom.
The snake is ready!

Knitted toys
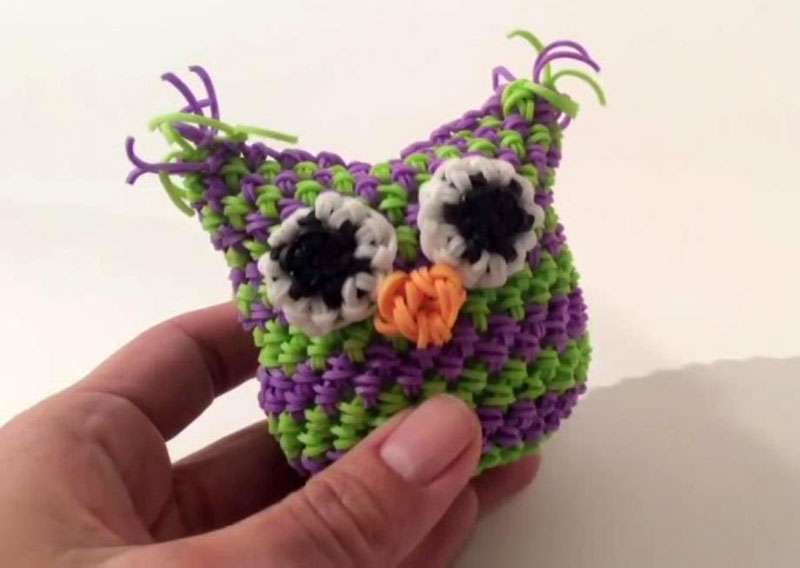
Weaving rubber toys - lumigurumi - is a rather labor-intensive activity that requires attentiveness, patience and some knitting skills. The technique of lumigurumi is similar to amigurumi - crocheting figures. Those who know how to knit a toy using this technique will not have any difficulty mastering lumigurumi.
As an example, it is proposed to weave a 3D owl. It looks very cute, and in addition, it is well suited for the first acquaintance with lumigurumi.
For this you will need:
- colored elastic bands;
- Crochet hook;
- slingshot or weaving machine;
- padding (for example, padding polyester).
If you plan to make the owl one color, then you need to prepare 500 elastic bands for the body (primary color). Accordingly, for a two-color owl you will need 250 rubber bands of each color. In addition, you need to prepare 8 white and 13 blue rubber bands for the eyes, and 9 rubber bands for the beak orange color.
The best way to learn how to weave, or rather, knit an owl is by watching the video below:
Video on the topic of the article
To study weaving on a machine in more detail and more clearly, we suggest watching video tutorials.
Any image ends small details. Without correctly selected accessories there will be no such play of colors and clarity of details. In summer and spring, jewelry such as bracelets are especially relevant. Now you can find a large assortment of these accessories. They all differ in design, materials of creation and weaving technique. Rhinestones and beads are used as decorations. But a person always strives for originality and tries to find new solutions. A great idea is to create beautiful bracelets from rubber bands. Accessories are made quite simply, and the source material is available and cheap. As a result, you can get a magnificent decoration in the desired color and desired shape.
How to weave a turtle toy from Rainbow Loom Bands
The popularity of rubber band bracelets is observed among school-age children and teenagers. By the way, this could be a great idea for something to do with your child on the weekend. Rest assured, he will love it, because what could be better than a piece of jewelry made by yourself. For older people, creating bracelets can become a kind of relaxing activity, relaxation.
As may be clear, the most important material from which bracelets are made is elastic bands. You can buy them at stationery stores or in the jewelry department. You can also look into specialized points of sale of hand-made materials or take a stroll through the market. The elastic bands are not simple, textile, but silicone. They are small, thin and come in different colors.
Review of a set for weaving from rubber bands video
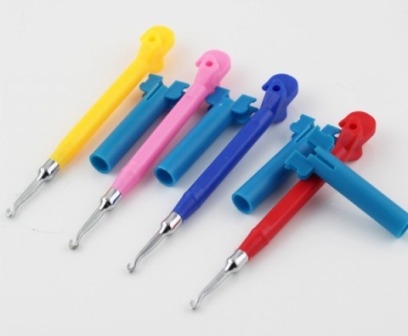
In addition to the material, you will need a tool that will be used to weave bracelets. A crochet hook performs this function perfectly. Just don’t take a big one, 3-4 numbers are enough.
The next tool is special machines for elastic bands, on which the bracelets are actually weaved. Their cost varies depending on the size, type and quality of the material. For minimal costs at first, you can use a fork that has two ends. The tool is available for purchase at sewing supply stores.
In terms of functional parameters, the machines are, of course, better than the fork. Depending on how many columns there are on them, you can weave different patterns. People who create accessories from rubber bands do more than just bracelets. On the machines you can create animal figures, flowers, or even weave a cover on mobile phone. You can purchase the machine in the online store. It will be much cheaper, and you don’t need to waste time looking for goods in stores or on the market.

Ideally, you can purchase a ready-made set. It already includes a large assortment of elastic bands different color, transforming machine and hook. Don’t be upset if your search for a tool is not successful; you can start with basic accessories that are woven using a handle or an ordinary fork.
Video: How to weave a dog from rubber bands
And so, once again about the set of necessary tools. To create a bracelet you will need:
- Silicone rubber bands of the desired color or multi-colored.
- A special fork with two ends, a handle or a table fork.
- Crochet hook No. 3-4.
The patterns that can be woven from rubber bands are limited only by your imagination. If you search on the Internet, you can find a lot of intricate shapes, get an idea somewhere, and, perhaps, come up with a pattern for your future bracelet yourself. But, as you know, you need to start small. Therefore, the first test should be performed on a simple bracelet. But this does not mean at all that it will be boring and uninteresting. You can create a bracelet using your skillful and dexterous hands, as well as rubber bands.

Technique for weaving rubber band bracelets
Two fingers are involved in the work: middle and index. They need to put on an elastic band, which is pre-folded into a figure eight or an infinity sign, whichever is more convenient for you. You need to put the next elastic band on top of our elastic band. Only this time there is no need to fold it. Then, the elastic band that was put on first must be removed from the fingers, and it must be threaded into the second elastic band. Next, we continue weaving in this way, as a result you will get a chain of rubber bands. If desired, the colors of the rubber bands can be alternated and then the bracelet will be bright, or it can be made in one color.
Video: New technology weaving from rubber bands
Upon completion of the weaving, this can be understood by relying on the desired length; a plastic lock is attached to the loops that are located on the edge. That's all. The original bracelet is ready. Thin bracelets made of rubber bands look great if they are worn not individually, but several items at once.
Various options for rubber bracelets
- Fish tail
After you have learned the first weaving technique, you can begin to complicate your tasks. A slightly modernized version of the bracelet is made using a weaving technique, which is known to many as “Fishtail”. The result of weaving will be a bracelet, and its shape will be voluminous. To create the accessory, about 50 elastic bands and, of course, a clasp are used. Weaving is convenient to do using a special machine, but if it is not available, your fingers will come to the rescue.
Video: Bracelet made of rubber bands on fingers using fishtail technique
As in the first technique, two fingers are used: the middle and index fingers. They should wear an elastic band folded in a figure eight. The following rubber bands that will be used do not need to be twisted. Two rubber bands are put on top of the figure eight, it is better if they are of different colors. After this, you need to remove the first elastic band on them, then the second figure eight, and remove the lower elastic band on it. The elastic band that was on top should remain on the fingers.
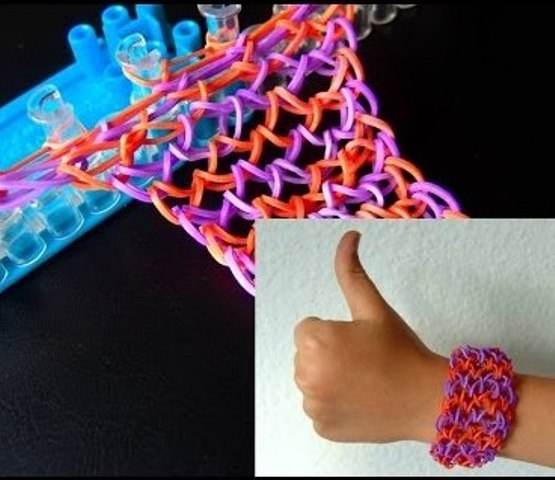
- Caterpillar

Another variation of the previous method is “Caterpillar”, here it is already necessary to use the simplest weaving machine. Such machines have a minimum of 4 columns.
Weaving begins by putting figure eight shaped elastic bands on the columns, which cross each other. Next, one by one, you should put on the rings in two rows (elastic bands that do not twist). After this, you need to remove the eights you put on earlier. After this, another row of rubber bands is laid down, arranged in a cross, and a row of rubber bands located at the bottom is removed from them.
Caterpillar bracelet made from rubber bands on a small machine
As a result of weaving, a three-dimensional bracelet is obtained, which has a pattern of teeth. When the desired length is woven, you need to remove all the loops on one of the posts and secure the lock.
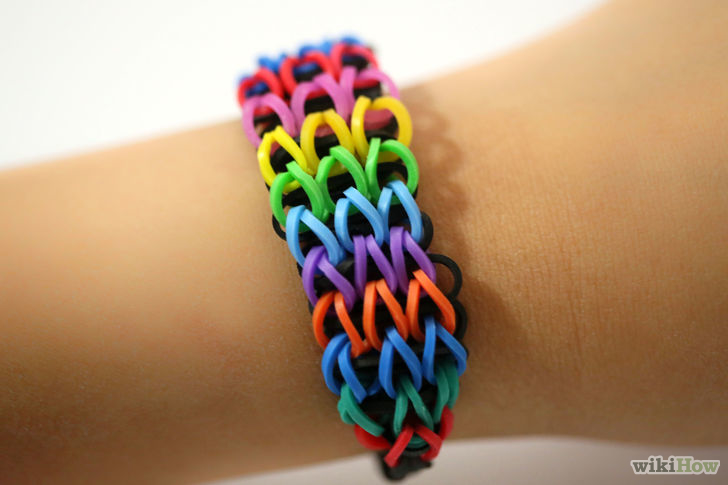
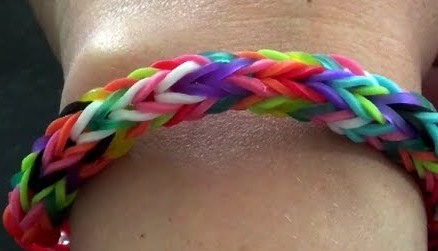
- Rainbow
This can be said to be a classic for creating bracelets using this technology. Distinctive feature is that to create an accessory you need to use a fork.
You need to take an elastic band, fold it in half and place it on the two middle pins of the plug, while the elastic band should look like a figure eight. Next, using the same technology, two more elastic bands are strung onto the outer pins of the fork. The first elastic band must be removed from above the loops located in the middle, carefully moving the elastic bands to the bottom. Then, again, one rubber band is put on the middle pins. It should be folded in half, but not twisted into a figure eight. The row that was made before is removed from above the elastic band that was put on last. The weaving process continues in this order: we place one elastic band in the center of the fork, two elastic bands are located at the edges. Each color of elastic band is followed by two repetitions of the row.
How to make a bracelet from rubber bands using a fork
Working with small parts like this can cause some discomfort. To make it easier to deal with rubber bands, you can use a hook, or, if you don’t have one, use a toothpick.
The name of the weaving technique comes from the colors. If you choose the right combination, the end result will look like a rainbow. Upon completion of weaving and reaching the required length, the bracelet must be completed. To do this, you need to move the loops from the pins located at the edges to the center, and the loops located at the bottom need to be put on those that are at the top. A non-twisted elastic band is put on the two loops that remain in the middle. After this, you need to place the loops on top of each other and secure the S-shaped fastener. After this, by pulling two loops you can remove the bracelet from the working tool. After the bracelet is removed, you need to give it a shape. To do this, you need to pull in different directions so that all the plexuses fall into place.

Bracelets with patterns
Bracelets that have any pattern look very stylish. The technique of weaving them requires a lot of attention, but when your hand is full, everything is done mechanically.
- Star pattern
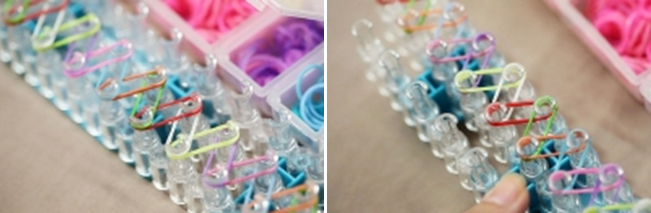
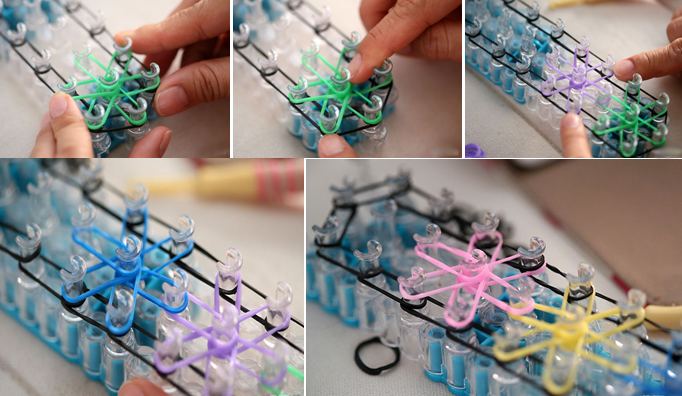
To create a pattern you will need a three-row loom, multi-colored silicone rubber bands and a crochet hook. The first thing to do is to put rings of black rubber bands around the perimeter of the machine. There will be 24 pieces in total: 10 on the long edges and 2 on the sides. Next, you need to make red stars on top of the black elastic bands. Each of them has 6 rays. You can make each star a different color.
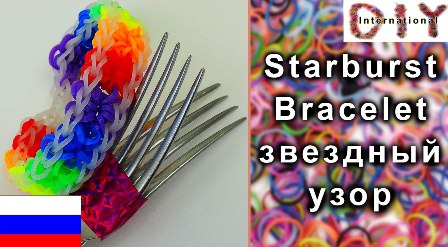
You need to start creating from the first middle column and continue moving in the direction of the clock, this is a very important point. This must be continued until stars appear on all the free central columns. As a result, you will get 7 identical stars.
Next, you need to fold the black elastic band in half and put its columns located in the middle through one column. You should start from the edge. Now you need to turn the bracelet over and remove the elastic band located on the edge. This can be done using a hook, then the elastic is put on the column in the center. It is necessary to work out each ray of the future pattern. To do this, the elastic bands need to be moved from the central part to the edges. The movements are performed counterclockwise. Similar actions need to be done with the next star. The first loop is threaded into the center, and the subsequent ones to the edges, counterclockwise.
How to make a bracelet from rubber bands “stars”
After this, you can begin to throw black rubber bands, done in exactly the same way as with the stars - from the center and to the edge. Upon completion of weaving all the black elastic bands, you need to take the elastic band and thread it into the outer loops. The loop should remain on the hook. This is necessary in order to simplify the removal of the finished bracelet from the machine.
Now you need to remove the woven bracelet from the working tool, the actions must be careful so that the rubber bands do not break. The bracelet must be pulled in different directions with a little effort so that the pattern falls into place.
It is possible that the finished bracelet will not be of sufficient length, then it will need to be extended. The extension is done as follows: put a black rubber band on your fingers, put the next rubber band on top and string the first one onto the second. You need to add loops until you get the desired length.
The two loops that were made last serve as the attachment point for the fastener. That's it, the bauble with the original star pattern is ready.
- French style braid
Weaving in this style will be appreciated by girls and women who love elegant jewelry. To make a bracelet, you need a double-column machine, as well as rubber bands of your favorite colors.

You need to start the bracelet by already known method"Fish tail". For the presented product, orange and green colors. You need to make a figure eight out of an orange elastic band and put it on your middle and index fingers. A green elastic band is strung on top of it, and then an orange elastic band, but there is no need to twist it, it looks like a ring. Then you need to remove the first eight, and put another green ring on top of it. Further differences will follow; you need to carefully monitor the process.
French braid. Rainbow Loom Bands Bracelet. Video
Now you need to remove the loop located in the middle on the right side, it is orange. On the left side, the bottom elastic band is removed - green. Next we weave the next row: you need to put on an orange elastic band in a ring. The central loop is removed on the left side, and the bottom loop on the right. Thus, we continue weaving until the braid reaches the end.
To complete the weaving, you need to perform the following steps: from each column on which the loops remain, you must remove the lower loops in turn, and the loop that remains on the left must be thrown onto the column on the right. The last two loops serve as a place for attaching the clasp, after which you can remove the French Braid bracelet from the machine.
Step-by-step instruction
The presented instructions are reminiscent in their technology of creating a star pattern, but due to the fact that the star will have not 6, but 4 rays, it is called “Spider”.

To make a bracelet you will need a three-row machine. Along the edges of the machine you need to put on rubber bands of the selected color. You need to start from the extreme left row, after it comes the extreme row on the right side, the sequence is very important, do not neglect this. If the sequence is not followed, the pattern simply will not work. Then you need to put on four rings of elastic bands clockwise. When the crosses have formed and the elastic bands are put on, you need to place an elastic band of a different color in the middle, this is done in a triple turn.
How to make a bracelet made of rubber bands, Spider style. Video
On the column located on the edge, on the sides located at the top and bottom, you need to put one elastic band on each with a double turn. Now, using a crochet hook, you can start weaving the pattern. The rubber bands from the column located inside must be removed, threaded through the elastic band, which was twisted three times, and lowered onto the column where the other end of the ring is located. All movements are performed strictly counterclockwise.
Such actions need to be done with each integral part pattern. After this, you can begin processing the edge line. To start, you need to transfer the right and left loops to the next column in turn. After finishing work with the outer row, you need to thread the elastic band into the loop located along the edge. After that, leave it on the hook. Now you can remove the bracelet from the working tool. If lengthening is necessary, you can use the method described in the star pattern.
The presented options for weaving from rubber bands are not the only ones. All of them can be easily combined with each other and improved.
DIY rubber band bracelets
Rubber bracelets
Children's handicrafts have a positive effect on personality development and creativity. Rainbow Loom Bands are a new children's hobby that have become widespread. The founder of this hobby was Cheong Chun Ng. The engineer patented the invention of a special rubber band weaving machine and began producing entire handicraft kits. You can knit different products from rubber bands, from bracelets to more complex accessories. In this article you will learn how to do rubber bracelets using a special machine and you can watch videos of different weaving techniques.

Machine for weaving bracelets with rubber bands
Rainbow bracelet made of rubber bands
Materials:
- rubber bands different colors;
- fasteners;
- twist.

1. Take three rubber bands of different colors.
2. Twist one of the rubber bands in a figure eight and put it on the loom. Put on the two remaining rubber bands without twisting them.
3. Each time you need to lift the end of the lower elastic band through the protruding parts of the machine and add a new elastic band until the bracelet reaches the required size.
4. At the end, pick up two elastic bands, and remove the last one and tie with any broken elastic band.
Watch the video on the topic: Fishtail Bracelet
1. Pull two rubber bands diagonally onto the machine so that they intersect.
2. Put on the third elastic band without twisting.
3. Make two rows in this way.
4. Proceed to weaving using a hook; to do this, grab the bottom elastic band and pull it up.
5. Repeat step 4 for the opposite side.
6. Add two elastic bands without twisting and continue weaving, grabbing the elastic band from the bottom.
7. You need to weave until the product is the desired size.
8. Attach the clasp.
1. Take 5 rubber bands, twist them in figure eights and secure them on the machine so that they occupy 6 nozzles.
2. Now pull each bottom rubber band up through the machine attachment.
3. Turn the outer rubber bands over.
4. Take three elastic bands and put them on the attachments, starting from the outer one.
5. Pull each bottom rubber band up through the nozzle again.
6. Take 2 rubber bands and put them on the middle nozzles.
7. Also pull the bottom elastic band up.
8. Take three elastic bands and repeat from step 4
9. Braid to the desired bracelet size. Attach hooks to the outer loops.
Watch the video on the topic: MK bracelet made of rubber bands Dragon Scales
We hope you liked this article How to make rubber bracelets. You will find more DIY crafts.


