Preparing new fisher skis for skating. How to wax cross-country skis for a beginner
To ensure high-quality gliding of cross-country skis on snow, they require lubrication. If you rent skis for skiing, you don’t have to worry about the lubrication procedure, but if you purchased your own skis, you will have to lubricate them yourself. But how exactly is it necessary? Lubricate skis at home? Our collection of tips AnyDayLife will tell you more about this.
Today, the range of lubricants for cross-country skis is simply huge, and to begin with it is useful to understand What's the best way to lubricate skis? in certain situations. Thus, all lubricants for cross-country skis are now usually divided into gliding ointments and grip ointments.
Glide waxes are ointments that are used to improve the gliding properties of skis. In amateur skating, such ointments are most often used in the form of solid paraffins, and in professional sports - in the form of powders, liquids, and sprays.
Glide ointments are used both with classic and skating moves. For skating in the classical way, such ointments are applied only to the front and back of the skis, and for skating - to the entire gliding surface (slider).
Holding ointments are ointments that improve the “adhesion” of the ski to the snow at the moment of repulsion and reduce the so-called recoil, i.e. it is undesirable for the skis to slip backwards. Holding ointments are divided into solid and liquid (klisters), their use is recommended for the classic method of skating.
The choice of the required gliding ointment or grip ointment depends on a number of factors, among which, in addition to the method of skiing, can also be mentioned snow temperature, humidity environment, the “age” of the snow cover. Makes sense for amateur skating choose ointments with the widest possible range of applications, to get by with only 2-3 pieces, while professionals’ arsenal of ointments can include up to 10 different items.
You should lubricate your skis at home with the selected ointments. directly on the day of skiing, since the lubricant applied in this way will best suit the riding conditions. However, if the weather is stable and no significant changes in temperature and humidity are expected, skis can be lubricated in the evening.
For lubricating cross-country skis at home you will need ointment(s), device for fixing skis (vise, clamps, profile), plastic scraper, hard nylon brush, iron, cork-rubbing. The method and sequence of applying ointments to skis will depend on your preferred method of skiing.
How to lubricate skating skis?
For skating, skis must be lubricated. only slip ointments(paraffins). If we are talking about amateur skating, it will be enough to apply one ointment, selected according to the air temperature on the day of skating. For example, if we are talking about ointments from the famous brand SWIX, then you can choose CH7, or purple ointment - in the range of ointments of this brand it occupies exactly the middle position. Suitable for temperature range from -8°C to -2°C, any snow.
To apply the selected ointment to your skis, each ski must be comfortable fix by sliding upwards in a vice or on a profile. If any ointment was previously applied to the skis, you must first remove it: first, run a scraper along the slide several times, and then apply remover to a cloth ski waxes or purified lighter gasoline and continue processing.
Now proceed directly to lubricating the skis. Heat a special iron to the temperature indicated on the paraffin packaging. If you don’t have a special iron, you can use a regular iron at home, but it should be an old model with a regular flat sole. Typically, the heating temperature of a paraffin iron varies from 110 to 130°C, and experienced people will have to find a mode on the iron that matches this range as closely as possible.
Remember that neither the ski surface nor the wax should be overheated under any circumstances. Therefore, do not overheat the iron and do not hold its soleplate in one place for too long. To apply paraffin to the ski, place the block on the heated surface of the iron and “drip” melted paraffin evenly along the entire length of the ski. Further gently run the iron over the entire ski from heel to toe, completely melting the paraffin. As a result, the ski should be evenly covered with paraffin, as evidenced by the “liquid” shine of the surface of the slide.
Wait until the paraffin hardens. Further take a scraper and remove excess paraffin, pressing it tightly (but not too much) to the surface. The direction of movement is against the ski, i.e. from toe to heel. Repeat several times until almost no paraffin remains on the scraper. Using a suitable scraper or the corner of a regular scraper, remove paraffin from the groove, as well as from the edges (side ribs) of the ski.
Use a nylon brush to polish the surface of the ski., running it along the slide with wide, slightly sliding movements. Periodically clean the brush from any remaining paraffin. After several “passes” the ski is ready. Treat the second ski in the same way.
How to lubricate skis for classic skiing?
For classic way skis need to be lubricated both gliding ointments and holding ointments. In this case, gliding ointments are applied to the sliding surface of the skis, and holding ointments are applied to the last. The last is a section in the middle of the ski, equal in length to two skier’s feet, it is defined as the distance from the heel of the skier’s boot plus 15-25 cm forward, depending on the height of the skier. For example, with a height above 180 cm, the length of the last will be 70-75 cm, and with a height of less than 180 - 60-65 cm.
First stages of processing skis for classic skiing correspond to those for skating: first remove old grease and dirt, and then treat the slipper with gliding ointment, applying the ointment only to the sliding surface of the skis, but without treating the block. Next comes the stage of treating the grip with ointment, which is not included in the lubrication of skate skis.
Holding ointment is selected for the classic stroke depending on the temperature and humidity of the snow. For warm skiing weather, liquid ointments (klisters) are selected, for cold weather - solid ones. If we talk about ointments from the same SWIX, then the universal ointment in their line can be called V40 ointment - a solid ointment with a temperature range from -1°C to -7°C for fresh snow and from -3°C to -10°C for stale.
Apply solid ointment to the ski block directly from the jar, then rub it over the surface using a rubbing stopper. If you don’t have such a device at hand, you can get by with a wine cork for the first time, but you should understand that this is not the best the best option and more effort will have to be made to apply the ointment evenly. Apply gliding ointment and grip ointment to both skis.
remember, that holding ointment should not be mixed with gliding ointment. After applying the first layer of such ointment, you should keep the skis in the cold for some time, and then apply the second layer. If you have several holding ointments at different temperatures on hand, then you can put a warmer holding ointment (primer layer) as the first layer, and a colder one as the second. After treating the skis with grip ointment, it is necessary to finally polish the sliding surfaces of the skis with a nylon brush - as already described for the skating method.
Lubricating skis at home is generally not that difficult, especially if you ski, as they say, “for yourself.” But even in the simplest cases you cannot do without a minimum set of ointments and devices, so it makes sense think about buying special kits for beginner skiers, in which manufacturers have already included the basic required ointments for different temperatures and the necessary tools for their application. Don’t forget to pay attention to what style of skiing the set is intended for: remember that for “skate” and “classic” skis are lubricated differently!

Lubrication
The preparation of skis for skating and classic moves is significantly different; this is due to a number of features and specifics of both the skis themselves and the differences in the push-glide phases during these moves.
It is important when preparing skis that their surface should be dry, clean and at room temperature!
There is also a difference in the preparation of plastic and wooden skis (plastic skis also include semi-plastic skis). Everything related to the use of paraffins (glide lubricants), powders, accelerators and other special preparation products is applicable only to plastic skis and skis with a plastic sliding base. As for the ointment, it is used equally on both wooden and plastic skis.
Selecting a lubricant is a very complex procedure, almost an art. Trainers and team lubricants spend months, or even years, gaining experience in handling and working with materials and accessories from various manufacturers. Unfortunately, their knowledge and experience are usually kept secret and shared only with their teammates. But in many cities they are already appearing (at last) service centers, at ski resorts and rentals, where ski preparation is carried out by specialists for a purely nominal fee. Of course, the cost of such a service will largely depend on the cost of the materials used for the preparation, but the person will receive great pleasure from the skiing itself, will receive competent advice, qualified ski care, and will remove the very problem of selecting lubricant and preparation.
For those who want to prepare their own skis, there are some rules and recommendations outlined below. Basically, when selecting a lubricant, they are guided by their financial capabilities, since the quality of materials is often determined by their price (although exceptions are possible).
The market for lubricants and service materials is becoming more saturated every year, and the task of the sales consultant is to help the buyer choose the best option. It is generally accepted that the Swix company is the world leader in the production of lubricants (although it is very conditional and controversial). There are also such foreign brands as: “START”, “Briko” and many others, but all of them are distinguished by the high price of materials, with no guaranteed best result. This is due to different climatic conditions “there” and in Russia. After all, lubricant of the same brand, in different climatic zones, in different regions, at the same temperature and humidity, it works completely differently, and sometimes it doesn’t work at all. Although she could show excellent results. All this equally applies to domestic lubricants. Their selection is not as wide as the selection of imported ones, but their price is several orders of magnitude lower, and the quality is sometimes not inferior to, and sometimes superior to, imported analogues.
Among them we can cite: “LUCH” Yekaterinburg, “M VIS” Moscow, “ANCOR” Kirov. Of course, the famous “Wisty” N. Novgorod, which has been the sales leader in Russia for many years and is popular not so much because of the quality, but because of the price.
Skating move.
Due to the fact that in the skating stroke the entire sliding surface of the ski “works”, which is associated with the peculiarity of the push, therefore the entire surface is subject to maintenance and processing. Preparing skis for skating is as follows: paraffin is applied to dry, clean skis, over the entire sliding surface by rubbing, or, if the paraffin is refractory, it is better to apply it in a jet-drop manner from a hot iron, when a block of applied paraffin is pressed against the sole of a heated service iron. Do not allow the paraffin to overheat! After cooling, the paraffin is removed with a plastic scraper. Remains of small paraffin particles are “pulled out” from the pores of the plastic with a hard copper or synthetic brush. Then polish the surface with a soft natural bristle brush. This procedure is necessary to give the melted paraffin particles a directional structure.
Classic move.
The difficulty of preparing skis for classic move, lies in the need to use holding ointment. Before applying it, a sliding lubricant (paraffin) is applied to the sliding ends of the skis (dry and clean) in the above order, while the block or, as it is also called, the cargo area, is left clean. This is due to the fact that the ointment applied to paraffin during the sliding process significantly loses its original qualities and, in addition, the duration of its action is reduced by an order of magnitude. Simply put, it simply “does not hold” and leaves the surface of the ski very quickly.
The ointment, like paraffin, is selected according to the temperature and humidity indicated on the packaging by the manufacturer. It is applied by rubbing, not too thick, “under the block,” as some skiers say. Then the applied ointment is rubbed with natural or synthetic cork until a shiny, uniform film appears on the surface of the ski. You should not “pull” the ointment too much along the surface of the skis, either up or down.
It is possible to level the ointment with a service iron, but it must be clean (from paraffin residues) and not too hot so as not to overheat the ointment! In general, when selecting equipment, you must first of all be based on the wishes of each client and his individual characteristics, such as the length of his arms and legs, height and weight, and their proportions. It is impossible not to note the decisive role of the client’s financial capabilities when selecting equipment, lubricants and accessories, because the “limited wallet size” will significantly narrow the choice possible options and models from the offered range. Therefore, the selection of equipment, equipment, lubricants and accessories is a creative process, but complex and time-consuming. Although it can be exciting both for the sales consultant (if he is well prepared) and for the buyer himself.
Shishkin Pavel Pavlovich
Kirov LLC “Anchor.Sport”.
Almost any athlete will confidently say that 50% of success depends on the quality of ski preparation for a race. Very often, due to poor lubrication or improper cleaning, it is not possible to achieve the desired results, especially with skating. How do athletes prepare their main equipment, and how should they select everything they need?
Lubrication of skis at home
For professional athletes, a whole team is involved in preparing the equipment, but in fact, each person can master this technique independently.
To begin with, you need to understand the what tools will be needed for processing skis. - paraffin;
- special iron for applying paraffin;
- sliding brush for cleaning the surface (steel or brass);
- scraper for cleaning the surface.
It is difficult for a beginner in skiing to understand all these tools, so to select special equipment, you need to go to a professional store. Here a person will be told what exactly he should buy to prepare his skis for skating.
To avoid problems with applying special substances and preparing skis for skating at home, you need to understand each issue separately.
Information about lubricants for skating skis
 For skating you need only sliding lubricants. They must be applied over the entire surface of the ski.
 There is currently on the market two types of lubricants:
- hydrocarbon;
- fluorocarbon.
Both types have their advantages and disadvantages. For example, hydrocarbon lubricants for skis wear off very quickly, so they have to be reapplied often. In addition, special substances in the composition of such paraffin are activated only at a certain temperature, and then the lubricant begins to work. That is why it will not be possible to use it in all weather conditions.
Fluorocarbon lubricants are divided into three types:
- low fluoride;
- mid-fluoride;
- high fluoride.
Everybody is here depends on humidity level. If the snow moisture level is low, low fluoride paraffins must be used. If the humidity level is high, then high-fluoride options are suitable.
The lubricants themselves for skating skis are inexpensive. Now on the market you can find options from domestic manufacturers, costing from 100 rubles.
Ski preparation
1 So, the first stage of ski preparation is their cleaning. First, you need to treat the surface with a steel or brass brush, cutting off the burrs, thus opening the pores on the sliding surface. 2
After that a layer of paraffin is applied, which should be leveled with an iron heated at a fairly low temperature.
2
After that a layer of paraffin is applied, which should be leveled with an iron heated at a fairly low temperature. This is a dangerous process for skis in the preparation of equipment - this is the application of paraffin. The thing is that paraffin is mainly applied with a special heated iron. If a person applies too much force, there will be no paraffin layer left between the skis and the iron, and the equipment itself will be damaged.
The first thing to do is preheat the iron to about 60 degrees. Using a warm iron, lightly touch the paraffin and apply a few drops to the entire surface of the skis. Next, the lubricant must be melted into the surface of the skis with an iron. Experts recommend applying one to three layers. After this process, you can leave the wax on the skis for 10 or 15 minutes.
 3
After this, the surface must be carefully clean with a scraper, removing all excess grease.
3
After this, the surface must be carefully clean with a scraper, removing all excess grease. Despite the fact that a person processes the skis with a scraper, a decent amount of paraffin still remains on the surface. It usually accumulates in scratches and plastic structures. That is why, after working with a scraper, it is necessary to treat the surface with a brush.
Removing wax from skis is a very difficult task, and here too there is a system of actions.
- Using a special scraper, you need to start removing paraffin from the surface.
- It is necessary to work with a scraper with the same pressure, without being too zealous in individual parts, otherwise the surface will be cleaned differently.
- The remaining parts of the lubricant should be removed with a special brush, and the movements should be short and quick.
- If you want to remove even the base layer of paraffin, you should use the iron again.
- Having applied one layer of paraffin, you should immediately remove it with a scraper, along with any remaining grease and dirt from the surface of the skis.
- Such removal of excess or complete removal of lubricant is required if the skis do not ride well. Perhaps, during the initial application of the substance, the person made some mistake, and the paraffin was applied incorrectly. This should be corrected immediately using the above technique.
- It is very difficult to apply lubricant yourself for the first time, so if difficulties arise, it is better to contact a professional or watch thematic videos. You should also be careful when working with a hot iron, trying not to hurt yourself or damage your skis.
- It is very important to never forget about preparatory stage works Often the success of all subsequent operations depends on the ski cleaning process.
- It is also worth working with skis only if they are securely fastened on a flat surface. Every little detail is important here, because it can affect the quality of work.
Preparing skating skis - video
It is very important to watch the training video before preparing your skis for skating for the first time. It will help you master the technique of the process.
» Preparing skis for racing
A. Grushin.
"How to prepare skis?"
TOOLS
Lubrication and processing table
First of all, to lubricate and process skis, we need a table of a convenient height, equipped with the necessary devices for work (electrical sockets, additional lighting, etc.). Tables can be either homemade or manufactured by other companies (for example, "SWIX"), stationary or portable, with a wide variety of designs and their modifications.
Profile machine for preparing skis

A machine is a device on which you can attach a ski so that it has support along its entire length. Machines can be, just like tables, homemade or “branded” - (“FISHER”, “ATOMIC”, etc.). They can be very different in design (solid, collapsible, variable length, etc.). Usually they are attached to the table with clamps or have independent “legs”. The last option is intended for work in “field” conditions.
TIP: if you have the opportunity to buy a “branded” table and machine, that’s good. If this is not possible, do not be discouraged. I was convinced from my own experience that our craftsmen make these devices sometimes no worse, and then even better than well-known foreign companies. The main requirement for all designs is ease of approach to the table (machine) and rigidity of the ski fixation.
Brushes
There are two types: conventional (for manual processing) and rotating (for mechanical processing using an electric drill).
For manual processing, several types of brushes are used:
- metal (brass, bronze, steel),
- nylon (hard, medium, soft),
- natural (usually from horsehair),
- combined (brass-nylon, bronze-nylon, brass-natural, natural-nylon),
- polishing (in the form of natural cork or a block with flannel).

For mechanical processing (in this case, electric or cordless drills are used as a drive), rotating brushes are used. They are placed on a special axis, one side of which serves as a handle for holding, and the other is mounted in the drill chuck (like a drill). Rotating brushes are similar in “bristle” materials to the above-mentioned brushes for manual processing. In principle, I could easily name at least several dozen varieties of brushes, but this hardly makes sense. It is probably more important to understand what basic classes they are divided into, and for what purposes each specific type of brush is used.
METAL BRUSHES (except steel) are mainly used to clean the sliding surface and microstructure from old paraffin and dirt.
STEEL BRUSHES are usually used not so much for removing paraffin, but for applying a fine microstructure to the sliding surface (depending on weather conditions).
NYLON BRUSHES come in hard, medium and soft. Hard ones are used to remove harder (frost) paraffin, medium ones - to remove soft ones (intended for transitional and warm weather). Soft brushes are used for final polishing of sliding surfaces.
NATURAL BRUSHES are used to remove soft paraffin and to treat surfaces after applying powders and accelerators to them.
POLISHING BRUSHES are used for the dry (without using an iron) method of applying compressed and regular (loose) powders.
TIP: It will be better if you use one specific brush for each type of powder. In other words, you should not treat plus and frost powder with the same brush.
Fiber porous fabric (fibertex)

Fibertex is a non-woven nylon fiber with or without abrasive microparticles.
- HARD FIBERTEX WITH ABRASIVE is used to remove fluff after scraping the sliding surface.
- SOFT FIBERTEX WITH ABRASIVE - for removing the top very thin layer of the surface (in fact, a kind of smoothing) without changing the structure of the ski.
- FIBERTEX WITHOUT ABRASIVE is used for polishing sliding surfaces.
Cycles, scrapers

METAL - used to level sliding surfaces and remove lint (the hardness of the steel from which the scraper is made and its thickness depend on how large a layer of plastic you need to remove). Metal cycles are produced by various companies (TOKO, SWIX, etc.) or made to order from special grades of steel. For example, I have been using homemade cycles produced by a Ural craftsman for many years now - I would not exchange them for any branded ones. I don’t specifically mention the name of this person, otherwise, I’m afraid he will be tormented with orders later. Every year in the spring I give him my fairly worn cycles, and he gives me new ones. I want to thank him on behalf of our entire team. The soft metal makes it possible to sharpen cycles under normal, “field” conditions using special sharpening tools. Hard metal requires sharpening of scrapers only in the factory.
TIP: for initial processing, use cycles made of a harder metal, which allows you to remove a fairly large layer of plastic in one pass, and for finishing, use a softer one.
 SCRAPERS MADE OF PLEXIGLASS, PLASTICS are used to remove paraffin and treat the sliding surface after applying the structure. Available in thicknesses of 3.4 and 5 mm. The thicker the scraper, the more harsh processing you can do.
RAZORS are used to remove lint after mechanical and manual sanding (scraping) of skis.
GUTTER CLEANING SCRAPS come in different varieties. Nowadays, scrapers that resemble fountain pens are becoming increasingly common.
Thermal devices

The main purpose of thermal devices is to heat paraffins and ointments. Electric irons, heated irons, gas burners, and hair dryers are usually used. Preference is given to devices that do not use open flames and that can maintain a constant, controlled temperature for a long time. Of all existing thermal devices, the most used are:
- electric irons - for melting paraffins and powders.
- hair dryers - for melting the holding ointment applied under the ski block. If you use an iron for this purpose, you will only achieve that the ointment will “run” into the groove and onto the sides of the ski. Hair dryers, unlike irons, are much more suitable for melting ointment, since they allow it to be heated evenly.
- gas burners - usually used in “field” conditions, where there is no access to the power supply.
TIP: Remember that electric heaters are always preferable to gas burners because they do not have an open flame. Use burners only if you cannot use an iron or hair dryer.
Devices for applying structures, cutting
The purpose of the cuts or "steinslift" is to reduce the phenomenon of "suction" that occurs between the sliding surface of the ski and the ski track. The influence of this phenomenon on the final result increases both with increasing air humidity and with increasing speed of movement. The structure and moisture content of the snow are decisive when choosing cuts. So, for example, freshly fallen, fine-grained snow implies a shallower (in depth) structure, and old, granular snow - a thicker, deeper structure. The style of movement also affects the choice of cuts. The ridge style is characterized by sparser and deeper grooves. In general, the structure for each specific weather is determined by testing directly according to the weather and snow conditions in this particular place on the day of the competition. But we can still give some general recommendations based on practical experience:
- 0.33 mm - 0.5 mm - frosty weather, freshly fallen snow,
- 0.7 mm -1.0 mm - wet coarse-grained snow, hard glossy ski track,
- 2.0 mm - new wet snow, shiny ski track,
- 3.0 mm - 4.0 mm - light frost, wet frosty weather. The effect of this cutting can be improved if it is used in conjunction with cutting with a pitch of 0.33 mm - 0.5 mm.
In general, the following trend is visible: warmer weather requires cutting at a sparser pace.
 HAND CUTTING AND KNURLING. The structure and cutting are applied to the ski by hand using special knurls. Knurling can be with rotating or fixed stationary cutters (knives). In addition, they can be with replaceable or standard (in the form of metal plates) cutters (knives). In addition, they are divided into structure cutting and extruding. It is clear that extruding ones are more gentle on plastic compared to cutting ones.
STEINSLIFT is a technology in which a ski is processed in a factory using special machines using emery stones. Such grinding of sliding surfaces and applying a certain structure (stein sand) to it can significantly improve the sliding properties of skis for the weather conditions for which they are intended. It should be noted here that various types of matte sanding can slightly shift the suitability of skis for certain weather conditions in the desired direction. That is, skis designed for warmth can be adapted to slightly cooler weather or, on the contrary, to outright “water” using a certain pattern. However, always remember: good skis suitable for wet snow and warm weather, no amount of steinlifting can make good skis for cold weather - we are talking only about a slight change in the use of a particular pair of skis in the direction of warmth or cold. The same kind of “shift” in the range of use of a particular pair of skis in one direction or another (for heat or cold) can be achieved if you manually remove part of the plastic from the metal frame and apply the necessary structure (more on this below). The disadvantage of stone grinding is that during this procedure quite a lot of plastic is removed from the sliding surface of the ski - 0.1 - 0.3 mm. It is clear that this procedure should not be abused, otherwise in half a season you can remove all the sliding plastic from the ski. As a result of scraping (factory or manual), the priming of the sliding surface of the ski becomes insufficient. After stone grinding or sanding, it is necessary to repeatedly prime the skis with appropriate processing.
Sanding paper
Waterproof sanding paper with various grits: 240,220,180,150,120,100, 8O, 60 is used for sanding, removing lint and raising lint to improve the adhesion of the holding ointment to the sliding surface of the ski in the most difficult weather conditions. In addition to the main listed working tools, when preparing skis, it is used great amount other various devices: "sharpening for metal and plastic cycles and scrapers, "sharpening for ski edges, "plastic for repairing the sliding surface of skis, "vises, clamps, "natural and synthetic corks for leveling holding ointments.HOW TO PREPARE SKIS?
Before you start working with skis, you need to familiarize yourself with certain safety rules. They are simple:
- Ventilate the room before and during work
- Use a respirator with a filter to trap dust and harmful gases
- When preparing skis, do not use open flames.
- No smoking
- Do not clean your hands with hand wash
 After this, all four people in the room were seriously ill for several days: all the symptoms of severe poisoning were evident - vomiting, nausea, terrible weakness. This state lasted for several days. So my advice to you: there should be no open fire (including burning cigarettes) in the room where you prepare your skis. I noticed that skiers from Scandinavian countries, wherever they come to compete, first of all install a powerful exhaust hood in the room where they are preparing skis. Try to adopt this practice.
 The preparation of skate and classic skis differs only in that skis intended for the classic style have a special area under the loading area (block), onto which ointment is applied. Preparation of skis for gliding - both for skating skis and for classic skis - is the same, and the skis are subjected to the following stages of processing:
- Ski scraping
- Preparing skis for priming
- Ski priming (before applying basic weather-appropriate wax)
- Priming skis with base wax, weather-appropriate
- Applying weather-appropriate base wax
- Application of powder, accelerator

1. Ski scraping
During training and competition, the sliding plastic of your skis experiences mechanical and thermal stress and, naturally, ages. There are two ways to update (scrape) the sliding surface of skis:
- factory (steinlift)
- manual
What should the cycle be?
The main criterion is that the cycle must be comfortable for you personally, it must fit comfortably in your hands. Some people make massive cycles, such that they can be comfortably held with both hands, while others do very small ones.  The cycle moves in the direction of the ski from toe to heel and should move smoothly, without encountering any obstacles. After the first one or two passes, you will immediately see where there are scratches, holes, bumps, etc. on your skis, since the old (whitish) plastic will be removed from a flat surface, revealing fresh black plastic. An uneven surface will show both bumps (the old plastic will stick on them) and depressions (where it will remain whitish). You can move along the ski in different ways: you can walk along the ski and move the wheel in front of you, or you can back away along the ski, and then the wheel will move as if following you.
  The main thing is that the cycle moves smoothly along the ski, does not jump or jump to the side.
How to repair large scratches and other serious damage on a ski? For this purpose, there is a special repair plastic, which, like skis, is divided according to its purpose into positive and frosty. Can be of different structures and colors. How to use it? We clean the damaged area from dirt, lightly scrape it with a metal scraper and degrease it. Then, using a blowtorch or gas torch, we fuse the plastic onto the damaged area. Fusing should be done only in small layers, remembering that the next layer can be applied only after the previous one has hardened. After hardening, excess plastic is removed from the sliding surface using a metal scraper. Then the sliding surface is polished and primed with paraffin.
Which layer of plastic should I remove when scraping?
In general, strictly speaking, no literal burnout occurs in this case. And this is what happens. Today, most of the world's leading companies - FISCHER, ATOMIC, MADSHUS and others - use graphite-containing Teflon for the sliding surface of skis. What does it look like when you look at it at high magnification? Roughly speaking, these are numerous particles of graphite that are embedded in plastic. It is these particles that provide modern skis with good glide. However, these graphite particles are much harder than the plastic itself. If you use a sharp scraper and cycle the ski, applying slight pressure on it, you seem to cut off these microparticles from the sliding surface of the ski in an even layer. If you use a dull scraper or press too hard on the ski when scraping, you simply pick out these particles from the plastic, and the same pattern appears on the ski, which in common parlance we call “burnout.”
TIP: Make sure your cycles are always sharp.
The second very important point when scraping is the angle of inclination of the scraper relative to the ski. In no case should the scraper be positioned at a right angle to the ski when scraping. The deviation from the right angle should be 20 - 40 degrees, and the more uneven the surface of the ski, the larger this angle should be. Otherwise, if you cycle the ski, positioning the cycle at a right angle, you will only aggravate the unevenness, causing a “wave”. At the same time, remember that with each new pass, either the left or the right edge of the cycle must go forward (otherwise, if you do not do this, you can catch an oblique wave). And only the very last pass is made at a right angle.
ADVICE: if you are starting to scrape skis for the first time, then you will almost certainly get into trouble; in no case do you start with scraping your cross-country skis - it is better to start with old, training ones. But even in this case, you have a long path of mistakes and discoveries of the Americas ahead of you. The best option is to find a person who has been doing this for a long time and more or less professionally. It is enough to observe its work once, and you will be able to avoid many mistakes of the first stage. Experience shows that even after sanding, some pairs of skis have a not very smooth, seemingly bumpy surface. The following danger may await you here: when trying to melt the powder onto such skis, you suddenly notice that in some places the powder adheres well to the ski, but in others it does not. When you try to melt the powder in those places where you couldn’t do it the first time, you only achieve the effect that the iron on the bumps sticks to the ski, and the plastic in these places is burned out. According to my observations, it can be much more difficult to cycle burnt plastic than regular plastic.  If burnt bumps appear on your skis and it’s difficult to remove them, you can fix the problem as follows: take a fairly long block (approximately 15 - 20 centimeters), wrap it in sandpaper and work hard on the sliding surface (this applies, by the way, not only to burnt bumps). skis, but in general any skis that have such large irregularities that cycles cannot be corrected). And after processing with a block of sandpaper, having achieved a smooth surface, the skis should be carefully cycled.
OBSERVATION: good job with a block of sandpaper and subsequent careful sanding can sometimes restore life to even completely “dead” skis.
 After each scraping, it is advisable to process the edges. With one or two movements at an angle of 45%, we remove the chamfer with fine sandpaper, removing excessive edge sharpness, burrs, etc. Do not overdo it - we are talking about two or three movements. But the chamfer must always be removed. Even if you can’t see the burrs with your eyes, believe me, they are there, and it’s better to remove them, since they (especially when skating) will slow down the movement.
2. Preparing skis for priming
Before you begin preparing new skis, you need to determine how the sliding surface is processed. Skis processed by the factory grinding method require light manual scraping (a sharp metal scraper), which removes only the fluff, but not the plastic (i.e., without erasing the pattern - the sandpaper on the sliding surface). If there was no factory grinding, then it is necessary to check the condition of the sliding surface, removing defects. This is done by removing a thin layer of the surface of the metal cycle, which alternates with impregnation with paraffin (soak generously in paraffin, then cycle - repeat this procedure several times). Then we clean the skis from any remaining paraffin using a brass brush and hard fibertex.
3. Ski priming
After scraping the ski with a metal scraper, it is necessary to thoroughly clean the sliding surface with a brass or bronze brush and hard fibertex, and then apply primer paraffin (special primer or any more or less soft one with an application range of -3-10 degrees. Usually purple is used). In this case, it is advisable to use paraffin in excess, warming the skis two or three times without intermediate scraping and adding paraffin to the extent that it is absorbed into the surface. Cool the skis. After 20 - 30 minutes, remove excess paraffin with a plastic scraper and treat the surface with a nylon brush. Carry out this treatment of the sliding surface several times, thoroughly cleaning it with a nylon brush after each layer. With the above ski primer we should create a shiny layer on the surface. If the weather conditions require that the skis have structure and the skis do not have a factory bolt, the appropriate threading must be done by hand. The structure is always applied before the main wax is applied to the ski. True, sometimes the weather interferes with this work procedure, for example, in the last hour before the start the temperature and humidity change sharply. In this case, the cutting had to be applied after the main paraffin.
4. Priming skis for appropriate weather
When priming the sliding surface under the base paraffin, remember:
- The melting point of the paraffin used for priming must be higher than the melting point of the base paraffin, i.e. the primer paraffin should be more refractory (in this case, the main paraffin does not mix with the primer). In the case of cold weather, when frosty, and therefore refractory, solid paraffin is used as the main paraffin and it is not possible to use a harder one as a primer, we prime the skis with paraffin that is similar in hardness to the main paraffin.
- With very old, hard, “aggressive” snow, if the weather remains the same for a long period of time (especially frost), and simply to remove electrostatic stress from the surface when priming, it is recommended to use “antistatic” paraffin (for example, “START” -antistatic or "REX" - antistatic, etc.)
- When priming skis in appropriate weather, you should use regular paraffin for regular paraffin, and fluoride for fluorine-containing paraffin.
 The primer is made in the usual way, using an iron with a normal melting temperature for a given paraffin (as a rule, this is a temperature of 120 degrees. To obtain such a temperature at the “sole” of the iron, the thermostat must be set to +150 degrees). Apply paraffin to the sliding surface, melting the paraffin block on the iron and thus filling the ski with a thick layer of molten hot paraffin.
 OBSERVATION: it is not always possible (primarily financial) to pour paraffin onto your ski like a river. I noticed that many ski enthusiasts use the following method: with a short, quick movement, a paraffin tile is melted on an iron and with the same quick movement, this tile (while there is molten paraffin on it) is rubbed on a section of the ski. The procedure is repeated several times until the entire ski is covered with paraffin. The paraffin is then melted onto the ski using an iron as usual. This method is not bad and has a right to life. In any case, you will be able to achieve significant savings in paraffin.

 Cool, then remove excess paraffin with a plastic scraper and carefully treat the surface with a nylon brush.
TIP: it is better to prime graphite-containing sliding surfaces with graphite or fluorographite paraffins.
Paraffin testing
To achieve the best gliding, it is very important to choose paraffin that suits today's weather conditions. This is done by testing paraffins. First, we determine the weather conditions, for which we evaluate:
- snow structure,
- snow moisture and pollution,
- snow temperature,
- humidity and air temperature.
5. Application of basic paraffin (weather appropriate)
For the appropriate weather, we select the most suitable paraffin by testing. For this purpose, we use several tetrahedral plastic bars, each face of which looks like a small ski. Each edge has its own number, so after testing we can easily obtain information about which paraffin or powder glides best today. After testing, the paraffin we have chosen is melted onto the sliding surface of the ski using an iron. Allow to cool and cycle using a plastic cycle. Next, remove the remaining paraffin with a nylon brush. Then you need to sand it to a shine using either a sanding cloth or a softer brush. When applying paraffin, you need to know the following: if you use paraffin for frosty weather (more refractory paraffin), then you need to remove most of it with a plastic scraper before it hardens, because if you let the refractory paraffin cool completely, it will become hard, and when scraping it will chip off the ski in pieces, leaving large spaces of the ski without wax. After the ski has completely cooled, the remaining paraffin is removed with a hard plastic scraper and then with a hard nylon brush. Soft paraffins are processed in a similar way. The only difference is that the soft paraffin should be allowed to cool completely and then removed using a plastic scraper and a medium-hard nylon brush. Otherwise, the procedure for applying and removing paraffin is identical to that used when priming skis.
6. Applying the last layer: regular (loose) powder or compressed (accelerator)
 The powder is sprinkled in a thin layer onto the sliding surface and then melted using an iron (correct melting of the powder is indicated by peculiar “dancing” sparks or stars that appear within one to two seconds after passing the iron. In this case, it is advisable to melt the powder or accelerator in one motion when the iron moves slowly along the ski. Many skiers use ordinary household irons ("Malysh" iron) to melt the powder. However, household irons have a sharp edge and if such an iron is moved along the ski, it begins to rake and throw powder off the sliding surface (branded irons have the same). usually a crushing edge). Trying to avoid this effect, skiers make a very serious mistake - pressing the iron for a few seconds at one place on top, and melting the powder to the ski, they forget that household irons have different temperatures in the middle and at the edges of the sole. The result, as a rule, is deplorable - the same burnt mounds that we talked about above appear. However, they are not visible when you melt the powder. But as soon as you start cycling the skis later, you will immediately discover them.
TIP: “splurge” and buy a branded iron. The second solution to this problem is to take a file and grind down the edge of the sole of your iron so that one of the edges becomes a crushing edge. In this case, you will be able to melt the powder in one smooth pass along the ski, without throwing it off the sliding surface or burning it out. It will be even better if on the side where, after processing with a file, a crushing edge appears on the iron, you cut several small (3-4 mm in length) grooves that disappear. Then, when the iron “runs” onto the powder, it will have somewhere to go - it will go into these grooves and certainly then melt into the plastic, and will not end up being thrown off the ski. 
After cooling, the sliding surface of the ski is cleaned of excess powder using a natural brush (horsehair) and polished with polishing paper.
All! Your skis are ready to race.
TIP: when cleaning the sliding surface from powder residues, do not press hard on the ski - make gentle movements with light pressure on the brush.
 Accelerators are the same powders, only in compressed form. They are more convenient to use - they can be used to rub skis on a quick fix when there is no table and machine at hand. At the same time, it is not at all necessary to keep your skis strictly horizontal, you don’t have to be afraid of the wind (which powder can easily blow off your skis if you are working in open areas, etc.), you don’t have to be afraid that someone will accidentally hit your ski , and the powder will be shaken off the ski. The compressed (solid) powder is applied as a final, very thin layer to the sliding surface. The processing method can be either hot or cold. The hot method involves the use of an iron, but it is advisable to have a layer of non-woven material between the sole of the iron and the surface of the ski, i.e. heat through this non-woven material (for example, using polishing paper). Why is non-woven material used when warming up the accelerator? You and I already know that all accelerators (both solid and granular) contain fluoride compounds, and the layer between the iron and the accelerator itself prevents the volatilization of fluorine. True, it is impossible to melt loose powder through paper, so we can recommend the following method: we quickly melt the powder to the ski, and then heat it through the non-woven material. In principle, it is advisable to lightly cycle the skis with a metal cycle after each use of the powder, followed by a mandatory primer. Why? Because the use of powder, or more precisely, high-temperature treatment of the surface of skis when applying powder causes the appearance of a hard plastic film (the degree of burnout of the plastic varies). However, remember that very frequent scraping of skis will quickly remove all the sliding plastic, changing the structure and stiffness of the skis. In a word, good ski care involves fairly frequent use of a metal scraper. However, this practice will certainly shorten the life of a given pair of skis - keep this in mind.
 Powders and accelerators can also be ground cold, without using an iron. To do this, the powder is sprinkled on the sliding surface of the ski (and the ski is rubbed with an accelerator) and rubbed by hand, with a natural cork or a special polishing plug. Then it is treated with a natural brush and polished with polishing paper. However, the powder applied in this way is retained on the ski worse than the powder fixed on the skis using a hot iron, and this method of preparing skis is recommended when participating in competitions over short (5 - 10 - 15 km) distances.
Preparing a last for classic skis
After applying the powder to the ends of the skis, be sure to remove the dust from the powder that inevitably gets onto the last when preparing the ends of the skis. To do this, use a metal scraper to clean the block from any remaining powders and paraffins, otherwise the ointment will come off the block very quickly. Then we lift the pile under the block with waterproof sandpaper, if necessary (for example, preparing skis for hard, crystalline snow, firn, ice). Then we apply the priming ointment and only after that - the holding ointment. Please remember that when using liquid ointments The block should be shorter, since the coefficient of adhesion to snow for liquid ointments is much higher compared to solid ones. On average, when using liquid ointment, the last becomes shorter by 20 cm. When switching to liquid ointments, many skiers not only make the last shorter, but often switch to stiffer skis altogether. In addition, the length of the block when switching to liquid ointments is greatly influenced by the length of the distance - the longer it is, the more tired the athlete is, the more confident he needs to hold, which means a longer block. In this case, the block is shortened in comparison with solid ointments not by 20 cm, but by 15 or only 10 cm.
How to clean classic skis from wax?
For example, from liquid ointment?
- Cover the ski area covered with ointment, toilet paper or napkins.
- Heat with an iron until the ointment is absorbed into the paper.
- Using a plastic cycle, remove this soaked paper. If necessary, repeat this procedure.
- Remaining dirt is removed by washing.
- Next, we proceed as described above, that is, we use paraffins.
When cleaning skate skis, washes are used if the surface of the skis is very dirty. With obligatory subsequent thorough cleaning with paraffin. In addition, for preventive purposes, it is necessary to use a wash after using skis 5-6 times, even on very clean ski surfaces. In this case, it is advisable to use only branded removers. The use of other agents (gasoline, turpentine) has an adverse effect on the microstructure of the sliding surface, causing the appearance of whitish spots.
Original text and photographs from the magazine "Ski Racing" No. 5 1997 were used. Cross-country skis are usually finished at the factory on a machine with an abrasive belt or abrasive stone. Final processing is usually carried out once before using new skis and periodically during the season using a grinding machine with an abrasive stone. Processing is carried out by experienced specialists in special workshops. The sander can be set up in different ways to produce a ski surface texture that matches specific trends in snow conditions.
- Structure of the sliding surface.
- very smooth, shiny, as if polished
- melted during processing high temperature and high blood pressure
- oxidized, dry as a result of storage without a layer of ointment
Experience shows that a surface glides poorly if it:
- Fine structure for dry friction conditions from -15°C and below;
- Average structure for intermediate friction from -15°C to O°C;
- Large structure for wet friction at 0°C and warmer. These groups of structures also correlate with the types and size of snow crystals, snow deformability and free water content in the snow.
Excellent ski surface structures can be applied using hand tools. The most commonly used tool for applying structure to cross-country skiing- knurling. This instrument can form structures from fine to very large (0.25 mm, 0.5 mm, 0.75 mm, 1.0 mm, 2.0 mm and 3.0 mm). The tool is held from the tip to the tail of the ski (or vice versa, depending on the knurling design) with firm, constant pressure. The ski should be supported along its entire length, if possible using a profile machine. Combinations of structure types can be obtained by rolling one structure onto another. After rolling the structure onto the surface, use a sharp steel scraper or razor scraper to lightly level the tops of the beds knurled on the surface. Also go along the ski several times with fibertex to round off the sharp edges of the grooves.
Structure applied by a grinding machine.
The grinder can create a variety of sliding surface patterns. Grinding is carried out, as is known, by passing the surface of the ski over a rapidly rotating abrasive stone. The shape of the working surface of the stone is maintained by removing irregularities with a diamond filling head moving across the working surface. This dressing not only maintains the flat shape of the working surface, but also creates a pattern on the stone, which, in turn, will create a structure on the surface of the ski. The speed at which the dressing head moves, the speed at which the abrasive stone rotates, the force with which the ski is pressed against the grinding stone, and the speed at which the ski is passed over the stone are all factors that create the desired pattern on the surface of the ski. The higher lateral speed of the diamond head when inserting will create larger structures. For a finer structure, this speed must be reduced.
After machine sanding, there are few or no fibers left to be removed. To be sure, look at the surface through a magnifying glass. After mechanical grinding, if you go over the surface with a razor scraper and then with fibertex, this will help remove the very top layer of the sliding surface, which may have fused during grinding.
Removing lint
For optimal gliding, it is necessary to completely free the polyethylene sliding surface from microfibers or fluff of worn plastic. When updating the sliding surface by any manual method or on a machine with an abrasive belt, additional removal of the pile is necessary to complete the processing. Fibertex is designed specifically for lint removal. The best results are obtained by fibertex made from thin nylon fibers and abrasive particles of silicon carbide. To remove lint, movements with a fibertex sponge can be made in both directions. Also, in order to lift more fibers for subsequent removal with fibertex, brush the surface with a bronze brush several times. You can even brush and fibertex several times from the tail to the tip of the ski in order to lift more microfibers. Finish the process with several passes of Fibertex, which contains a softer abrasive.
Another very effective tool for removing polyethylene microfibers is a razor scraper. Light scraping movements with it in combination with fibertex will remove the lint without disturbing the pattern of the structure.
Surface burn (oxidized sliding surface)
A common problem when skiing on hard snow is the so-called “surface burn”. It is best visible on black surfaces. The “burnt” surface looks “dry”, but in fact what you see is frayed polyethylene fibers worn out by the hard cold snow. In the first half of winter, when the air and soil are cold and there is little snow, the chances of surface damage due to abrasion are highest.
“Fired” and oxidized surfaces are treated in the same way. It is wise to remove the worn layer with a razor scraper or steel scraper. Don't forget to re-knurl the grooves. However, if the burn or oxidation is “mild” (not severe), Fibertex alone may be sufficient. Hot coat the surface with soft ointment. To reduce surface wear under these conditions, it is preferable to use ointments with synthetic paraffins as the top layer. They can be used alone or mixed with ointment, one step warmer.
Before going out on the ski slopes, take care of your skis!
Progress does not stand still, and these days every self-respecting skier should know words such as “wax”, “accelerator” and “structure”.The need to lubricate skis is determined in an obvious way. If they glide poorly, snow sticks to the sliding surface, and when moving it feels like someone is stepping on your skis from behind, then it’s time to think about lubrication.
Let's start with the fact that according to the “rules,” skis must be prepared for each ski trip, although this is not necessary. But if yesterday your skis slid well, and today the temperature and humidity of the air (and, accordingly, the snow) have changed, this is a sure sign that you should remember what you coated your skis with yesterday and make adjustments. If the weather is more or less even, the snow is good, and you are a lazy person, then after treating your skis with good paraffin, you can safely ski for 15-20 km, usually that is how long the paraffin lasts on the sliding surface of the skis.
Sometimes the sliding surface of the ski looks as if it is “dried up”, covered with some kind of white “patina”. In fact, these are microvilli protruding from the sliding surface of the skis, torn by snow crystals. Such a “plaque” is an excellent reason to wax your skis, but try to prevent its appearance, as during oxidation the sliding surface loses precious fluorine, graphite and other impurities contained in it. In addition to abrasion, the sliding surface with paraffin applied to it is subject to another unpleasant phenomenon - it perfectly absorbs various dirt, which is clearly visible when the sliding surface is initially white and then begins to turn gray (currently, skis with a white sliding surface are practically not produced, as it was already noted earlier that the sliding surface contains components such as fluorine and graphite, which give it a dark color). The fact is that the polyethylene from which the sliding surface is made is a porous material. These pores absorb paraffin, especially when applied hot, and help to retain it longer. But dirt penetrates into these same pores. Therefore, before applying fresh paraffin, you should clean the sliding surface by removing old contaminated paraffin. In addition, a so-called structure - microscopic longitudinal grooves - can be applied to the prepared sliding surface. When preparing cross-country skis, the structure can be applied with special knurling at home, and the pitch and depth of its grooves is determined by the condition of the snow, namely the size of its crystals.
And now more details.
2. Preparing classic skis.
How to clean classic skis from wax? For example, from liquid ointment?- Cover the ski area covered with ointment, toilet paper or napkins.
- Heat with an iron until the ointment is absorbed into the paper.
- Using a plastic cycle, remove this soaked paper. If necessary, repeat this procedure.
- Remaining dirt is removed by washing.
The ointment goes on more evenly if applied cold, and if applied in several thin layers. It is better (and more correct) to grind the ointment on a profile machine.
Rubbing the ointment is done with quick movements. The cork rubs due to the heat created by friction, but if there is too much heat, the ointment will begin to stretch, resulting in lumps and gaps.
Remember that when using liquid ointments, the shoe must be shorter, since the coefficient of adhesion to snow for liquid ointments is much higher compared to solid ones. On average, when using liquid ointment, the last becomes shorter by 15 cm. When switching to liquid ointments, many skiers not only make the last shorter, but often switch to stiffer skis altogether. In addition, the length of the block when switching to liquid ointments is greatly influenced by the length of the distance - the longer it is, the more tired the athlete is, the more confident he needs to hold, which means a longer block. In this case, the block is shortened in comparison with solid ointments not by 20 cm, but by 15 or only 10 cm.
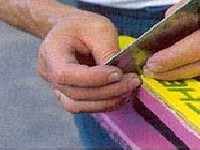
Block for holding liquid ointment (klister)
3. Preparing skating skis.
Since waxes are hot applied ointments, you will need an iron to use them, spend a little money on buying a good wax iron - it will work better and keep your skis from overheating.
HOW SHOULD YOU USE AN IRON
Once the iron reaches the correct temperature (which is usually the temperature at which wax begins to melt on the surface of the iron), the iron is moved from the tip of the ski to the tip in one continuous pass. Transfer the iron and start the same procedure again from the tip of the ski. Repeat the process 4 to 7 times per ski. This process guarantees right time, spent on warming up the ski and the low probability of the base overheating.
The room temperature must be at least 16°C. Most skiers do not understand the importance of this problem. At ambient temperatures below 16°C, the temperature inside the ski also drops, leaving too little space between the polyethylene molecules to properly absorb wax. A cold room often results in the base heating to excessive temperatures or poor wax penetration.
Applying paraffin is the most important point when proper preparation skis Simple facts:
COMMON ERRORS:
Most skiers use the wrong iron. The home iron commonly used by most skiers is not designed to melt fluoride and synthetic paraffin waxes. The melting point of Swix Cera F is 100°C (212 F), and the melting point of Swix CH 4 is 95°C (203 F). Waxes made today wear less easily, are harder than traditional waxes, and therefore require a hotter iron temperature. When skiers use their home iron, they usually set the temperature somewhere around... "cotton", "silk" or "synthetic". It's horrible!
Do not use a household iron!
Preparing skis for priming
Before you begin preparing new skis, you need to determine how the sliding surface is processed. Skis processed by the factory grinding method require light manual scraping (a sharp metal scraper), which removes only the fluff, but not the plastic (i.e., without erasing the pattern - the sandpaper on the sliding surface). If there was no factory grinding, then it is necessary to check the condition of the sliding surface, removing defects. This is done by removing a thin layer of the surface of the metal cycle, which alternates with impregnation with paraffin (soak generously in paraffin, then cycle - repeat this procedure several times). Then we clean the skis from any remaining paraffin using a brass brush and hard fibertex.
Ski priming
After scraping the ski with a metal scraper, it is necessary to thoroughly clean the sliding surface with a brass or bronze brush and hard fibertex, and then apply primer paraffin (special primer or any more or less soft one with a range of application - 3 -10 degrees. Usually purple is used). In this case, it is advisable to use paraffin in excess, warming the skis two or three times without intermediate scraping and adding paraffin to the extent that it is absorbed into the surface.
Cool the skis. After 20 - 30 minutes, remove excess paraffin with a plastic scraper and treat the surface with a nylon brush. Carry out this treatment of the sliding surface several times, thoroughly cleaning it with a nylon brush after each layer. With the above ski primer we should create a shiny layer on the surface.
If the weather conditions require that the skis have structure and the skis do not have a factory bolt, the appropriate threading must be done by hand. The structure is always applied before the main wax is applied to the ski. True, sometimes the weather interferes with this work order: for example, in the last hour before the start the temperature and humidity change sharply. In this case, the cutting must be applied after the main paraffin.
Priming skis for appropriate weather.
When priming the sliding surface under the base paraffin, remember:
The primer is made in the usual way, using an iron with a normal melting temperature for a given paraffin (usually a temperature of 120 degrees). Apply paraffin to the sliding surface, melting the paraffin block on the iron and thus filling the ski with a thick layer of molten hot paraffin.

OBSERVATION:– it is not always possible (primarily financial) to pour paraffin onto your ski like a river. Many ski enthusiasts use the following method: with a short, quick movement, a paraffin tile is melted on an iron and with the same quick movement, this tile (while there is molten paraffin on it) is rubbed on a section of the ski. The procedure is repeated several times until the entire ski is covered with paraffin. The paraffin is then melted onto the ski using an iron as usual. This method is not bad and has a right to life. In any case, you will be able to achieve significant savings in paraffin.
Cool the ski for 20-30 minutes. (to room temperature), then remove excess paraffin with a plastic scraper and carefully treat the surface with a nylon brush.
 |
 |
 |
 |
Applying basic paraffin (weather appropriate)
We select the most suitable paraffin for the appropriate weather. After selecting the appropriate wax, apply it to the skiing surface by melting the wax block on the iron and thus filling the ski with a thick layer of molten hot wax. Allow to cool and cycle using a plastic cycle. Next, remove the remaining paraffin with a nylon brush. Then you need to sand it to a shine using either a sanding cloth or a softer brush.
When applying paraffin, you need to know the following: if you use paraffin for frosty weather (more refractory paraffin), then you need to remove most of it with a plastic scraper before it hardens, because if you let the refractory paraffin cool completely, it will become hard and will chip off the ski when scraping pieces, leaving large spaces of the ski without wax. After the ski has completely cooled, the remaining paraffin is removed with a hard plastic scraper and then with a hard nylon brush. Soft paraffins are processed in a similar way. The only difference is that the soft paraffin should be allowed to cool completely and then removed using a plastic scraper and a medium-hard nylon brush. Otherwise, the procedure for applying and removing paraffin is identical to that used when priming skis.
Applying the last layer: regular (loose) powder or compressed (accelerator)
The powder is sprinkled in a thin layer on the sliding surface, and then melted using an iron (correct melting of the powder is indicated by peculiar “dancing” sparks or stars that appear within one to two seconds after passing the iron). In this case, it is advisable to melt the powder or accelerator in one motion, when the iron slowly moves along the ski.
After cooling, the sliding surface of the ski is cleaned of excess powder using a natural brush (horsehair) and polished with polishing paper. All! Your skis are ready to race.
ADVICE: When cleaning the sliding surface from powder residues, do not press hard on the ski - make gentle movements with slight pressure on the brush.
Powders and accelerators can also be ground cold, without using an iron. To do this, the powder is sprinkled on the sliding surface of the ski (and the ski is rubbed with an accelerator) and rubbed by hand, with a natural cork or a special polishing plug. Then it is treated with a natural brush and polished with polishing paper. However, the powder applied in this way is retained on the ski worse than the powder fixed on the skis using a hot iron, and this method of preparing skis is recommended only when participating in competitions over short distances (5 -10 -15 km).


