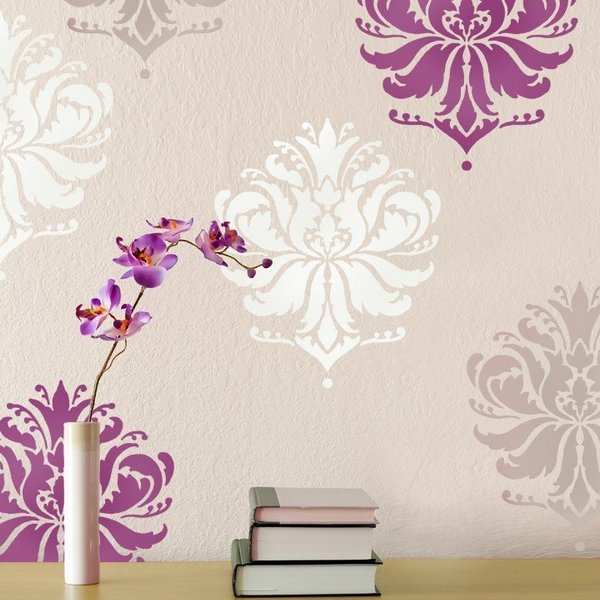
Stencil painting of walls: step-by-step master class. Stencils for walls: rules of use.
Giving your home a unique look and making it stylish is a completely justified desire. And there are many ways to turn it into a cozy nest, but stencils for walls help create a particularly sensual and truly exclusive decor.
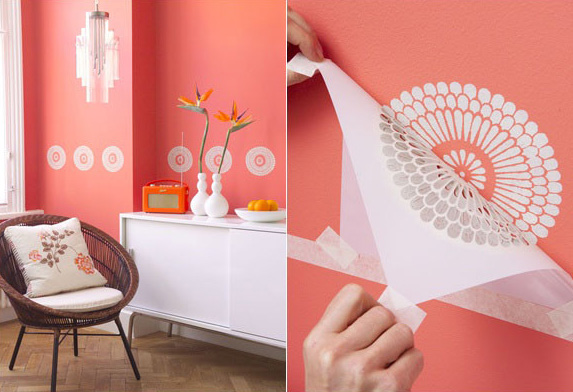
This method of transforming a home is simple and inexpensive. It is available to everyone. With the help of a stencil pattern, you can easily highlight the desired area without overloading the rest of the space. Skillfully selected themes of drawings, in addition to beauty, will create a special mood.
Stencil ornament will give the interior a special mood
Stencil ornament is a universal thing. It can be applied to the floor, furniture fronts, fireplace or window. Show your imagination, because with a stencil, everything is literally in your hands.
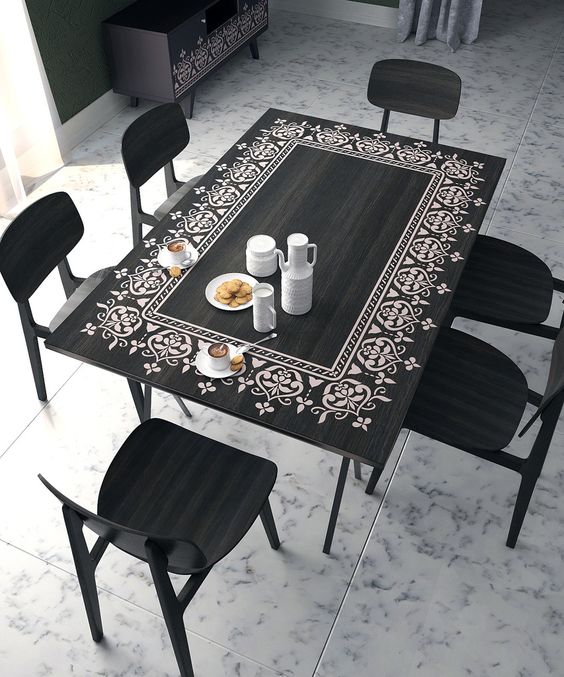
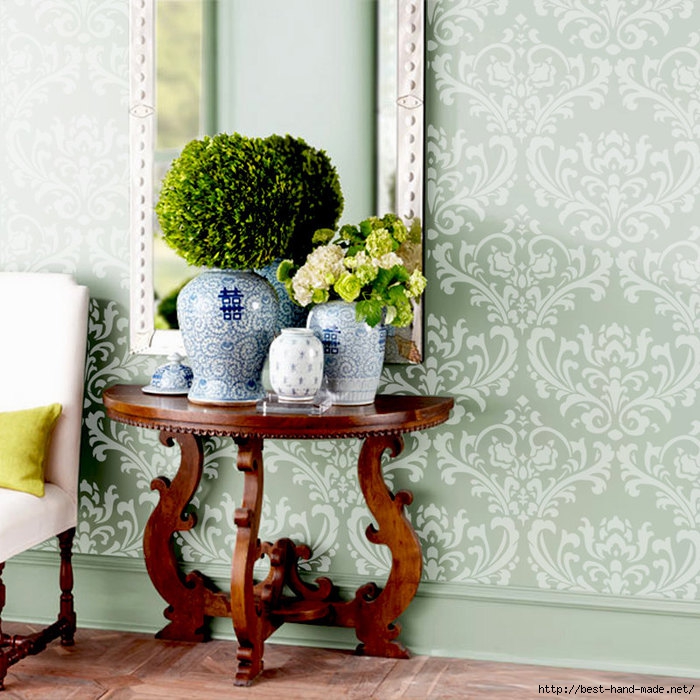
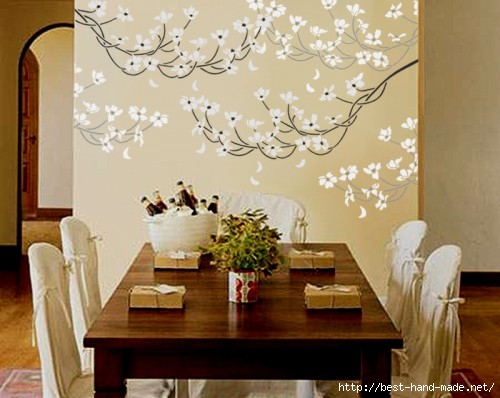
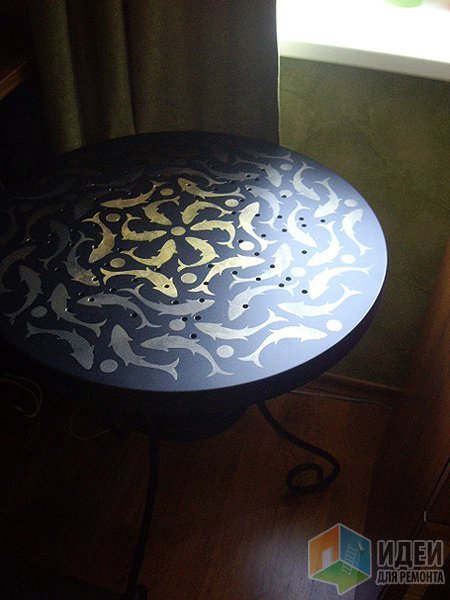
Table decor with stencil pattern
Types of stencils
According to their types, stencils are divided into:
1. Disposable.

Disposable stencil for walls
2. Reusable.

Durable, reusable stencil
The name of the first speaks for itself. The quality of the material is not important in them, since they are used only once. For reusable products, this parameter is important. Such stencils must be made of high-strength material that is not afraid of moisture.
According to the method of use, stencils for walls can be:
1. Plain.

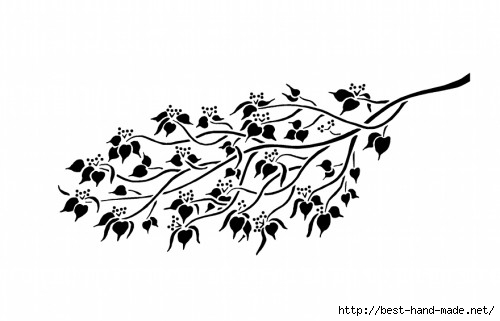
Plain stencil for walls
2. Multi-colored.

Stencil for multi-color drawing
3. Volumetric.
Stencil for three-dimensional drawings
4. Reverse.

Reverse stencil
Plain types are the most popular. They are applied to the surface and paint is passed over them. The work is progressing quickly and the decor is beautiful.
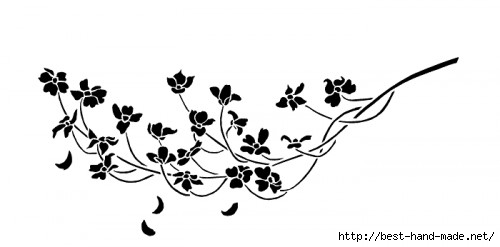
Popular plain stencils
Multicolor ones are more difficult to use. Working with them requires some skill. Often the stencil base is made by hand. You will need a lot of blanks, since when applying a multi-colored pattern they will have to be superimposed on each other and here it will be important not to get confused in the sequence.
Multi-colored drawing made using a stencil
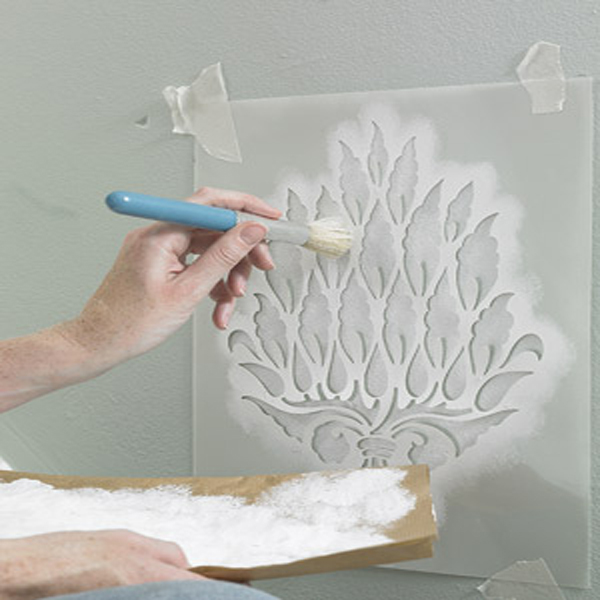
Three-dimensional drawings are made with putty. The latter is applied in a layer of up to 3 millimeters. The method is not particularly labor-intensive, but the result of using three-dimensional stencils for wall decor is always magnificent. The surface decorated with their help gets a velvety texture. This finish looks very rich.

Applying putty to a stencil to obtain a three-dimensional pattern
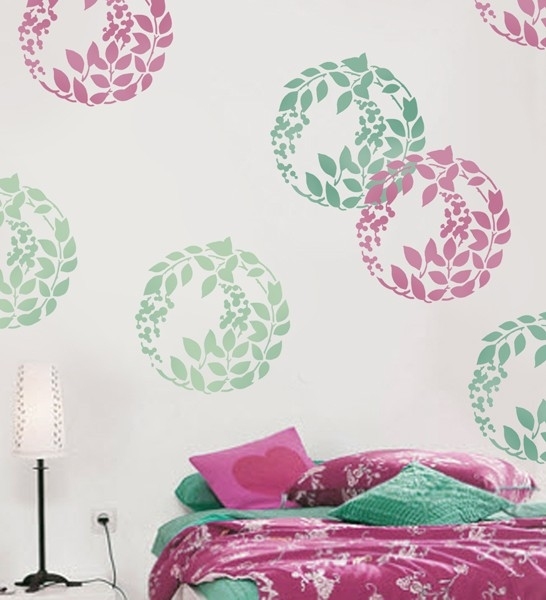
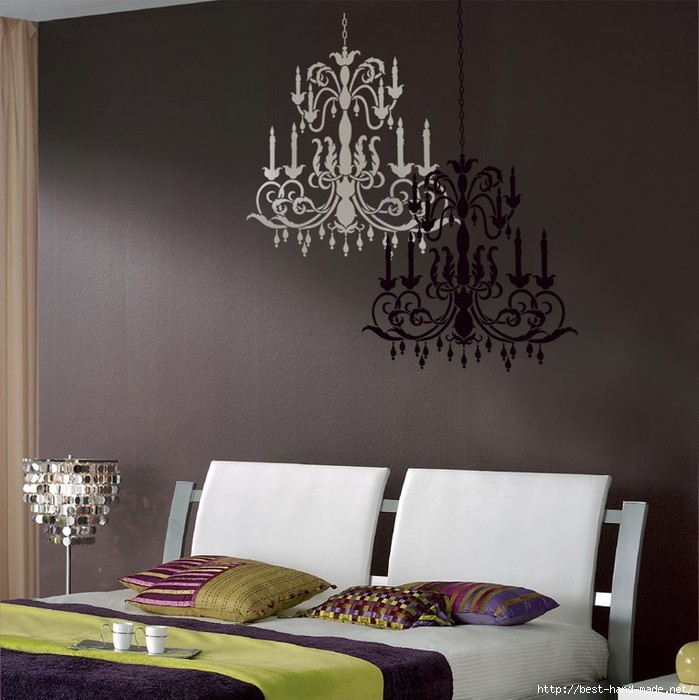
Reverse or, as it is also called, anti-stencil differs from the usual blanks in the way it is used. When working with it, it is not the drawing inside that is painted, but rather the space behind it. A backlight effect is created. This method is a good solution for bedroom decor, for example.
Reverse stencil drawing
Where to place the stencil design
“The subject of drawings applied with stencils for walls can be very diverse: from ornate patterns to images of animals or letters”
Any special rules for this issue does not exist, but it is worth noting that stencil patterns will look much better on large open surfaces. If your room has a free wall that is not hidden by furniture, then you can start decorating the interior directly from there. To prevent the pattern from looking lonely, do not make it too small.

Stencil designs look great in spacious rooms
As for the theme of the drawings applied with stencils for walls, it can be very diverse: from ornate ornaments to images of animals or letters. Only a developed sense of beauty can tell you where and what stencil to use.
The stencil design must match the interior of the room
It is appropriate to use stencil decor to decorate sockets and switches, the locations of shelves and bedside tables, the space at the head of the bed and above the mantelpiece. In cases with decor in the area of shelves, you can put on the wall images of those things that could be located on them.
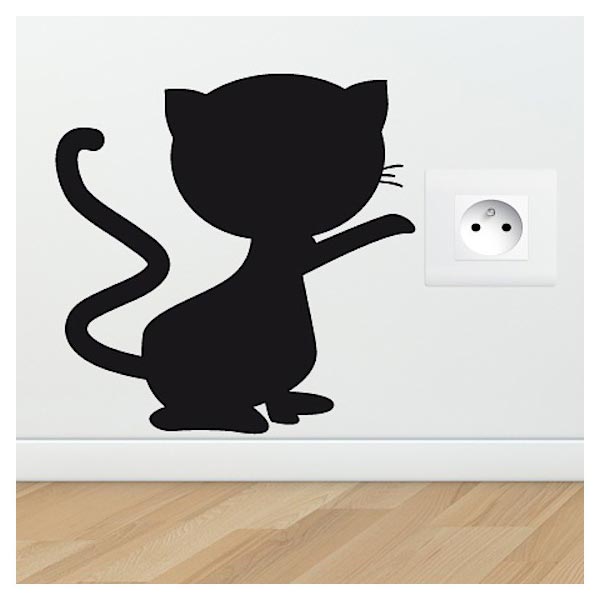
Drawing that plays off the rosette
Stencils for walls: rules of use
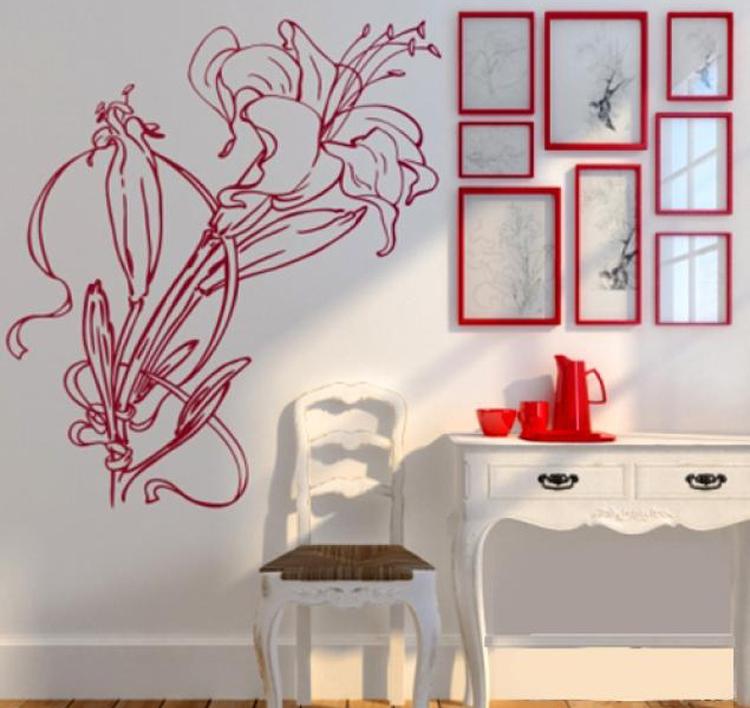
It’s not difficult to make stencils for interior decor with your own hands, but in order to insure against possible failure in the form of getting a picture of poor quality, it’s worth purchasing factory-made blanks.
For high-quality drawings, it is better to buy factory stencils for walls
Before you apply the stencil to the wall and begin to paint over it, make sure that the surface to be painted is completely clean and dry.
To more accurately apply the pattern and maintain symmetry, they resort to markings, which are made with a simple pencil. For orientation, it will be enough to mark the side, top and bottom points.
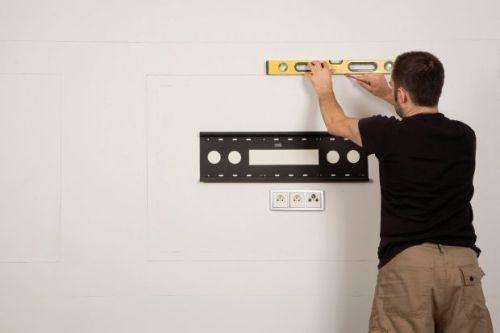
Before working with the stencil, make markings on the wall
If there is a need to select a shade, then do this on a draft sheet. In parallel with the selection of colors, you will gain experience working with a stencil.

You can choose the right color for the stencil using paper
When decorating a finished surface, do not be lazy to firmly attach the workpiece to it, doing this not with tape, but by placing it on special glue.

Special stencil adhesive for more precise drawing
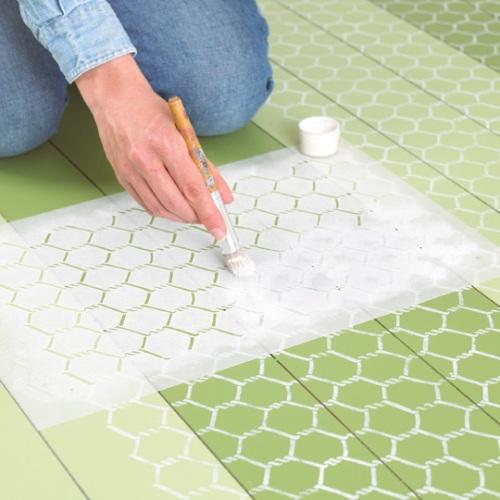
Spray paint is applied to the stencil from a distance of at least 30 centimeters. Only in this case will you avoid the appearance of drips. When using a sponge to work with wall stencils, get rid of excess paint on it by squeezing it out. When applying a drawing with a brush, do it with vertical strokes, moving your hand from top to bottom.
Painting with a brush is applied from top to bottom
For narrow stencils and when decorating walls in corners, never use a roller, even if the pattern is quite large.

When applying a narrow pattern, a roller is not used
Avoid common mistakes
What are the most common annoying mistakes that haunt beginners in decorating with stencils? This is displacement of workpieces and spreading of paint. Such incidents can be avoided quite easily. You need to use aerosol glue, which will securely fix the drawing blank on the wall, and do not apply it to a roller, brush or sponge. a large number of paints for drawing details. Accuracy and diligence will allow you to obtain wonderful decors.

When working with a sponge, do not pick up too much paint.
Stencil painting living room
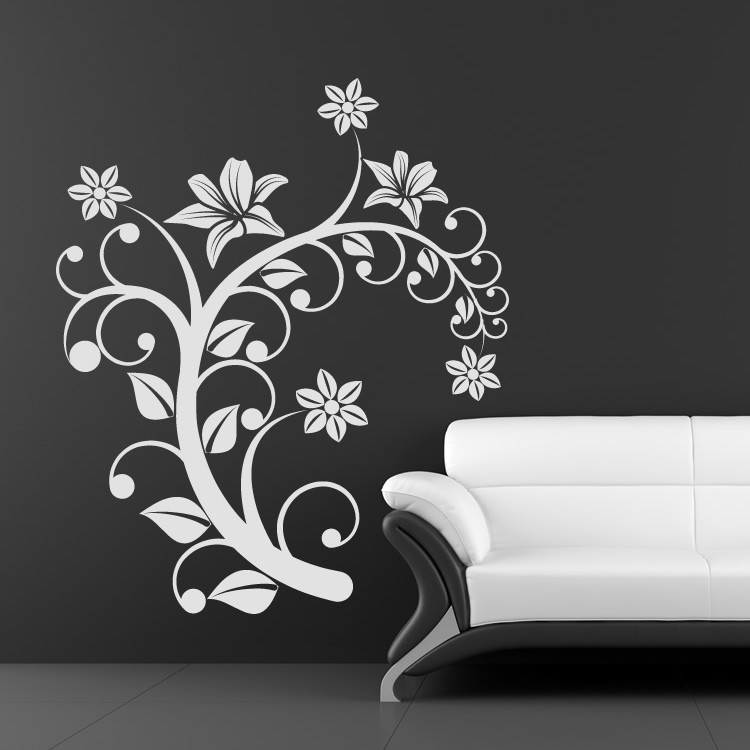
This is the leading room in the house, so you always want to decorate it in an unusual way. The stencil designs that have appeared in the interior decor can add style and comfort to the atmosphere.
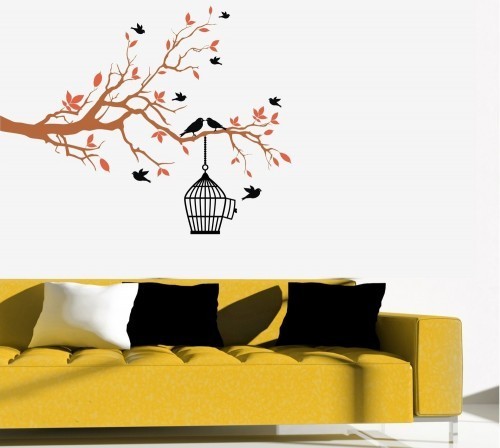
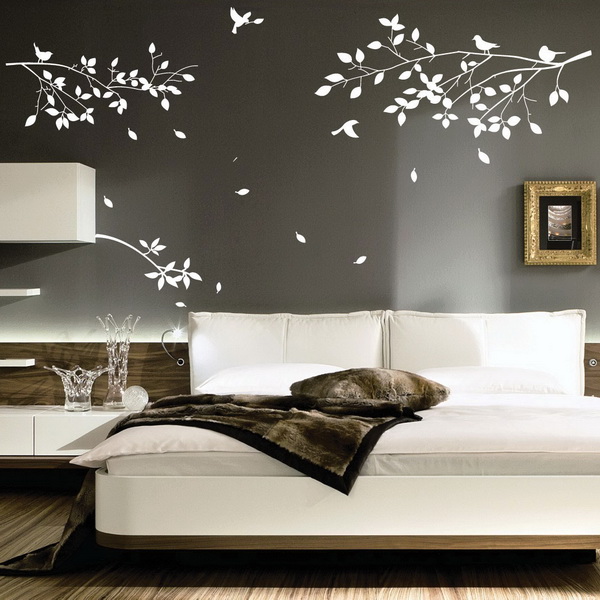
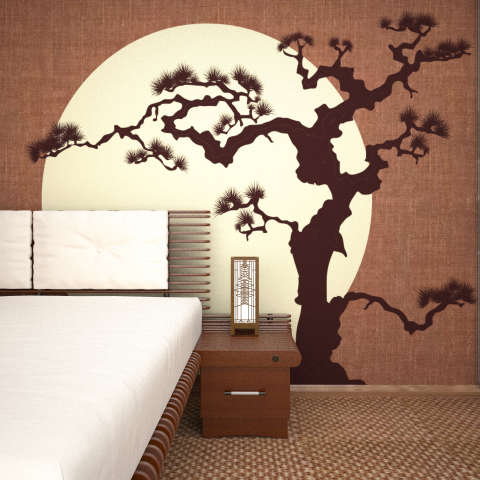
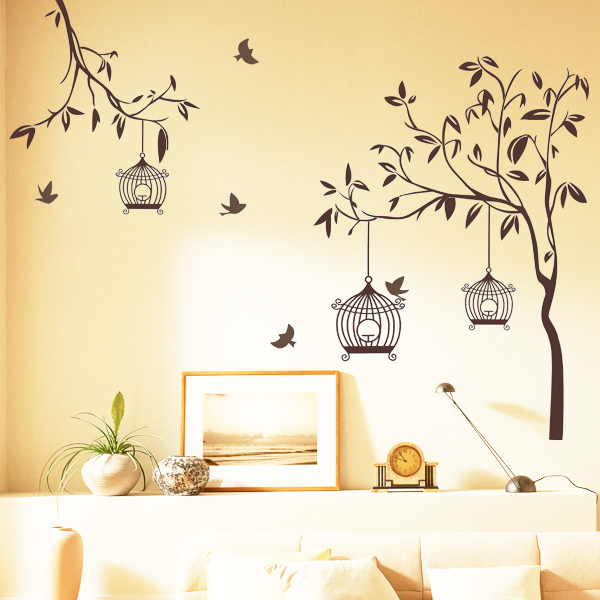
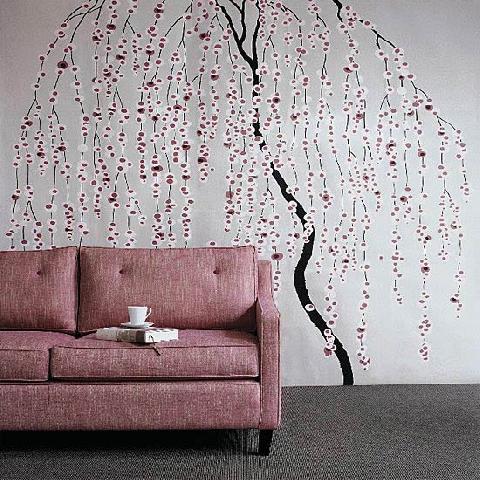
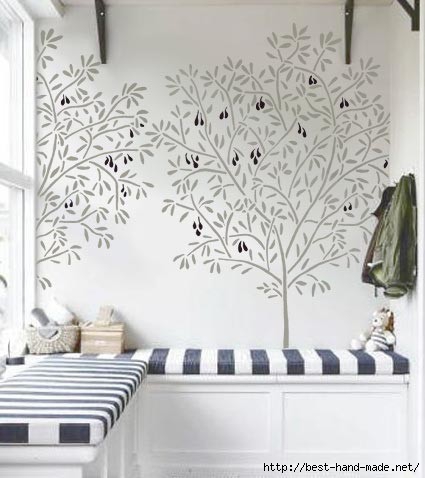
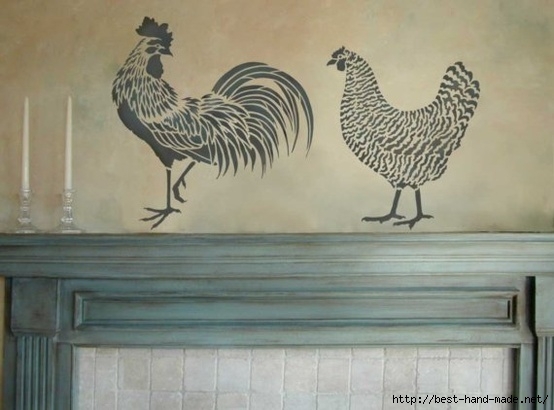
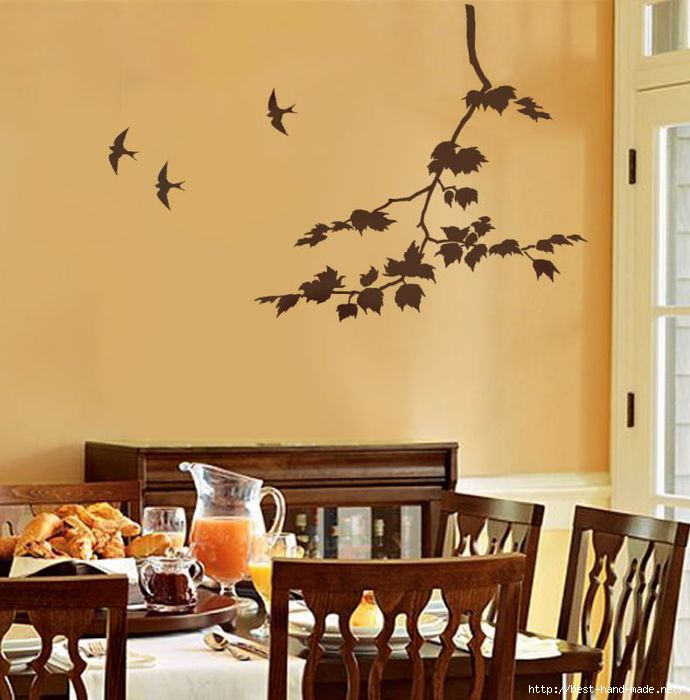
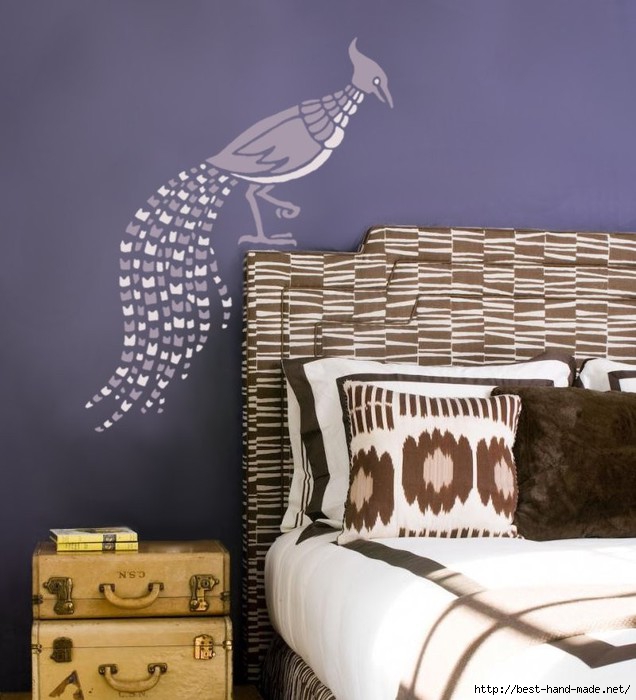
When choosing stencils for walls, give preference to images of birds, trees, people swinging on swings, as well as drawings of cats and dogs in black and white.

These motifs are in fashion today. Such paintings are often painted across the entire wall or placed above the sofa.
Monochrome stencil pattern in the living room interior

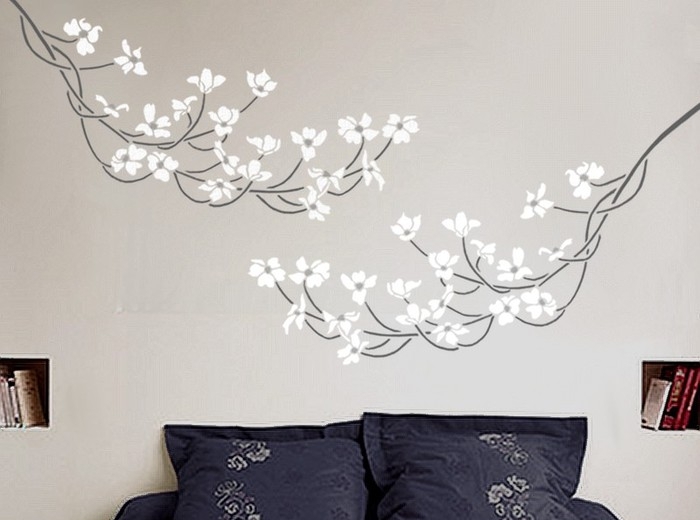
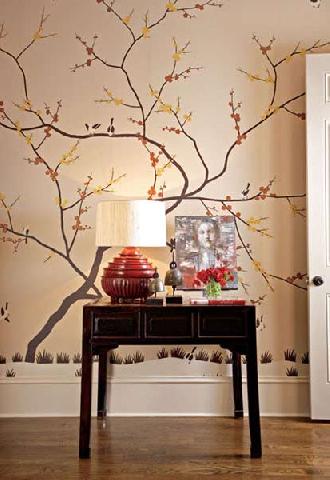
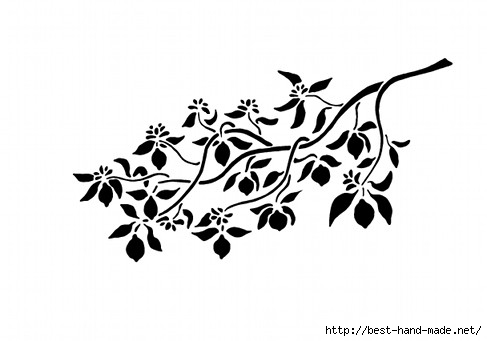
You can combine motifs and, for example, draw a tree branch and plant several exotic birds in its foliage. The drawings are made in a single color or a combination of a pair of colors. Pastel shades are a priority. Such scenes are traditional for oriental decor styles. With their appearance, calm and a feeling of happiness will come to the interior.
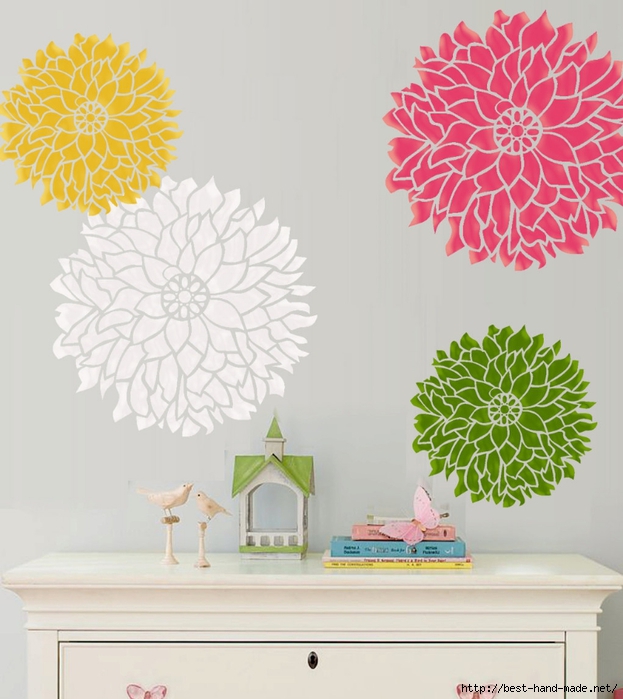
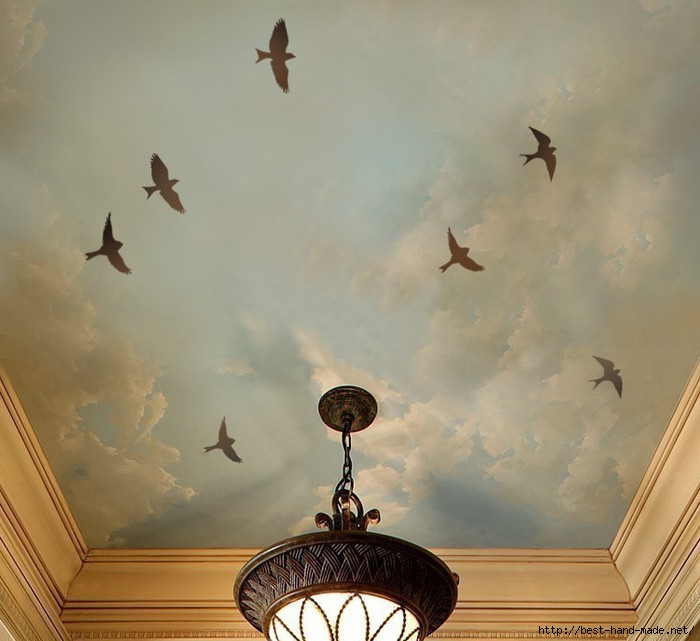
You can expand the theme and decorate the ceiling with stencil painting. Images of flowers, climbing vines or abstractions would be a creative addition.

Stencil for drawing on the ceiling
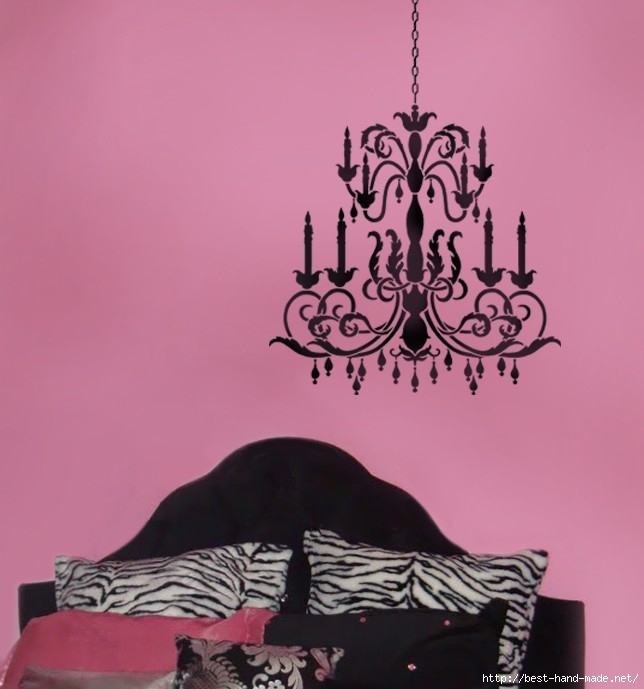
In the corners of the eastern living room, triangular patterns would be appropriate, creating a three-dimensional effect. A similar motif is used to decorate the space around the chandelier. The interior decor will become complete.
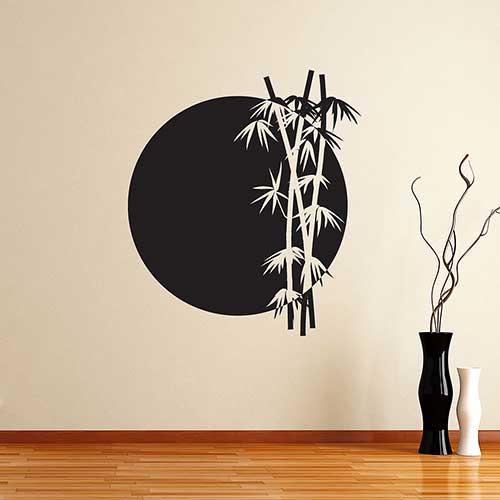
To decorate a room in Japanese and Chinese style, experts recommend using hieroglyph stencils for walls. It is important to know the meaning of the characters you are going to write. Stencil inscriptions can be introduced into other stylistic solutions of the living room interior. In this case, on the wall there will be a favorite quote, a couplet of a poem or a phrase that attracts success and prosperity to the house.

Chinese style stencil design
Stencil painting bedroom
“You may not know how to draw at all. Ready-made stencils for wall painting will help you cope with the task.”
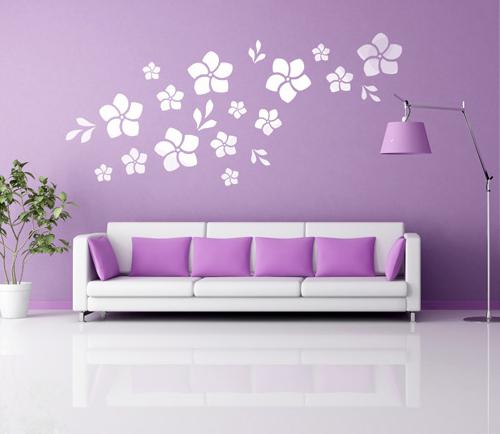
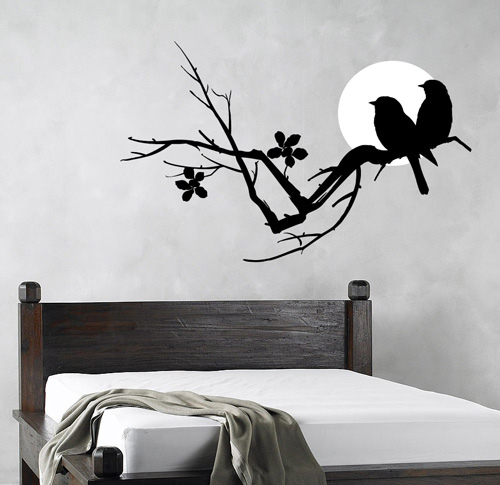
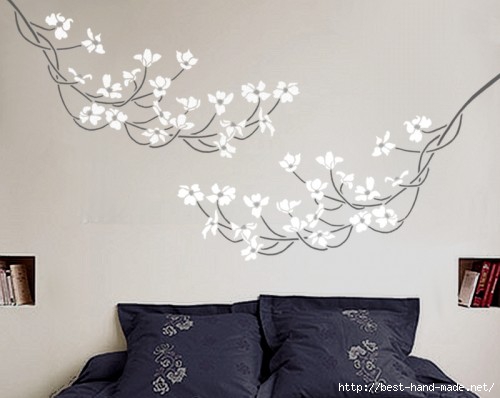
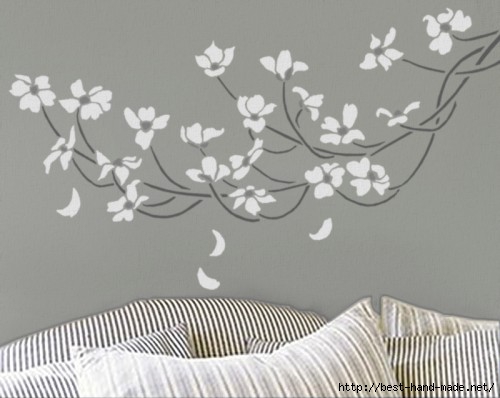
To embellish the bedroom decor and make it more sensual, it is best to add romantic inscriptions, images of flowers, plants and animals. When wondering where to embody such beauty, look at the wall above the bed. This place seems to be waiting for decorative delights.

Stencil design above the head of the bed
Since ancient times, paintings and tapestries have been hung at the head, and today stencil painting will deservedly become their alternative. To create masterpieces you will not need to have an artistic gift. You may not be able to draw at all. Ready-made stencils for wall painting will help you cope with the task. Today it is not difficult to buy them in any specialized store.

Stencil for wall painting
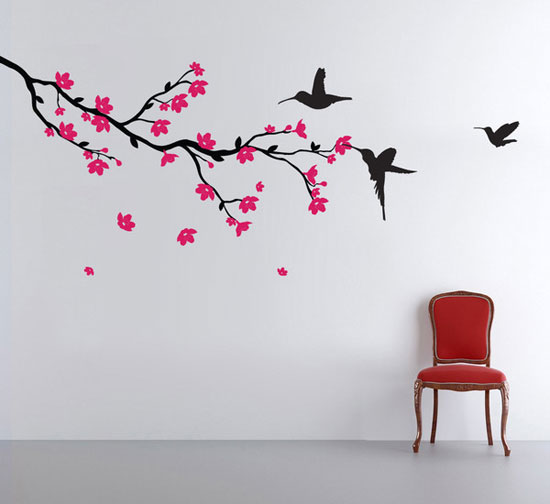
Vinyl stickers can be added to reproduced images. These two methods of decorating walls complement each other perfectly and allow you to create entire thematic scenes.

Combination of stencil painting and vinyl stickers in bedroom design
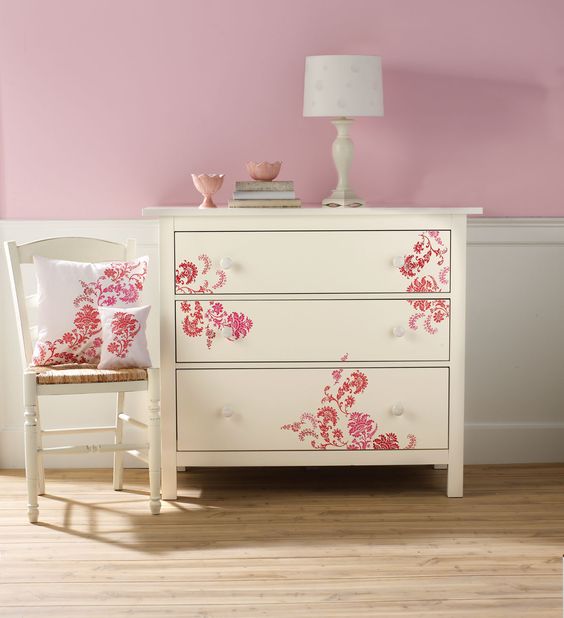
The range of applications of stencils and stickers in the bedroom should not be limited only to the area of the walls. The technique is suitable for finishing ceilings, mirrors, and furniture.
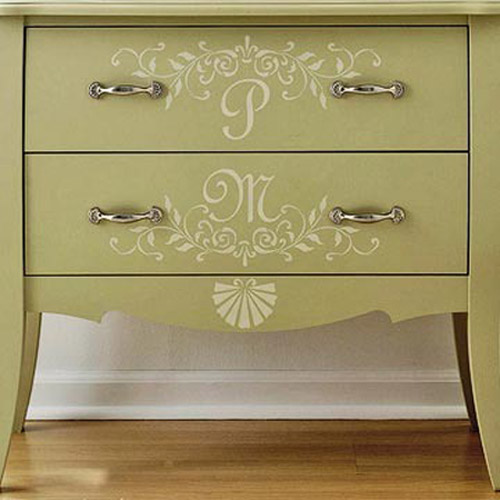
Dresser decoration with stencil painting
The color solutions are mostly calm, however, if there is a need to add a touch of passion to the atmosphere, then you should take a closer look at the red spectrum. They will cope perfectly with the original task of a composition of flaming hearts. By the way, with the addition of gold monograms, such scenes can become relevant even in an elegant bedroom with an Empire atmosphere.

Exquisite gold stencil pattern in the bedroom
Stencil painting of the kitchen
The kitchen space cannot be without its special charm, because here is the center of home attraction. The place should attract household members with its hospitality and comfort. Again, stencils for wall decoration can take part in this.

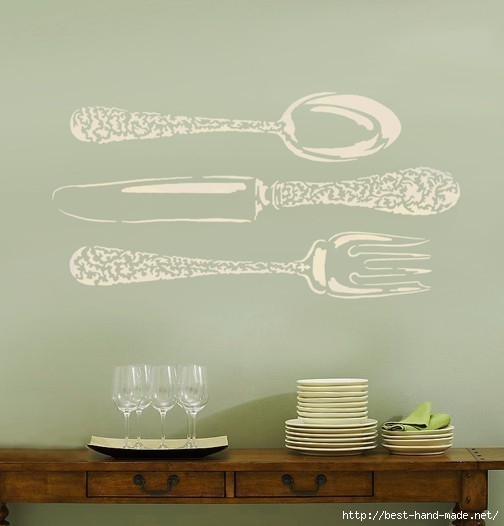
Stencil patterns will bring with them the missing warmth. It is appropriate to place images of food on the kitchen wall near the table. A painted plate of sausages or a bowl of fruit will instantly whet your appetite.
Kitchen wall decor using a stencil
You can depict cutlery. The specifics of the room are not a reason to abandon geometric and ornamental motifs in its decor. Contrasting landscapes will help lift your mood. All this will look quite harmonious in the kitchen space. Select only those paintings for the kitchen that will carry positive associations with them.

Stencil with cutlery for kitchen decor
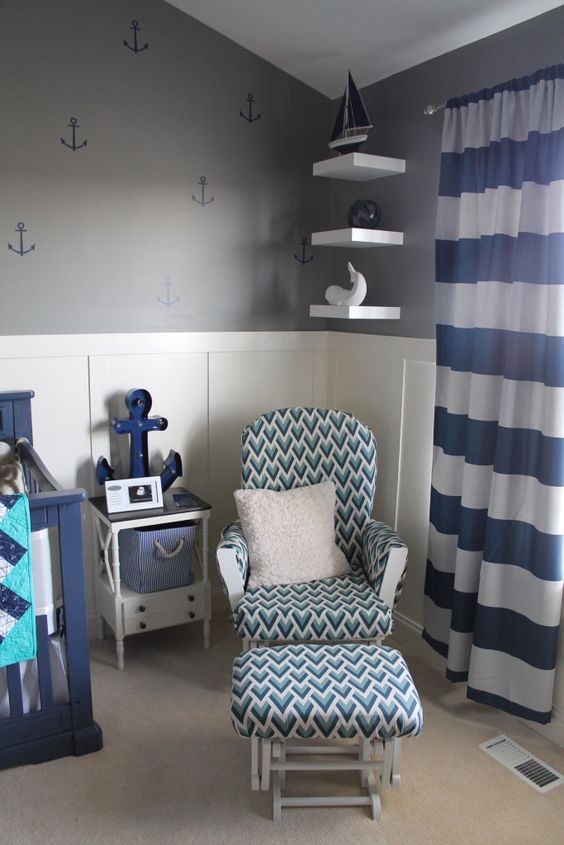
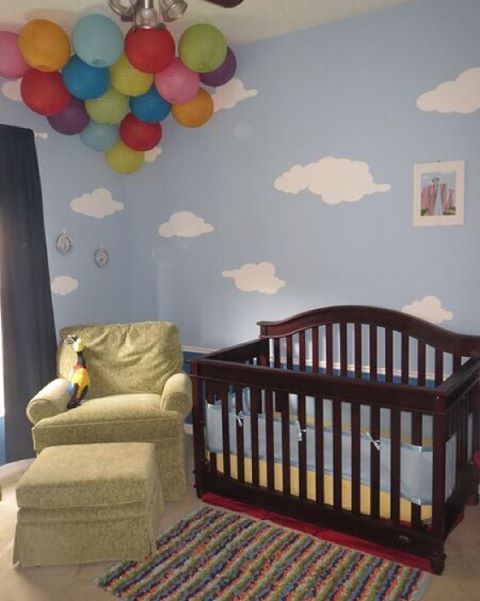
Stencil painting for children's room
Bright experiments with the play of colors can be safely carried out in the nursery. This room is transformed more often than other rooms, since as its owner grows, the furnishings must also change. Even decors that are not very successful will be quickly replaced. Room decoration idea stencils for walls The baby will certainly like it, as he will be able to personally take part in the action. In addition to drawings from stencils, the child can complete with felt-tip pens all the elements that are missing from his point of view. He will be happy to put up vinyl stickers of the appropriate theme. The main thing is to give him an idea of where and how best to place them. Believe me, there is not a single child who would refuse to take part in such an entertaining process as playing with real paints and stencil coloring books, because making your room bright and cheerful is so interesting.
Stencils for walls will brighten up a child's room
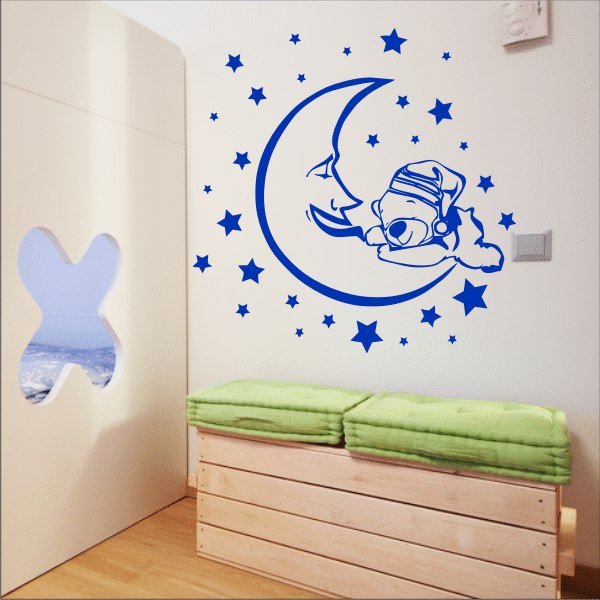
Stencils used in children's rooms can depict small cars or a scene from a fairy tale with your favorite characters. Guidelines for choosing a subject assortment stencils for wall decoration no and cannot be. Better yet, ask your child what he would like to see on the walls of his room, and who he would like to live with comfortably.
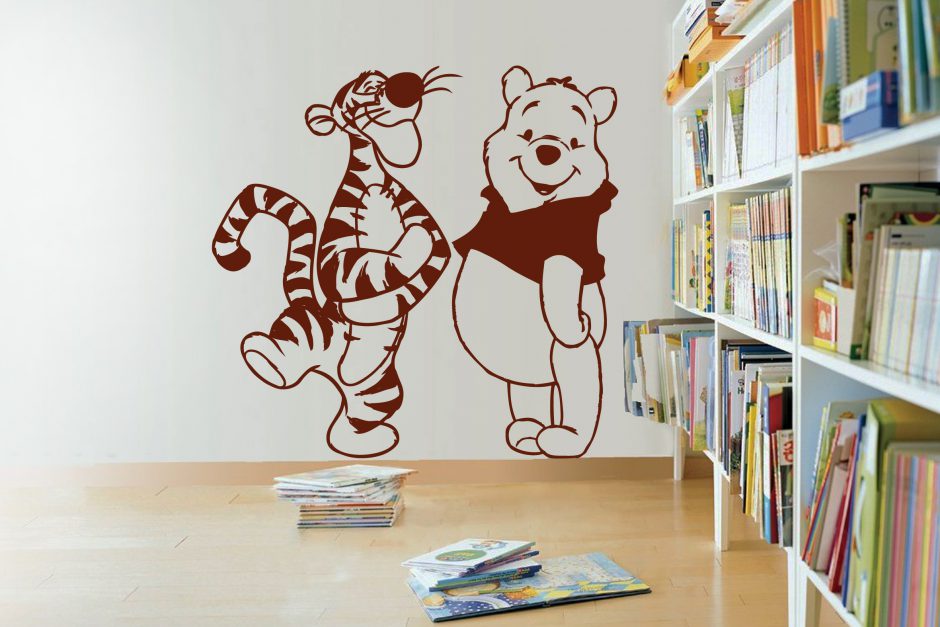
Every child will appreciate stencils for walls with cartoon characters.
For small children good option There will be a step-by-step daily routine. This great way Teach your baby how to plan time. The child will quickly remember the main daily repeated actions. And in general, drawings in a nursery should certainly be instructive. Images with cartoon characters can demonstrate friendship, sharing, and mutual assistance.
Educational stencil for children's
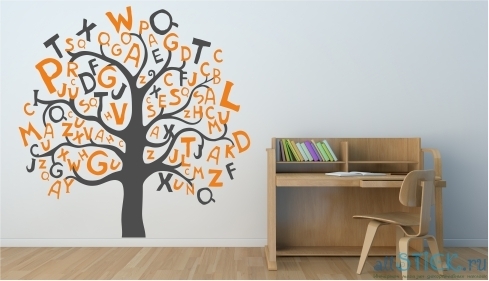
It makes sense to decorate the walls of a preschool child’s nursery with a scattering of letters and numbers. It is also a great aesthetic and practical solution, allowing you to quickly remember these important basic elements.
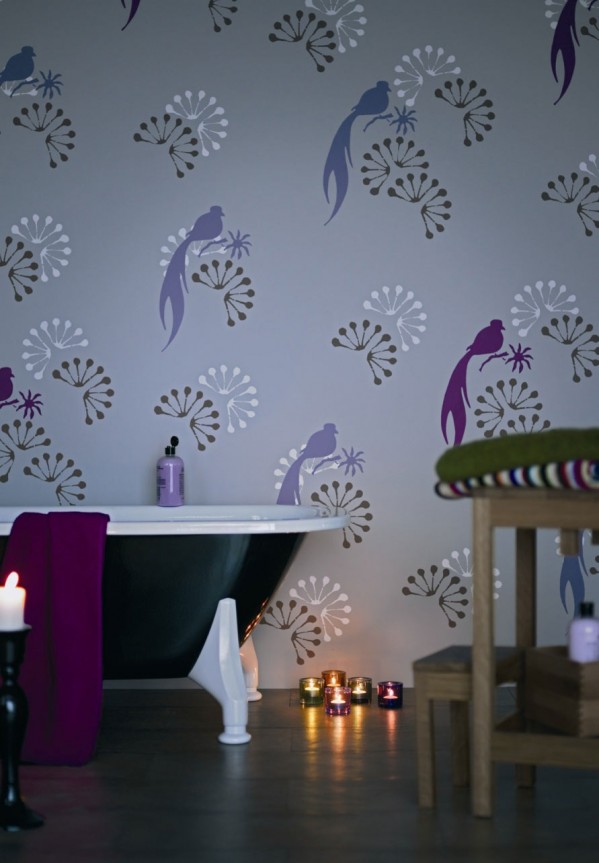
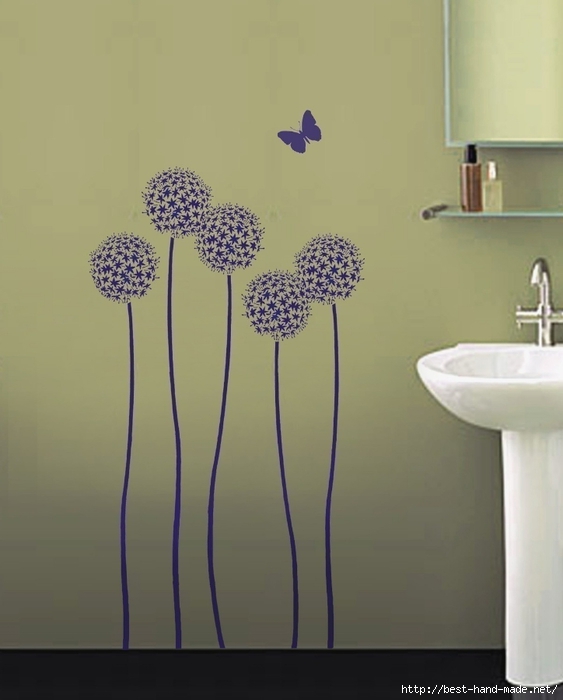
Stencil painting bathroom
Naturally, you can’t go wrong by choosing wall tiles as the main finishing material for your bathroom. It will not only be ideal for the specific microclimate of the room, but will also allow you to decorate it with a stylish design. But you can add originality to your bathroom and make it unique by using stencils for the walls. If you were still sure that stencil painting can only be done on wallpaper and plaster, now this myth will be dispelled, and you will see that stencil designs adhere perfectly to glass and ceramics. So think about what you would like to see in the decor of your bathroom and feel free to go looking for a blank suitable for the theme.
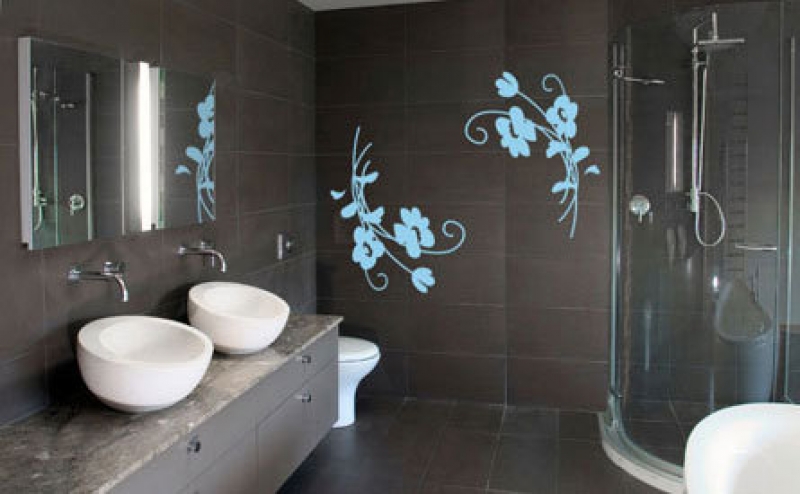
Decorating a bathroom wall with a stencil in a contrasting color
You can create a stencil with your own hands. A piece of cardboard or a regular sheet of Whatman paper is suitable for its base. Of course, you can use your own stencils to decorate walls only once, but such decor will cost you very little, so there is nothing to regret.
DIY stencil for walls
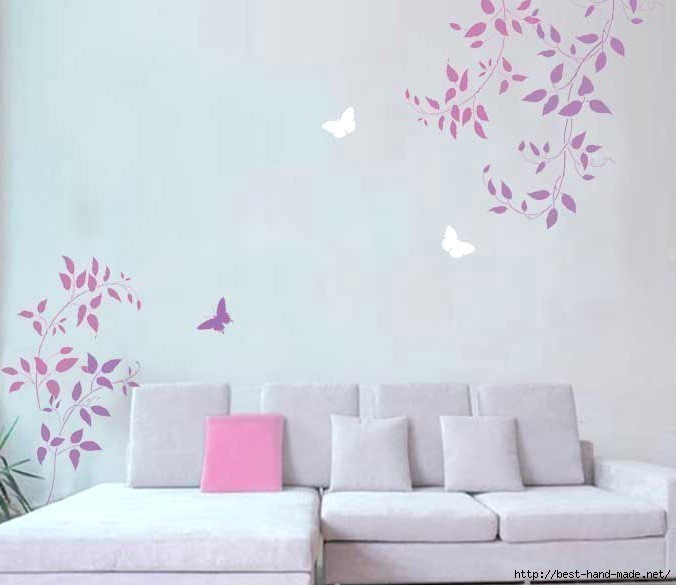
If the bathroom has a shower stall, then the stencil design should be duplicated on its doors. A bathroom with butterflies on the walls will look tender. This is a symbolic drawing that gives vigor and inspiration. You can play with their sizes and colors. In general, experiment and you are guaranteed a beautifully decorated interior.
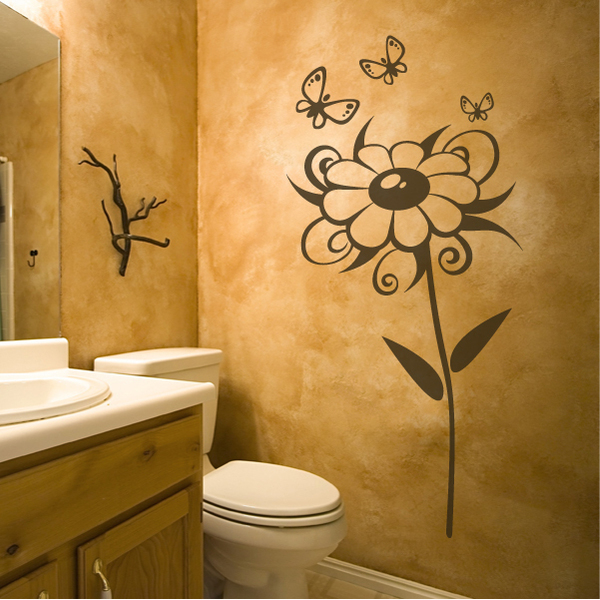
Stencil with butterflies on the bathroom wall
Conclusion
Stencils for walls are decor that is accessible to everyone. With their help, home decoration will gain exclusivity. Stencil designs will complement or become the basis of interiors with a variety of stylistic solutions. They are applied to any surface, and the application process itself is quick and labor-intensive.
Photo gallery - stencils for walls


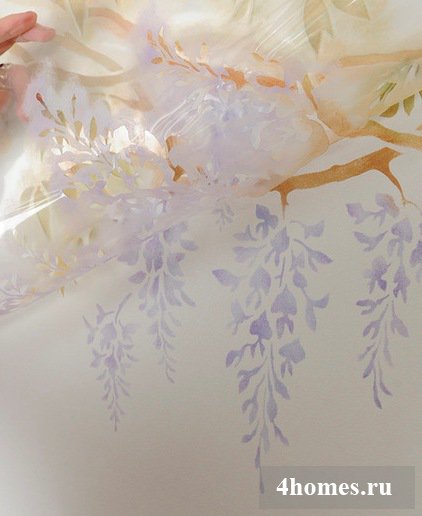
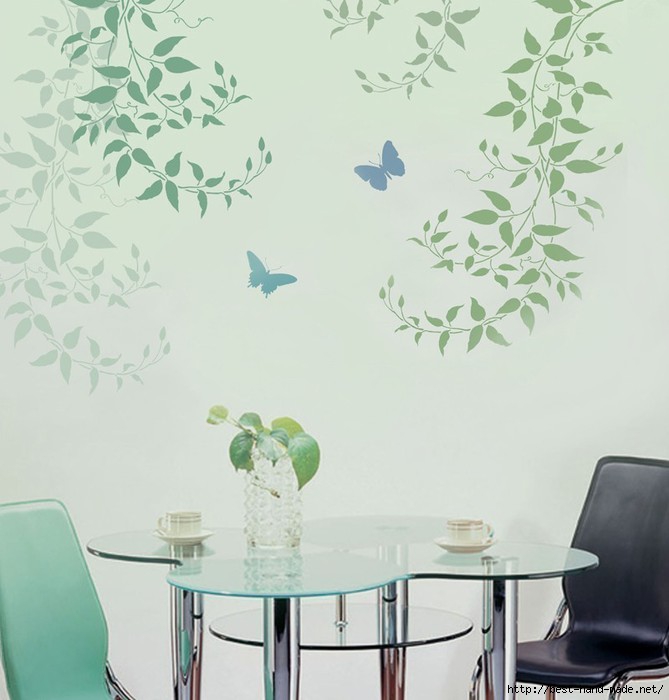
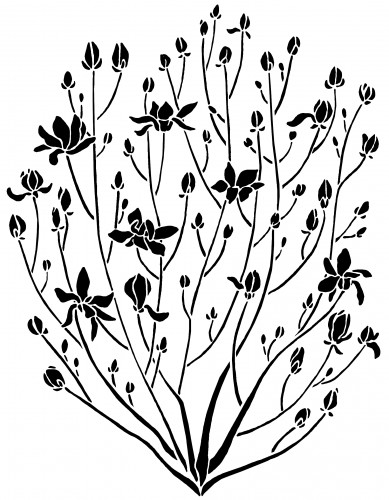
The variety of stencils and color combinations makes it possible to use this technique in different styles in an almost endless number of options. Stencil painting of walls is an exciting activity not only for professional artists, but also for ordinary people who love creativity and drawing in particular. This master class talks about painting walls with your own hands using a stencil and creating a pattern of woven wisteria branches with beautiful and delicate flowers.
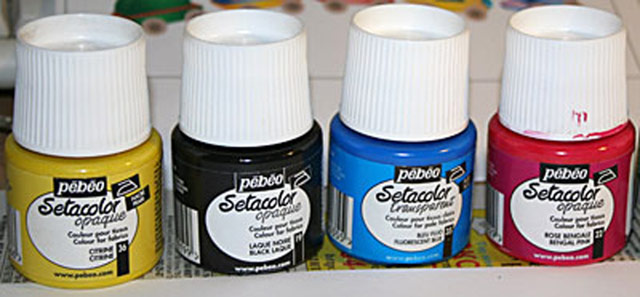
Required materials and tools:
- stencil; - stencil brushes;
- acrylic paints;
- paper towel;
- disposable plate (easel);
- blue masking tape or another that holds well and comes off easily;
- thin brushes for watercolor paint.
Note: For such a delicate and detailed pattern, using stencil brushes is a must. With their help, you will be able to convey the desired color and shade transitions. Another recommendation concerns the use of paints for painting walls. After you dip your brush into the paint, wipe off almost all the paint on the brush on a folded paper towel. Only now can you apply paint to the surface to be decorated with light movements.
It is this kind of almost dry brush work that will make the edges of your drawing clean and crisp. If you plan to paint a large area of the wall (for example, when creating geometric patterns), it is recommended to use a stencil roller.
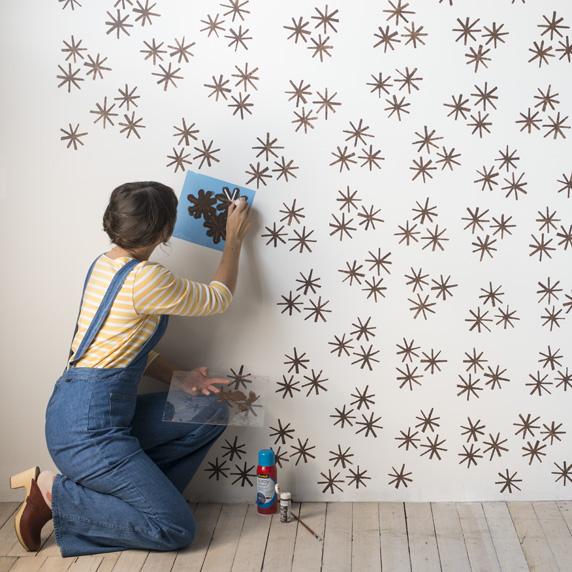
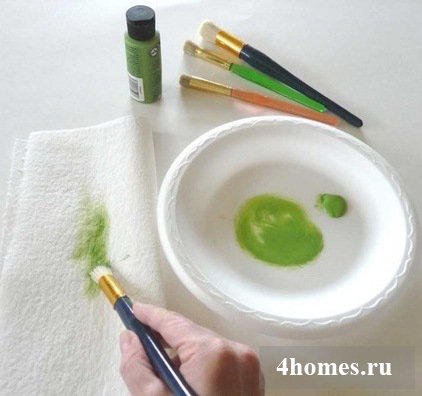
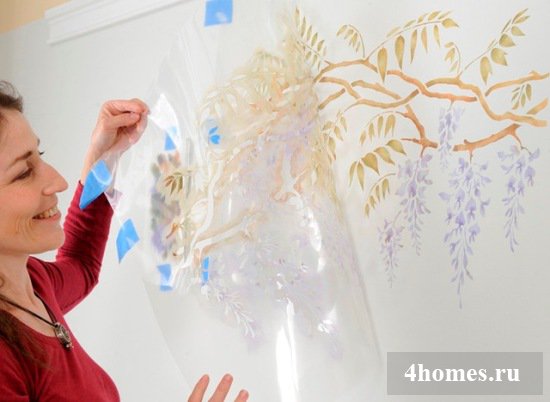
Step 1. Secure the stencil in the desired location with masking tape. You can also do this with glue in an aerosol can.
Apply a small amount of each color used in the design around the perimeter of the plate, leaving room in the center for them to mix.
For ease of work, fix a paper towel folded in several layers on the wall next to the stencil. Otherwise, you will constantly need to bend over or go down the stairs to systematically get the brush wet.

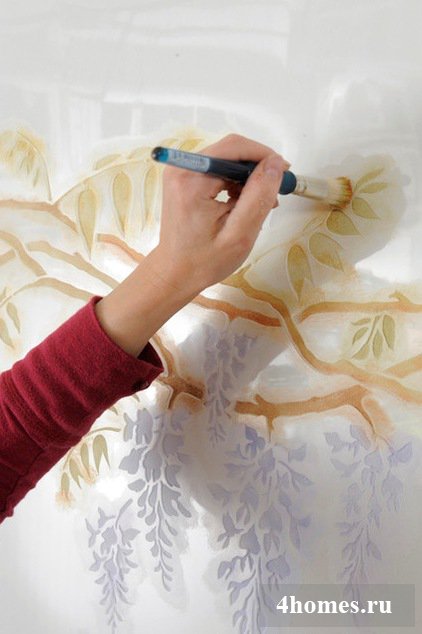
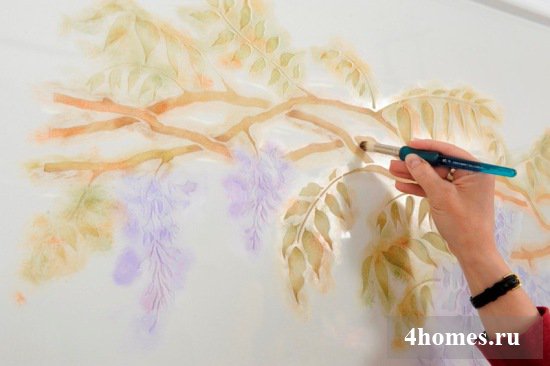
Step 2. Put some paint on your brush. Wipe it on a towel to remove excess paint. Using light strokes of the brush, apply thin layers of paint over the stencil for wall painting. The thinner the paint layer on the wall, the more transparent and lighter the composition will ultimately look.

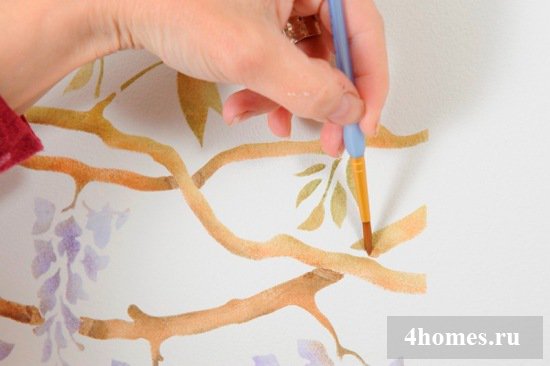
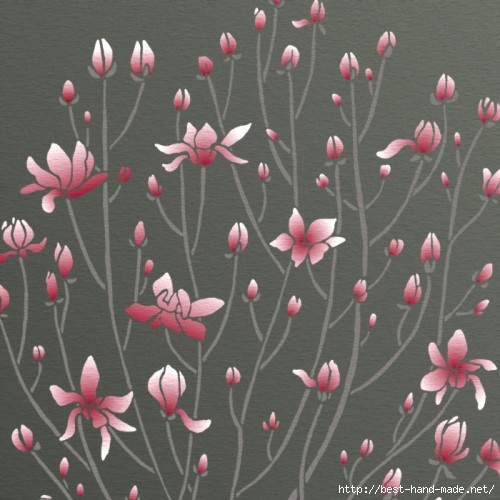
Step 3: Start applying another color. Do this with the same striking movements of the brush against the wall. If you need to make a color transition in this area of the drawing, take another brush and apply new color. In addition, apply this color in all other in the right places pattern.

The photo below shows how the picture after Brown Olive is applied in the area of the leaves and in some areas of the branches.

Don't forget to wipe off excess paint from the brush that you dipped into a fresh batch of paint.

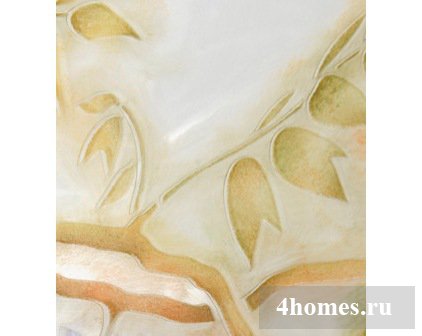
Step 4. Create the effect of color transitions by applying a new color over the old one, forming the volume of the picture. For example, add a layer of yellowish ocher and rust to olive-colored leaves.
When painting walls, do not be afraid to apply paint over the stencil itself, smearing the structure of the design. You will soon remove the stencil, and the picture will acquire its clear contours. The main thing is that the required amount of paint for the drawing remains on the wall itself. But don’t worry if you missed something somewhere – it can all be corrected later. Stick to one technique to create the entire pattern.
Try to use a separate brush for each shade. Never use the same brush for dark and light paint one color - the drawing will turn out dirty. It is not recommended to wash brushes while working - it is difficult to dry them quickly from water.
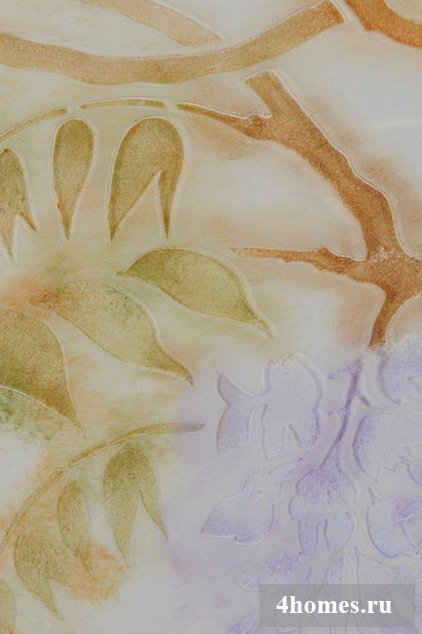
Sometimes you can open a corner of the stencil and evaluate the result. If there is not enough paint, lower the corner, fix it and continue working.
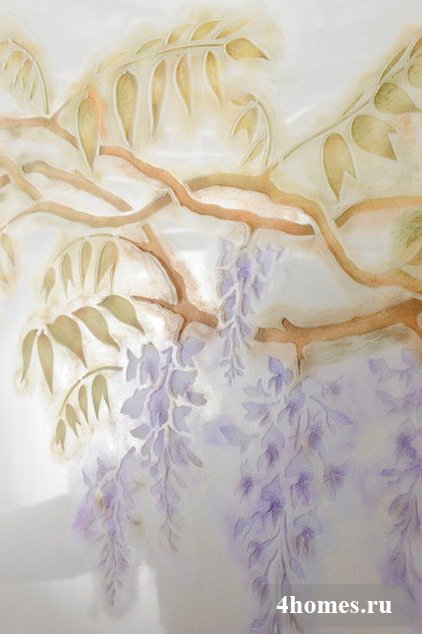
Look how clear the contours are!
Step 5. To add depth to the picture when painting walls with a stencil, use the following technique. After applying a solid light shade of one color, apply a dark shade of the same color to the outline of the design. This way you can easily create stunning depth and three-dimensionality in your drawing.

Note: When creating dark shades of color, do not use black. It won't look natural. For example, to draw shadows from branches, use shades of dark brown.
Note: Do not apply shadow on all sides of leaves or other objects. In nature, light comes from the sun. Imagine where the light is coming from in your drawing. And on that side, make the elements of the picture light, and on the opposite side – dark. Although, if you sometimes break this rule, you can get some pretty funny drawings.
Note: To make the foliage look realistic, shade the bases and tips of the leaves.
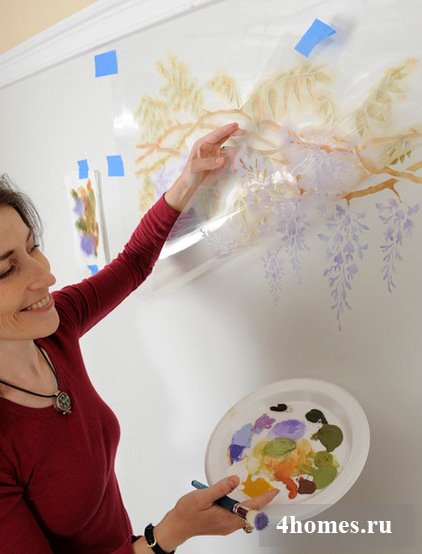
The moment of discovery...
Step 6. Filling. To hide the seams after applying the stencil, paint over the gaps with a thin watercolor brush.
Voila!
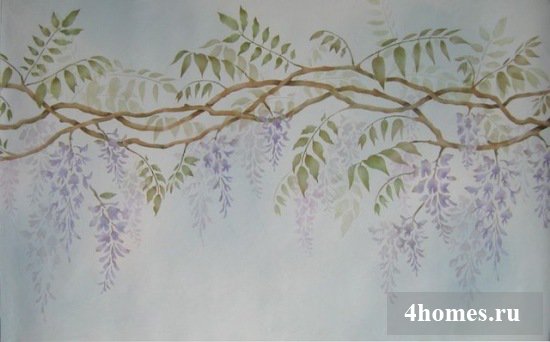
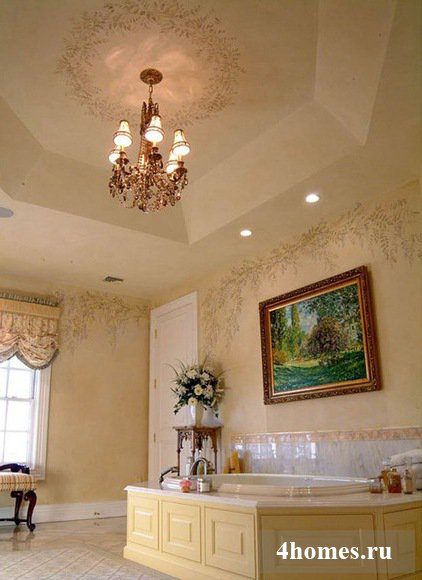
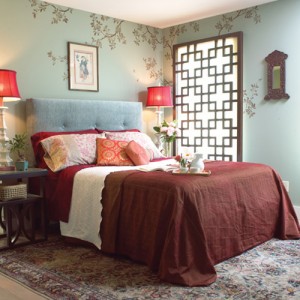
Now look how this drawing looks in a classic interior.
Quote from Glebova_Elena's message Stencil painting in the interior. Ideas, useful tips, video
I greet you on the pages of my diary!
Creating an original design on the walls is now easier than ever: you can try to find wallpaper with an interesting image, select photo wallpaper, or perform stencil painting. Moreover, the last option is probably the most attractive due to the fact that it is done very simply, on your own, and there are a lot of options and ideas! I want to offer you a selection of ideas for using stencil painting in the interior, collected by me all over the world, as well as an excellent article from the construction portal Ibud.ua “Decorating walls with stencils” with a video lesson that will allow you to easily use it in your home. Enjoy watching!


![]()

There are miracles in life! You have new flat! You've been waiting to meet her for so long... and now square meters guarantee you stability, comfort and protection. How you want to make your home unique, not like everyone else’s! How I want every guest, upon crossing the threshold, to be struck dumb by the beauty that will open before his eyes! You shovel great amount magazines, construction sites with pictures and... you get lost. So many great ideas, but only one apartment! It is impossible to realize all desires at the same time. And if you also calculate the correspondence of limited possibilities to endless desires... then you can slide from inspiration into a state of confusion, and then into a state of “I don’t care anymore, let everything be somehow!” Stop. It is very harmful to bring yourself to such a state. Your home will definitely be the most beautiful and comfortable. And uniqueness can be achieved using decoration techniques. We will consider one of these possibilities in this article. This is decorating walls with stencils.

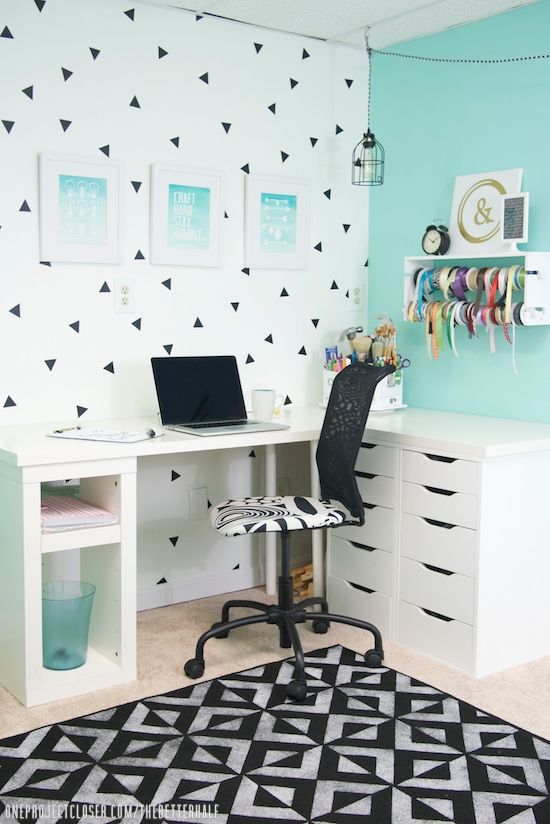
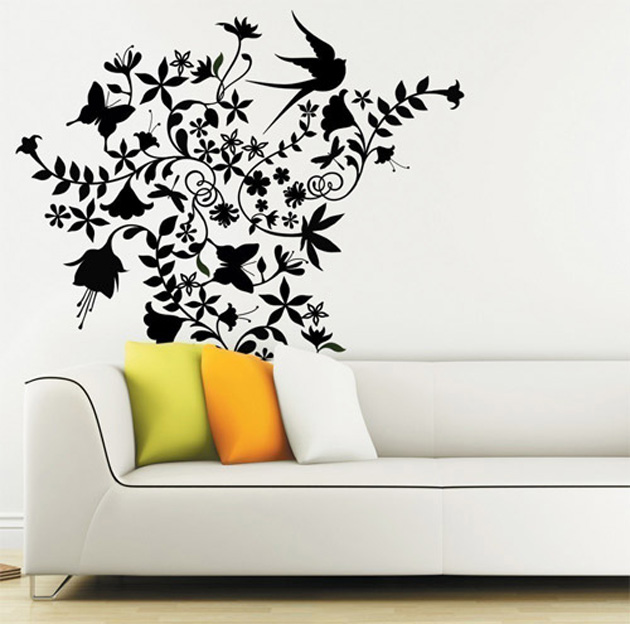
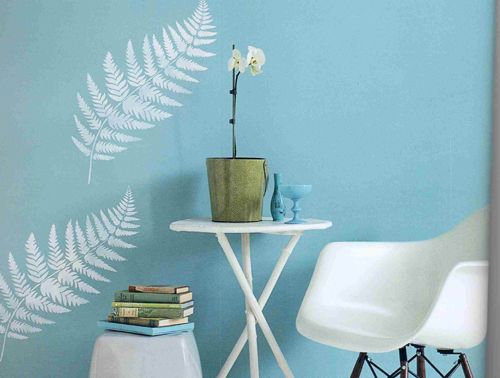
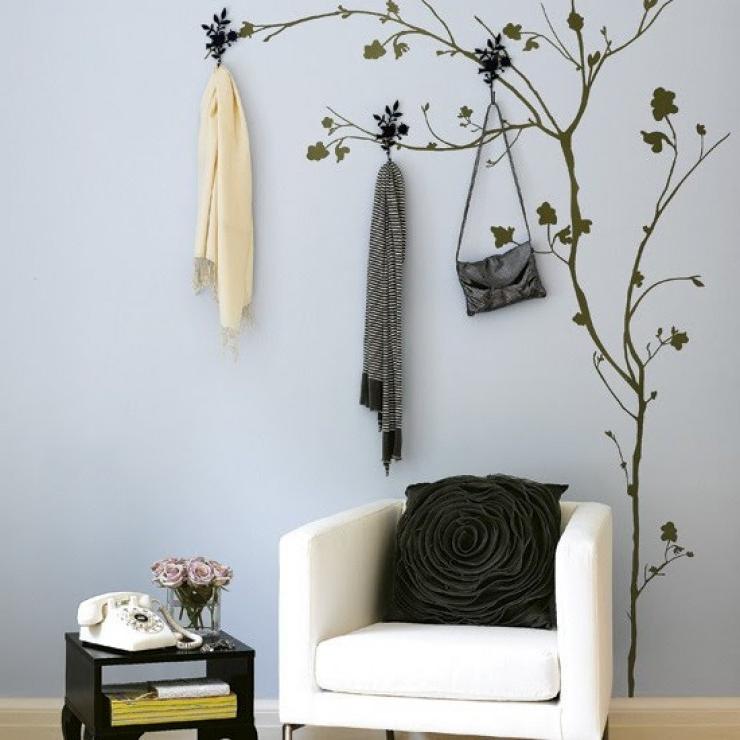
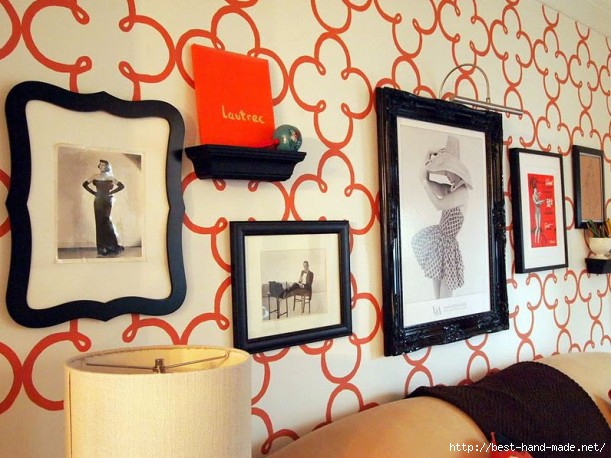
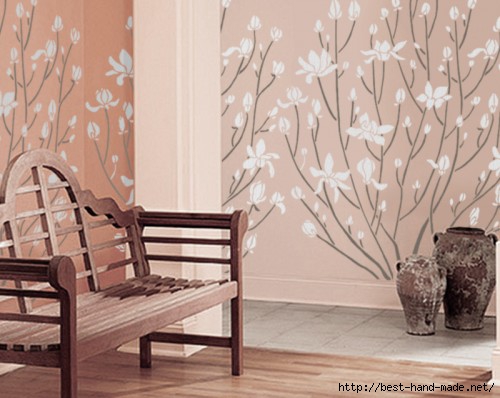
Forget about the dull wall stencils of the last century. New technologies keep pace with fashion and comfort.

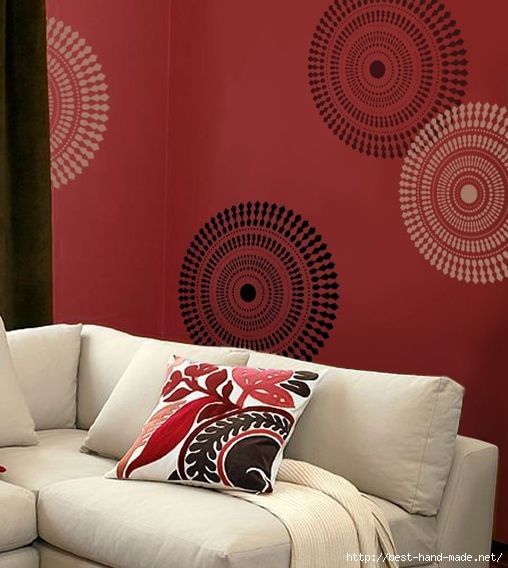
See how cleverly wall stencils are used? They are not massive and do not overwhelm with their large area. They combine walls and furniture into a single whole, place accents, and create the impression of a completed interior.
Types of stencils
1. Simple, that is, in one paint;
2. Combined, when a complex pattern is created using a set of stencils and several shades of paint;

3. Volumetric stencil, which is made using putty;
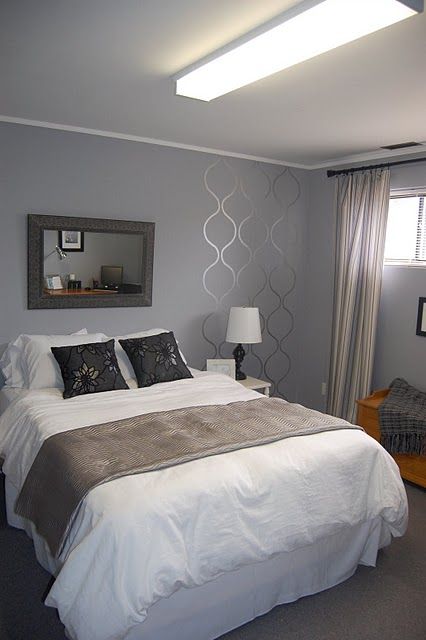
4. The so-called “reverse” or “anti-stencil”, when the paint is sprayed around a closed area of the wall. Such pictures create a glowing effect, a halo around a clear outline.

The best part is that you can easily decorate a wall with your own hands in a few minutes, or hours if you choose a more complex option. Thanks to the versatility of acrylic paint, which is recommended by all designers, stencils can be applied not only to painted walls, but also to panels, wallpaper, glass, wood, and fabric. Whatever the walls are covered with, acrylic will stick to them firmly. Unless a very textured wall is suitable for decorating with stencils.

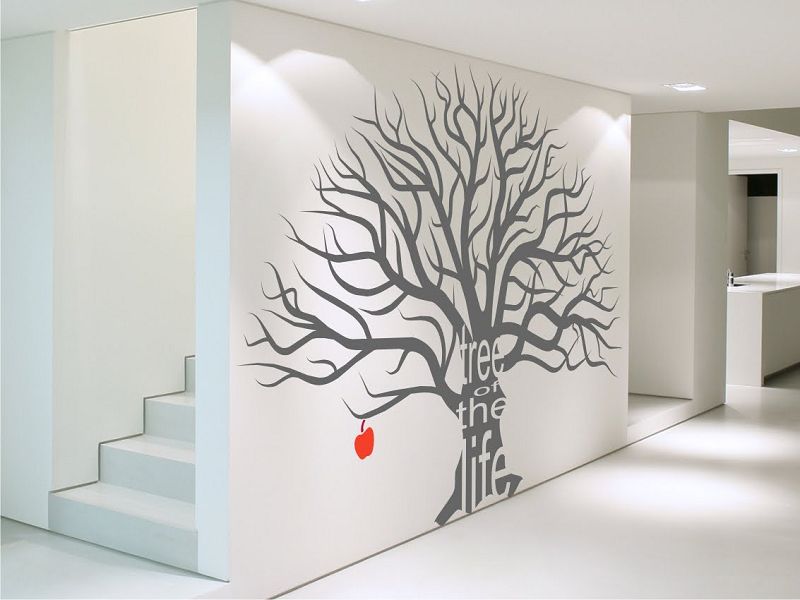
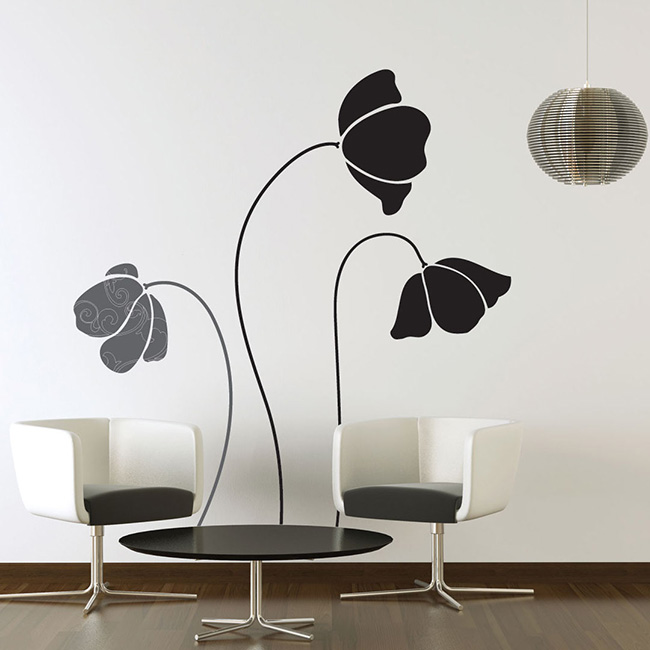
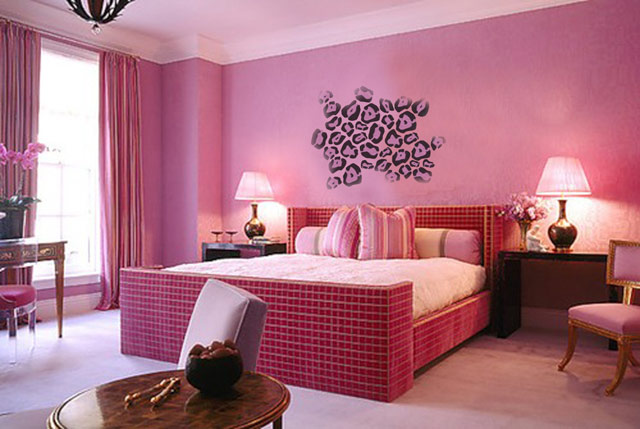
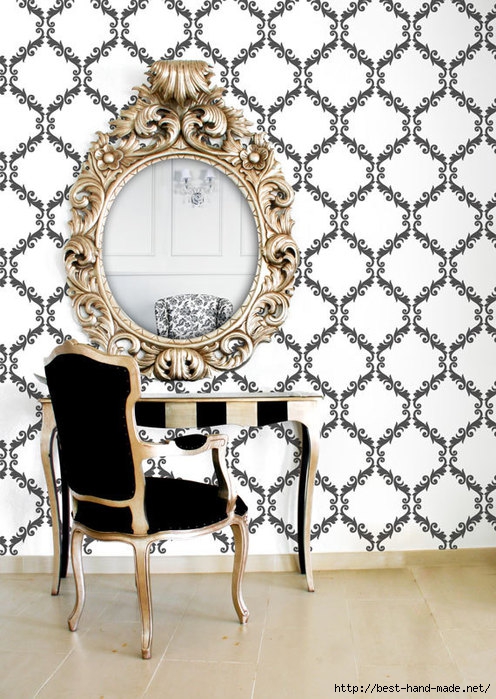
Stencils for walls can be bought ready-made in all major stores building materials, you can even buy it online. They are convenient because you can order a stencil based on the image you choose. You can cut a stencil using a vinyl film plotter at any advertising company. You can even bring a photograph there, and the designer will make the image suitable for a stencil. There are many implementation options. The most important thing is to figure out what you want to depict and where. Today, black openwork elements and elements that unite the entire color scheme interior You see such solutions in the first photographs.
In production, stencils are cut from thin and durable transparent or colored vinyl film. Volumetric - made of polyvinyl chloride several times thick millimeters.
There is also a special aerosol adhesive that is used to attach the film to the wall. This stencil glue leaves no residue. We use acrylic paint for stencils. It could be construction, it could be art. Acrylic dries very quickly and is resistant to life. You can use a spray - this is the easiest option. Gives an even coating. You can use a foam sponge - a budget option, but it also makes it possible to tint the picture. Other suitable tools are a brush with short, stiff bristles and a roller.

Choosing a location for the stencil
Where can I place the stencils? Anywhere. It is impossible to give clear recommendations here. In this matter we are guided only by a sense of beauty.
If you don't want to fill a large area of the wall, you can make small stencils near the switches.
The stencil looks very nice above the bed or above the table, or near the window or door. Then the drawing fits into the space absolutely harmoniously.


Let's look at how to work with a stencil correctly so that a short time Decorate the wall with a stencil yourself and achieve the result promised by the manufacturers.
Rules for working with stencils
1. Unless you are an artist, it is best not to cut out the stencil by hand. It's not that simple. Any hangnail or unevenness will increase many times over as a result. It is better to order a stencil. Lines cut with a plotter look incomparably neater.
2. The wall must be smooth, dry and clean. If the wall can be washed, wash it; if not, wipe it with dry microfiber or cotton cloth.
3. On the wall we make markings with a pencil: where is the top, where is the bottom and the side points, so that the image does not warp or crawl to the side.
4. Be sure to do a trial version on a piece of wallpaper, for example. With this you will kill several birds with one stone: you will train your hand, select paint and, by attaching a sample to the wall, you will be able to see how it will look in the finale.
5. Use special glue! It makes life a lot easier. When using tape, you risk tearing off the film along with the paint from the wall.
6. There shouldn't be too much paint! In general, a minimum of it is needed for such work.
7. If we use spray paint, hold the can at a distance of 30 cm, and at the same time make sure that it does not spray beyond the film. If necessary, we additionally protect the wall.
8. If we work with a foam sponge, then after dipping it in paint, we make sure to make the first prints on the same old wallpaper in order to remove excess paint.
9. If we work with a brush, we make up and down movements. There is minimal paint on the bristles.
10. If we work with a roller, then we carefully monitor how the paint behaves in the corners. In general, it is better to use a roller for stencils where there are no narrow slots or sharp corners. Because the paint will either not get into them at all, or in excess, which is unacceptable.
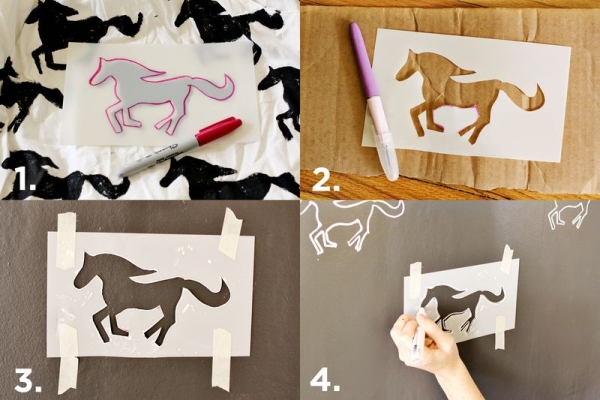
DIY stencils for walls
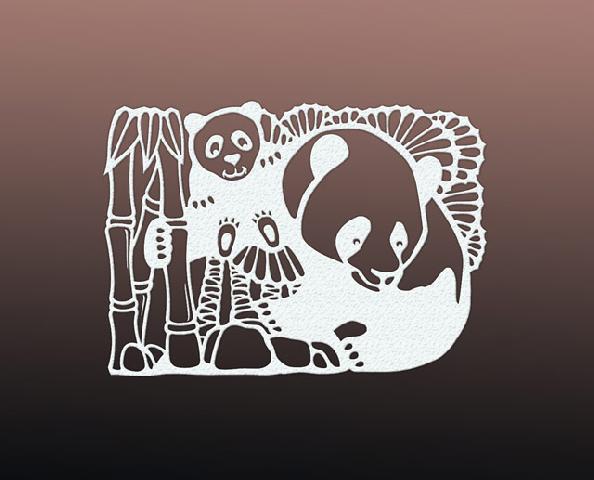
Now in more detail about each type of stencil. We will work with these cute pandas from the catalog of vector drawings.
We glue it to the prepared wall with special glue. And we apply the paint either in an even layer, or just a little bit to create a vintage effect.

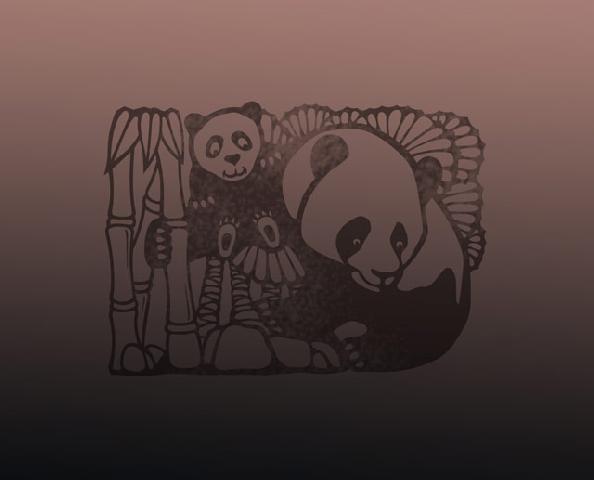
2. Gradient effect
We take two shades of the same paint. How to do it? Add a little black to one portion, and as much white as needed to the other. And create a gradient, moving from the darkest to the lightest. To do this, we work only with a sponge. At the end, we apply pure white color to the sponge and enhance the effect by walking a little along the light edge.
In the same way you can color pandas in different colors using a few sponges and a palette. It is important to adhere to the color scheme inherent in the room so that the stencil does not look alien.
Another secret. In order to make a color drawing, it is not at all necessary to buy up the entire art store. Three basic colors are enough: yellow, crimson, blue, and basic black and white to achieve any shade by mixing.


We buy acrylic wall putty in a bucket. It should have the consistency of soft ice cream or thick sour cream. However, this is usually the case. And use a spatula to apply the putty layer by layer, covering the entire surface of the film until we reach the desired thickness. A pattern that sticks out too much will not look beautiful; it is enough to achieve 1-3 mm in thickness. (If you want a more voluminous effect, you should resort to sculpting.
![]()
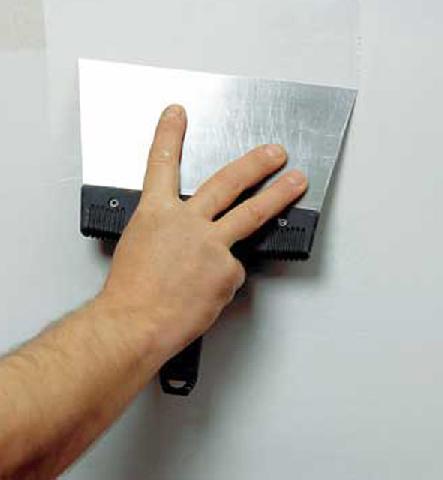
Then wait exactly one minute. This is enough for the putty to set, and carefully remove the film!

The resulting image is very beautiful, with a glow effect around the main pattern of the same color as the wall. This is a reverse stencil. The reverse is glued to the wall, that is, what is thrown away from a regular stencil. Be sure to use glue and spray paint. Extend the paint layer as far from the film as wide the halo you want to get. Be sure to do a test on paper the same color as the wall to achieve the desired effect.

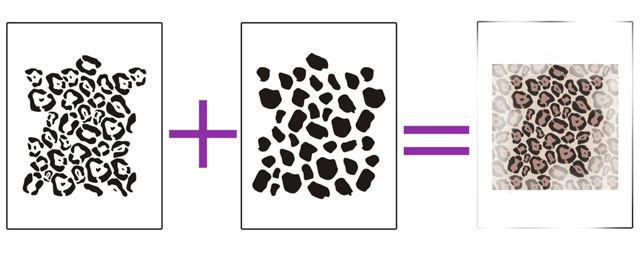
5. Multi-color layered stencil
For it, several films are created from one drawing, each for its own color. We work with each one in turn, waiting until the paint in the previous layer has completely dried. We combine the stencils according to the marks made in production. Therefore the work is not difficult.
That's basically all I wanted to say about stencils for walls. The only thing I can add is that large surfaces are best handled by two people. “It’s twice as much fun for two to even fly across the sky. And not just live on earth,” Boris Grebenshchikov once sang. Even use work as another chance to strengthen relationships with loved ones. Then your home will be happy, as will your life!
Video lesson
A selection of ideas for using stencil painting in the interior


| Complexity murals |
Prices per sq/m |
Discounts | Deadlines in r/h per sq/m |
||
|---|---|---|---|---|---|
| From 50 sq/m | From 150 sq/m | From 350 sq/m | |||
| Very simple painting | From 900 rub. | 5% | 10% | 20% | From 1 day |
| Simple painting | From 3-5000 rub. | 10% | 15% | 20% | From 2 days |
| Fairly simple painting | From 5-7000 rub. | 5% | 10% | 15% | From 3 days |
| More complex painting | From 7-10000r. | 5% | 10% | 15% | From 4 days |
| Quite a complex painting | From 10-20000 rub. | 10% | 15% | 20% | From 5 days |
| Complex painting | From 20-50000 rub. | 5% | 10% | 15% | From 6 days |
| If you do not have a drawing that you would like to see, we can offer ours( Selection of ready-made pictures) or develop a new one - find out the cost of making a sketch by phone | |||||
| The minimum order amount for work and related materials is 15,000 rubles. | |||||
What Can Our Artists Draw?


And much more!!!
Interior painting has always been considered an expensive pleasure, since the artist needs to create a sketch based on an individual project, work out all the details and color scheme. The artists of our workshop have developed and offer you inexpensive stencil painting.
We have a large number of templates for wall painting at our disposal, so you can always choose a design that suits the design of your apartment. With the help of stencils you can create a cozy and stylish design any room in your apartment.
Stencils are perfect for spot painting small areas: windows, doors, kitchen cabinets and tables.
There are many ways to make your home unique. This can be achieved by combining finishing materials, furniture, accessories, and when you want something special and unique, add a hand-made detail to the interior.
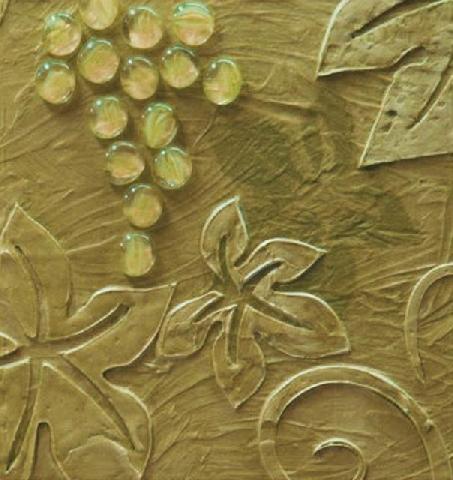
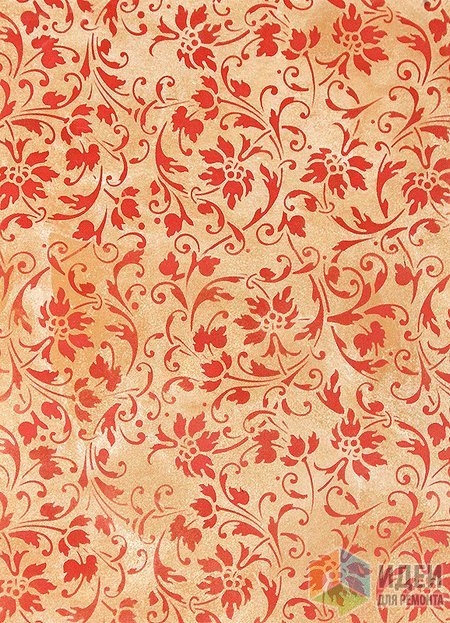
"Irises", base - decorative plaster. The main drawing is also made with decorative plaster, tinted in contrast
Particularly interesting in this regard are decorative panels and paintings, which are created to order, in a single copy. But there is more affordable way bring something individual to the apartment or breathe new life into old things - and accessible not only to professional artists, designers and decorators, but also to creative people who, alas, do not know how to draw.
We're talking about stencils. With their help, an arbitrary design is applied to walls or ceilings, doors, furniture facades and tiles; they are used for matting mirrors or glass inserts; they are used in decoupage to decorate small household items, as well as for painting interior textiles.
Stencils can represent both letters and simple geometric figures, as well as complex artistic compositions, ornaments reproducing the style of a certain era or national color. The materials from which stencils are made are also very diverse. This can be a durable metal stencil, on which the design is carved using laser cutting, or a homemade paper stencil, hand-cut with a stationery knife or scalpel on a thick sheet of cardboard.
Recently, stencils made of translucent film (PVC), made on a cutting plotter, and used in interior decoration, have become increasingly popular.
Stencil designer says: “The most technologically advanced and affordable method used by manufacturing specialists is plotter cutting of PVC film - both for reusable and disposable ones. This is a relatively new, rapidly developing technology, which in the mid-90s of the last century made it possible to give a “second wind” to the technique of stencil decoration, turning a half-forgotten art into part of the powerful “handmade” industry.
According to their purpose, modern stencils are divided, roughly speaking, into disposable (so-called “adhesive”) and reusable. Each of them has its own “language”. Thus, with the help of “adhesive” stencils, you can paint concave-convex surfaces, even spherical ones (of course, with a certain skill and sufficient radii of the spheres being decorated). Reusable stencils made from durable, thick film allow you to work with viscous materials – decorative plasters, for example – and create very effective relief compositions.”
Disposable stencils are convenient because they are easier to attach to the wall, since they initially have a sticky layer. They are usually made according to the specific dimensions of the customer.
Reusable stencils are a tool that helps create repeating motifs in interior painting and working with decorative plaster. Often, reusable stencils find fans among people who are professionally involved in renovations, because by varying several stencils, you can decorate many apartments, houses and cottages.
However, the durability and reusability of stencils depends on proper use, care and compliance with storage conditions. So, after use, reusable stencils must be washed carefully, making sure that small parts are not damaged.
Although purchased stencils are usually delivered in a tube, it is better to store them unrolled so that the surface does not deform.
If contact with a stencil is just a random episode in your life, place it horizontally on a shelf, hiding it in a folder or protecting it with thick cardboard. Those who use stencils constantly can build a vertical storage system: several stencils are placed in a bag, reinforced with a sheet of cardboard and hung on a special hanger in the closet. In this case, the stencils must be covered with paper so that their jumpers do not adhere to each other.
Where do stencils come from, and is it possible to create a stencil based on a picture you like?
The first and easiest way is to select a ready-made stencil from a catalog offered by specialized online stores and studios, and in some cases, art salons and art supply stores.
A completely different matter is a custom-made stencil. In principle, you can contact a copy center or an advertising agency, where the image will be enlarged, processed and cut on a plotter. However, a reusable stencil for wall painting is made from a thicker film than oracal, traditionally used in copy centers, and therefore requires different plotter settings. In addition, the designer or operator who implements your idea must know the rules for constructing a stencil image (location of jumpers, permissible sizes of fragments, etc.), and at the same time understand how the stencil will behave in working conditions. Therefore, if the production of “artistic” stencils is not a core service for an agency, there is no guarantee that they will be able to satisfy all your whims.
What kind of image can be used to transfer to a stencil? It could be a photograph, a reproduction, an original pattern...
“Theoretically, you can make a high-quality stencil design from any image,- says Alexander Chudov. - You just need to understand that the stencil technique has its own language, which imposes certain restrictions - like any technique, strictly speaking, after all, we will not demand the reproduction of the “sfumato” effect from woodcut printing, for example. However, a talented artist or designer can create a rather complex, multi-color composition using stencil technology, which can easily be classified as an object of art. But this, as they say, is a “piece” product.
In practice, stencils are usually made “to order” based on classical ornaments that the customer likes (“seen”, for example, in books, art albums), various decorative panels and motifs - when the customer “sets” a topic that interests him and then works on it with the designer. Various font compositions are in great demand - from purely utilitarian signs and inscriptions to monograms and monograms for decorating interiors or household items. We happened to make stencils based on engravings, paintings, drawings by old masters - for example, stencil “arrangements” of works by artists of the Art Nouveau era - Gustav Klimt and Alphonse Mucha - are very popular.”
The degree of complexity of the stencil may vary, but if you plan to use the stencil yourself, correctly assess your strengths: the thinner and more detailed the image, the more carefully and accurately you will have to apply it.
By the way, it is wrong to think that working with a stencil requires an absolutely smooth base. Textured wallpaper and similar “uneven” surfaces are great for creativity - just take your time and don’t put a lot of paint on a brush or sponge.
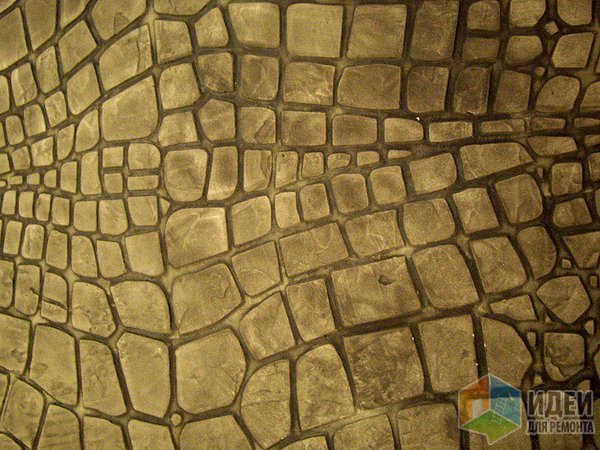
Rapport "crocodile skin", volumetric decorative plaster
When working with decorative plaster, including for creating volumetric compositions, the stencil is fixed on a previously prepared wall, and then a layer is evenly applied with a spatula decorative plaster. Here it is important to catch the moment when the plaster begins to harden, so that when removing the stencil, smearing it will damage the image. In this way you can decorate free space on the wall or a niche, or make a patterned border
For regular, flat designs, you can use acrylic paint water-based, which is sold in construction and art stores, and also use different colors when working with one stencil.
Working with multilayer stencils requires the greatest skill. This more complex technique is used to create multi-color compositions in which the colors overlap, and if in single-layer stencils there are gaps-bridges, then with multi-layer application there are none - not everyone will guess that the image is made from a stencil. A multilayer stencil, as its name implies, consists of several layers, each of which imprints individual parts of the overall design.
Have you decided to decorate a wall or other surface with a stencil design? Then stock up on paints, masking tape or special aerosol glue to secure the stencil; you will also need brushes, a roller or sponge to apply the paint. To mix paints and control their quantity, a flat disposable plastic plate will do.
Glue is applied to the surface of the stencil so that it fits tightly to the wall. Regardless of what tool you use - roller, brush or sponge, make sure that the amount of paint on them is minimal. If the roller is pre-rolled out and excess paint is removed from the brush or swab, the design will be neat and the paint will not leak.
We hope you find the process of creating a drawing fun!
The editors would like to thank Alexander Chudov for his assistance in preparing the article and for the provided photographic materials.


